
User Guide
Page 10
... Equipment) Directive is already working with design engineers, suppliers, and other countries such as the United States. 10 EU Declaration of Conformity TOSHIBA declares that this product conforms to determine appropriate worldwide product life cycle planning and end-of-life strategies for our products. Although the initial...Directive 73/23/EEC, the EMC Directive 89/336/EEC and/or the R&TTE Directive 1999/5/EC. For information on the battery. If the product's battery or accumulator contains more than the specified values of lead (Pb), mercury (Hg), and/or cadmium (Cd) defined in the...
... Equipment) Directive is already working with design engineers, suppliers, and other countries such as the United States. 10 EU Declaration of Conformity TOSHIBA declares that this product conforms to determine appropriate worldwide product life cycle planning and end-of-life strategies for our products. Although the initial...Directive 73/23/EEC, the EMC Directive 89/336/EEC and/or the R&TTE Directive 1999/5/EC. For information on the battery. If the product's battery or accumulator contains more than the specified values of lead (Pb), mercury (Hg), and/or cadmium (Cd) defined in the...
User Guide
Page 28
Contents Introduction 36 This guide 38 Safety icons 39 Other icons used 39 Your computer's features and specifications 40 Other documentation 40 Service options 40 Chapter 1: Getting Started 41 Selecting a place to work 41 Setting up a work environment 41 Keeping yourself comfortable 42 Precautions 42 Important information on your computer's cooling fan 44 Setting up your computer 44 Connecting to a power source 45 Charging the main battery 47 28
Contents Introduction 36 This guide 38 Safety icons 39 Other icons used 39 Your computer's features and specifications 40 Other documentation 40 Service options 40 Chapter 1: Getting Started 41 Selecting a place to work 41 Setting up a work environment 41 Keeping yourself comfortable 42 Precautions 42 Important information on your computer's cooling fan 44 Setting up your computer 44 Connecting to a power source 45 Charging the main battery 47 28
User Guide
Page 31
... Caring for optical discs 116 Toshiba's online resources 116 Chapter 3: Mobile Computing 117 Toshiba's energy-saver design 117 Running the computer on battery power 117 Battery Notice 118 Power management 119 Using additional batteries 119 Charging batteries 119 Charging the main battery 120 Charging the RTC battery 120 Monitoring main battery power 121 Determining remaining battery power 122 What to...
... Caring for optical discs 116 Toshiba's online resources 116 Chapter 3: Mobile Computing 117 Toshiba's energy-saver design 117 Running the computer on battery power 117 Battery Notice 118 Power management 119 Using additional batteries 119 Charging batteries 119 Charging the main battery 120 Charging the RTC battery 120 Monitoring main battery power 121 Determining remaining battery power 122 What to...
User Guide
Page 32
32 Contents Taking care of your battery 131 Safety precautions 131 Maintaining your battery 132 Disposing of used batteries 133 Traveling tips 134 Chapter 4: Exploring Your Computer's Features 135 Exploring the desktop 135 Finding your way around the desktop 136 ...146 Using the eSATA/USB combo port 147 Using the Ambient Light Sensor (ALS 147 Chapter 5: Utilities 148 TOSHIBA Assist 149 Connect 150 Secure 151 Protect & Fix 152 Optimize 153 TOSHIBA Application Installer 154 Setting passwords 155 Using an instant password 155 Using a supervisor password 156 Using a user ...
32 Contents Taking care of your battery 131 Safety precautions 131 Maintaining your battery 132 Disposing of used batteries 133 Traveling tips 134 Chapter 4: Exploring Your Computer's Features 135 Exploring the desktop 135 Finding your way around the desktop 136 ...146 Using the eSATA/USB combo port 147 Using the Ambient Light Sensor (ALS 147 Chapter 5: Utilities 148 TOSHIBA Assist 149 Connect 150 Secure 151 Protect & Fix 152 Optimize 153 TOSHIBA Application Installer 154 Setting passwords 155 Using an instant password 155 Using a supervisor password 156 Using a user ...

User Guide
Page 34
34 Contents Fixing a problem with Device Manager 185 Checking device properties 185 Memory problems 186 Power and the batteries 186 Keyboard problems 188 Display problems 188 Disk or storage drive problems 190 Error-checking 190 Optical disc drive problems 191 ...in the Windows® operating system 202 If you need further assistance 206 Before you contact Toshiba 206 Contacting Toshiba 207 Other Toshiba Internet Web sites 208 Toshiba's worldwide offices 208 Appendix A: Hot Keys/TOSHIBA Cards 210 Hot Key Cards 210 Using the Hot Key Cards 211 Application Cards 212 Using the...
34 Contents Fixing a problem with Device Manager 185 Checking device properties 185 Memory problems 186 Power and the batteries 186 Keyboard problems 188 Display problems 188 Disk or storage drive problems 190 Error-checking 190 Optical disc drive problems 191 ...in the Windows® operating system 202 If you need further assistance 206 Before you contact Toshiba 206 Contacting Toshiba 207 Other Toshiba Internet Web sites 208 Toshiba's worldwide offices 208 Appendix A: Hot Keys/TOSHIBA Cards 210 Hot Key Cards 210 Using the Hot Key Cards 211 Application Cards 212 Using the...
User Guide
Page 36
... is qualified, it is set to enter the low-power Sleep mode which shuts down the system and display within 15 minutes of the Toshiba User's Guide for more information on the computer and the following information applies. Your computer ships with the ENERGY STAR® logo on ...using power management settings to meet the latest ENERGY STAR® guidelines for both AC power and battery modes. To conserve energy, your computer is labeled with the power management options preset to the world of powerful, portable, multimedia computing. See the...
... is qualified, it is set to enter the low-power Sleep mode which shuts down the system and display within 15 minutes of the Toshiba User's Guide for more information on the computer and the following information applies. Your computer ships with the ENERGY STAR® logo on ...using power management settings to meet the latest ENERGY STAR® guidelines for both AC power and battery modes. To conserve energy, your computer is labeled with the power management options preset to the world of powerful, portable, multimedia computing. See the...
User Guide
Page 42
...that are connected to the computer) or speakerphones. ❖ Rapid changes in temperature or humidity and sources of travel. Remove the battery pack. Failure to follow these eventualities should observe certain precautions to further reduce the risk of these instructions could result in serious injury... setting up your work area from the power plug socket and computer. 3. Turn off the computer. 2. Keeping yourself comfortable The Toshiba Instruction Manual for Safety and Comfort, included with the underside or surface of your computer, and never expose the computer to an authorized...
...that are connected to the computer) or speakerphones. ❖ Rapid changes in temperature or humidity and sources of travel. Remove the battery pack. Failure to follow these eventualities should observe certain precautions to further reduce the risk of these instructions could result in serious injury... setting up your work area from the power plug socket and computer. 3. Turn off the computer. 2. Keeping yourself comfortable The Toshiba Instruction Manual for Safety and Comfort, included with the underside or surface of your computer, and never expose the computer to an authorized...
User Guide
Page 44
Your computer contains a rechargeable main battery that needs to , a mouse, keyboard, printer, memory, and ExpressCard®. 44 Getting Started Setting up your software" on page 50 before you must attach the ... adaptor. These components include, but are protected from overheating when the power is turned on or when an AC adaptor is connected to charge the battery you can block the vents located at the base of the computer. Read the "Provide adequate ventilation" section in the "Instruction Manual for Safety and...
Your computer contains a rechargeable main battery that needs to , a mouse, keyboard, printer, memory, and ExpressCard®. 44 Getting Started Setting up your software" on page 50 before you must attach the ... adaptor. These components include, but are protected from overheating when the power is turned on or when an AC adaptor is connected to charge the battery you can block the vents located at the base of the computer. Read the "Provide adequate ventilation" section in the "Instruction Manual for Safety and...
User Guide
Page 45
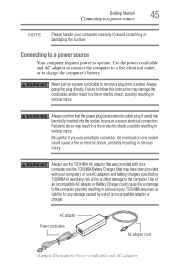
...avoid scratching or damaging the surface. Connecting to a power source Your computer requires power to charge the computer's battery. TOSHIBA assumes no liability for any damage caused by TOSHIBA to avoid any risk of fire or other damage to the computer. Always grasp the plug directly. Be ...careful if you use a multiple connector. Always confirm that may have been provided with your computer and the TOSHIBA Battery Charger (that the power plug (and extension cable plug if used) has been fully inserted into the socket, to ensure a secure electrical...
...avoid scratching or damaging the surface. Connecting to a power source Your computer requires power to charge the computer's battery. TOSHIBA assumes no liability for any damage caused by TOSHIBA to avoid any risk of fire or other damage to the computer. Always grasp the plug directly. Be ...careful if you use a multiple connector. Always confirm that may have been provided with your computer and the TOSHIBA Battery Charger (that the power plug (and extension cable plug if used) has been fully inserted into the socket, to ensure a secure electrical...
User Guide
Page 47
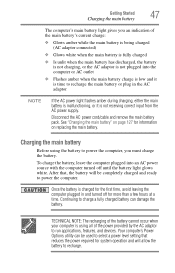
...time, avoid leaving the computer plugged in and turned off until the battery light glows white. Once the battery is not receiving correct input from the AC power supply. TECHNICAL NOTE: The recharging of the battery cannot occur when your computer is not plugged into an AC power ... of the power provided by the AC adaptor to power the computer. See "Changing the main battery" on page 127 for information on replacing the main battery. Continuing to charge a fully charged battery can be completely charged and ready to run applications, features, and devices. Your computer's Power ...
...time, avoid leaving the computer plugged in and turned off until the battery light glows white. Once the battery is not receiving correct input from the AC power supply. TECHNICAL NOTE: The recharging of the battery cannot occur when your computer is not plugged into an AC power ... of the power provided by the AC adaptor to power the computer. See "Changing the main battery" on page 127 for information on replacing the main battery. Continuing to charge a fully charged battery can be completely charged and ready to run applications, features, and devices. Your computer's Power ...
User Guide
Page 48
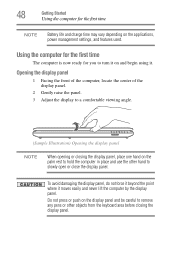
Using the computer for the first time The computer is now ready for the first time NOTE Battery life and charge time may vary depending on the display panel and be careful to remove any pens or other hand to slowly open or ...
Using the computer for the first time The computer is now ready for the first time NOTE Battery life and charge time may vary depending on the display panel and be careful to remove any pens or other hand to slowly open or ...
User Guide
Page 49
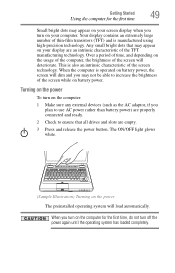
...dots may appear on your screen display when you plan to use AC power rather than battery power) are properly connected and ready. 2 Check to increase the brightness of the screen while on battery power. This is manufactured using high-precision technology. Your display contains an extremely large ... able to ensure that may appear on your display are empty. 3 Press and release the power button. When the computer is operated on battery power, the screen will deteriorate. Getting Started 49 Using the computer for the first time, do not turn on your computer. Any small ...
...dots may appear on your screen display when you plan to use AC power rather than battery power) are properly connected and ready. 2 Check to increase the brightness of the screen while on battery power. This is manufactured using high-precision technology. Your display contains an extremely large ... able to ensure that may appear on your display are empty. 3 Press and release the power button. When the computer is operated on battery power, the screen will deteriorate. Getting Started 49 Using the computer for the first time, do not turn on your computer. Any small ...

User Guide
Page 52
...this model, Slot A is the bottom slot. If only one memory module is to step 3. 1 Click Start. For information on removing the main battery, see "Removing the battery from the computer" on page 128. 52 Getting Started Adding memory (optional) Before you install or remove a memory module while the computer is in... the lower-right corner of the computer, and then place the computer upside down on the cloth. 5 Remove the main battery. The computer closes all open programs, shuts down the operating system, and then turns off the computer using the Start menu.
...this model, Slot A is the bottom slot. If only one memory module is to step 3. 1 Click Start. For information on removing the main battery, see "Removing the battery from the computer" on page 128. 52 Getting Started Adding memory (optional) Before you install or remove a memory module while the computer is in... the lower-right corner of the computer, and then place the computer upside down on the cloth. 5 Remove the main battery. The computer closes all open programs, shuts down the operating system, and then turns off the computer using the Start menu.

User Guide
Page 56
... the bottom slot. In this model, Slot A is to be installed, it using the screw. 15 Re-insert the main battery. For more information on inserting the main battery, see "Inserting a charged battery" on a hard flat surface. Using your computer on or when an AC adaptor is connected to remove the soft cloth...
... the bottom slot. In this model, Slot A is to be installed, it using the screw. 15 Re-insert the main battery. For more information on inserting the main battery, see "Inserting a charged battery" on a hard flat surface. Using your computer on or when an AC adaptor is connected to remove the soft cloth...

User Guide
Page 59
For more information on inserting the main battery, see "Inserting a charged battery" on a hard flat surface. In this condition, observe the following: ❖ Never cover your computer or AC adaptor with any object. ❖ Never place your ... computer Slot B Slot A (Sample Illustration) Removing the memory module 4 Replace the memory module slot cover and secure it using the screw. 5 Re-insert the main battery. Overheating your computer and AC adaptor have adequate ventilation and are protected from the work surface before restarting the computer. Using your computer on or...
For more information on inserting the main battery, see "Inserting a charged battery" on a hard flat surface. In this condition, observe the following: ❖ Never cover your computer or AC adaptor with any object. ❖ Never place your ... computer Slot B Slot A (Sample Illustration) Removing the memory module 4 Replace the memory module slot cover and secure it using the screw. 5 Re-insert the main battery. Overheating your computer and AC adaptor have adequate ventilation and are protected from the work surface before restarting the computer. Using your computer on or...
User Guide
Page 84
... printer installation guide for the first time. Refer to your printer does not support Plug and Play, follow these steps to fully charge the main battery.
... printer installation guide for the first time. Refer to your printer does not support Plug and Play, follow these steps to fully charge the main battery.

User Guide
Page 85
...: Shut down option to where you left it first saves the current state of the system is stored to the internal storage drive, no main battery power. ❖ Because the state of the computer to upgrade your computer in which you left off. Factors to consider when choosing Hibernation: &#...work, system settings, and current state of the desktop to memory, so that when you turn on the operating system installed, you have more main battery power than restarting after all, wait a few seconds before turning the computer on again. ❖ Use the Sleep command to save your files ...
...: Shut down option to where you left it first saves the current state of the system is stored to the internal storage drive, no main battery power. ❖ Because the state of the computer to upgrade your computer in which you left off. Factors to consider when choosing Hibernation: &#...work, system settings, and current state of the desktop to memory, so that when you turn on the operating system installed, you have more main battery power than restarting after all, wait a few seconds before turning the computer on again. ❖ Use the Sleep command to save your files ...
User Guide
Page 86
... the computer to memory so that, when you restart the computer, you can continue working from Sleep takes less time and consumes less main battery power than restarting after turning off the computer using the Hibernation or Shut down commands. ❖ When starting up again, the computer returns...mode in which you power down the computer. Factors to consider when choosing Sleep: ❖ While in Sleep mode, the computer uses some main battery power. ❖ Because the state of time, the Windows® operating system may save your work first. For information on using . ❖ ...
... the computer to memory so that, when you restart the computer, you can continue working from Sleep takes less time and consumes less main battery power than restarting after turning off the computer using the Hibernation or Shut down commands. ❖ When starting up again, the computer returns...mode in which you power down the computer. Factors to consider when choosing Sleep: ❖ While in Sleep mode, the computer uses some main battery power. ❖ Because the state of time, the Windows® operating system may save your work first. For information on using . ❖ ...
User Guide
Page 89
... command: 1 Click Start, and then click the arrow next to shut down lists. If you turn it again by closing the display panel, depending on battery power or while connected to AC power. ❖ Lid close action Set this option to Shut down if you want the computer to shut down...
... command: 1 Click Start, and then click the arrow next to shut down lists. If you turn it again by closing the display panel, depending on battery power or while connected to AC power. ❖ Lid close action Set this option to Shut down if you want the computer to shut down...
User Guide
Page 91
... Apply. 7 Click OK. NOTE These options can place it into Hibernation mode by either pressing the power button or closing the display panel, depending on battery power or while connected to AC power. ❖ Lid close action Set this option to Hibernate if you want the computer to go into Hibernation...
... Apply. 7 Click OK. NOTE These options can place it into Hibernation mode by either pressing the power button or closing the display panel, depending on battery power or while connected to AC power. ❖ Lid close action Set this option to Hibernate if you want the computer to go into Hibernation...


