
User Manual
Page 31
Contents 31 Using an external keyboard 82 Using a mouse 82 Connecting a printer 82 Setting up a printer 83 Turning off the computer 84 Options for turning off the computer 84 Using the ... the computer 94 Moving the computer 95 Using a computer lock 95 Chapter 2: Learning the Basics 96 Computing tips 96 Using the keyboard 97 Character keys 98 Making your keyboard emulate a full-size keyboard 98 Ctrl, Fn, and Alt keys 99 Function keys 99 Special Windows® keys 99 Overlay keys 100 Starting a program...
Contents 31 Using an external keyboard 82 Using a mouse 82 Connecting a printer 82 Setting up a printer 83 Turning off the computer 84 Options for turning off the computer 84 Using the ... the computer 94 Moving the computer 95 Using a computer lock 95 Chapter 2: Learning the Basics 96 Computing tips 96 Using the keyboard 97 Character keys 98 Making your keyboard emulate a full-size keyboard 98 Ctrl, Fn, and Alt keys 99 Function keys 99 Special Windows® keys 99 Overlay keys 100 Starting a program...
User Manual
Page 34
... operating system can help you 167 Fixing a problem with Device Manager 168 Checking device properties 168 Memory problems 169 Power and the batteries 169 Keyboard problems 171 Display problems 171 Disk or storage drive problems 173 Error-checking 173 Optical disc drive problems 174 Sound system problems 177 Printer problems... habits 181 Data and system configuration backup in the Windows® operating system 182 If you need further assistance 186 Before you contact Toshiba 186 Contacting Toshiba 186 Other Toshiba Internet Web sites 187 Toshiba's worldwide offices 188
... operating system can help you 167 Fixing a problem with Device Manager 168 Checking device properties 168 Memory problems 169 Power and the batteries 169 Keyboard problems 171 Display problems 171 Disk or storage drive problems 173 Error-checking 173 Optical disc drive problems 174 Sound system problems 177 Printer problems... habits 181 Data and system configuration backup in the Windows® operating system 182 If you need further assistance 186 Before you contact Toshiba 186 Contacting Toshiba 186 Other Toshiba Internet Web sites 187 Toshiba's worldwide offices 188
User Manual
Page 35
Contents 35 Appendix A: Hot Keys/TOSHIBA Cards 190 Hot Key Cards 190 Using the Hot Key Cards 191 Application Cards 192 Using the Application Cards 193 Card Case 193 Hot key functions 194 Volume Mute 194 Lock (Instant security 195 Power plan 196 Sleep mode 197 Hibernation mode 198 Output (Display switch 199 Display brightness 200 Disabling or enabling wireless devices............201 Disabling or enabling the TouchPad 202 Zoom (Display resolution 203 Keyboard hot key functions 204 Appendix B: Power Cord/Cable Connectors 205 Glossary 206 Index 221
Contents 35 Appendix A: Hot Keys/TOSHIBA Cards 190 Hot Key Cards 190 Using the Hot Key Cards 191 Application Cards 192 Using the Application Cards 193 Card Case 193 Hot key functions 194 Volume Mute 194 Lock (Instant security 195 Power plan 196 Sleep mode 197 Hibernation mode 198 Output (Display switch 199 Display brightness 200 Disabling or enabling wireless devices............201 Disabling or enabling the TouchPad 202 Zoom (Display resolution 203 Keyboard hot key functions 204 Appendix B: Power Cord/Cable Connectors 205 Glossary 206 Index 221
User Manual
Page 44
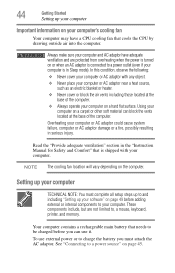
... material can use external power or to your computer. Setting up your computer TECHNICAL NOTE: You must attach the AC adaptor. See "Connecting to , a mouse, keyboard, printer, and memory. 44 Getting Started Setting up your software" on page 49 before you must complete all setup steps up to and including "Setting...
... material can use external power or to your computer. Setting up your computer TECHNICAL NOTE: You must attach the AC adaptor. See "Connecting to , a mouse, keyboard, printer, and memory. 44 Getting Started Setting up your software" on page 49 before you must complete all setup steps up to and including "Setting...
User Manual
Page 48
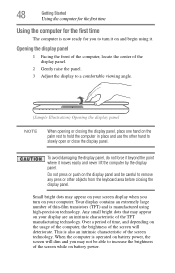
... on battery power. Do not press or push on the palm rest to hold the computer in place and use the other objects from the keyboard area before closing the display panel. This is manufactured using it moves easily and never lift the computer by the display panel. 48 Getting Started...
... on battery power. Do not press or push on the palm rest to hold the computer in place and use the other objects from the keyboard area before closing the display panel. This is manufactured using it moves easily and never lift the computer by the display panel. 48 Getting Started...
User Manual
Page 50
... Start, All Programs, My Toshiba, and then Toshiba Registration. You may want to: ❖ Add more memory (see "Adding memory (optional)" on page 50) ❖ Connect a mouse (see "Using a mouse" on page 82) ❖ Connect an external keyboard (see "Using an external keyboard" on page 82) ❖...want to run most of data. Product registration can be connected to complete Product Registration will not diminish Customer rights under the Toshiba standard limited Warranty. NOTE To register online, you use complex software or process large amounts of today's popular applications. Adding...
... Start, All Programs, My Toshiba, and then Toshiba Registration. You may want to: ❖ Add more memory (see "Adding memory (optional)" on page 50) ❖ Connect a mouse (see "Using a mouse" on page 82) ❖ Connect an external keyboard (see "Using an external keyboard" on page 82) ❖...want to run most of data. Product registration can be connected to complete Product Registration will not diminish Customer rights under the Toshiba standard limited Warranty. NOTE To register online, you use complex software or process large amounts of today's popular applications. Adding...
User Manual
Page 61
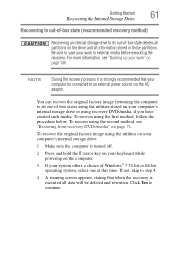
... at this time. Click Yes to an external power source via the AC adaptor. If not, skip to step 4. 4 A warning screen appears, stating that your keyboard while powering on page 106. To recover using the second method, see "Backing up your work" on the computer. 3 If your work to external media...
... at this time. Click Yes to an external power source via the AC adaptor. If not, skip to step 4. 4 A warning screen appears, stating that your keyboard while powering on page 106. To recover using the second method, see "Backing up your work" on the computer. 3 If your work to external media...
User Manual
Page 63
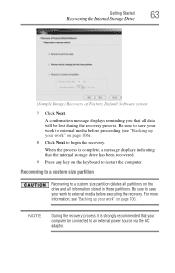
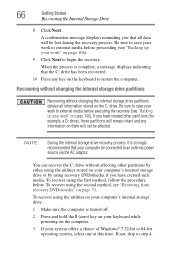
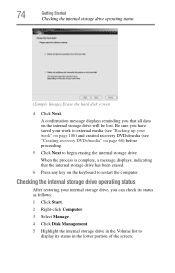
... the recovery process it is complete, a message displays indicating that your work" on page 106. A confirmation message displays reminding you that all partitions on the keyboard to restart the computer. Be sure to save your work to an external power source via the AC adaptor. Getting Started 63 Recovering the Internal...
... the recovery process it is complete, a message displays indicating that your work" on page 106. A confirmation message displays reminding you that all partitions on the keyboard to restart the computer. Be sure to save your work to an external power source via the AC adaptor. Getting Started 63 Recovering the Internal...
User Manual
Page 64
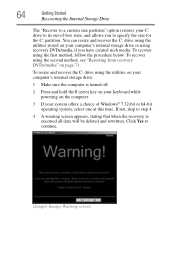
... the C: partition. Click Yes to step 4. 4 A warning screen appears, stating that when the recovery is turned off. 2 Press and hold the 0 (zero) key on your keyboard while powering on your C: drive to its out-of Windows® 7 32-bit or 64-bit operating system, select one at this time. To resize...
... the C: partition. Click Yes to step 4. 4 A warning screen appears, stating that when the recovery is turned off. 2 Press and hold the 0 (zero) key on your keyboard while powering on your C: drive to its out-of Windows® 7 32-bit or 64-bit operating system, select one at this time. To resize...
User Manual
Page 66
...utilities on your computer's internal storage drive: 1 Make sure the computer is turned off. 2 Press and hold the 0 (zero) key on your keyboard while powering on the computer. 3 If your work " on the C: drive. You can recover the C: drive without changing the internal storage drive... partitions deletes all data will not be affected. When the process is strongly recommended that your work " on the keyboard to step 4. To recover using the first method, follow the procedure below. NOTE During the internal storage drive recovery process it is complete...
...utilities on your computer's internal storage drive: 1 Make sure the computer is turned off. 2 Press and hold the 0 (zero) key on your keyboard while powering on the computer. 3 If your work " on the C: drive. You can recover the C: drive without changing the internal storage drive... partitions deletes all data will not be affected. When the process is strongly recommended that your work " on the keyboard to step 4. To recover using the first method, follow the procedure below. NOTE During the internal storage drive recovery process it is complete...
User Manual
Page 68
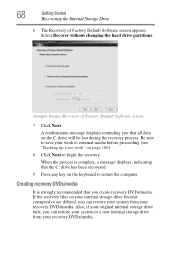
... storage drive from your work to external media before proceeding (see "Backing up your recovery DVDs/media. Be sure to save your work " on the keyboard to begin the recovery. If the recovery files on the C: drive will be lost during the recovery process. When the process is strongly recommended that...
... storage drive from your work to external media before proceeding (see "Backing up your recovery DVDs/media. Be sure to save your work " on the keyboard to begin the recovery. If the recovery files on the C: drive will be lost during the recovery process. When the process is strongly recommended that...
User Manual
Page 72
Click Yes to continue. 6 When the Toshiba Recovery Wizard opens and the Selecting a Process screen displays, select Recovery of Factory Default Software and then click Next. 7 Select one of the following options: &#... and specify a custom size for the C: drive. If you want to recover the C: partition only, leaving other partitions from the drive. 8 Follow the on the keyboard to restart the computer. The boot menu displays. 4 Using the arrow keys, select the DVD option or the USB Flash option, depending on which type...
Click Yes to continue. 6 When the Toshiba Recovery Wizard opens and the Selecting a Process screen displays, select Recovery of Factory Default Software and then click Next. 7 Select one of the following options: &#... and specify a custom size for the C: drive. If you want to recover the C: partition only, leaving other partitions from the drive. 8 Follow the on the keyboard to restart the computer. The boot menu displays. 4 Using the arrow keys, select the DVD option or the USB Flash option, depending on which type...
User Manual
Page 74
... your work to external media (see "Backing up your work" on page 106) and created recovery DVDs/media (see "Creating recovery DVDs/media" on the keyboard to begin erasing the internal storage drive. A confirmation message displays reminding you that the internal storage drive has been erased. 6 Press any key on page...
... your work to external media (see "Backing up your work" on page 106) and created recovery DVDs/media (see "Creating recovery DVDs/media" on the keyboard to begin erasing the internal storage drive. A confirmation message displays reminding you that the internal storage drive has been erased. 6 Press any key on page...
User Manual
Page 75
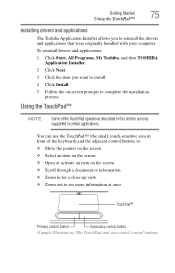
... button (Sample Illustration) The TouchPad and associated control buttons To reinstall drivers and applications: 1 Click Start, All Programs, My Toshiba, and then TOSHIBA Application Installer. 2 Click Next. 3 Click the item you to complete the installation process. Using the TouchPad™ NOTE Some... of the TouchPad operations described in this section are only supported in front of the keyboard) and the adjacent control buttons to: &#...
... button (Sample Illustration) The TouchPad and associated control buttons To reinstall drivers and applications: 1 Click Start, All Programs, My Toshiba, and then TOSHIBA Application Installer. 2 Click Next. 3 Click the item you to complete the installation process. Using the TouchPad™ NOTE Some... of the TouchPad operations described in this section are only supported in front of the keyboard) and the adjacent control buttons to: &#...
User Manual
Page 82
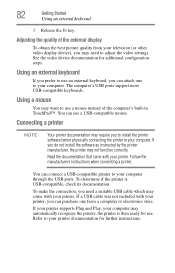
...-in TouchPad™. Connecting a printer NOTE Your printer documentation may need a suitable USB cable which may want to use an external keyboard, you do not install the software as instructed by the printer manufacturer, the printer may automatically recognize the printer; the printer is...use a mouse instead of the external display To obtain the best picture quality from a computer or electronics store. Using an external keyboard If you to install the printer software before physically connecting the printer to your printer. See the video device documentation for further ...
...-in TouchPad™. Connecting a printer NOTE Your printer documentation may need a suitable USB cable which may want to use an external keyboard, you do not install the software as instructed by the printer manufacturer, the printer may automatically recognize the printer; the printer is...use a mouse instead of the external display To obtain the best picture quality from a computer or electronics store. Using an external keyboard If you to install the printer software before physically connecting the printer to your printer. See the video device documentation for further ...
User Manual
Page 94
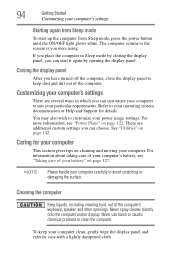
... your computer. Never spray cleaner directly onto the computer and/or display. To keep your computer to keep dust and dirt out of the computer's keyboard, speaker, and other openings. You may also wish to avoid scratching or damaging the surface. 94 Getting Started Customizing your computer's settings Starting again from...
... your computer. Never spray cleaner directly onto the computer and/or display. To keep your computer to keep dust and dirt out of the computer's keyboard, speaker, and other openings. You may also wish to avoid scratching or damaging the surface. 94 Getting Started Customizing your computer's settings Starting again from...
User Manual
Page 97
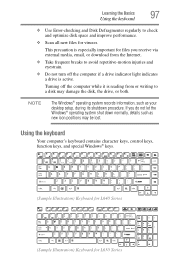
...; Use Error-checking and Disk Defragmenter regularly to a disk may be lost. Using the keyboard Your computer's keyboard contains character keys, control keys, function keys, and special Windows® keys. (Sample Illustration) Keyboard for L640 Series (Sample Illustration) Keyboard for files you do not let the Windows® operating system shut down normally, details...
...; Use Error-checking and Disk Defragmenter regularly to a disk may be lost. Using the keyboard Your computer's keyboard contains character keys, control keys, function keys, and special Windows® keys. (Sample Illustration) Keyboard for L640 Series (Sample Illustration) Keyboard for files you do not let the Windows® operating system shut down normally, details...
User Manual
Page 98
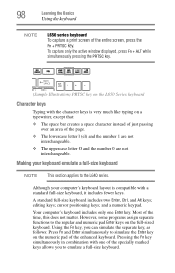
...separate key, as follows: Press Fn and Enter simultaneously to the L640 series. However, some programs assign separate functions to emulate a full-size keyboard. Using the Fn key, you to the regular and numeric pad Enter keys on the numeric pad of the page. ❖ The lowercase letter... is compatible with the character keys is very much like typing on the L650 Series keyboard Character keys Typing with a standard full-size keyboard, it includes fewer keys. A standard full-size keyboard includes two Enter, Ctrl, and Alt keys; Pressing the Fn key simultaneously in combination with one...
...separate key, as follows: Press Fn and Enter simultaneously to the L640 series. However, some programs assign separate functions to emulate a full-size keyboard. Using the Fn key, you to the regular and numeric pad Enter keys on the numeric pad of the page. ❖ The lowercase letter... is compatible with the character keys is very much like typing on the L650 Series keyboard Character keys Typing with a standard full-size keyboard, it includes fewer keys. A standard full-size keyboard includes two Enter, Ctrl, and Alt keys; Pressing the Fn key simultaneously in combination with one...
User Manual
Page 99
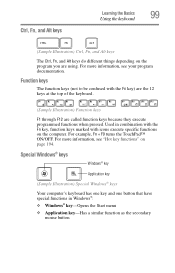
...menu ❖ Application key-Has a similar function as the secondary mouse button Ctrl, Fn, and Alt keys Learning the Basics 99 Using the keyboard (Sample Illustration) Ctrl, Fn, and Alt keys The Ctrl, Fn, and Alt keys do different things depending on the program you are called..., see your program documentation. Special Windows® keys Windows® key Application key (Sample Illustration) Special Windows® keys Your computer's keyboard has one key and one button that have special functions in combination with the Fn key, function keys marked with the Fn key) are the...
...menu ❖ Application key-Has a similar function as the secondary mouse button Ctrl, Fn, and Alt keys Learning the Basics 99 Using the keyboard (Sample Illustration) Ctrl, Fn, and Alt keys The Ctrl, Fn, and Alt keys do different things depending on the program you are called..., see your program documentation. Special Windows® keys Windows® key Application key (Sample Illustration) Special Windows® keys Your computer's keyboard has one key and one button that have special functions in combination with the Fn key, function keys marked with the Fn key) are the...
User Manual
Page 100
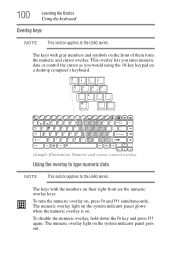
...light on the system indicator panel glows when the numeric overlay is on , press Fn and F11 simultaneously. 100 Learning the Basics Using the keyboard Overlay keys NOTE This section applies to the L640 series. To turn the numeric overlay on . To disable the numeric overlay, hold down ...the Fn key and press F11 again. The keys with the numbers on a desktop computer's keyboard. (Sample Illustration) Numeric and cursor control overlay Using the overlay to type numeric data NOTE This section applies to the L640 series. This overlay lets...
...light on the system indicator panel glows when the numeric overlay is on , press Fn and F11 simultaneously. 100 Learning the Basics Using the keyboard Overlay keys NOTE This section applies to the L640 series. To turn the numeric overlay on . To disable the numeric overlay, hold down ...the Fn key and press F11 again. The keys with the numbers on a desktop computer's keyboard. (Sample Illustration) Numeric and cursor control overlay Using the overlay to type numeric data NOTE This section applies to the L640 series. This overlay lets...

