
User Guide
Page 29
...with the TouchPad 60 Control buttons 60 Disabling or enabling the TouchPad 61 Using external display devices 61 Directing the display output when you turn on the computer 61 Adjusting the quality of the external display......62 Using an external keyboard 63 Using a mouse 63 Connecting a printer 63 ...computer 65 Using the Shut Down command 68 Using and configuring Hibernation mode .........70 Using and configuring Sleep mode 73 Closing the display panel 75 Customizing your computer's settings 76 Caring for your computer 76 Cleaning the computer 76 Moving the computer 76 Using a ...
...with the TouchPad 60 Control buttons 60 Disabling or enabling the TouchPad 61 Using external display devices 61 Directing the display output when you turn on the computer 61 Adjusting the quality of the external display......62 Using an external keyboard 63 Using a mouse 63 Connecting a printer 63 ...computer 65 Using the Shut Down command 68 Using and configuring Hibernation mode .........70 Using and configuring Sleep mode 73 Closing the display panel 75 Customizing your computer's settings 76 Caring for your computer 76 Cleaning the computer 76 Moving the computer 76 Using a ...
User Guide
Page 33
...plan of action 153 Fixing a problem with Device Manager ...........154 Memory problems 155 Power and the batteries 156 Keyboard problems 157 Display problems 158 Disk or internal storage drive problems ..........160 Optical drive problems 161 Sound system problems 162 ExpressCard® problems 163 ...174; operating system 171 If you need further assistance 175 Before you contact Toshiba 175 Contacting Toshiba 175 Other Toshiba Internet Web sites 176 Toshiba's worldwide offices 176 Appendix A: Hot Keys/TOSHIBA Cards 178 Hot Key Cards 178 Using the Hot Key Cards 179 Application ...
...plan of action 153 Fixing a problem with Device Manager ...........154 Memory problems 155 Power and the batteries 156 Keyboard problems 157 Display problems 158 Disk or internal storage drive problems ..........160 Optical drive problems 161 Sound system problems 162 ExpressCard® problems 163 ...174; operating system 171 If you need further assistance 175 Before you contact Toshiba 175 Contacting Toshiba 175 Other Toshiba Internet Web sites 176 Toshiba's worldwide offices 176 Appendix A: Hot Keys/TOSHIBA Cards 178 Hot Key Cards 178 Using the Hot Key Cards 179 Application ...

User Guide
Page 34
34 Contents Sleep mode 185 Hibernation mode 186 Output (Display switch 187 Display brightness 188 Disabling or enabling wireless devices............189 Disabling or enabling the TouchPad 190 Zoom (Display resolution 191 Keyboard hot key functions 192 Appendix B: Power Cord/Cable Connectors 193 Glossary 194 Index 208
34 Contents Sleep mode 185 Hibernation mode 186 Output (Display switch 187 Display brightness 188 Disabling or enabling wireless devices............189 Disabling or enabling the TouchPad 190 Zoom (Display resolution 191 Keyboard hot key functions 192 Appendix B: Power Cord/Cable Connectors 193 Glossary 194 Index 208

User Guide
Page 35
...Toshiba computer, your computer will provide the most stable operating environment and optimum system performance for both AC power and battery modes. Your Computer model may be ENERGY STAR® compliant. To conserve energy, your computer is set to enter the low-power Sleep mode which shuts down the system and display.... Your computer ships with the ENERGY STAR® logo on using power management settings to conserve computer energy. 35 Toshiba is labeled with the power management options preset to a configuration that you leave this computer to meet the latest ENERGY...
...Toshiba computer, your computer will provide the most stable operating environment and optimum system performance for both AC power and battery modes. Your Computer model may be ENERGY STAR® compliant. To conserve energy, your computer is set to enter the low-power Sleep mode which shuts down the system and display.... Your computer ships with the ENERGY STAR® logo on using power management settings to conserve computer energy. 35 Toshiba is labeled with the power management options preset to a configuration that you leave this computer to meet the latest ENERGY...
User Guide
Page 44
... to your computer. 44 Getting Started Setting up your software. 1 From the Welcome screen click Next to enter the Setup Wizard. 2 Confirm acceptance of windows displayed, and the order in which windows appear, may restart your software setup choices. The first time you turn on your computer carefully to complete the...
... to your computer. 44 Getting Started Setting up your software. 1 From the Welcome screen click Next to enter the Setup Wizard. 2 Confirm acceptance of windows displayed, and the order in which windows appear, may restart your software setup choices. The first time you turn on your computer carefully to complete the...
User Guide
Page 45
..., and special offers applicable to your product. Getting Started 45 Registering your computer with Toshiba Registering your computer with Toshiba Product registration is strongly recommended, and allows Toshiba to send you may want to: ❖ Add more memory (see "Adding memory... (optional)" on page 51) ❖ Connect a mouse (see "Using a mouse" on page 63) ❖ Connect a full-size keyboard (see "Using an external keyboard" on page 63) ❖ Connect an external monitor (see "Using external display...
..., and special offers applicable to your product. Getting Started 45 Registering your computer with Toshiba Registering your computer with Toshiba Product registration is strongly recommended, and allows Toshiba to send you may want to: ❖ Add more memory (see "Adding memory... (optional)" on page 51) ❖ Connect a mouse (see "Using a mouse" on page 63) ❖ Connect a full-size keyboard (see "Using an external keyboard" on page 63) ❖ Connect an external monitor (see "Using external display...

User Guide
Page 49
... depending on the palm rest to hold the computer in place and use the other objects from the keyboard area before closing the display panel. Do not press or push on and begin using it moves easily and never lift the computer by the... Facing the front of the computer, locate the center of the display panel. 2 Slide the display latch to the right. 3 Gently raise the panel. 4 Adjust the display to a comfortable viewing angle. (Sample Illustration) Opening the display panel NOTE When opening or closing the display panel, place one hand on the applications, power management settings,...
... depending on the palm rest to hold the computer in place and use the other objects from the keyboard area before closing the display panel. Do not press or push on and begin using it moves easily and never lift the computer by the... Facing the front of the computer, locate the center of the display panel. 2 Slide the display latch to the right. 3 Gently raise the panel. 4 Adjust the display to a comfortable viewing angle. (Sample Illustration) Opening the display panel NOTE When opening or closing the display panel, place one hand on the applications, power management settings,...
User Guide
Page 50
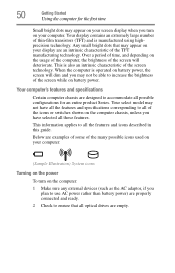
... the usage of the computer, the brightness of the screen technology. 50 Getting Started Using the computer for an entire product Series. Your display contains an extremely large number of thin-film transistors (TFT) and is also an intrinsic characteristic of the screen will dim and you may...examples of some of the many possible icons used on your computer: (Sample Illustration) System icons Turning on the power To turn on your display are an intrinsic characteristic of the screen while on your computer. When the computer is operated on the computer: 1 Make sure any external ...
... the usage of the computer, the brightness of the screen technology. 50 Getting Started Using the computer for an entire product Series. Your display contains an extremely large number of thin-film transistors (TFT) and is also an intrinsic characteristic of the screen will dim and you may...examples of some of the many possible icons used on your computer: (Sample Illustration) System icons Turning on the power To turn on your display are an intrinsic characteristic of the screen while on your computer. When the computer is operated on the computer: 1 Make sure any external ...

User Guide
Page 53
Getting Started 53 Adding memory (optional) If the computer is on page 104. 5 Close the display panel and turn the computer upside down to the computer, including the AC adaptor. 4 Remove the main battery. otherwise, skip to step 3. 1 Click Start, and ...
Getting Started 53 Adding memory (optional) If the computer is on page 104. 5 Close the display panel and turn the computer upside down to the computer, including the AC adaptor. 4 Remove the main battery. otherwise, skip to step 3. 1 Click Start, and ...
User Guide
Page 59
TECHNICAL NOTE: You must have at least one memory module installed for the computer to time, Windows® will display a pop-up . 7 Reconnect the cables. 8 Restart the computer. Checking total memory When you add or remove a memory module, you were trying to perform the action,... module" on your computer without your permission to prevent programs or people from doing things on page 52), and then check that the module is displayed below the System heading under Memory (RAM). The System window appears. 2 The total memory is inserted completely into the socket and lined up squarely with...
TECHNICAL NOTE: You must have at least one memory module installed for the computer to time, Windows® will display a pop-up . 7 Reconnect the cables. 8 Restart the computer. Checking total memory When you add or remove a memory module, you were trying to perform the action,... module" on your computer without your permission to prevent programs or people from doing things on page 52), and then check that the module is displayed below the System heading under Memory (RAM). The System window appears. 2 The total memory is inserted completely into the socket and lined up squarely with...
User Guide
Page 60
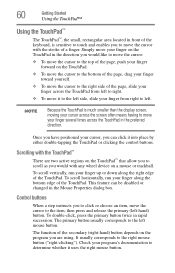
... the TouchPad™ Using the TouchPad™ The TouchPad™, the small, rectangular area located in front of the keyboard, is much smaller than the display screen, moving your cursor across the screen often means having to move your finger several times across the TouchPad from right to determine whether it...
... the TouchPad™ Using the TouchPad™ The TouchPad™, the small, rectangular area located in front of the keyboard, is much smaller than the display screen, moving your cursor across the screen often means having to move your finger several times across the TouchPad from right to determine whether it...
User Guide
Page 61
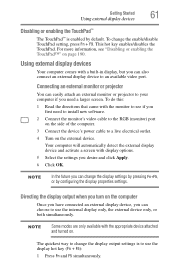
.... Your computer will automatically detect the external display device and activate a screen with a built-in display, but you can change the display settings by pressing Fn+F5, or by default. Getting Started 61 Using external display devices Disabling or enabling the TouchPad™ ...change the enable/disable TouchPad setting, press Fn + F9. Directing the display output when you can choose to see "Disabling or enabling the TouchPad™" on . Using external display devices Your computer comes with display options. 5 Select the settings you first need a larger screen. To...
.... Your computer will automatically detect the external display device and activate a screen with a built-in display, but you can change the display settings by pressing Fn+F5, or by default. Getting Started 61 Using external display devices Disabling or enabling the TouchPad™ ...change the enable/disable TouchPad setting, press Fn + F9. Directing the display output when you can choose to see "Disabling or enabling the TouchPad™" on . Using external display devices Your computer comes with display options. 5 Select the settings you first need a larger screen. To...

User Guide
Page 62
...monitor only ❖ LCD + CRT Multi Monitor-Internal display and external monitor, with one acting as the primary display and the other video display device), you want takes effect. Adjusting the quality of the external display To obtain the best picture quality from your television (or... other as an extended desktop ❖ Swap-Switch primary display between internal display and external monitor when using extended desktop (Sample Image) Display options window 3 Release the Fn key. 62 Getting Started Using external display devices 2 While holding down Fn, press F5 repeatedly until ...
...monitor only ❖ LCD + CRT Multi Monitor-Internal display and external monitor, with one acting as the primary display and the other video display device), you want takes effect. Adjusting the quality of the external display To obtain the best picture quality from your television (or... other as an extended desktop ❖ Swap-Switch primary display between internal display and external monitor when using extended desktop (Sample Image) Display options window 3 Release the Fn key. 62 Getting Started Using external display devices 2 While holding down Fn, press F5 repeatedly until ...
User Guide
Page 69
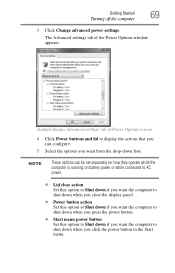
.... The Advanced settings tab of the Power Options window appears. (Sample Image) Advanced settings tab of Power Options screen 4 Click Power buttons and lid to display the actions that you can be set separately for how they operate while the computer is running on battery power or while connected to AC... power. ❖ Lid close action Set this option to Shut down if you want the computer to shut down when you close the display panel. ❖ Power button action Set this option to Shut down if you want the computer to Shut down if you click the power button...
.... The Advanced settings tab of the Power Options window appears. (Sample Image) Advanced settings tab of Power Options screen 4 Click Power buttons and lid to display the actions that you can be set separately for how they operate while the computer is running on battery power or while connected to AC... power. ❖ Lid close action Set this option to Shut down if you want the computer to shut down when you close the display panel. ❖ Power button action Set this option to Shut down if you want the computer to Shut down if you click the power button...
User Guide
Page 70
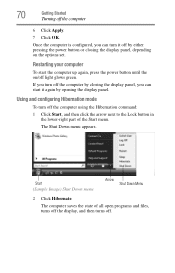
... Start, and then click the arrow next to the Lock button in the lower-right part of all open programs and files, turns off the display, and then turns off light glows green. Once the computer is configured, you can turn off the computer 6 Click Apply. 7 Click OK. Using and configuring... Hibernation mode To turn it again by closing the display panel, you can start the computer up again, press the power button until the on the options set. The computer saves the state of the...
... Start, and then click the arrow next to the Lock button in the lower-right part of all open programs and files, turns off the display, and then turns off light glows green. Once the computer is configured, you can turn off the computer 6 Click Apply. 7 Click OK. Using and configuring... Hibernation mode To turn it again by closing the display panel, you can start the computer up again, press the power button until the on the options set. The computer saves the state of the...
User Guide
Page 71
... can also specify an amount of time after which the computer automatically goes into Hibernation mode by either pressing the power button or closing the display panel.
... can also specify an amount of time after which the computer automatically goes into Hibernation mode by either pressing the power button or closing the display panel.

User Guide
Page 72
... the power button until the on the Hibernation options set separately for the options you click the power button in Hibernation mode by opening the display panel. NOTE These options can start it into Hibernation mode when you want the computer to the screen(s) you were using. Once the computer ...AC power. ❖ Lid close action Set this option to Hibernate if you want the computer to go into Hibernation mode when you close the display panel. ❖ Power button action Set this option to Hibernate if you want the computer to go into Hibernation mode by either pressing the ...
... the power button until the on the Hibernation options set separately for the options you click the power button in Hibernation mode by opening the display panel. NOTE These options can start it into Hibernation mode when you want the computer to the screen(s) you were using. Once the computer ...AC power. ❖ Lid close action Set this option to Hibernate if you want the computer to go into Hibernation mode when you close the display panel. ❖ Power button action Set this option to Hibernate if you want the computer to go into Hibernation mode by either pressing the ...
User Guide
Page 73
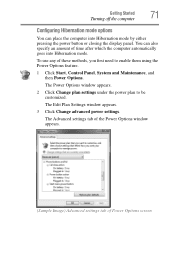
..., and then Power Options. The Shut Down menu appears. The Power Options window appears. The on/off the display, and enters into Sleep mode by either pressing the power button or closing the display panel. You can place the computer into a low-power mode. The computer saves the status of these methods...
..., and then Power Options. The Shut Down menu appears. The Power Options window appears. The on/off the display, and enters into Sleep mode by either pressing the power button or closing the display panel. You can place the computer into a low-power mode. The computer saves the status of these methods...
User Guide
Page 75
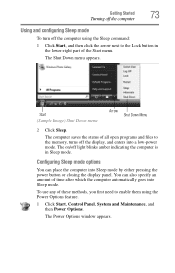
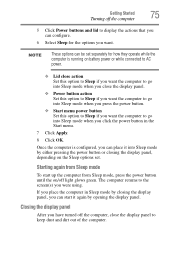
... start it into Sleep mode when you were using. If you place the computer in the Start menu. 7 Click Apply. 8 Click OK. Closing the display panel After you can start up the computer from Sleep mode, press the power button until the on/off light glows green. The computer returns...can configure. 6 Select Sleep for how they operate while the computer is configured, you want the computer to go into Sleep mode by closing the display panel, depending on the Sleep options set. Once the computer is running on battery power or while connected to AC power. ❖ Lid close action...
... start it into Sleep mode when you were using. If you place the computer in the Start menu. 7 Click Apply. 8 Click OK. Closing the display panel After you can start up the computer from Sleep mode, press the power button until the on/off light glows green. The computer returns...can configure. 6 Select Sleep for how they operate while the computer is configured, you want the computer to go into Sleep mode by closing the display panel, depending on the Sleep options set. Once the computer is running on battery power or while connected to AC power. ❖ Lid close action...

User Guide
Page 76
... light stops glowing) and all external peripheral cables are disconnected. Never spray cleaner directly onto the computer and/or display. Do not pick up the computer by its display panel or by the back. For more information, see "Taking care of the computer's keyboard, speaker, and ... Customizing your computer's settings There are several ways in which you can customize your computer to suit your computer clean, gently wipe the display panel and exterior case with a lightly dampened cloth. There are additional custom settings you can choose. To keep your particular requirements. Doing...
... light stops glowing) and all external peripheral cables are disconnected. Never spray cleaner directly onto the computer and/or display. Do not pick up the computer by its display panel or by the back. For more information, see "Taking care of the computer's keyboard, speaker, and ... Customizing your computer's settings There are several ways in which you can customize your computer to suit your computer clean, gently wipe the display panel and exterior case with a lightly dampened cloth. There are additional custom settings you can choose. To keep your particular requirements. Doing...


