
User Guide
Page 2
... will expose you must read and follow all set-up and usage instructions in the applicable user guides and/or manuals enclosed or provided electronically. Protection of Stored Data For your important data, please make periodic back-up copies of all...Satellite Pro® C800/L800/S800 Series Recordable and/or ReWritable Drive(s) and Associated Software Warranty The computer system you may include Recordable and/or ReWritable optical disc drive(s) and associated software, among the most advanced data storage technologies available. If you fail to cause birth defects or other damage. TOSHIBA...
... will expose you must read and follow all set-up and usage instructions in the applicable user guides and/or manuals enclosed or provided electronically. Protection of Stored Data For your important data, please make periodic back-up copies of all...Satellite Pro® C800/L800/S800 Series Recordable and/or ReWritable Drive(s) and Associated Software Warranty The computer system you may include Recordable and/or ReWritable optical disc drive(s) and associated software, among the most advanced data storage technologies available. If you fail to cause birth defects or other damage. TOSHIBA...
User Guide
Page 16
... The information contained in this guide cannot be reproduced in contravention of the U.S. TOSHIBA CORPORATION AND TOSHIBA AMERICA INFORMATION SYSTEMS, INC. (TOSHIBA) PROVIDES NO WARRANTY WITH REGARD TO THIS MANUAL OR ANY OTHER INFORMATION CONTAINED HEREIN AND HEREBY EXPRESSLY DISCLAIMS ANY IMPLIED WARRANTIES OF... OR FOR DISCREPANCIES BETWEEN THE PRODUCT AND THE MANUAL. with respect to any form without notice. Under the copyright laws, this manual, including but not limited to the use of Toshiba. IN NO EVENT SHALL TOSHIBA BE LIABLE FOR ANY INCIDENTAL, CONSEQUENTIAL, SPECIAL,...
... The information contained in this guide cannot be reproduced in contravention of the U.S. TOSHIBA CORPORATION AND TOSHIBA AMERICA INFORMATION SYSTEMS, INC. (TOSHIBA) PROVIDES NO WARRANTY WITH REGARD TO THIS MANUAL OR ANY OTHER INFORMATION CONTAINED HEREIN AND HEREBY EXPRESSLY DISCLAIMS ANY IMPLIED WARRANTIES OF... OR FOR DISCREPANCIES BETWEEN THE PRODUCT AND THE MANUAL. with respect to any form without notice. Under the copyright laws, this manual, including but not limited to the use of Toshiba. IN NO EVENT SHALL TOSHIBA BE LIABLE FOR ANY INCIDENTAL, CONSEQUENTIAL, SPECIAL,...
User Guide
Page 26
... product design approval process. NOTE This computer is compatible with this computer may not include user manuals or all your home office, purchase products that have earned the ENERGY STAR® for all program functionality. Toshiba requires its computer component suppliers to meet RoHS requirements and verifies its retail version (if available...
... product design approval process. NOTE This computer is compatible with this computer may not include user manuals or all your home office, purchase products that have earned the ENERGY STAR® for all program functionality. Toshiba requires its computer component suppliers to meet RoHS requirements and verifies its retail version (if available...
User Guide
Page 28
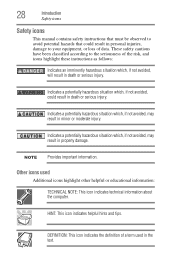
... , if not avoided, will result in death or serious injury. HINT: This icon indicates helpful hints and tips. 28 Introduction Safety icons Safety icons This manual contains safety instructions that must be observed to avoid potential hazards that could result in death or serious injury.
... , if not avoided, will result in death or serious injury. HINT: This icon indicates helpful hints and tips. 28 Introduction Safety icons Safety icons This manual contains safety instructions that must be observed to avoid potential hazards that could result in death or serious injury.

User Guide
Page 68
... new software. 2 Connect the monitor's video cable to the RGB (monitor) port on the side of the computer. 3 Connect the device's power cable to the manual that came with your computer) to the HDMI™ Out port on certain models (Sample Illustration) Video ports Selecting video cables To connect a device to...
... new software. 2 Connect the monitor's video cable to the RGB (monitor) port on the side of the computer. 3 Connect the device's power cable to the manual that came with your computer) to the HDMI™ Out port on certain models (Sample Illustration) Video ports Selecting video cables To connect a device to...
User Guide
Page 79
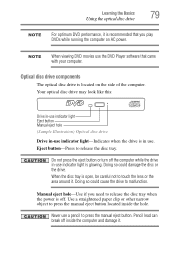
... the disc or the drive. Use a straightened paper clip or other narrow object to press the manual eject button located inside the computer and damage it . Your optical disc drive may look like this: ...disc drive is in -use . Do not press the eject button or turn off inside the hole. Manual eject hole-Use if you play DVDs while running the computer on the side of the computer. When ...drive in use indicator light is off. NOTE When viewing DVD movies use a pencil to press the manual eject button. Never use the DVD Player software that you need to release the disc tray when the ...
... the disc or the drive. Use a straightened paper clip or other narrow object to press the manual eject button located inside the computer and damage it . Your optical disc drive may look like this: ...disc drive is in -use . Do not press the eject button or turn off inside the hole. Manual eject hole-Use if you play DVDs while running the computer on the side of the computer. When ...drive in use indicator light is off. NOTE When viewing DVD movies use a pencil to press the manual eject button. Never use the DVD Player software that you need to release the disc tray when the ...
User Guide
Page 81
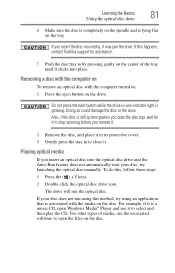
... associated with the computer turned on: 1 Press the eject button on the drive. The drive will run using this method, try launching the optical disc manually. If this , follow these steps: 1 Press the ( ) + E keys. 2 Double-click the optical disc drive icon. Removing a disc with the computer on To remove an ...optical disc with the media on the center of media, use it to select and then play the CD. To do this happens, contact Toshiba support for it to stop spinning before you open the disc tray, wait for assistance. 7 Push the disc tray in by pressing gently on the...
... associated with the computer turned on: 1 Press the eject button on the drive. The drive will run using this method, try launching the optical disc manually. If this , follow these steps: 1 Press the ( ) + E keys. 2 Double-click the optical disc drive icon. Removing a disc with the computer on To remove an ...optical disc with the media on the center of media, use it to select and then play the CD. To do this happens, contact Toshiba support for it to stop spinning before you open the disc tray, wait for assistance. 7 Push the disc tray in by pressing gently on the...
User Guide
Page 82
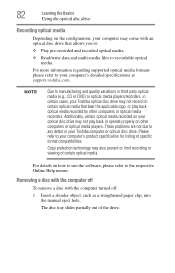
... Online Help menus. Removing a disc with the computer off : 1 Insert a slender object, such as a straightened paper clip, into the manual eject hole. The disc tray slides partially out of certain optical media. For details on how to use the software, please refer to any ... or play back or operate properly on other computers or optical media recorders. Please refer to your computer's detailed specifications at support.toshiba.com. Copy protection technology may also prevent or limit recording or viewing of the drive. For more information regarding supported optical media ...
... Online Help menus. Removing a disc with the computer off : 1 Insert a slender object, such as a straightened paper clip, into the manual eject hole. The disc tray slides partially out of certain optical media. For details on how to use the software, please refer to any ... or play back or operate properly on other computers or optical media recorders. Please refer to your computer's detailed specifications at support.toshiba.com. Copy protection technology may also prevent or limit recording or viewing of the drive. For more information regarding supported optical media ...
User Guide
Page 83
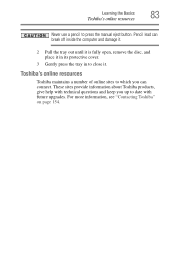
Toshiba's online resources Toshiba maintains a number of online sites to date with technical questions and keep you up to which you can break off inside the computer and damage ... is fully open, remove the disc, and place it in its protective cover. 3 Gently press the tray in to press the manual eject button. These sites provide information about Toshiba products, give help with future upgrades. For more information, see "Contacting Toshiba" on page 154. Pencil lead can connect. Learning the Basics 83...
Toshiba's online resources Toshiba maintains a number of online sites to date with technical questions and keep you up to which you can break off inside the computer and damage ... is fully open, remove the disc, and place it in its protective cover. 3 Gently press the tray in to press the manual eject button. These sites provide information about Toshiba products, give help with future upgrades. For more information, see "Contacting Toshiba" on page 154. Pencil lead can connect. Learning the Basics 83...
User Guide
Page 98
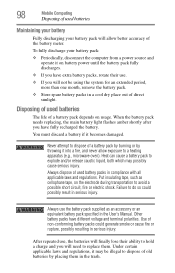
... batteries The life of a battery pack depends on usage. Put insulating tape, such as an accessory or an equivalent battery pack specified in the User's Manual. Use of non-conforming battery packs could possibly result in serious injury. Never attempt to dispose of a battery pack by burning or by placing them...
... batteries The life of a battery pack depends on usage. Put insulating tape, such as an accessory or an equivalent battery pack specified in the User's Manual. Use of non-conforming battery packs could possibly result in serious injury. Never attempt to dispose of a battery pack by burning or by placing them...
User Guide
Page 99
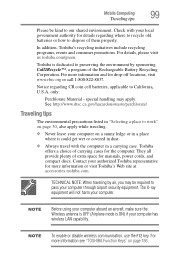
... of carrying cases for drop-off locations, visit www.rbrc.org or call 1-800-822-8837. For details, please visit us.toshiba.com/green. Toshiba is ON) if your computer. For more information and for the computer. special handling may be kind to California, U.S.A. Contact...or visit Toshiba's Web site at accessories.toshiba.com. For more information see "TOSHIBA Function Keys" on a sunny ledge or in a place where it could get wet or covered in a carrying case. Check with the computer in dust. ❖ Always travel with your authorized Toshiba representative for manuals, power ...
... of carrying cases for drop-off locations, visit www.rbrc.org or call 1-800-822-8837. For details, please visit us.toshiba.com/green. Toshiba is ON) if your computer. For more information and for the computer. special handling may be kind to California, U.S.A. Contact...or visit Toshiba's Web site at accessories.toshiba.com. For more information see "TOSHIBA Function Keys" on a sunny ledge or in a place where it could get wet or covered in a carrying case. Check with the computer in dust. ❖ Always travel with your authorized Toshiba representative for manuals, power ...

User Guide
Page 132
... PC (with computers. If Windows® fails to choose from the normal routine. ❖ The screen does not look right. To enter the Boot menu manually: 1 Press Ctrl, Alt, and Del simultaneously (once). 2 Press the Power button in the lower right corner of these problems, use the options in some way...
... PC (with computers. If Windows® fails to choose from the normal routine. ❖ The screen does not look right. To enter the Boot menu manually: 1 Press Ctrl, Alt, and Del simultaneously (once). 2 Press the Power button in the lower right corner of these problems, use the options in some way...
User Guide
Page 133
... troubleshooting mode ❖ Enable boot logging Creates a file that lists all the drivers that are created: ❖ When new hardware or software is installed ❖ Manually by the user System Image Recovery Windows® will automatically look for advanced users. Automatic Repair This feature automates the repair process. If Something Goes...
... troubleshooting mode ❖ Enable boot logging Creates a file that lists all the drivers that are created: ❖ When new hardware or software is installed ❖ Manually by the user System Image Recovery Windows® will automatically look for advanced users. Automatic Repair This feature automates the repair process. If Something Goes...

User Guide
Page 143
Consult your software documentation for example, if the battery is connected to press the manual eject button. Press gently until it is an external drive, make sure the two USB cables or the AC adaptor cable are damaged or corrupted. ...
Consult your software documentation for example, if the battery is connected to press the manual eject button. Press gently until it is an external drive, make sure the two USB cables or the AC adaptor cable are damaged or corrupted. ...
User Guide
Page 144
... that they are using is compatible with an optical data disc, refer to the speakers and the speaker volume is with your computer at support.toshiba.com. Adjust the volume control. 144 If Something Goes Wrong Sound system problems Never use a pencil to see "You press the disc eject button, but...
... that they are using is compatible with an optical data disc, refer to the speakers and the speaker volume is with your computer at support.toshiba.com. Adjust the volume control. 144 If Something Goes Wrong Sound system problems Never use a pencil to see "You press the disc eject button, but...
User Guide
Page 149
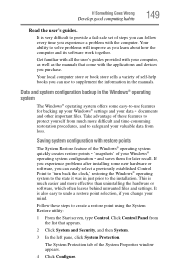
...mind. If you experience problems after installing some easy-to-use to supplement the information in just prior to solve problems will improve as the manuals that appears. 2 Click System and Security, and then System. 3 In the left pane, click System Protection. Saving system configuration with the... select a previously established Control Point to 'turn back the clock,' restoring the Windows® operating system to the state it was in the manuals. It is also easy to create a restore point using the System Restore utility: 1 From the Start screen, type Control. Your ability to...
...mind. If you experience problems after installing some easy-to-use to supplement the information in just prior to solve problems will improve as the manuals that appears. 2 Click System and Security, and then System. 3 In the left pane, click System Protection. Saving system configuration with the... select a previously established Control Point to 'turn back the clock,' restoring the Windows® operating system to the state it was in the manuals. It is also easy to create a restore point using the System Restore utility: 1 From the Start screen, type Control. Your ability to...
User Guide
Page 180
...N network accessing 105 connecting your computer 105 networking wireless 105 notification area 103 notifications 104 O ON/OFF indicator light 89 online resources Toshiba 83 optical disc Auto-Run feature 81 handling 80 inserting 80 playing optical media 81 positioning 80 recording optical media 82 removing with computer...optical disc drive components 79 drive in-use indicator light 79 eject button 79 handling an optical disc 80 inserting an optical disc 80 manual eject hole 79 playing optical media 81 recording optical media 82 removing a disc 81, 82 troubleshooting 143 using 78, 79 optical ...
...N network accessing 105 connecting your computer 105 networking wireless 105 notification area 103 notifications 104 O ON/OFF indicator light 89 online resources Toshiba 83 optical disc Auto-Run feature 81 handling 80 inserting 80 playing optical media 81 positioning 80 recording optical media 82 removing with computer...optical disc drive components 79 drive in-use indicator light 79 eject button 79 handling an optical disc 80 inserting an optical disc 80 manual eject hole 79 playing optical media 81 recording optical media 82 removing a disc 81, 82 troubleshooting 143 using 78, 79 optical ...


