User Manual
Page 30
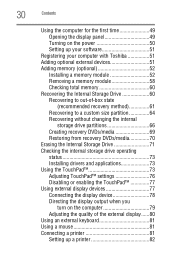
...the first time 49 Opening the display panel 49 Turning on the power 50 Setting up your software 51 Registering your computer with Toshiba 51 Adding optional external devices 51 Adding memory (optional 52 Installing a memory module 52 Removing a memory module 58 Checking total... 61 Recovering to a custom size partition 64 Recovering without changing the internal storage drive partitions 66 Creating recovery DVDs/media 69 Restoring from recovery DVDs/media 70 Erasing the Internal Storage Drive 71 Checking the internal storage drive operating status 73 Installing drivers and ...
...the first time 49 Opening the display panel 49 Turning on the power 50 Setting up your software 51 Registering your computer with Toshiba 51 Adding optional external devices 51 Adding memory (optional 52 Installing a memory module 52 Removing a memory module 58 Checking total... 61 Recovering to a custom size partition 64 Recovering without changing the internal storage drive partitions 66 Creating recovery DVDs/media 69 Restoring from recovery DVDs/media 70 Erasing the Internal Storage Drive 71 Checking the internal storage drive operating status 73 Installing drivers and ...
User Manual
Page 35
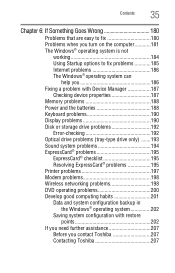
... problems 194 ExpressCard® problems 195 ExpressCard® checklist 195 Resolving ExpressCard® problems 195 Printer problems 197 Modem problems 198 Wireless networking problems 198 DVD operating problems 200 Develop good computing habits 201 Data and system configuration backup in the Windows® operating system 202 Saving system configuration with restore...
... problems 194 ExpressCard® problems 195 ExpressCard® checklist 195 Resolving ExpressCard® problems 195 Printer problems 197 Modem problems 198 Wireless networking problems 198 DVD operating problems 200 Develop good computing habits 201 Data and system configuration backup in the Windows® operating system 202 Saving system configuration with restore...
User Manual
Page 61
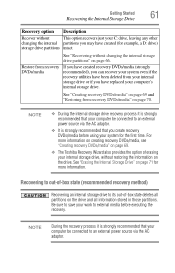
...the drive and all information stored in those partitions. Restore from recovery If you have created recovery DVDs/media (strongly DVDs/media recommended), you create recovery DVDs/media before executing the recovery. Recovering to out-of erasing your internal storage drive, without changing the.... See "Erasing the Internal Storage Drive" on page 71 for more information on creating recovery DVDs/media, see "Creating recovery DVDs/media" on page 69. ❖ The Toshiba Recovery Wizard also provides the option of -box state (recommended recovery method) Recovering an internal ...
...the drive and all information stored in those partitions. Restore from recovery If you have created recovery DVDs/media (strongly DVDs/media recommended), you create recovery DVDs/media before executing the recovery. Recovering to out-of erasing your internal storage drive, without changing the.... See "Erasing the Internal Storage Drive" on page 71 for more information on creating recovery DVDs/media, see "Creating recovery DVDs/media" on page 69. ❖ The Toshiba Recovery Wizard also provides the option of -box state (recommended recovery method) Recovering an internal ...
User Manual
Page 62
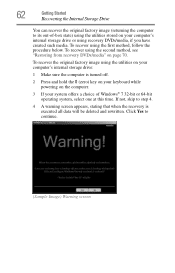
To recover using the second method, see "Restoring from recovery DVDs/media" on your computer's internal storage drive or using the utilities on your system offers a choice of -box state) using the first method, follow the ... its out-of Windows® 7 32-bit or 64-bit operating system, select one at this time. To recover the original factory image using recovery DVDs/media, if you have created such media. Click Yes to step 4. 4 A warning screen appears, stating that when the recovery is turned off. 2 Press and hold...
To recover using the second method, see "Restoring from recovery DVDs/media" on your computer's internal storage drive or using the utilities on your system offers a choice of -box state) using the first method, follow the ... its out-of Windows® 7 32-bit or 64-bit operating system, select one at this time. To recover the original factory image using recovery DVDs/media, if you have created such media. Click Yes to step 4. 4 A warning screen appears, stating that when the recovery is turned off. 2 Press and hold...
User Manual
Page 64
...displays indicating that your work to an external power source via the AC adaptor. To recover using the second method, see "Restoring from recovery DVDs/media" on the drive and all information stored in those partitions. NOTE During the recovery process it is strongly recommended that the internal storage...Windows® 7 32-bit or 64-bit operating system, select one at this time. You can resize and recover the C: drive using recovery DVDs/media, if you to step 4. To resize and recover the C: drive using the first method, follow the procedure below. 64 Getting Started Recovering...
...displays indicating that your work to an external power source via the AC adaptor. To recover using the second method, see "Restoring from recovery DVDs/media" on the drive and all information stored in those partitions. NOTE During the recovery process it is strongly recommended that the internal storage...Windows® 7 32-bit or 64-bit operating system, select one at this time. You can resize and recover the C: drive using recovery DVDs/media, if you to step 4. To resize and recover the C: drive using the first method, follow the procedure below. 64 Getting Started Recovering...
User Manual
Page 67
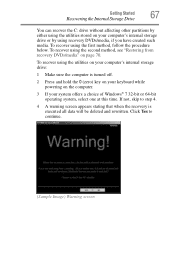
... off. 2 Press and hold the 0 (zero) key on your keyboard while powering on the computer. 3 If your computer's internal storage drive or by using recovery DVDs/media, if you have created such media. Getting Started 67 Recovering the Internal Storage Drive You can recover the C: drive without affecting other partitions by... system, select one at this time. If not, skip to continue. (Sample Image) Warning screen To recover using the second method, see "Restoring from recovery DVDs/media" on page 70.
... off. 2 Press and hold the 0 (zero) key on your keyboard while powering on the computer. 3 If your computer's internal storage drive or by using recovery DVDs/media, if you have created such media. Getting Started 67 Recovering the Internal Storage Drive You can recover the C: drive without affecting other partitions by... system, select one at this time. If not, skip to continue. (Sample Image) Warning screen To recover using the second method, see "Restoring from recovery DVDs/media" on page 70.
User Manual
Page 69
...see "Restoring from your internal storage drive or if you have been deleted from recovery DVDs/media" on -screen prompts to each DVD sequentially (for your optical disc drive when prompted. The Toshiba Customer Support Center in which gives you the ability to recover your system if the ... the items you may be sure to begin the recovery. To create recovery DVDs/media: 1 Click Start, All Programs, My Toshiba, and then Recovery Media Creator. 2 Select DVD (to create Recovery media on your computer's internal storage drive. When the process is (949) 859-4273. Getting Started...
...see "Restoring from your internal storage drive or if you have been deleted from recovery DVDs/media" on -screen prompts to each DVD sequentially (for your optical disc drive when prompted. The Toshiba Customer Support Center in which gives you the ability to recover your system if the ... the items you may be sure to begin the recovery. To create recovery DVDs/media: 1 Click Start, All Programs, My Toshiba, and then Recovery Media Creator. 2 Select DVD (to create Recovery media on your computer's internal storage drive. When the process is (949) 859-4273. Getting Started...
User Manual
Page 70
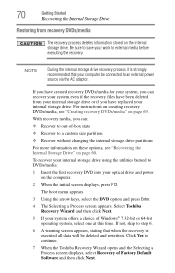
For instructions on creating recovery DVDs/media, see "Recovering the Internal Storage Drive" on page 60. Select Toshiba Recovery Wizard and then click Next. 5 If your optical drive and power on the computer. 2 When the initial screen displays, press F12. NOTE ... stating that when the recovery is strongly recommended that your work to external media before executing the recovery. Be sure to continue. 7 When the Toshiba Recovery Wizard opens and the Selecting a Process screen displays, select Recovery of Factory Default Software and then click Next. Click Yes to save your ...
For instructions on creating recovery DVDs/media, see "Recovering the Internal Storage Drive" on page 60. Select Toshiba Recovery Wizard and then click Next. 5 If your optical drive and power on the computer. 2 When the initial screen displays, press F12. NOTE ... stating that when the recovery is strongly recommended that your work to external media before executing the recovery. Be sure to continue. 7 When the Toshiba Recovery Wizard opens and the Selecting a Process screen displays, select Recovery of Factory Default Software and then click Next. Click Yes to save your ...
User Manual
Page 71
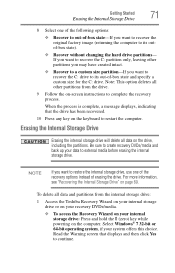
... drive, including the partitions. When the process is complete, a message displays, indicating that displays and then click Yes to create recovery DVDs/media and back up your system offers this choice. NOTE If you want to recover the original factory image (returning the computer to ...If you want to recover the C: partition only, leaving other partitions from the internal storage drive: 1 Access the Toshiba Recovery Wizard on your internal storage drive or on your recovery DVDs/media. ❖ To access the Recovery Wizard on your internal storage drive: Press and hold the 0 (zero...
... drive, including the partitions. When the process is complete, a message displays, indicating that displays and then click Yes to create recovery DVDs/media and back up your system offers this choice. NOTE If you want to recover the original factory image (returning the computer to ...If you want to recover the C: partition only, leaving other partitions from the internal storage drive: 1 Access the Toshiba Recovery Wizard on your internal storage drive or on your recovery DVDs/media. ❖ To access the Recovery Wizard on your internal storage drive: Press and hold the 0 (zero...
User Manual
Page 72
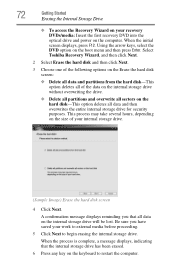
... take several hours, depending on the hard disk-This option deletes all data and then overwrites the entire internal storage drive for security purposes. Select Toshiba Recovery Wizard, and then click Next. 2 Select Erase the hard disk and then click Next. 3 Choose one of the following options on the ... ❖ Delete all partitions and overwrite all data on the keyboard to begin erasing the internal storage drive. Using the arrow keys, select the DVD option on the computer. Be sure you that the internal storage drive has been erased. 6 Press any key on the internal storage drive will ...
... take several hours, depending on the hard disk-This option deletes all data and then overwrites the entire internal storage drive for security purposes. Select Toshiba Recovery Wizard, and then click Next. 2 Select Erase the hard disk and then click Next. 3 Choose one of the following options on the ... ❖ Delete all partitions and overwrite all data on the keyboard to begin erasing the internal storage drive. Using the arrow keys, select the DVD option on the computer. Be sure you that the internal storage drive has been erased. 6 Press any key on the internal storage drive will ...

User Manual
Page 77
... character you type. ❖ Temporarily disable the TouchPad, so that it is enabled by default. For more information, please visit www.support.toshiba.com, and enter the phrase "Mouse pointer jumps around as you can disable only the tapping feature. If you disable tapping only, you type...accessible through the Mouse Properties option of external display devices to the video ports described below: ❖ An HDMI™-compatible television or VCR/DVD player via the HDMI Out port* ❖ An external monitor or projector via the RGB (monitor) port To disable tapping only, use ...
... character you type. ❖ Temporarily disable the TouchPad, so that it is enabled by default. For more information, please visit www.support.toshiba.com, and enter the phrase "Mouse pointer jumps around as you can disable only the tapping feature. If you disable tapping only, you type...accessible through the Mouse Properties option of external display devices to the video ports described below: ❖ An HDMI™-compatible television or VCR/DVD player via the HDMI Out port* ❖ An external monitor or projector via the RGB (monitor) port To disable tapping only, use ...

User Manual
Page 78
... to the HDMI™ Out port, you to: ❖ Use a TV remote control to output the computer screen onto the TV screen. Toshiba computers with the television for more information. Connecting to a TV using HDMI™-CEC (Available on certain models) HDMI™-CEC (Consumer Electronics ... Installer). To access the TOSHIBA Application Installer, see page 152. Selecting video cables To connect a device to the HDMI Out port on page 78. Connecting an HDMI™-compatible television or VCR/DVD player To connect an HDMI™-compatible television or VCR/DVD player to the computer: &#...
... to the HDMI™ Out port, you to: ❖ Use a TV remote control to output the computer screen onto the TV screen. Toshiba computers with the television for more information. Connecting to a TV using HDMI™-CEC (Available on certain models) HDMI™-CEC (Consumer Electronics ... Installer). To access the TOSHIBA Application Installer, see page 152. Selecting video cables To connect a device to the HDMI Out port on page 78. Connecting an HDMI™-compatible television or VCR/DVD player To connect an HDMI™-compatible television or VCR/DVD player to the computer: &#...
User Manual
Page 102
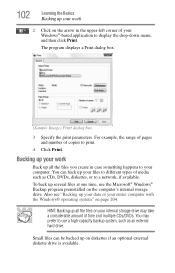
...diskettes if an optional external diskette drive is available. To back up several files at one time, use a high-capacity backup system, such as CDs, DVDs, diskettes, or to display the drop-down menu, and then click Print. You may take a considerable amount of media such as an external hard ...box. (Sample Image) Print dialog box 3 Specify the print parameters. Small files can back up your files to different types of time and multiple CDs/DVDs. For example, the range of pages and number of your entire computer with the Windows® operating system" on page 204. Also see "Backing ...
...diskettes if an optional external diskette drive is available. To back up several files at one time, use a high-capacity backup system, such as CDs, DVDs, diskettes, or to display the drop-down menu, and then click Print. You may take a considerable amount of media such as an external hard ...box. (Sample Image) Print dialog box 3 Specify the print parameters. Small files can back up your files to different types of time and multiple CDs/DVDs. For example, the range of pages and number of your entire computer with the Windows® operating system" on page 204. Also see "Backing ...
User Manual
Page 103
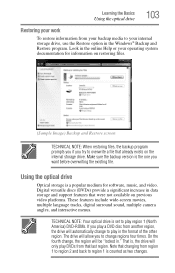
...Image) Backup and Restore screen TECHNICAL NOTE: When restoring files, the backup program prompts you if you to change to play region 1 (North America) DVD-ROMs. If you want before overwriting the existing file. TECHNICAL NOTE: Your optical drive is a popular medium for information on previous video platforms. These ...times. That is counted as two changes. Make sure the backup version is the one you play DVDs from region 1 to region 2 and back to region 1 is , the drive will only play a DVD disc from another region, the drive will be "locked in the Windows® Backup and Restore ...
...Image) Backup and Restore screen TECHNICAL NOTE: When restoring files, the backup program prompts you if you to change to play region 1 (North America) DVD-ROMs. If you want before overwriting the existing file. TECHNICAL NOTE: Your optical drive is a popular medium for information on previous video platforms. These ...times. That is counted as two changes. Make sure the backup version is the one you play DVDs from region 1 to region 2 and back to region 1 is , the drive will only play a DVD disc from another region, the drive will be "locked in the Windows® Backup and Restore ...
User Manual
Page 104
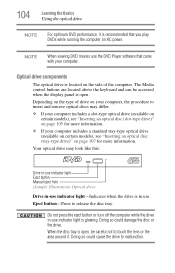
NOTE When viewing DVD movies use . Your optical drive may differ. ❖ If your computer includes a slot-type optical drive (available on ...could damage the disc or the drive. 104 Learning the Basics Using the optical drive NOTE For optimum DVD performance, it . Do not press the eject button or turn off the computer while the drive in use the... DVD Player software that you play DVDs while running the computer on AC power. Optical drive components The optical drive is open , be accessed when...
NOTE When viewing DVD movies use . Your optical drive may differ. ❖ If your computer includes a slot-type optical drive (available on ...could damage the disc or the drive. 104 Learning the Basics Using the optical drive NOTE For optimum DVD performance, it . Do not press the eject button or turn off the computer while the drive in use the... DVD Player software that you play DVDs while running the computer on AC power. Optical drive components The optical drive is open , be accessed when...

User Manual
Page 105
.... The Mute button allows you to press the manual eject button located inside the computer and damage it. Pencil lead can play audio CDs or DVD movies when the computer is on. Use a straightened paper clip or other narrow object to mute the sound. Never use a pencil to decrease and...Media button activates a media playing application that it pause if currently playing. The Volume control allows you mute the sound and play audio CDs or DVD movies. Inserting an optical disc (slot-type drive) (Available on the system control panel above the keyboard let you to press the manual eject ...
.... The Mute button allows you to press the manual eject button located inside the computer and damage it. Pencil lead can play audio CDs or DVD movies when the computer is on. Use a straightened paper clip or other narrow object to mute the sound. Never use a pencil to decrease and...Media button activates a media playing application that it pause if currently playing. The Volume control allows you mute the sound and play audio CDs or DVD movies. Inserting an optical disc (slot-type drive) (Available on the system control panel above the keyboard let you to press the manual eject ...
User Manual
Page 106
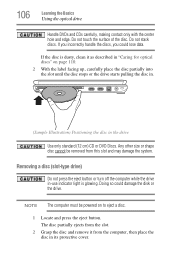
.... The disc partially ejects from the slot. 2 Grasp the disc and remove it as described in the drive Use only standard (12 cm) CD or DVD Discs. Do not touch the surface of the disc. If you incorrectly handle the discs, you could damage the disk or the drive. If the... press the eject button or turn off the computer while the drive in its protective cover. 106 Learning the Basics Using the optical drive Handle DVDs and CDs carefully, making contact only with the center hole and edge. Any other size or shape disc cannot be powered on page 110. 2 With...
.... The disc partially ejects from the slot. 2 Grasp the disc and remove it as described in the drive Use only standard (12 cm) CD or DVD Discs. Do not touch the surface of the disc. If you incorrectly handle the discs, you could damage the disk or the drive. If the... press the eject button or turn off the computer while the drive in its protective cover. 106 Learning the Basics Using the optical drive Handle DVDs and CDs carefully, making contact only with the center hole and edge. Any other size or shape disc cannot be powered on page 110. 2 With...

User Manual
Page 108
... you incorrectly handle the discs, you insert the disc incorrectly, it clicks into place. You are ready to use the disc. If this happens, contact Toshiba support for assistance. 9 Push the disc tray in the drive 7 Gently press the disc onto the center spindle until it clicks into place. Handle...
... you incorrectly handle the discs, you insert the disc incorrectly, it clicks into place. You are ready to use the disc. If this happens, contact Toshiba support for assistance. 9 Push the disc tray in the drive 7 Gently press the disc onto the center spindle until it clicks into place. Handle...

User Manual
Page 110
...Using the optical drive NOTE Due to manufacturing and quality variations in third party optical media (e.g., CD or DVD) or optical media players/recorders, in certain cases, your Toshiba computer or optical drive. Copy protection technology may not record on certain optical media that bear the applicable logo..., or play back or operate properly on other computers or optical media recorders. For details on your discs in your Toshiba optical drive may also prevent or limit recording or viewing of the drive. The disc tray slides partially out of certain optical media...
...Using the optical drive NOTE Due to manufacturing and quality variations in third party optical media (e.g., CD or DVD) or optical media players/recorders, in certain cases, your Toshiba computer or optical drive. Copy protection technology may not record on certain optical media that bear the applicable logo..., or play back or operate properly on other computers or optical media recorders. For details on your discs in your Toshiba optical drive may also prevent or limit recording or viewing of the drive. The disc tray slides partially out of certain optical media...

User Manual
Page 113
...will lose its maximum capacity, operate the computer on battery power at accessories.toshiba.com. This may shorten the life of the battery, and may vary considerably from an AC outlet. NOTE For optimum DVD performance, it is not necessary to retain a charge. Battery Notice Battery... configuration settings and the current time and date information. The RTC battery powers the RTC memory that provides power when you play DVDs while running the computer on AC power. Use only batteries designed to a month while the computer is continuously operated on usage....
...will lose its maximum capacity, operate the computer on battery power at accessories.toshiba.com. This may shorten the life of the battery, and may vary considerably from an AC outlet. NOTE For optimum DVD performance, it is not necessary to retain a charge. Battery Notice Battery... configuration settings and the current time and date information. The RTC battery powers the RTC memory that provides power when you play DVDs while running the computer on AC power. Use only batteries designed to a month while the computer is continuously operated on usage....


