

User Guide
Page 14
14 Contents Creating a computer-friendly environment....... 40 Keeping yourself comfortable 41 Precautions 44 Setting up your computer 45 Installing additional memory (optional 46 Connecting a mouse 50 Connecting a printer 50 Using external display devices 51 Directing the display output when you turn on the computer 51 Adjusting ...
14 Contents Creating a computer-friendly environment....... 40 Keeping yourself comfortable 41 Precautions 44 Setting up your computer 45 Installing additional memory (optional 46 Connecting a mouse 50 Connecting a printer 50 Using external display devices 51 Directing the display output when you turn on the computer 51 Adjusting ...

User Guide
Page 20
... can help you 214 Resolving a hardware conflict 215 A plan of action 215 Resolving hardware conflicts on your own .... 215 Fixing a problem with Device Manager .......... 217 Memory card problems 218 Power and the batteries 219 Keyboard problems 220
... can help you 214 Resolving a hardware conflict 215 A plan of action 215 Resolving hardware conflicts on your own .... 215 Fixing a problem with Device Manager .......... 217 Memory card problems 218 Power and the batteries 219 Keyboard problems 220

User Guide
Page 32
... supports 8 MB (3.3V), 16 MB (3.3V), 32 MB (3.3V), 64 MB (3.3V) and 128 MB (3.3V) SmartMedia Random Access Memory (RAM) cards. The Secure Digital card slot holds a highly secure, stampsize flash memory card with a variety of the CPU, make sure you don't block the cooling vents. The USB (Universal Serial Bus...
... supports 8 MB (3.3V), 16 MB (3.3V), 32 MB (3.3V), 64 MB (3.3V) and 128 MB (3.3V) SmartMedia Random Access Memory (RAM) cards. The Secure Digital card slot holds a highly secure, stampsize flash memory card with a variety of the CPU, make sure you don't block the cooling vents. The USB (Universal Serial Bus...

User Guide
Page 38
...your computer when a standard electrical outlet is currently playing. Underside *Optional Wi-Fi Mini-PCI cover Modem/LAN cover Subwoofer speaker Expansion memory slot cover Battery cover Battery release latch Hard disk drive cover The subwoofer speaker allows the user to eject the disc. The battery ...release latch secures the battery cover to the battery module, which lets you insert additional memory. The modem/LAN cover protects the built-in modem and LAN (Local Area Network) connection. For information about replacing the battery, see...
...your computer when a standard electrical outlet is currently playing. Underside *Optional Wi-Fi Mini-PCI cover Modem/LAN cover Subwoofer speaker Expansion memory slot cover Battery cover Battery release latch Hard disk drive cover The subwoofer speaker allows the user to eject the disc. The battery ...release latch secures the battery cover to the battery module, which lets you insert additional memory. The modem/LAN cover protects the built-in modem and LAN (Local Area Network) connection. For information about replacing the battery, see...

User Guide
Page 46
...is on page 90. CAUTION: To avoid damaging the computer's screws, use a standard Phillips no . 1 screwdriver to run most of data. Additional memory comes in 128 MB and 256 MB modules. otherwise, skip to a telephone line. If the computer is in good condition. Before starting to use ... To register your computer, you use complex software or process large amounts of today's popular applications. Your system may also want to: ❖ Add more memory ❖ Connect a mouse (see "Connecting a mouse" on page 50) ❖ Connect a full-size keyboard (see "Using an external keyboard" on ...
...is on page 90. CAUTION: To avoid damaging the computer's screws, use a standard Phillips no . 1 screwdriver to run most of data. Additional memory comes in 128 MB and 256 MB modules. otherwise, skip to a telephone line. If the computer is in good condition. Before starting to use ... To register your computer, you use complex software or process large amounts of today's popular applications. Your system may also want to: ❖ Add more memory ❖ Connect a mouse (see "Connecting a mouse" on page 50) ❖ Connect a full-size keyboard (see "Using an external keyboard" on ...

User Guide
Page 47
... cover Base of the computer 6 Using a standard Phillips no. 1 screwdriver, unscrew the two screws that secure the memory slot cover, then remove the memory slot cover. The Turn off the computer. 3 Unplug and remove any cables connected to the computer. 4 Remove the battery. 5 Close the display panel and turn ...
... cover Base of the computer 6 Using a standard Phillips no. 1 screwdriver, unscrew the two screws that secure the memory slot cover, then remove the memory slot cover. The Turn off the computer. 3 Unplug and remove any cables connected to the computer. 4 Remove the battery. 5 Close the display panel and turn ...

User Guide
Page 48
... gold connector bar (on the side you insert into the computer). 8 Remove the new memory module from its antistatic packaging. 9 Holding the memory module by its edges so that you may have built up your computer Removing the memory slot cover screws 7 Put the screws and the cover in place. To avoid damaging... the memory module, be level when secured in a safe place so that the gold connector bar faces the slot, fit the module ...
... gold connector bar (on the side you insert into the computer). 8 Remove the new memory module from its antistatic packaging. 9 Holding the memory module by its edges so that you may have built up your computer Removing the memory slot cover screws 7 Put the screws and the cover in place. To avoid damaging... the memory module, be level when secured in a safe place so that the gold connector bar faces the slot, fit the module ...

User Guide
Page 49
...dust on the computer. Getting Started Setting up your computer 49 Inserting the memory module CAUTION: Avoid touching the connectors on the memory module or on the connectors may cause memory access problems. 11 Replace the memory slot cover. 12 Replace the screws and tighten them. 13 Turn the ...computer over and reconnect any cables you removed. 14 To verify that the computer correctly recognizes the memory: ❖ Click Start, then click Control Panel ❖ Click Performance and Maintenance. ❖ Click System. ❖ The General tab view...
...dust on the computer. Getting Started Setting up your computer 49 Inserting the memory module CAUTION: Avoid touching the connectors on the memory module or on the connectors may cause memory access problems. 11 Replace the memory slot cover. 12 Replace the screws and tighten them. 13 Turn the ...computer over and reconnect any cables you removed. 14 To verify that the computer correctly recognizes the memory: ❖ Click Start, then click Control Panel ❖ Click Performance and Maintenance. ❖ Click System. ❖ The General tab view...

User Guide
Page 50
... of the computer's USB ports. 50 Getting Started Connecting a mouse Removing a memory module 1 Follow steps 1 through 6 in "Installing additional memory (optional)" on page 46. 2 Gently push the memory locks outward until the memory module pops up a printer" on the printer. To achieve the connection, you...suitable USB cable, which may want to your printer documentation for additional configuration steps, or see "Setting up . 3 Gently pull the memory module diagonally out of the TouchPad, the computer's built-in pointing device. To connect a mouse, plug the mouse cable into one from...
... of the computer's USB ports. 50 Getting Started Connecting a mouse Removing a memory module 1 Follow steps 1 through 6 in "Installing additional memory (optional)" on page 46. 2 Gently push the memory locks outward until the memory module pops up a printer" on the printer. To achieve the connection, you...suitable USB cable, which may want to your printer documentation for additional configuration steps, or see "Setting up . 3 Gently pull the memory module diagonally out of the TouchPad, the computer's built-in pointing device. To connect a mouse, plug the mouse cable into one from...

User Guide
Page 64
... ) to fully charge the main battery. For more information, see "Powering down menu. 4 Click the Device tab. 5 Under the device name, right-click Toshiba Soft Modem AMR, highlight Receive and click the auto option. If you are not connected to a network, use the operating system Standby command to save...function, repeat steps 1-4. 64 Getting Started Turning off the power while a drive-in progress and are using it may damage your system settings to memory so that, when you turn on the computer again, you automatically return to where you are not using the computer for the first time, ...
... ) to fully charge the main battery. For more information, see "Powering down menu. 4 Click the Device tab. 5 Under the device name, right-click Toshiba Soft Modem AMR, highlight Receive and click the auto option. If you are not connected to a network, use the operating system Standby command to save...function, repeat steps 1-4. 64 Getting Started Turning off the power while a drive-in progress and are using it may damage your system settings to memory so that, when you turn on the computer again, you automatically return to where you are not using the computer for the first time, ...

User Guide
Page 67
... occurs and you must restart your computer, or your file to the disk. See "Setting battery alarms" on . Your work stays in the computer's temporary memory until you save feature that you can be configured to warn you are working. This feature saves your battery runs out of charge while you...
... occurs and you must restart your computer, or your file to the disk. See "Setting battery alarms" on . Your work stays in the computer's temporary memory until you save feature that you can be configured to warn you are working. This feature saves your battery runs out of charge while you...

User Guide
Page 82
... the drive, begins to Play/Pause play. If a DVD is in the drive, the The operating system and you system enters CD player starts, the TOSHIBA press Play/ mode and operates as a MEDIA PLAYER starts Pause stand-alone CD player. CD player mode and you press starts and the CD begins... a CD is in the drive, WinDVD starts and the DVD begins to play. CAUTION: Do not install or remove a memory module while the DVD-ROM drive power is in the drive, the TOSHIBA MEDIA ning and Windows MediaTM Player PLAYER starts and Digi- the operating system starts and the DVD player starts...
... the drive, begins to Play/Pause play. If a DVD is in the drive, the The operating system and you system enters CD player starts, the TOSHIBA press Play/ mode and operates as a MEDIA PLAYER starts Pause stand-alone CD player. CD player mode and you press starts and the CD begins... a CD is in the drive, WinDVD starts and the DVD begins to play. CAUTION: Do not install or remove a memory module while the DVD-ROM drive power is in the drive, the TOSHIBA MEDIA ning and Windows MediaTM Player PLAYER starts and Digi- the operating system starts and the DVD player starts...
User Guide
Page 92
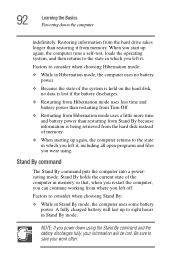
...battery discharges fully, your work often. Factors to save your information will last up to consider when choosing Stand By: ❖ While in memory so that, when you restart the computer, you can continue working from the hard disk instead of the computer in Stand By mode, ...the computer uses some battery power. Restoring information from memory. A fully charged battery will be lost if the battery discharges. ❖ Restarting from Hibernation mode uses less time and battery power than ...
...battery discharges fully, your work often. Factors to save your information will last up to consider when choosing Stand By: ❖ While in memory so that, when you restart the computer, you can continue working from the hard disk instead of the computer in Stand By mode, ...the computer uses some battery power. Restoring information from memory. A fully charged battery will be lost if the battery discharges. ❖ Restarting from Hibernation mode uses less time and battery power than ...

User Guide
Page 98
To use any of all open programs and files to memory, turns off the display, and goes into Stand By mode by either pressing the power button or closing the display panel. The on batteries area, ... when you first need to go The Control Panel appears. 2 Click Performance and Maintenance. 3 Double-click the Toshiba Power Saver icon. 4 In the Running on /off light blinks amber indicating the machine is in Toshiba's Power Saver utility. 1 Click Start, then click Control Panel. 98 Learning the Basics Using Stand By Sample...
To use any of all open programs and files to memory, turns off the display, and goes into Stand By mode by either pressing the power button or closing the display panel. The on batteries area, ... when you first need to go The Control Panel appears. 2 Click Performance and Maintenance. 3 Double-click the Toshiba Power Saver icon. 4 In the Running on /off light blinks amber indicating the machine is in Toshiba's Power Saver utility. 1 Click Start, then click Control Panel. 98 Learning the Basics Using Stand By Sample...
User Guide
Page 101
Overcharging will cause it immediately. 101 Mobile Computing Running the computer on battery power The RTC battery powers the RTC memory, which you can then replace a discharged battery and continue working. Battery safety precautions ❖ Never try to a month ...replace it to carry additional charged batteries with another metal object. Use protective gloves when handling a damaged battery. You can purchase from Toshiba's Web site at toshibaaccessories.com. To replace the main battery, use an identical battery, which stores your system configuration settings and the...
Overcharging will cause it immediately. 101 Mobile Computing Running the computer on battery power The RTC battery powers the RTC memory, which you can then replace a discharged battery and continue working. Battery safety precautions ❖ Never try to a month ...replace it to carry additional charged batteries with another metal object. Use protective gloves when handling a damaged battery. You can purchase from Toshiba's Web site at toshibaaccessories.com. To replace the main battery, use an identical battery, which stores your system configuration settings and the...
User Guide
Page 182
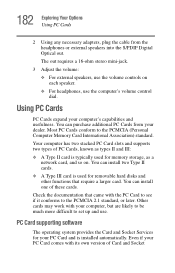
... hard disks and other functions that came with your computer, but are likely to be much more difficult to the PCMCIA (Personal Computer Memory Card International Association) standard. Your computer has two stacked PC Card slots and supports two types of Card and Socket Other cards may ... control dial. 182 Exploring Your Options Using PC Cards 2 Using any necessary adapters, plug the cable from your PC Card and is typically used for memory storage, as types II and III: ❖ A Type II card is installed automatically. The out requires a 16-ohm stereo mini-jack. 3 Adjust ...
... hard disks and other functions that came with your computer, but are likely to be much more difficult to the PCMCIA (Personal Computer Memory Card International Association) standard. Your computer has two stacked PC Card slots and supports two types of Card and Socket Other cards may ... control dial. 182 Exploring Your Options Using PC Cards 2 Using any necessary adapters, plug the cable from your PC Card and is typically used for memory storage, as types II and III: ❖ A Type II card is installed automatically. The out requires a 16-ohm stereo mini-jack. 3 Adjust ...
User Guide
Page 185
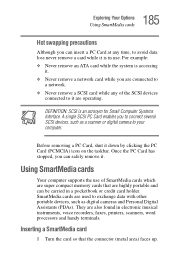
... in a pocketbook or credit card holder. SmartMedia cards are highly portable and can insert a PC Card at any of SmartMedia cards which are super compact memory cards that the connector (metal area) faces up. For example: ❖ Never remove an ATA card while the system is accessing it down by clicking...
... in a pocketbook or credit card holder. SmartMedia cards are highly portable and can insert a PC Card at any of SmartMedia cards which are super compact memory cards that the connector (metal area) faces up. For example: ❖ Never remove an ATA card while the system is accessing it down by clicking...
User Guide
Page 186
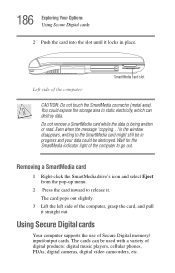
... it locks in progress and your data could expose the storage area to go out. The cards can destroy data. Left side of Secure Digital memory/ input/output cards. You could be destroyed. Using Secure Digital cards Your computer supports the use of the computer SmartMedia card slot CAUTION: Do not...
... it locks in progress and your data could expose the storage area to go out. The cards can destroy data. Left side of Secure Digital memory/ input/output cards. You could be destroyed. Using Secure Digital cards Your computer supports the use of the computer SmartMedia card slot CAUTION: Do not...
User Guide
Page 212
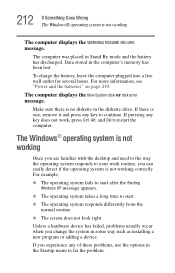
... the battery has discharged. If there is one, remove it and press any key does not work routine, you change the system in the computer's memory has been lost.
... the battery has discharged. If there is one, remove it and press any key does not work routine, you change the system in the computer's memory has been lost.
User Guide
Page 216
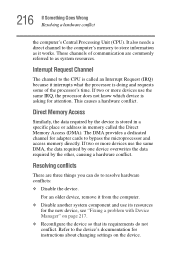
...DMA, the data required by one device overwrites the data required by the device is stored in a specific place or address in memory called an Interrupt Request (IRQ) because it interrupts what the processor is doing and requests some of communication are three things you can...computer. ❖ Disable another system component and use the same IRQ, the processor does not know which device is called the Direct Memory Access (DMA). Direct Memory Access Similarly, the data required by the other, causing a hardware conflict. 216 If Something Goes Wrong Resolving a hardware conflict the ...
...DMA, the data required by one device overwrites the data required by the device is stored in a specific place or address in memory called an Interrupt Request (IRQ) because it interrupts what the processor is doing and requests some of communication are three things you can...computer. ❖ Disable another system component and use the same IRQ, the processor does not know which device is called the Direct Memory Access (DMA). Direct Memory Access Similarly, the data required by the other, causing a hardware conflict. 216 If Something Goes Wrong Resolving a hardware conflict the ...


