
User Guide
Page 29
... 58 Scrolling with the TouchPad 59 Using the Scroll button 59 Using the Control buttons 59 Disabling or enabling the TouchPad 60 Installing additional memory (optional 61 Removing a memory module 65 Using an external keyboard 67 Using a mouse 67 Connecting a local printer 67 Setting up your printer 68 Connecting an optional external...
... 58 Scrolling with the TouchPad 59 Using the Scroll button 59 Using the Control buttons 59 Disabling or enabling the TouchPad 60 Installing additional memory (optional 61 Removing a memory module 65 Using an external keyboard 67 Using a mouse 67 Connecting a local printer 67 Setting up your printer 68 Connecting an optional external...

User Guide
Page 32
... 151 Removing a PC Card 152 Setting up a PC Card for your computer .........153 Using the Bridge Media slot 153 Inserting Memory Stick or Memory Stick PRO media 154 Removing Memory Stick or Memory Stick PRO media 154 Inserting an SD™ Card 155 Removing an SD™ Card 155 Inserting an xD-Picture Card...
... 151 Removing a PC Card 152 Setting up a PC Card for your computer .........153 Using the Bridge Media slot 153 Inserting Memory Stick or Memory Stick PRO media 154 Removing Memory Stick or Memory Stick PRO media 154 Inserting an SD™ Card 155 Removing an SD™ Card 155 Inserting an xD-Picture Card...

User Guide
Page 35
35 Contents Hotkey utility 233 Toshiba Hardware Settings 233 Toshiba Picture Enhancement Utility 235 CD/DVD Drive Acoustic Silencer 236 Enabling Hibernation 237 Setting passwords 238 Using an instant password 238 Using a supervisor password 238 ... can help you 246 Resolving a hardware conflict 247 A plan of action 247 Resolving hardware conflicts on your own .....248 Fixing a problem with Device Manager ...........249 Memory problems 251 Power and the batteries 251 Keyboard problems 253 Display problems 253 Disk drive problems 256 DVD-ROM or multi-function drive problems...258...
35 Contents Hotkey utility 233 Toshiba Hardware Settings 233 Toshiba Picture Enhancement Utility 235 CD/DVD Drive Acoustic Silencer 236 Enabling Hibernation 237 Setting passwords 238 Using an instant password 238 Using a supervisor password 238 ... can help you 246 Resolving a hardware conflict 247 A plan of action 247 Resolving hardware conflicts on your own .....248 Fixing a problem with Device Manager ...........249 Memory problems 251 Power and the batteries 251 Keyboard problems 253 Display problems 253 Disk drive problems 256 DVD-ROM or multi-function drive problems...258...

User Guide
Page 49
... will pause for a moment while checking for an Internet connection, and you must be charged before adding external or internal components to , a mouse, keyboard, printer, memory, and PC Cards. To use it. Setting up your software The first time you turn on your computer, the Setup Wizard guides you through steps...
... will pause for a moment while checking for an Internet connection, and you must be charged before adding external or internal components to , a mouse, keyboard, printer, memory, and PC Cards. To use it. Setting up your software The first time you turn on your computer, the Setup Wizard guides you through steps...

User Guide
Page 51
... Setting up your computer 51 Adding external devices NOTE Before adding external devices, Toshiba recommends setting up your software" on page 151) Before starting to use your computer, you may also want to: ❖ Add more memory (see "Installing additional memory (optional)" on page 61) ❖ Connect a mouse (see "Using a mouse" on page...
... Setting up your computer 51 Adding external devices NOTE Before adding external devices, Toshiba recommends setting up your software" on page 151) Before starting to use your computer, you may also want to: ❖ Add more memory (see "Installing additional memory (optional)" on page 61) ❖ Connect a mouse (see "Using a mouse" on page...

User Guide
Page 61
...menu. If this happens, let the memory modules cool to increase the computer's memory if you use the computer for other product information, be lost. NOTE The Fn + F9 shortcut can be used to regularly check the Toshiba Web site at accessories.toshiba.com). You may have both slots ...occupied. If you install or remove a memory module while the computer is in various capacities (to run most recent software and hardware ...
...menu. If this happens, let the memory modules cool to increase the computer's memory if you use the computer for other product information, be lost. NOTE The Fn + F9 shortcut can be used to regularly check the Toshiba Web site at accessories.toshiba.com). You may have both slots ...occupied. If you install or remove a memory module while the computer is in various capacities (to run most recent software and hardware ...

User Guide
Page 62
...then click Turn off computer or Shut down command" on , begin at step 1; See "Using the Turn off computer. Memory module slot cover Sample locating the memory module slot cover The operating system turns off computer window appears. 2 Click Turn Off or Shut Down. If the computer is... on page 106 for this procedure. You can install one or two memory modules. The computer has two memory module slots-Slot A and Slot B. otherwise, skip to locate the memory module slot cover. To avoid damaging the computer's screws, use a standard Phillips no .1 ...
...then click Turn off computer or Shut down command" on , begin at step 1; See "Using the Turn off computer. Memory module slot cover Sample locating the memory module slot cover The operating system turns off computer window appears. 2 Click Turn Off or Shut Down. If the computer is... on page 106 for this procedure. You can install one or two memory modules. The computer has two memory module slots-Slot A and Slot B. otherwise, skip to locate the memory module slot cover. To avoid damaging the computer's screws, use a standard Phillips no .1 ...

User Guide
Page 63
..., be careful not to discharge any static electricity you can damage the memory module. Static electricity can retrieve it later. Sample removing the memory module slot cover 7 Place the memory module slot cover in a safe place so that you may have built up. Before you ... the slot, fit the memory module into the computer). 8 Remove the new memory module from its antistatic packaging. 9 Holding the memory module by its edges so that secures the memory module slot cover, then remove the memory module slot cover. Getting Started Installing additional memory (optional) 63 5 Remove...
..., be careful not to discharge any static electricity you can damage the memory module. Static electricity can retrieve it later. Sample removing the memory module slot cover 7 Place the memory module slot cover in a safe place so that you may have built up. Before you ... the slot, fit the memory module into the computer). 8 Remove the new memory module from its antistatic packaging. 9 Holding the memory module by its edges so that secures the memory module slot cover, then remove the memory module slot cover. Getting Started Installing additional memory (optional) 63 5 Remove...

User Guide
Page 64
... continue setting up the computer. You can verify that the computer has recognized the additional memory. 64 Getting Started Installing additional memory (optional) 10 Gently press down on the connectors may cause memory access problems. 11 Replace the memory module slot cover and tighten the screw. 12 Turn the computer over and restart it...
... continue setting up the computer. You can verify that the computer has recognized the additional memory. 64 Getting Started Installing additional memory (optional) 10 Gently press down on the connectors may cause memory access problems. 11 Replace the memory module slot cover and tighten the screw. 12 Turn the computer over and restart it...

User Guide
Page 65
.... Do not try to shut down for five seconds, then turn it on and data in Standby mode. Do not remove the memory module while the computer is in memory will not be lost. The computer could hang up the next time you turn the power on again. 2 Pull the clips away... computer hangs up when you turn it on, perform the following: Press the power button and hold it down the computer and open the memory module cover. The memory module pops partially out of the above cases, the Standby configuration will be saved. You can damage the computer and the device. In...
.... Do not try to shut down for five seconds, then turn it on and data in Standby mode. Do not remove the memory module while the computer is in memory will not be lost. The computer could hang up the next time you turn the power on again. 2 Pull the clips away... computer hangs up when you turn it on, perform the following: Press the power button and hold it down the computer and open the memory module cover. The memory module pops partially out of the above cases, the Standby configuration will be saved. You can damage the computer and the device. In...

User Guide
Page 66
... the computer over and restart it. If the computer does not recognize the memory configuration, turn off the computer, remove the memory slot cover, and make sure the memory module is seated properly, as described in step 10 of "Installing additional memory (optional)" on page 61. To do this: 1 Click Start, then click Control...
... the computer over and restart it. If the computer does not recognize the memory configuration, turn off the computer, remove the memory slot cover, and make sure the memory module is seated properly, as described in step 10 of "Installing additional memory (optional)" on page 61. To do this: 1 Click Start, then click Control...

User Guide
Page 79
... for the first time, leave the computer plugged into a power source (even though the computer is a good idea to turn off your system settings to memory so When you power down the computer, you are not using it may take several hours to recharge the main battery. Each option has its...
... for the first time, leave the computer plugged into a power source (even though the computer is a good idea to turn off your system settings to memory so When you power down the computer, you are not using it may take several hours to recharge the main battery. Each option has its...

User Guide
Page 83
...: Some programs have an automatic save it to reconnect, or your work " on page 92 for details. 83 Your work stays in the computer's temporary memory until you must restart your computer to the disk. If the network you are using goes down and you save feature that can be activated...
...: Some programs have an automatic save it to reconnect, or your work " on page 92 for details. 83 Your work stays in the computer's temporary memory until you must restart your computer to the disk. If the network you are using goes down and you save feature that can be activated...

User Guide
Page 108
... the display panel. If you start up again, press the power button until the on page 230. When you shut down To start it from memory. Since Hibernation mode does not require power to green.
... the display panel. If you start up again, press the power button until the on page 230. When you shut down To start it from memory. Since Hibernation mode does not require power to green.

User Guide
Page 109
... and files you were previously using Configuring your computer for Hibernation 1 Open the Start menu, click Control Panel, then Performance and Maintenance. 2 Click the Toshiba Power Saver icon. 3 Click the Setup Action tab. 4 Select Hibernation for the options you want. ❖ When I press the power button Set ...time and battery power to start up than restarting from Standby, because information is being retrieved from the hard disk rather than from memory ❖ When starting up again, the computer returns to Hibernate so that the computer will go into Hibernation mode when you left it....
... and files you were previously using Configuring your computer for Hibernation 1 Open the Start menu, click Control Panel, then Performance and Maintenance. 2 Click the Toshiba Power Saver icon. 3 Click the Setup Action tab. 4 Select Hibernation for the options you want. ❖ When I press the power button Set ...time and battery power to start up than restarting from Standby, because information is being retrieved from the hard disk rather than from memory ❖ When starting up again, the computer returns to Hibernate so that the computer will go into Hibernation mode when you left it....
User Guide
Page 110
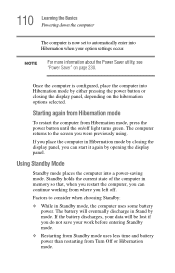
... mode To restart the computer from Hibernation mode, press the power button until the on the hibernation options selected. If you place the computer in memory so that, when you restart the computer, you can start it again by opening the display panel. NOTE For more information about the Power Saver...
... mode To restart the computer from Hibernation mode, press the power button until the on the hibernation options selected. If you place the computer in memory so that, when you restart the computer, you can start it again by opening the display panel. NOTE For more information about the Power Saver...

User Guide
Page 118
... off . Charging the RTC battery Your computer has an internal real-time clock (RTC) battery. The RTC battery powers the System Time Clock and BIOS memory used to select a power level setting that the battery charges to its full capacity, wait until it reaches room temperature. ❖ The battery is powered...
... off . Charging the RTC battery Your computer has an internal real-time clock (RTC) battery. The RTC battery powers the System Time Clock and BIOS memory used to select a power level setting that the battery charges to its full capacity, wait until it reaches room temperature. ❖ The battery is powered...

User Guide
Page 125
... profile, see "Power Saver" on page 230. Be sure to save your battery power is in Standby mode. The power profile options are now in memory will be lost . When handling a battery, be lost . Data in the selected mode. If your battery discharges fully, your information will be careful not to...
... profile, see "Power Saver" on page 230. Be sure to save your battery power is in Standby mode. The power profile options are now in memory will be lost . When handling a battery, be lost . Data in the selected mode. If your battery discharges fully, your information will be careful not to...

User Guide
Page 153
... Bridge Media slot Sample ejecting a PC card The PC Card ejects slightly from one media to another, use the drag-and-drop feature of Memory Stick or Memory Stick PRO media, Secure DigitalTM (SDTM) Cards, or xD-Picture Cards. To set up a PC Card for this type of the slot. NOTE Do...
... Bridge Media slot Sample ejecting a PC card The PC Card ejects slightly from one media to another, use the drag-and-drop feature of Memory Stick or Memory Stick PRO media, Secure DigitalTM (SDTM) Cards, or xD-Picture Cards. To set up a PC Card for this type of the slot. NOTE Do...

User Guide
Page 154
...card and pull it straight out. Even when the message "copying..." After the media is stopped, it is being written or read. Removing Memory Stick or Memory Stick PRO media 1 Right-click the Safely Remove Hardware icon on the System tray. 154 Exploring Your Options Using the Bridge Media slot ...Inserting Memory Stick or Memory Stick PRO media 1 Turn the Memory Stick so that the notched corner faces the back of the computer and the arrow is face up. 2 Push the media...
...card and pull it straight out. Even when the message "copying..." After the media is stopped, it is being written or read. Removing Memory Stick or Memory Stick PRO media 1 Right-click the Safely Remove Hardware icon on the System tray. 154 Exploring Your Options Using the Bridge Media slot ...Inserting Memory Stick or Memory Stick PRO media 1 Turn the Memory Stick so that the notched corner faces the back of the computer and the arrow is face up. 2 Push the media...


