User Guide
Page 29
29 Contents Your computer's features and specifications ....... 56 Turning on the power 56 Using the AccuPoint II 57 Installing additional memory (optional 58 Removing a memory module 64 Connecting an external USB mouse 65 Connecting an external USB keyboard 65 Connecting a printer 65 Connecting the modem 67 Connecting to a phone line ...
29 Contents Your computer's features and specifications ....... 56 Turning on the power 56 Using the AccuPoint II 57 Installing additional memory (optional 58 Removing a memory module 64 Connecting an external USB mouse 65 Connecting an external USB keyboard 65 Connecting a printer 65 Connecting the modem 67 Connecting to a phone line ...
User Guide
Page 35
... conflict 194 A plan of action 195 Resolving hardware conflicts on your own ....... 195 Fixing a problem with Device Manager 197 Memory problems 198 Power and the batteries 199 Keyboard problems 201 AccuPoint II problems 201 Display problems 202 Disk drive problems 205 Problems ... operating problems 214 Develop good computing habits 216 If you need further assistance 217 Before you call 218 Contacting Toshiba 218 Other Toshiba Internet Web sites 219 Toshiba's worldwide offices 220 Appendix A: Hot Keys 222 Volume Mute 222 Password security 222 Without a password 222 With...
... conflict 194 A plan of action 195 Resolving hardware conflicts on your own ....... 195 Fixing a problem with Device Manager 197 Memory problems 198 Power and the batteries 199 Keyboard problems 201 AccuPoint II problems 201 Display problems 202 Disk drive problems 205 Problems ... operating problems 214 Develop good computing habits 216 If you need further assistance 217 Before you call 218 Contacting Toshiba 218 Other Toshiba Internet Web sites 219 Toshiba's worldwide offices 220 Appendix A: Hot Keys 222 Volume Mute 222 Password security 222 Without a password 222 With...
User Guide
Page 49
... all set up your name and the name of windows displayed, and the order in which windows appear, may vary according to , a mouse, keyboard, printer, memory, and PC Cards. These components include, but are not limited to your software setup choices. The first time you through steps to set up steps...
... all set up your name and the name of windows displayed, and the order in which windows appear, may vary according to , a mouse, keyboard, printer, memory, and PC Cards. These components include, but are not limited to your software setup choices. The first time you through steps to set up steps...
User Guide
Page 51
... cord/cable and AC adapter to connect the computer to a live electrical outlet, or to operate. Getting Started Connecting a power source 51 ❖ Add more memory (see "Using the AccuPoint II" on page 57) ❖ Connect a mouse (see "Connecting an external USB mouse" on page 65 and "Connecting a mouse to the...
... cord/cable and AC adapter to connect the computer to a live electrical outlet, or to operate. Getting Started Connecting a power source 51 ❖ Add more memory (see "Using the AccuPoint II" on page 57) ❖ Connect a mouse (see "Connecting an external USB mouse" on page 65 and "Connecting a mouse to the...

User Guide
Page 58
... software and hardware options for your system or visit Toshiba's Web site at accessories.toshiba.com. Your computer comes with your computer, and for other product information, be lost. 58 Getting Started Installing additional memory (optional) Primary and secondary control buttons The control buttons... on the most of data. It usually corresponds to regularly check the Toshiba Web site at toshibaaccessories.com. HINT: To purchase additional memory modules, see the accessories information packaged with enough memory to find whether it uses the secondary mouse button. You may want ...
... software and hardware options for your system or visit Toshiba's Web site at accessories.toshiba.com. Your computer comes with your computer, and for other product information, be lost. 58 Getting Started Installing additional memory (optional) Primary and secondary control buttons The control buttons... on the most of data. It usually corresponds to regularly check the Toshiba Web site at toshibaaccessories.com. HINT: To purchase additional memory modules, see the accessories information packaged with enough memory to find whether it uses the secondary mouse button. You may want ...
User Guide
Page 59
...can be a long beep followed by two short beeps. To avoid damaging the computer's screws, use the computer for this happens, let the memory modules cool to operate the computer with the computer, a beep will be installed in good condition. 1 Shut down the computer" on the ...under your computer completely using the Start menu. do not try to room temperature before you install or remove a memory module, turn on page 96. If the module is incompatible with a memory module in slot A, thee will sound when you use a standard Phillips no .1 screwdriver and a small flat ...
...can be a long beep followed by two short beeps. To avoid damaging the computer's screws, use the computer for this happens, let the memory modules cool to operate the computer with the computer, a beep will be installed in good condition. 1 Shut down the computer" on the ...under your computer completely using the Start menu. do not try to room temperature before you install or remove a memory module, turn on page 96. If the module is incompatible with a memory module in slot A, thee will sound when you use a standard Phillips no .1 screwdriver and a small flat ...

User Guide
Page 60
60 Getting Started Installing additional memory (optional) 2 Unplug the computer and remove any cables you may damage the computer, the module, or both. 3 Open the display panel and remove the panel that contains the Power and TOSHIBA Console buttons. Grasp the end of its position by using a flat head screwdriver.... When removing the computer's power and TOSHIBA Console button panel to install additional memory, be careful not to pry the panel off You can pry the panel out of the panel, lift up and wiggle it ...
60 Getting Started Installing additional memory (optional) 2 Unplug the computer and remove any cables you may damage the computer, the module, or both. 3 Open the display panel and remove the panel that contains the Power and TOSHIBA Console buttons. Grasp the end of its position by using a flat head screwdriver.... When removing the computer's power and TOSHIBA Console button panel to install additional memory, be careful not to pry the panel off You can pry the panel out of the panel, lift up and wiggle it ...

User Guide
Page 61
Removing the right keyboard screw Getting Started Installing additional memory (optional) 61 Removing the left keyboard screw 4 Locate and remove the screws that hold the keyboard in place.
Removing the right keyboard screw Getting Started Installing additional memory (optional) 61 Removing the left keyboard screw 4 Locate and remove the screws that hold the keyboard in place.

User Guide
Page 62
62 Getting Started Installing additional memory (optional) 5 Lift the keyboard and place it face down on the palm rest of the computer. Lifting off the keyboard The memory module expansion slots
62 Getting Started Installing additional memory (optional) 5 Lift the keyboard and place it face down on the palm rest of the computer. Lifting off the keyboard The memory module expansion slots

User Guide
Page 63
... from its pin connector on the side you may have built up. To avoid damaging the memory module, be careful not to touch its antistatic packaging. 7 Insert the memory module in the slot and gently press it down into place. Before you handle the module, touch a grounded metal... surface to secure the module. Getting Started Installing additional memory (optional) 63 Static electricity can damage the memory module. The clips on either side of the module will click to discharge any static electricity you insert into the slot...
... from its pin connector on the side you may have built up. To avoid damaging the memory module, be careful not to touch its antistatic packaging. 7 Insert the memory module in the slot and gently press it down into place. Before you handle the module, touch a grounded metal... surface to secure the module. Getting Started Installing additional memory (optional) 63 Static electricity can damage the memory module. The clips on either side of the module will click to discharge any static electricity you insert into the slot...

User Guide
Page 64
... the keyboard panel to shut down the computer and expose the memory module(s). 2 Pull the clips away from the slot. 4 Replace the keyboard and the screws. 5 Replace the panel that contains the Power and TOSHIBA Console buttons. 64 Getting Started Installing additional memory (optional) 8 Replace the keyboard and the screws. 9 Replace the panel...
... the keyboard panel to shut down the computer and expose the memory module(s). 2 Pull the clips away from the slot. 4 Replace the keyboard and the screws. 5 Replace the panel that contains the Power and TOSHIBA Console buttons. 64 Getting Started Installing additional memory (optional) 8 Replace the keyboard and the screws. 9 Replace the panel...

User Guide
Page 73
... feature saves your software documentation for further information. See your file to the disk. Computing tips ❖ Save your work stays in the computer's temporary memory until you save feature which you will lose all work " on .
... feature saves your software documentation for further information. See your file to the disk. Computing tips ❖ Save your work stays in the computer's temporary memory until you save feature which you will lose all work " on .
User Guide
Page 96
... to protect them from scratches and keep them on a device capable of a disc. ❖ Hold a disc by its outside edge. The most efficient method to memory and enters a low power mode ❖ Restart, which restarts the computer
... to protect them from scratches and keep them on a device capable of a disc. ❖ Hold a disc by its outside edge. The most efficient method to memory and enters a low power mode ❖ Restart, which restarts the computer

User Guide
Page 98
...Since Hibernation does not require power to consider when choosing Standby: ❖ While in Standby mode for an extended period, your computer is in memory so that, when you restart the computer, you start up again, this choice uses less time and battery power than restoring it . Restoring information...Turn Off or Shut down the computer Hibernation command The Hibernation command powers off the computer, but it first saves the current state of from memory. ❖ On restarting, the computer returns to the state in which you left it from where you left in Standby mode, the ...
...Since Hibernation does not require power to consider when choosing Standby: ❖ While in Standby mode for an extended period, your computer is in memory so that, when you restart the computer, you start up again, this choice uses less time and battery power than restoring it . Restoring information...Turn Off or Shut down the computer Hibernation command The Hibernation command powers off the computer, but it first saves the current state of from memory. ❖ On restarting, the computer returns to the state in which you left it from where you left in Standby mode, the ...

User Guide
Page 107
...; By pressing the power button ❖ By closing the display panel. NOTE If you are connected to memory, turns off light blinks green to indicate the machine is in Standby mode. Be sure to memory, turns off light ( ) blinks amber indicating the machine is in Standby mode. The computer saves the state...
...; By pressing the power button ❖ By closing the display panel. NOTE If you are connected to memory, turns off light blinks green to indicate the machine is in Standby mode. Be sure to memory, turns off light ( ) blinks amber indicating the machine is in Standby mode. The computer saves the state...

User Guide
Page 115
... battery is low, the real-time clock and calendar may display the incorrect time and date or stop working . 115 Mobile Computing Charging the batteries memory used while the RTC battery is being charged, although the charging status of the RTC battery cannot be monitored.
... battery is low, the real-time clock and calendar may display the incorrect time and date or stop working . 115 Mobile Computing Charging the batteries memory used while the RTC battery is being charged, although the charging status of the RTC battery cannot be monitored.

User Guide
Page 123
Data in memory will be lost . Removing the battery from the computer To remove the battery: 1 Save your work often. Do not scratch or break the casing and ...
Data in memory will be lost . Removing the battery from the computer To remove the battery: 1 Save your work often. Do not scratch or break the casing and ...

User Guide
Page 139
... NOTE: For PCMCIA-compatible PC Cards, check the package to make sure they are likely to be much more difficult to the PCMCIA (Personal Computer Memory Card International Association) standard. Inserting a module into the Slim SelectBay To install a module into the Slim SelectBay, slide the module all the way into the...
... NOTE: For PCMCIA-compatible PC Cards, check the package to make sure they are likely to be much more difficult to the PCMCIA (Personal Computer Memory Card International Association) standard. Inserting a module into the Slim SelectBay To install a module into the Slim SelectBay, slide the module all the way into the...
User Guide
Page 141
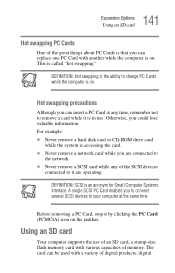
... one PC Card with another while the computer is an acronym for Small Computer Systems Interface. The card can be used with various capacities of memory. A single SCSI PC Card enables you to connect several SCSI devices to it by clicking the PC Card (PCMCIA) icon on . This is in use... of an SD card, a stamp-size flash memory card with a variety of the SCSI devices connected to your computer at any of digital products: digital Hot swapping precautions Although you could lose valuable...
... one PC Card with another while the computer is an acronym for Small Computer Systems Interface. The card can be used with various capacities of memory. A single SCSI PC Card enables you to connect several SCSI devices to it by clicking the PC Card (PCMCIA) icon on . This is in use... of an SD card, a stamp-size flash memory card with a variety of the SCSI devices connected to your computer at any of digital products: digital Hot swapping precautions Although you could lose valuable...

User Guide
Page 143
... any applications which have formatted the SD card drive with the Windows® operating system format (see Formatting an SD Card in use the TOSHIBA SD Memory Card Format Utility. The card pops out slightly. 143 Expansion Options Using an SD card Formatting an SD card If you want to format your...
... any applications which have formatted the SD card drive with the Windows® operating system format (see Formatting an SD Card in use the TOSHIBA SD Memory Card Format Utility. The card pops out slightly. 143 Expansion Options Using an SD card Formatting an SD card If you want to format your...


