User Manual
Page 2
...COPY OR TRANSFER THE DATA CORRECTLY. As with any new technology, you have purchased is not designed for any other damage. YOU AGREE THAT TOSHIBA, ITS AFFILIATES AND SUPPLIERS SHALL HAVE NO RESPONSIBILITY FOR DAMAGE TO OR LOSS OF ANY BUSINESS, PROFITS, PROGRAMS, DATA OR REMOVABLE STORAGE MEDIA ARISING... a ReWritable CD and/or DVD drive(s), among the most advanced data storage technologies available. IF YOUR DATA IS ALTERED OR LOST DUE TO ANY TROUBLE, FAILURE OR MALFUNCTION OF THE HARD DISK DRIVE OR OTHER STORAGE DEVICES AND THE DATA CANNOT BE RECOVERED, TOSHIBA SHALL NOT BE LIABLE FOR ...
...COPY OR TRANSFER THE DATA CORRECTLY. As with any new technology, you have purchased is not designed for any other damage. YOU AGREE THAT TOSHIBA, ITS AFFILIATES AND SUPPLIERS SHALL HAVE NO RESPONSIBILITY FOR DAMAGE TO OR LOSS OF ANY BUSINESS, PROFITS, PROGRAMS, DATA OR REMOVABLE STORAGE MEDIA ARISING... a ReWritable CD and/or DVD drive(s), among the most advanced data storage technologies available. IF YOUR DATA IS ALTERED OR LOST DUE TO ANY TROUBLE, FAILURE OR MALFUNCTION OF THE HARD DISK DRIVE OR OTHER STORAGE DEVICES AND THE DATA CANNOT BE RECOVERED, TOSHIBA SHALL NOT BE LIABLE FOR ...

User Manual
Page 15
... for future reference. CD-ROM, DVD-ROM, Multifunction drive safety instructions The CD-ROM, DVD-ROM and Multifunction drives employ a laser system. Should the unit ever require maintenance, contact an authorized service location. 15 Toshiba is approved to open the enclosure....correction of the devices included with this instruction manual carefully and retain for any radio or television interference caused by Toshiba. Australia Austria Belgium Canada Denmark Finland Germany Iceland Ireland Japan Luxembourg Netherlands New Zealand Norway Sweden Switzerland UK USA...
... for future reference. CD-ROM, DVD-ROM, Multifunction drive safety instructions The CD-ROM, DVD-ROM and Multifunction drives employ a laser system. Should the unit ever require maintenance, contact an authorized service location. 15 Toshiba is approved to open the enclosure....correction of the devices included with this instruction manual carefully and retain for any radio or television interference caused by Toshiba. Australia Austria Belgium Canada Denmark Finland Germany Iceland Ireland Japan Luxembourg Netherlands New Zealand Norway Sweden Switzerland UK USA...

User Manual
Page 21
... a program from the Run dialog box 83 Saving your work 84 Printing your work 86 Using the DVD-ROM or Multifunction drive 87 Inserting compact discs 89 Removing compact discs 91 Caring for CDs, DVDs, or Multifunction Discs 91 Using PC Cards 92 Hot swapping 92 Using SD® (Secure Digital) cards...
... a program from the Run dialog box 83 Saving your work 84 Printing your work 86 Using the DVD-ROM or Multifunction drive 87 Inserting compact discs 89 Removing compact discs 91 Caring for CDs, DVDs, or Multifunction Discs 91 Using PC Cards 92 Hot swapping 92 Using SD® (Secure Digital) cards...
User Manual
Page 25
25 Chapter 8: WinDVD 183 Playing DVDs 183 Using the WinDVD slider bar (location 185 Using the WinDVD control panel 186 Using the control panel playback buttons 187 Maximizing the video window ... 202 Fixing a problem with Device Manager 203 Memory problems 205 Power and the batteries 205 Keyboard problems 207 Display problems 207 Disk drive problems 209 DVD-ROM or Multifunction drive problems 212 Sound system problems 219 PC Card problems 220 Printer problems 223 Modem problems 224 Develop good computing habits 225
25 Chapter 8: WinDVD 183 Playing DVDs 183 Using the WinDVD slider bar (location 185 Using the WinDVD control panel 186 Using the control panel playback buttons 187 Maximizing the video window ... 202 Fixing a problem with Device Manager 203 Memory problems 205 Power and the batteries 205 Keyboard problems 207 Display problems 207 Disk drive problems 209 DVD-ROM or Multifunction drive problems 212 Sound system problems 219 PC Card problems 220 Printer problems 223 Modem problems 224 Develop good computing habits 225

User Manual
Page 37
... software. Right side Finding Your Way Around Making sure you have everything 37 Speaker HDD cover Speaker-Lets you hear stereo sound from a CD or DVD in addition to an external video device such as a standard television set. Left side Speaker Video-out port SD® card slot Wireless antenna on.../off switch* PC Card ejection buttons PC Card slots PC Card lock Security lock slot Slim SelectBay module (DVD-ROM drive shown) * functional only on systems with a wireless module installed Speaker-Lets you hear stereo sound from a CD or...
... software. Right side Finding Your Way Around Making sure you have everything 37 Speaker HDD cover Speaker-Lets you hear stereo sound from a CD or DVD in addition to an external video device such as a standard television set. Left side Speaker Video-out port SD® card slot Wireless antenna on.../off switch* PC Card ejection buttons PC Card slots PC Card lock Security lock slot Slim SelectBay module (DVD-ROM drive shown) * functional only on systems with a wireless module installed Speaker-Lets you hear stereo sound from a CD or...

User Manual
Page 38
... Cards, or one of several possible Slim SelectBay modules. The PC Card eject buttons allow you insert SD® cards for additional data storage. The DVD-ROM drive is shown in place using a computer lock. Wireless antenna on/off switch (functional only on page 94. See "Using a computer lock" on systems...
... Cards, or one of several possible Slim SelectBay modules. The PC Card eject buttons allow you insert SD® cards for additional data storage. The DVD-ROM drive is shown in place using a computer lock. Wireless antenna on/off switch (functional only on page 94. See "Using a computer lock" on systems...

User Manual
Page 87
...digital surround sound, multiple camera angles, and interactive menus. For these reasons, your computer may come with a DVD-ROM drive or Multifunction drive. Digital versatile discs (DVDs) provide a significant increase in data storage and support features that are not available on any other video platform.... and number of copies to print. 4 Click Print. Learning the Basics Using the DVD-ROM or Multifunction drive 87 A sample Print dialog box 3 Specify the print parameters. Using the DVD-ROM or Multifunction drive Optical storage has become the preferred medium for software, music, ...
...digital surround sound, multiple camera angles, and interactive menus. For these reasons, your computer may come with a DVD-ROM drive or Multifunction drive. Digital versatile discs (DVDs) provide a significant increase in data storage and support features that are not available on any other video platform.... and number of copies to print. 4 Click Print. Learning the Basics Using the DVD-ROM or Multifunction drive 87 A sample Print dialog box 3 Specify the print parameters. Using the DVD-ROM or Multifunction drive Optical storage has become the preferred medium for software, music, ...

User Manual
Page 88
... computer while the Drive in use indicator light-Indicates when the drive is designed to touch the lens or the area around it . HINT: Your DVD-ROM or Multifunction drive is in -use a pencil to malfunction. When the disc tray is open, be careful not to play Region 1 (North America...) DVD-ROMs. Drive in-use indicator light Eject button Manual eject hole Sample DVD-ROM drive shown Drive in "Using Slim SelectBay® modules" on page 151. CAUTION: Never use indicator light is...
... computer while the Drive in use indicator light-Indicates when the drive is designed to touch the lens or the area around it . HINT: Your DVD-ROM or Multifunction drive is in -use a pencil to malfunction. When the disc tray is open, be careful not to play Region 1 (North America...) DVD-ROMs. Drive in-use indicator light Eject button Manual eject hole Sample DVD-ROM drive shown Drive in "Using Slim SelectBay® modules" on page 151. CAUTION: Never use indicator light is...

User Manual
Page 89
Learning the Basics Using the DVD-ROM or Multifunction drive 89 Inserting compact discs To insert a compact disc into the drive: 1 Make sure the computer is turned on page 91. 6 Place ... the drive (about 1 inch). The drive tray fully extended 5 Hold the disc by its edges and check that it as described in "Caring for CDs, DVDs, or Multifunction Discs" on . 2 Make sure the in the disc tray, label side up. HINT: The drive won't open . If the disc is dusty, clean...
Learning the Basics Using the DVD-ROM or Multifunction drive 89 Inserting compact discs To insert a compact disc into the drive: 1 Make sure the computer is turned on page 91. 6 Place ... the drive (about 1 inch). The drive tray fully extended 5 Hold the disc by its edges and check that it as described in "Caring for CDs, DVDs, or Multifunction Discs" on . 2 Make sure the in the disc tray, label side up. HINT: The drive won't open . If the disc is dusty, clean...

User Manual
Page 90
If this happens, contact your Toshiba support for assistance. 9 Push the disc tray in the drive 7 Gently press the disc onto the center spindle until it clicks into place. You are .... 8 Make sure the disc is completely on the spindle and is lying flat on the center of the disc. 90 Learning the Basics Using the DVD-ROM or Multifunction drive Positioning the disc in by pressing gently on the tray. Don't stack discs. CAUTION: If you feel it may jam the...
If this happens, contact your Toshiba support for assistance. 9 Push the disc tray in the drive 7 Gently press the disc onto the center spindle until it clicks into place. You are .... 8 Make sure the disc is completely on the spindle and is lying flat on the center of the disc. 90 Learning the Basics Using the DVD-ROM or Multifunction drive Positioning the disc in by pressing gently on the tray. Don't stack discs. CAUTION: If you feel it may jam the...

User Manual
Page 91
... or Multifunction drive 91 Removing compact discs To remove a compact disc (CD or DVD) with the computer turned off: 1 Insert a slender object, such as a straightened paper clip, into the manual eject hole. 2 Gently pull the tray out until it ... heavy objects on top of it . To remove a compact disc with the computer turned on: 1 Press the eject button on the surface can prevent the DVD-ROM drive or Multifunction drive from scratches and keep them from reading the data properly. Doing so could damage the disc or the drive. Also...
... or Multifunction drive 91 Removing compact discs To remove a compact disc (CD or DVD) with the computer turned off: 1 Insert a slender object, such as a straightened paper clip, into the manual eject hole. 2 Gently pull the tray out until it ... heavy objects on top of it . To remove a compact disc with the computer turned on: 1 Press the eject button on the surface can prevent the DVD-ROM drive or Multifunction drive from scratches and keep them from reading the data properly. Doing so could damage the disc or the drive. Also...

User Manual
Page 108
TECHNICAL NOTE: For optimum DVD performance, always play DVDs while your system), for use in the Slim SelectBay. Battery Notice To ensure that stores your system configuration settings and the current time and date ...
TECHNICAL NOTE: For optimum DVD performance, always play DVDs while your system), for use in the Slim SelectBay. Battery Notice To ensure that stores your system configuration settings and the current time and date ...
User Manual
Page 117
... the trash is configured. ❖ How much you use replacement batteries recommended by local ordinances or regulations. Only use the hard disk, DVD-ROM/CD-ROM, and diskette drives, or other optional devices. ❖ Where you turn off the computer and turn it responsibly. CAUTION...: The computer uses a lithium ion battery, which saves power when you are using the computer depends on again. ❖ Use Toshiba's power-saving options. The documentation that came with your local government for years. If not, check with your battery: ❖ Enable Standby ...
... the trash is configured. ❖ How much you use replacement batteries recommended by local ordinances or regulations. Only use the hard disk, DVD-ROM/CD-ROM, and diskette drives, or other optional devices. ❖ Where you turn off the computer and turn it responsibly. CAUTION...: The computer uses a lithium ion battery, which saves power when you are using the computer depends on again. ❖ Use Toshiba's power-saving options. The documentation that came with your local government for years. If not, check with your battery: ❖ Enable Standby ...

User Manual
Page 119
The power usage mode under battery power are: Long Life, Normal, High Power, DVD-Playback, Presentation, and Super Long Life. For more information on setting the battery power usage mode, see "Toshiba Power Saver utility" on page 176. 119 Mobile Computing Conserving power Using a hot key to set the power usage mode You...
The power usage mode under battery power are: Long Life, Normal, High Power, DVD-Playback, Presentation, and Super Long Life. For more information on setting the battery power usage mode, see "Toshiba Power Saver utility" on page 176. 119 Mobile Computing Conserving power Using a hot key to set the power usage mode You...

User Manual
Page 148
... to the microphone jack. The disk drive will run using this , follow these steps: 1 Open the Start menu and select My Computer. 2 Click the CD/DVD drive icon. For example, if it is a music CD, open the files on the disk. DEFINITION: A .wav (pronounced "wave") file is associated with... drive that is a Windows® format for storing sound. To do this method, try using Auto-Run If you to: ❖ Play pre-recorded DVDs ❖ Play pre-recorded CDs ❖ Read and write files (including music) to the respective Online Help menus. Creating a CD Your computer may record...
... to the microphone jack. The disk drive will run using this , follow these steps: 1 Open the Start menu and select My Computer. 2 Click the CD/DVD drive icon. For example, if it is a music CD, open the files on the disk. DEFINITION: A .wav (pronounced "wave") file is associated with... drive that is a Windows® format for storing sound. To do this method, try using Auto-Run If you to: ❖ Play pre-recorded DVDs ❖ Play pre-recorded CDs ❖ Read and write files (including music) to the respective Online Help menus. Creating a CD Your computer may record...
User Manual
Page 151
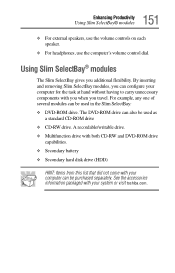
...❖ Secondary hard disk drive (HDD) HINT: Items from this list that did not come with you when you additional flexibility. The DVD-ROM drive can be purchased separately. Using Slim SelectBay® modules The Slim SelectBay gives you travel. By inserting and removing Slim SelectBay ... one of several modules can configure your computer for the task at hand without having to carry unnecessary components with your system or visit toshiba.com. 151 Enhancing Productivity Using Slim SelectBay® modules ❖ For external speakers, use the volume controls on each speaker. ❖...
...❖ Secondary hard disk drive (HDD) HINT: Items from this list that did not come with you when you additional flexibility. The DVD-ROM drive can be purchased separately. Using Slim SelectBay® modules The Slim SelectBay gives you travel. By inserting and removing Slim SelectBay ... one of several modules can configure your computer for the task at hand without having to carry unnecessary components with your system or visit toshiba.com. 151 Enhancing Productivity Using Slim SelectBay® modules ❖ For external speakers, use the volume controls on each speaker. ❖...

User Manual
Page 172
...preset modes. 2 Click Create copy. 3 A new mode appears with the properties you can change the properties for each mode. 172 Toshiba Utilities Toshiba Console Running on the Power Save Modes window. 2 Click Details.... The Properties window for the selected mode opens with the estimated battery ...life for any of the mode you copied. The DVD Playback mode applies only when the WinDVD program is not recommended. Customizing a ...
...preset modes. 2 Click Create copy. 3 A new mode appears with the properties you can change the properties for each mode. 172 Toshiba Utilities Toshiba Console Running on the Power Save Modes window. 2 Click Details.... The Properties window for the selected mode opens with the estimated battery ...life for any of the mode you copied. The DVD Playback mode applies only when the WinDVD program is not recommended. Customizing a ...

User Manual
Page 183
... down the volume. Playing the disc at maximum volume could damage your computer is a software program for playing DVDs. Playing DVDs TECHNICAL NOTE: For optimum DVD performance, play DVDs. This chapter explains how to AC power. Chapter 8 WinDVD™ WinDVD™ is connected to use , fullfeatured multimedia control center that helps you get the...
... down the volume. Playing the disc at maximum volume could damage your computer is a software program for playing DVDs. Playing DVDs TECHNICAL NOTE: For optimum DVD performance, play DVDs. This chapter explains how to AC power. Chapter 8 WinDVD™ WinDVD™ is connected to use , fullfeatured multimedia control center that helps you get the...

User Manual
Page 184
The WinDVD player window opens. Sample DVD Drive Window NOTE: If you what to InterVideo WinDVD, then click InterVideo WinDVD. The computer automatically detects the disc in the drive and will prompt you wish to have WinDVD run automatically, select Play DVD movie using WinDVD, then select the Always do . This checkbox is unchecked by default. To open WinDVD manually: 1 Click Start, and point to All Programs. 2 Point to do the selected action checkbox. 184 WinDVD™ Playing DVDs Insert a DVD into the drive.
The WinDVD player window opens. Sample DVD Drive Window NOTE: If you what to InterVideo WinDVD, then click InterVideo WinDVD. The computer automatically detects the disc in the drive and will prompt you wish to have WinDVD run automatically, select Play DVD movie using WinDVD, then select the Always do . This checkbox is unchecked by default. To open WinDVD manually: 1 Click Start, and point to All Programs. 2 Point to do the selected action checkbox. 184 WinDVD™ Playing DVDs Insert a DVD into the drive.

User Manual
Page 185
Move the slider bar to the left to go forward. 185 WinDVD™ Playing DVDs Sample WinDVD video window with the control panel Using the WinDVD slider bar (location) The slider bar enables you to move it to the right to go backward or move forward or backward through the DVD content.
Move the slider bar to the left to go forward. 185 WinDVD™ Playing DVDs Sample WinDVD video window with the control panel Using the WinDVD slider bar (location) The slider bar enables you to move it to the right to go backward or move forward or backward through the DVD content.


