

User Guide
Page 2
... Product Name: Camcorder Model number: CAMILEO® BW20 FCC notice "Declaration of Conformity Information" This equipment has been tested and found to comply with the instructions, may cause harmful interference to radio communications. If this equipment, not expressly approved by TOSHIBA or parties authorized.... ❖ Connect the equipment into an outlet on , the user is encouraged to try to correct the interference by TOSHIBA could void the user's authority to provide reasonable protection against harmful interference in a particular installation. This equipment generates, uses ...
... Product Name: Camcorder Model number: CAMILEO® BW20 FCC notice "Declaration of Conformity Information" This equipment has been tested and found to comply with the instructions, may cause harmful interference to radio communications. If this equipment, not expressly approved by TOSHIBA or parties authorized.... ❖ Connect the equipment into an outlet on , the user is encouraged to try to correct the interference by TOSHIBA could void the user's authority to provide reasonable protection against harmful interference in a particular installation. This equipment generates, uses ...
User Guide
Page 3
...Contact Address: TOSHIBA America Information Systems, Inc. 9740 Irvine Boulevard Irvine, California 92618-1697 Telephone: (949) 583-3305 Safety Instructions 1 Do not drop, puncture or disassemble the camcorder; Avoid pressing hard on the camcorder body. 4 For your own safety, avoid using the camcorder when there... the battery with care. Operation is a storm or lightning. 5 Use only the accessories supplied by the manufacturer. 6 Keep the camcorder out of the reach of the FCC Rules. Including interference that may not cause harmful interference. (2) This device must accept any other...
...Contact Address: TOSHIBA America Information Systems, Inc. 9740 Irvine Boulevard Irvine, California 92618-1697 Telephone: (949) 583-3305 Safety Instructions 1 Do not drop, puncture or disassemble the camcorder; Avoid pressing hard on the camcorder body. 4 For your own safety, avoid using the camcorder when there... the battery with care. Operation is a storm or lightning. 5 Use only the accessories supplied by the manufacturer. 6 Keep the camcorder out of the reach of the FCC Rules. Including interference that may not cause harmful interference. (2) This device must accept any other...

User Guide
Page 5
...176;F (40 °C). ❖ Do not open and close the slot cover or port cover when the camcorder is wet or while it is immersed in water. ❖ Do not open and close the slot cover ...10070; Do not immerse in water at a depth greater than 16 ft. (5.0m). ❖ Do not subject the camcorder to 30 minutes. Cautions concerning use in water, allow it to dry for up to high-pressure water. ❖ ... cover or port cover on the beach or at the pool side. ❖ Do not jolt the camcorder while it is immersed in water. they do not apply to carefully read and heed the following precautions ...
...176;F (40 °C). ❖ Do not open and close the slot cover or port cover when the camcorder is wet or while it is immersed in water. ❖ Do not open and close the slot cover ...10070; Do not immerse in water at a depth greater than 16 ft. (5.0m). ❖ Do not subject the camcorder to 30 minutes. Cautions concerning use in water, allow it to dry for up to high-pressure water. ❖ ... cover or port cover on the beach or at the pool side. ❖ Do not jolt the camcorder while it is immersed in water. they do not apply to carefully read and heed the following precautions ...

User Guide
Page 6
..., thus compromising its waterproof properties. Before recording in water ❖ Make sure that no foreign object such as doing so will get inside the camcorder and damage it. When closing the slot cover and port cover, make sure that the slot cover and the port cover are places in water, ..., as doing so may cause corrosion and discoloration of the plating, as well as deterioration of water adhering to it. ❖ Do not leave the camcorder in salt water or if salt water is caught in water, use fresh water to it. If a cover is open, water will cause deterioration of...
..., thus compromising its waterproof properties. Before recording in water ❖ Make sure that no foreign object such as doing so will get inside the camcorder and damage it. When closing the slot cover and port cover, make sure that the slot cover and the port cover are places in water, ..., as doing so may cause corrosion and discoloration of the plating, as well as deterioration of water adhering to it. ❖ Do not leave the camcorder in salt water or if salt water is caught in water, use fresh water to it. If a cover is open, water will cause deterioration of...

User Guide
Page 8
Contents Regulatory Information 2 About the battery 3 Safety icons 4 Chapter 1: Getting to 16' (5 meters) .........13 Ruggedized 13 System requirements 13 Lens view 14 Underside view 14 Rear view 15 Chapter 2: Getting Started 16 Charge the built-in battery 16 Inserting and removing a Micro SD™ Card 17 Remove moisture from all camcorder surfaces ......18 Turning the camcorder on and getting started .......19 Turning off the camcorder 20 8 up to Know Your Camcorder 11 Overview 11 Check the components 12 Waterproof design -
Contents Regulatory Information 2 About the battery 3 Safety icons 4 Chapter 1: Getting to 16' (5 meters) .........13 Ruggedized 13 System requirements 13 Lens view 14 Underside view 14 Rear view 15 Chapter 2: Getting Started 16 Charge the built-in battery 16 Inserting and removing a Micro SD™ Card 17 Remove moisture from all camcorder surfaces ......18 Turning the camcorder on and getting started .......19 Turning off the camcorder 20 8 up to Know Your Camcorder 11 Overview 11 Check the components 12 Waterproof design -

User Guide
Page 11
... a small amount of your CAMILEO® BW20 camcorder are: ❖ High quality images up to 16 megapixels (interpolated). ❖ 5x digital zoom.... that can either be adjusted automatically or changed manually. ❖ 16' (5 meters) water resistant design is usable for the camcorder's firmware. 11 Other features of built-in a single file. ❖ ISO sensitivity and white balance can take H.264 format...effects options, such as Time Lapse and Slow Motion. Chapter 1 Getting to Know Your Camcorder Overview The CAMILEO® BW20 camcorder is equipped with less memory usage.
... a small amount of your CAMILEO® BW20 camcorder are: ❖ High quality images up to 16 megapixels (interpolated). ❖ 5x digital zoom.... that can either be adjusted automatically or changed manually. ❖ 16' (5 meters) water resistant design is usable for the camcorder's firmware. 11 Other features of built-in a single file. ❖ ISO sensitivity and white balance can take H.264 format...effects options, such as Time Lapse and Slow Motion. Chapter 1 Getting to Know Your Camcorder Overview The CAMILEO® BW20 camcorder is equipped with less memory usage.

User Guide
Page 12
12 Getting to remove the protective film on a PC. Check the components Unpack the box and make sure all items listed below are included: (Sample Illustration) Components NOTE Be sure to Know Your Camcorder Overview NOTE Install the bundled software application for viewing the videos correctly on the lens before using.
12 Getting to remove the protective film on a PC. Check the components Unpack the box and make sure all items listed below are included: (Sample Illustration) Components NOTE Be sure to Know Your Camcorder Overview NOTE Install the bundled software application for viewing the videos correctly on the lens before using.

User Guide
Page 13
... - However, some tiny black and/or bright dots (white, red, blue or green) may appear on the LCD touch screen. Ruggedized ❖ The camcorder is manufactured using extremely high-precision technology. for a drop of up to 30 minutes. ❖ The cover for a period of up to 16' (5... meters), for the ports must be waterproof in all environments or conditions. ❖ Keep the lens clean, and wipe any water off the camcorder, after underwater use, with a soft and dry cloth. System requirements ❖ Microsoft Windows® XP / Windows Vista® / Windows® 7 / Mac ...
... - However, some tiny black and/or bright dots (white, red, blue or green) may appear on the LCD touch screen. Ruggedized ❖ The camcorder is manufactured using extremely high-precision technology. for a drop of up to 30 minutes. ❖ The cover for a period of up to 16' (5... meters), for the ports must be waterproof in all environments or conditions. ❖ Keep the lens clean, and wipe any water off the camcorder, after underwater use, with a soft and dry cloth. System requirements ❖ Microsoft Windows® XP / Windows Vista® / Windows® 7 / Mac ...

User Guide
Page 14
14 Getting to Know Your Camcorder Overview Lens view LED indicator Speaker Lens Power button Light Microphone (Sample Illustration) Lens view Underside view Mini USB 2.0 port Mini HDMI® port Tripod socket Reset button (Sample Illustration) Underside view Micro SD™ Card slot
14 Getting to Know Your Camcorder Overview Lens view LED indicator Speaker Lens Power button Light Microphone (Sample Illustration) Lens view Underside view Mini USB 2.0 port Mini HDMI® port Tripod socket Reset button (Sample Illustration) Underside view Micro SD™ Card slot

User Guide
Page 15
Rear view LCD screen Getting to Know Your Camcorder 15 Overview Power button Menu button Left button Playback button Record / OK button Up button Mode button Right button Strap hook Down button (Sample Illustration) Rear view Delete button
Rear view LCD screen Getting to Know Your Camcorder 15 Overview Power button Menu button Left button Playback button Record / OK button Up button Mode button Right button Strap hook Down button (Sample Illustration) Rear view Delete button
User Guide
Page 16
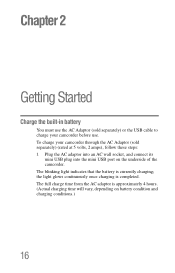
...that the battery is completed. the light glows continuously once charging is currently charging; To charge your camcorder through the AC Adaptor (sold separately) or the USB cable to charge your camcorder before use. The full charge time from the AC adaptor is approximately 4 hours. (Actual charging ...time will vary, depending on the underside of the camcorder. Chapter 2 Getting Started Charge the built-in battery You must use the AC Adaptor (sold separately) (rated at 5 volts, 2 amps), follow these ...
...that the battery is completed. the light glows continuously once charging is currently charging; To charge your camcorder through the AC Adaptor (sold separately) or the USB cable to charge your camcorder before use. The full charge time from the AC adaptor is approximately 4 hours. (Actual charging ...time will vary, depending on the underside of the camcorder. Chapter 2 Getting Started Charge the built-in battery You must use the AC Adaptor (sold separately) (rated at 5 volts, 2 amps), follow these ...

User Guide
Page 17
...a Micro SD™ Card The blinking light indicates that allows you to expand the camcorder's memory capacity with the supplied USB cable. Doing so may need to be purchased separately. Your camcorder comes with a Micro SD™ Card slot that the battery is completed. When ... resulting in serious injury. Charging the battery through the supplied USB cable, follow these steps: 1 Connect your camcorder's mini USB port to a USB port on your camcorder through the USB cable takes approximately 5 hours. (Actual charging time will vary, depending on battery condition and charging...
...a Micro SD™ Card The blinking light indicates that allows you to expand the camcorder's memory capacity with the supplied USB cable. Doing so may need to be purchased separately. Your camcorder comes with a Micro SD™ Card slot that the battery is completed. When ... resulting in serious injury. Charging the battery through the supplied USB cable, follow these steps: 1 Connect your camcorder's mini USB port to a USB port on your camcorder through the USB cable takes approximately 5 hours. (Actual charging time will vary, depending on battery condition and charging...

User Guide
Page 18
... format the Micro SD™ Card in the slot cover and port cover is not properly wiped off any cover is not closed completely, the camcorder will be waterproof. All data will no foreign object such as sand, hair, dust, etc. Make sure that no longer be erased when the...8482; Card is not closed or is formatted. When closing a cover, make sure that all data is 1 GB or greater. Remove moisture from all camcorder surfaces NOTE The recommended capacity of an (optional) Micro SD™ Card is copied to your computer or other media before using. is inserted, photos...
... format the Micro SD™ Card in the slot cover and port cover is not properly wiped off any cover is not closed completely, the camcorder will be waterproof. All data will no foreign object such as sand, hair, dust, etc. Make sure that no longer be erased when the...8482; Card is not closed or is formatted. When closing a cover, make sure that all data is 1 GB or greater. Remove moisture from all camcorder surfaces NOTE The recommended capacity of an (optional) Micro SD™ Card is copied to your computer or other media before using. is inserted, photos...

User Guide
Page 19
...off completely. (Sample Illustration) Wiping the moisture off the ports and slot cover and port cover NOTE Moisture inside the camcorder may not only be imprinted with the camcorder reflect can optionally be due to stop recording. is not closed or is caught in water. To record video: ...OK ( ) button to take a photo. When closing a cover, make sure that no longer be waterproof. Press it again. Turning the camcorder on and getting started To turn on the camcorder, press the Power ( ) button for approximately one second. To take a photo: In Photo Mode, press the Record/OK ( ) ...
...off completely. (Sample Illustration) Wiping the moisture off the ports and slot cover and port cover NOTE Moisture inside the camcorder may not only be imprinted with the camcorder reflect can optionally be due to stop recording. is not closed or is caught in water. To record video: ...OK ( ) button to take a photo. When closing a cover, make sure that no longer be waterproof. Press it again. Turning the camcorder on and getting started To turn on the camcorder, press the Power ( ) button for approximately one second. To take a photo: In Photo Mode, press the Record/OK ( ) ...

User Guide
Page 20
20 Getting Started Turning off the camcorder Turning off the camcorder To turn off the camcorder, press the Power ( approximately one second. ) button for NOTE If you don't use the camcorder for approximately 3 minutes, it will turn itself off.
20 Getting Started Turning off the camcorder Turning off the camcorder To turn off the camcorder, press the Power ( approximately one second. ) button for NOTE If you don't use the camcorder for approximately 3 minutes, it will turn itself off.

User Guide
Page 21
Chapter 3 Record Mode Before recording in the rubber seal. NOTE There are closed tightly. ❖ If a cover is open, water will not affect its waterproof properties. 21 are caught in water ❖ Make sure that the slot cover and the port cover are locations on the camcorder where water might accumulate, but this will get inside the camcorder and cause internal damage. ❖ When closing the slot cover and port cover, make sure that no foreign objects such as sand, hair, dust, etc.
Chapter 3 Record Mode Before recording in the rubber seal. NOTE There are closed tightly. ❖ If a cover is open, water will not affect its waterproof properties. 21 are caught in water ❖ Make sure that the slot cover and the port cover are locations on the camcorder where water might accumulate, but this will get inside the camcorder and cause internal damage. ❖ When closing the slot cover and port cover, make sure that no foreign objects such as sand, hair, dust, etc.

User Guide
Page 22
... between menu option items. 1 In Video mode, press to take a photo. 3 In Playback mode, press to take video. Press the Delete button to turn the camcorder on or off. Playback Delete Up Down Left Right Record / OK 1 View recorded videos / photos in . Zoom out. • In preview mode, press to review...
... between menu option items. 1 In Video mode, press to take a photo. 3 In Playback mode, press to take video. Press the Delete button to turn the camcorder on or off. Playback Delete Up Down Left Right Record / OK 1 View recorded videos / photos in . Zoom out. • In preview mode, press to review...
User Guide
Page 28
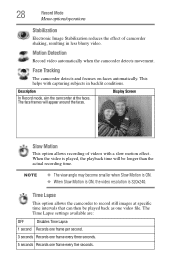
...will be played back as one frame every five seconds. Motion Detection Record video automatically when the camcorder detects movement. Slow Motion This option allows recording of camcorder shaking, resulting in backlit conditions. The Time Lapse settings available are: OFF Disables Time Lapse....Slow Motion is ON, the video resolution is played, the playback time will appear around the faces. Face Tracking The camcorder detects and focuses on faces automatically. 28 Record Mode Menu options/operations Stabilization Electronic Image Stabilization reduces the effect of videos ...
...will be played back as one frame every five seconds. Motion Detection Record video automatically when the camcorder detects movement. Slow Motion This option allows recording of camcorder shaking, resulting in backlit conditions. The Time Lapse settings available are: OFF Disables Time Lapse....Slow Motion is ON, the video resolution is played, the playback time will appear around the faces. Face Tracking The camcorder detects and focuses on faces automatically. 28 Record Mode Menu options/operations Stabilization Electronic Image Stabilization reduces the effect of videos ...

User Guide
Page 30
Auto Sets the ISO setting automatically, according to take a photo in a chosen interval of the photo. ISO The camcorder automatically adjusts the ISO setting of the current date and time on each photo. 30 Record Mode Menu options/operations Date Printing This setting enables ...
Auto Sets the ISO setting automatically, according to take a photo in a chosen interval of the photo. ISO The camcorder automatically adjusts the ISO setting of the current date and time on each photo. 30 Record Mode Menu options/operations Date Printing This setting enables ...

User Guide
Page 31
... subjects when brightly lit from behind. Underwater Adjusts color tones for pictures / video taken while submerged in Night mode, place the camcorder on a flat, steady surface, or use a tripod. The Filter settings available are : Auto Automatically adjusts to the scene and conditions. ...White Balance The camcorder adjusts the white balance of the original. Record Mode 31 Menu options/operations Effects Scene You can select a special filter effect for ...
... subjects when brightly lit from behind. Underwater Adjusts color tones for pictures / video taken while submerged in Night mode, place the camcorder on a flat, steady surface, or use a tripod. The Filter settings available are : Auto Automatically adjusts to the scene and conditions. ...White Balance The camcorder adjusts the white balance of the original. Record Mode 31 Menu options/operations Effects Scene You can select a special filter effect for ...


