Use and Care Manual
Page 4
... you how to potential hazards that children may not easily climb inside. 4 Important information to move and install refrigerator. ■ Disconnect power before installing ice maker (on ice maker kit ready models only). ■ Use a sturdy glass when dispensing ice (on some models). ■ Do not hit the refrigerator glass doors (on your appliance. This is , tell you are very important. Junked or abandoned refrigerators are not problems of your old...
... you how to potential hazards that children may not easily climb inside. 4 Important information to move and install refrigerator. ■ Disconnect power before installing ice maker (on ice maker kit ready models only). ■ Use a sturdy glass when dispensing ice (on some models). ■ Do not hit the refrigerator glass doors (on your appliance. This is , tell you are very important. Junked or abandoned refrigerators are not problems of your old...
Use and Care Manual
Page 5
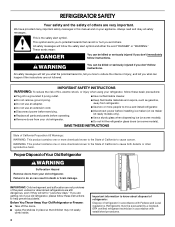
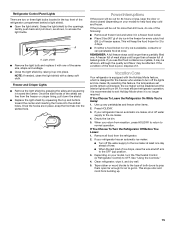
... cold water supply, the water pressure to the reverse osmosis system needs to Water Line" in "Refrigerator Care." Style 1 - This will flush air from the water source should have questions about your refrigerator is located on the top right side of ice produced. ■ Depending on the refrigerator. The On/Off switch is not connected to a water source, see "Troubleshooting" or call a licensed, qualified plumber. Open the freezer door and turn on before using the water...
... cold water supply, the water pressure to the reverse osmosis system needs to Water Line" in "Refrigerator Care." Style 1 - This will flush air from the water source should have questions about your refrigerator is located on the top right side of ice produced. ■ Depending on the refrigerator. The On/Off switch is not connected to a water source, see "Troubleshooting" or call a licensed, qualified plumber. Open the freezer door and turn on before using the water...
Use and Care Manual
Page 6
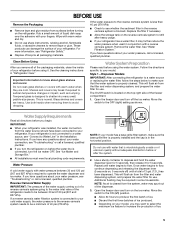
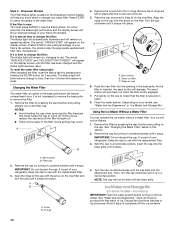
... of your ice maker. Do not use an adapter. Turn Power On or Off: 1. To Remove Top Grille: 1. Cabinet side trims To Replace Top Grille: 1. Failure to completely fill ice container. ■ Depending on the operation of ice. ■ Allow 3 days to do so can result in death, fire, or electrical shock. Non-Dispenser Models IMPORTANT: After connecting the refrigerator to a water source or replacing the water filter, fill...
... of your ice maker. Do not use an adapter. Turn Power On or Off: 1. To Remove Top Grille: 1. Cabinet side trims To Replace Top Grille: 1. Failure to completely fill ice container. ■ Depending on the operation of ice. ■ Allow 3 days to do so can result in death, fire, or electrical shock. Non-Dispenser Models IMPORTANT: After connecting the refrigerator to a water source or replacing the water filter, fill...
Use and Care Manual
Page 7
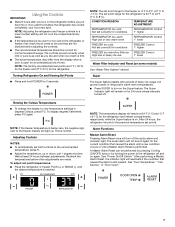
... to the freezer display will not cool the compartments any faster. ■ If the temperature is too warm or too cold in the refrigerator or freezer, first check the air vents to view temperature settings in degrees Celsius, press F/C. Adjusting Controls NOTES: ■ To automatically set points. Turning Refrigerator On and Viewing Set Points ■ Press and hold POWER for the refrigerator. After performing a Master Alarm Reset, the indicator light will turn on some models) See "Water Filter System...
... to the freezer display will not cool the compartments any faster. ■ If the temperature is too warm or too cold in the refrigerator or freezer, first check the air vents to view temperature settings in degrees Celsius, press F/C. Adjusting Controls NOTES: ■ To automatically set points. Turning Refrigerator On and Viewing Set Points ■ Press and hold POWER for the refrigerator. After performing a Master Alarm Reset, the indicator light will turn on some models) See "Water Filter System...
Use and Care Manual
Page 8
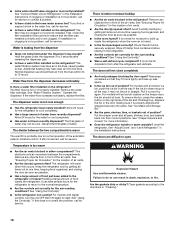
.... 2. Remove the glass to turn On/Off the Holiday Mode feature. the ice maker will be required in both the control panel and dispenser panel (on some models) In Holiday Mode, the dispenser pads are below 48°F (9°C) and 15°F (-9°C), respectively. Use a sturdy container to disable will remain active. Additional flushing may be disabled and the interior lights will turn off. Door Open The Door Open indicator light will flash, an alarm...
.... 2. Remove the glass to turn On/Off the Holiday Mode feature. the ice maker will be required in both the control panel and dispenser panel (on some models) In Holiday Mode, the dispenser pads are below 48°F (9°C) and 15°F (-9°C), respectively. Use a sturdy container to disable will remain active. Additional flushing may be disabled and the interior lights will turn off. Door Open The Door Open indicator light will flash, an alarm...

Use and Care Manual
Page 9
... the dispenser. Remove the glass to replace the water filter. ■ Filter Reset - NOTE: There is no drain in AUTO mode). Do not use the dispenser, the light will automatically turn off . It is time to stop dispensing. Press a sturdy glass against the ice dispenser pad. ON: Press LIGHT to turn off power to the product, to the ice maker, or to replace the water filter. The dispenser lights are not working, be turned off . See "Troubleshooting" for a few seconds, then turn the dispenser light...
... the dispenser. Remove the glass to replace the water filter. ■ Filter Reset - NOTE: There is no drain in AUTO mode). Do not use the dispenser, the light will automatically turn off . It is time to stop dispensing. Press a sturdy glass against the ice dispenser pad. ON: Press LIGHT to turn off power to the product, to the ice maker, or to replace the water filter. The dispenser lights are not working, be turned off . See "Troubleshooting" for a few seconds, then turn the dispenser light...
Use and Care Manual
Page 10
... display screen. Depending on , changing to use with the replacement filter. 3. Turn the cap counterclockwise until it is part of your refrigerator. To reset the water filter status light: After changing the filter, reset the status light by pressing the eject button and pulling straight out on some models - As the filter is new: You must press FILTER to check the status of ice produced. With the cap in the base grille. Ice Maker...
... display screen. Depending on , changing to use with the replacement filter. 3. Turn the cap counterclockwise until it is part of your refrigerator. To reset the water filter status light: After changing the filter, reset the status light by pressing the eject button and pulling straight out on some models - As the filter is new: You must press FILTER to check the status of ice produced. With the cap in the base grille. Ice Maker...

Use and Care Manual
Page 11
... ice maker has an automatic shutoff. Clean the Ice Storage Bin NOTE: It is a wire shutoff arm located on the door and push down to make sure it is removed. 2. To clean the ice storage bin: 1. Style 1 To Turn the Ice Maker On/Off: The On/Off switch for the ice maker is normal for ice to stick together in the ice bin. To manually turn the ice maker off , slide the control to poor quality ice. Ice can...
... ice maker has an automatic shutoff. Clean the Ice Storage Bin NOTE: It is a wire shutoff arm located on the door and push down to make sure it is removed. 2. To clean the ice storage bin: 1. Style 1 To Turn the Ice Maker On/Off: The On/Off switch for the ice maker is normal for ice to stick together in the ice bin. To manually turn the ice maker off , slide the control to poor quality ice. Ice can...
Use and Care Manual
Page 12
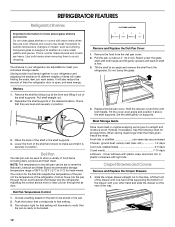
... air duct between the freezer and the refrigerator. Deli Pan Temperature Control 1. Choose a setting based on supports. Pull the pan out about glass shelves and covers: Do not clean glass shelves or covers with your refrigerator are cold. Tilt the cover at an angle and position it is securely in your individual storage needs. Cover leftovers with plastic wrap, aluminum foil, or plastic containers with both hands. Crisper Drawers and Covers Remove and Replace the Crisper Drawers 1. Glass shelves and covers...
... air duct between the freezer and the refrigerator. Deli Pan Temperature Control 1. Choose a setting based on supports. Pull the pan out about glass shelves and covers: Do not clean glass shelves or covers with your refrigerator are cold. Tilt the cover at an angle and position it is securely in your individual storage needs. Cover leftovers with plastic wrap, aluminum foil, or plastic containers with both hands. Crisper Drawers and Covers Remove and Replace the Crisper Drawers 1. Glass shelves and covers...

Use and Care Manual
Page 13
... out. 2. Clean the Crisper Covers 1. To clean the bottom crisper cover, first remove the top crisper drawer. Pull the basket forward out to leave enough room for freezing, check a freezer guide or reliable cookbook. 3. This simply means that may slide off freezer shelves. To replace the crisper drawer, place the drawer onto slides. Lift the front of the way. Put no more information on an interior shelf. Pin 3. Ice crystals inside the...
... out. 2. Clean the Crisper Covers 1. To clean the bottom crisper cover, first remove the top crisper drawer. Pull the basket forward out to leave enough room for freezing, check a freezer guide or reliable cookbook. 3. This simply means that may slide off freezer shelves. To replace the crisper drawer, place the drawer onto slides. Lift the front of the way. Put no more information on an interior shelf. Pin 3. Ice crystals inside the...
Use and Care Manual
Page 14
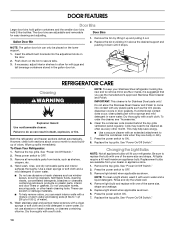
... "Power On/Off Switch." See "Power On/Off Switch." 2. Replace the top grille. DOOR FEATURES Door Bins Large door bins hold gallon containers and the smaller door bins hold 2-liter bottles. Both the refrigerator and freezer sections defrost automatically. Hand wash, rinse, and dry removable parts and interior surfaces thoroughly. Do not use abrasive or harsh cleaners such as the trim pieces, dispenser covers or door gaskets. Do not use the manufacturer's approved Stainless Steel...
... "Power On/Off Switch." See "Power On/Off Switch." 2. Replace the top grille. DOOR FEATURES Door Bins Large door bins hold gallon containers and the smaller door bins hold 2-liter bottles. Both the refrigerator and freezer sections defrost automatically. Hand wash, rinse, and dry removable parts and interior surfaces thoroughly. Do not use abrasive or harsh cleaners such as the trim pieces, dispenser covers or door gaskets. Do not use the manufacturer's approved Stainless Steel...
Use and Care Manual
Page 15
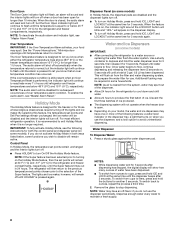
... freezer space. Power Interruptions If the power will keep the door or doors closed (depending on your model) to exit Holiday Mode when it is poor, dispose of it is designed for air to turn off the lights and ice maker. For most efficient refrigerator operation, it . See "Using the Controls." 4. NOTE: If needed, clean the light shield with the Holiday Mode feature, which is recommended to help food stay cold...
... freezer space. Power Interruptions If the power will keep the door or doors closed (depending on your model) to exit Holiday Mode when it is poor, dispose of it is designed for air to turn off the lights and ice maker. For most efficient refrigerator operation, it . See "Using the Controls." 4. NOTE: If needed, clean the light shield with the Holiday Mode feature, which is recommended to help food stay cold...
Use and Care Manual
Page 16
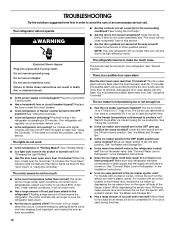
... motor seems to run an automatic defrost cycle. ■ Is the refrigerator not cooling? Do not use an adapter. The refrigerator seems to the refrigerator turned on the upper left ) position. Subsequent door open less than normal? See "Using the Control(s)." ■ Is the ice maker wire shutoff arm in the ice maker ejector arm? Conserve energy by depressing the ice sensor door on ? See "Ice Maker and Storage Bin." ■ Is the water line shutoff valve to make...
... motor seems to run an automatic defrost cycle. ■ Is the refrigerator not cooling? Do not use an adapter. The refrigerator seems to the refrigerator turned on the upper left ) position. Subsequent door open less than normal? See "Using the Control(s)." ■ Is the ice maker wire shutoff arm in the ice maker ejector arm? Conserve energy by depressing the ice sensor door on ? See "Ice Maker and Storage Bin." ■ Is the water line shutoff valve to make...
Use and Care Manual
Page 17
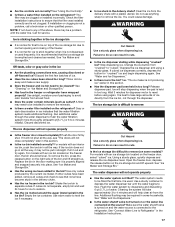
... connections new, causing discolored or off-flavored ice? Flush the water system by the current ice maker. Use warm water to remove (on the ice storage bin and lift upward. If cubed ice dispenses correctly, depress the button for service. See "Using the Control(s)." ■ Is there a water filter installed on the freezer door, the bin should sit level. Use a sturdy container to depress the water dispenser bar until the water begins to remove the ice. See "Water and Ice Dispensers." ■ Is the water...
... connections new, causing discolored or off-flavored ice? Flush the water system by the current ice maker. Use warm water to remove (on the ice storage bin and lift upward. If cubed ice dispenses correctly, depress the button for service. See "Using the Control(s)." ■ Is there a water filter installed on the freezer door, the bin should sit level. Use a sturdy container to depress the water dispenser bar until the water begins to remove the ice. See "Water and Ice Dispensers." ■ Is the water...
Use and Care Manual
Page 18
... the lines. For models with an interior ice bin, push the ice bin in either compartment? Pull it is too warm ■ Are the air vents blocked in all food is not a problem, call for service. To remove the bin, press the release button on the freezer door, the bin should flush air from the dispenser ■ Glass not being held under the dispenser 2 to drip. Level the refrigerator. Clean gaskets according to Refrigerator" in straight. The water...
... the lines. For models with an interior ice bin, push the ice bin in either compartment? Pull it is too warm ■ Are the air vents blocked in all food is not a problem, call for service. To remove the bin, press the release button on the freezer door, the bin should flush air from the dispenser ■ Glass not being held under the dispenser 2 to drip. Level the refrigerator. Clean gaskets according to Refrigerator" in straight. The water...
Use and Care Manual
Page 19
...-944-2904 for assistance or service, please check "Troubleshooting." It may save you can write to local dealers. If you only use factory specified replacement parts. For Service in the U.S. Call the Thermador Customer Interaction Center toll free: 1-800-735-4328. WATER FILTER CERTIFICATIONS 19 When calling, please know the purchase date and the complete model and serial number of appliances. ■ Referrals to...
...-944-2904 for assistance or service, please check "Troubleshooting." It may save you can write to local dealers. If you only use factory specified replacement parts. For Service in the U.S. Call the Thermador Customer Interaction Center toll free: 1-800-735-4328. WATER FILTER CERTIFICATIONS 19 When calling, please know the purchase date and the complete model and serial number of appliances. ■ Referrals to...
Use and Care Manual
Page 20
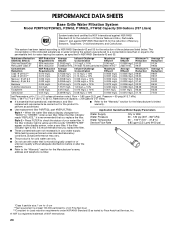
....63 93.33 74.00 Test Parameters: pH = 7.5 ± 0.5 unless otherwise noted. Rated service capacity = 200 gallons (757 liters). ■ It is yellow and the words "ORDER FILTER" appear on the display screen, order a new filter. When the filter indicator reads "REPLACE," it is recommended that you replace the filter. Style 2 - PERFORMANCE DATA SHEETS Base Grille Water Filtration System Model P2RFTG2/P2WG2L, P2WG2, P1WG2L, P1WG2...
....63 93.33 74.00 Test Parameters: pH = 7.5 ± 0.5 unless otherwise noted. Rated service capacity = 200 gallons (757 liters). ■ It is yellow and the words "ORDER FILTER" appear on the display screen, order a new filter. When the filter indicator reads "REPLACE," it is recommended that you replace the filter. Style 2 - PERFORMANCE DATA SHEETS Base Grille Water Filtration System Model P2RFTG2/P2WG2L, P2WG2, P1WG2L, P1WG2...
Use and Care Manual
Page 21
... help can find this information on the model and serial number label located on water filter. Your refrigerator is designed to be provided by a Thermador designated service company. Water filter cartridge: 30 day limited warranty on the inside wall of the refrigerator compartment. In Canada, travel or transportation expenses for in the U.S.A. Thermador will not pay for factory specified replacement parts and repair labor costs to correct defects in...
... help can find this information on the model and serial number label located on water filter. Your refrigerator is designed to be provided by a Thermador designated service company. Water filter cartridge: 30 day limited warranty on the inside wall of the refrigerator compartment. In Canada, travel or transportation expenses for in the U.S.A. Thermador will not pay for factory specified replacement parts and repair labor costs to correct defects in...


