User Manual
Page 3
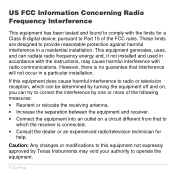
...and can try to correct the interference by one or more of the FCC rules. If this equipment not expressly approved by turning the equipment off and on, you can radiate radio frequency energy and, if not installed and used in accordance with the instructions,... Class B digital device, pursuant to which can be determined by Texas Instruments may cause harmful interference with radio communications. However, there is connected. • Consult the dealer or an experienced radio/television technician for help. TI-83 Plus These limits are designed to operate the equipment. Caution: Any changes...
...and can try to correct the interference by one or more of the FCC rules. If this equipment not expressly approved by turning the equipment off and on, you can radiate radio frequency energy and, if not installed and used in accordance with the instructions,... Class B digital device, pursuant to which can be determined by Texas Instruments may cause harmful interference with radio communications. However, there is connected. • Consult the dealer or an experienced radio/television technician for help. TI-83 Plus These limits are designed to operate the equipment. Caution: Any changes...
User Manual
Page 9
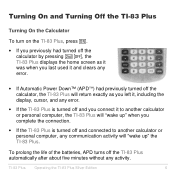
... or personal computer, the TI-83 Plus will "wake up" when you complete the connection. • If the TI-83 Plus is turned off and you left it, including the display, cursor, and any error. • If the TI-83 Plus is turned off the TI-83 Plus automatically after about five minutes without any communication activity will "wake up" the TI-83 Plus. TI-83 Plus Operating the TI-83 Plus Silver Edition 6
... or personal computer, the TI-83 Plus will "wake up" when you complete the connection. • If the TI-83 Plus is turned off and you left it, including the display, cursor, and any error. • If the TI-83 Plus is turned off the TI-83 Plus automatically after about five minutes without any communication activity will "wake up" the TI-83 Plus. TI-83 Plus Operating the TI-83 Plus Silver Edition 6
User Manual
Page 10
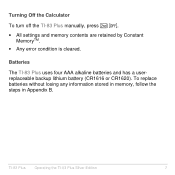
TI-83 Plus Operating the TI-83 Plus Silver Edition 7 Turning Off the Calculator To turn off the TI-83 Plus manually, press y M. • All settings and memory contents are retained by Constant MemoryTM. • Any error condition is cleared. Batteries The TI-83 Plus uses four AAA alkaline batteries and has a userreplaceable backup lithium battery (CR1616 or CR1620). To replace batteries without losing any information stored in memory, follow the steps in Appendix B.
TI-83 Plus Operating the TI-83 Plus Silver Edition 7 Turning Off the Calculator To turn off the TI-83 Plus manually, press y M. • All settings and memory contents are retained by Constant MemoryTM. • Any error condition is cleared. Batteries The TI-83 Plus uses four AAA alkaline batteries and has a userreplaceable backup lithium battery (CR1616 or CR1620). To replace batteries without losing any information stored in memory, follow the steps in Appendix B.
User Manual
Page 11
Press and release the y key. 2. TI-83 Plus Operating the TI-83 Plus Silver Edition 8 As you change the contrast setting, a number from 0 (lightest) to suit your viewing angle and lighting conditions. To adjust the contrast, follow these steps. 1. Setting ... too light or too dark. You may not be able to see the number if contrast is turned off. The TI-83 Plus retains the contrast setting in the top-right corner indicates the current level. Note: The TI-83 Plus has 40 contrast settings, so each number 0 through 9 represents four settings. Press and hold † or...
Press and release the y key. 2. TI-83 Plus Operating the TI-83 Plus Silver Edition 8 As you change the contrast setting, a number from 0 (lightest) to suit your viewing angle and lighting conditions. To adjust the contrast, follow these steps. 1. Setting ... too light or too dark. You may not be able to see the number if contrast is turned off. The TI-83 Plus retains the contrast setting in the top-right corner indicates the current level. Note: The TI-83 Plus has 40 contrast settings, so each number 0 through 9 represents four settings. Press and hold † or...
User Manual
Page 12
...All memory should be replaced. Note: If you : • Turn on the calculator. • Download a new application. • Attempt to upgrade to new software. Batteries must be retained. TI-83 Plus Operating the TI-83 Plus Silver Edition 9 To restore the screen, press and release y, and then press... and hold } until the display reappears. After this period, the TI-83 Plus will turn off automatically and the unit will continue to ...
...All memory should be replaced. Note: If you : • Turn on the calculator. • Download a new application. • Attempt to upgrade to new software. Batteries must be retained. TI-83 Plus Operating the TI-83 Plus Silver Edition 9 To restore the screen, press and release y, and then press... and hold } until the display reappears. After this period, the TI-83 Plus will turn off automatically and the unit will continue to ...
User Manual
Page 22
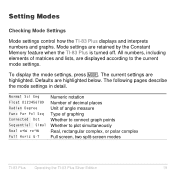
...measure Type of matrices and lists, are retained by the Constant Memory feature when the TI-83 Plus is turned off. Setting Modes Checking Mode Settings Mode settings control how the TI-83 Plus displays and interprets numbers and graphs. The current settings are highlighted below. The following ... according to plot simultaneously Real, rectangular complex, or polar complex Full screen, two split-screen modes TI-83 Plus Operating the TI-83 Plus Silver Edition 19 All numbers, including elements of graphing Whether to connect graph points Whether to the current mode settings.
...measure Type of matrices and lists, are retained by the Constant Memory feature when the TI-83 Plus is turned off. Setting Modes Checking Mode Settings Mode settings control how the TI-83 Plus displays and interprets numbers and graphs. The current settings are highlighted below. The following ... according to plot simultaneously Real, rectangular complex, or polar complex Full screen, two split-screen modes TI-83 Plus Operating the TI-83 Plus Silver Edition 19 All numbers, including elements of graphing Whether to connect graph points Whether to the current mode settings.
User Manual
Page 36
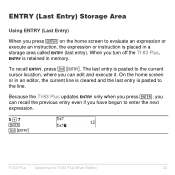
... The last entry is pasted to the current cursor location, where you have begun to enter the next expression. 5 Ã 7 Í y [ TI-83 Plus Operating the TI-83 Plus Silver Edition 33 On the home screen or in an editor, the current line is cleared and the last entry is pasted to evaluate an expression...205;, you can recall the previous entry even if you can edit and execute it. When you press Í on the home screen to the line. ENTRY (Last Entry) Storage Area Using ENTRY (Last Entry) When you turn off the TI-83 Plus, ENTRY is retained in a storage area called ENTRY (last ...
... The last entry is pasted to the current cursor location, where you have begun to enter the next expression. 5 Ã 7 Í y [ TI-83 Plus Operating the TI-83 Plus Silver Edition 33 On the home screen or in an editor, the current line is cleared and the last entry is pasted to evaluate an expression...205;, you can recall the previous entry even if you can edit and execute it. When you press Í on the home screen to the line. ENTRY (Last Entry) Storage Area Using ENTRY (Last Entry) When you turn off the TI-83 Plus, ENTRY is retained in a storage area called ENTRY (last ...
User Manual
Page 39
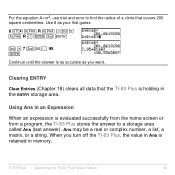
... number, a list, a matrix, or a string. TI-83 Plus Operating the TI-83 Plus Silver Edition 36 Use 8 as your first guess. 8 ¿ ƒ R ƒ [:] y B ƒ R ¡ Í y [ y | 7 y 6 Ë 95 Í Continue until the answer is as accurate as you turn off the TI-83 Plus, the value in Ans is retained in the ENTRY storage... area. When you want. For the equation A=pr2, use trial and error to find the radius of a circle that the TI-83 Plus is evaluated successfully from the home...
... number, a list, a matrix, or a string. TI-83 Plus Operating the TI-83 Plus Silver Edition 36 Use 8 as your first guess. 8 ¿ ƒ R ƒ [:] y B ƒ R ¡ Í y [ y | 7 y 6 Ë 95 Í Continue until the answer is as accurate as you turn off the TI-83 Plus, the value in Ans is retained in the ENTRY storage... area. When you want. For the equation A=pr2, use trial and error to find the radius of a circle that the TI-83 Plus is evaluated successfully from the home...

User Manual
Page 117
... the selected functions. Press Í to display the Y= editor. 2. TI-83 Plus Function Graphing 114 Press o to change the selection status. Move the cursor to the function you want to place the cursor on and turn on the function's = sign. 4. When you enter or edit a function, it is highlighted. A function is selected when the = sign...
... the selected functions. Press Í to display the Y= editor. 2. TI-83 Plus Function Graphing 114 Press o to change the selection status. Move the cursor to the function you want to place the cursor on and turn on the function's = sign. 4. When you enter or edit a function, it is highlighted. A function is selected when the = sign...

User Manual
Page 118
... line. Select 4:On/Off to place the cursor on Plot1, Plot2, or Plot3, and then press Í. When a plot is on, its name is turned on. TI-83 Plus Function Graphing 115 To change the on/off status of a stat plot in the Y= Editor To view and change the on/off . Selecting and Deselecting... To select or deselect a function from the Y= editor, press } and ~ to display the ON/OFF secondary menu. Press ~ to display the VARS Y.VARS menu. 2. Turning On or Turning Off a Stat Plot in the Y= editor, use Plot1 Plot2 Plot3 (the top line of the Y= editor).
... line. Select 4:On/Off to place the cursor on Plot1, Plot2, or Plot3, and then press Í. When a plot is on, its name is turned on. TI-83 Plus Function Graphing 115 To change the on/off status of a stat plot in the Y= Editor To view and change the on/off . Selecting and Deselecting... To select or deselect a function from the Y= editor, press } and ~ to display the ON/OFF secondary menu. Press ~ to display the VARS Y.VARS menu. 2. Turning On or Turning Off a Stat Plot in the Y= editor, use Plot1 Plot2 Plot3 (the top line of the Y= editor).

User Manual
Page 119
... not enter a number after FnOn or FnOff. Press Í. The instruction you enter two or more functions. TI-83 Plus Function Graphing 116 3. For example, in Func mode, FnOff :FnOn 1,3 turns off one or more numbers, separate them with commas. • To turn on Y1 and Y3. FnOn[function#,function#, . . .,function n] FnOff[function#,function#, . . .,function...
... not enter a number after FnOn or FnOff. Press Í. The instruction you enter two or more functions. TI-83 Plus Function Graphing 116 3. For example, in Func mode, FnOff :FnOn 1,3 turns off one or more numbers, separate them with commas. • To turn on Y1 and Y3. FnOn[function#,function#, . . .,function n] FnOff[function#,function#, . . .,function...

User Manual
Page 124
... above and to another. To turn off tick marks, set Xscl=0 and Yscl=0. Yscl (Y scale) defines the distance between tick marks on the x-axis. The default is the portion of the coordinate plane defined by Xmin, Xmax, Ymin, and Ymax. Setting the Viewing Window Variables The TI-83 Plus Viewing Window The viewing window...
... above and to another. To turn off tick marks, set Xscl=0 and Yscl=0. Yscl (Y scale) defines the distance between tick marks on the x-axis. The default is the portion of the coordinate plane defined by Xmin, Xmax, Ymin, and Ymax. Setting the Viewing Window Variables The TI-83 Plus Viewing Window The viewing window...

User Manual
Page 159
... change the graph style to è for X2T and Y2T. Tmin=0 Tmax=5 Tstep=.1 Xmin=L10 Xmax=100 Xscl=50 Ymin=L5 Ymax=15 Yscl=10 9. TI-83 Plus Parametric Graphing 156 Press } Í Í to change the graph style to ë for X3T and Y3T. Press ~ 2, and then press 1 Í to define... set to ë for the window variables. Enter these values for X1T and Y1T. (These keystrokes assume that all graph styles were set AxesOff, which turns off the axes. Press p. The horizontal component vector is defined by X3T and Y3T. 6.
... change the graph style to è for X2T and Y2T. Tmin=0 Tmax=5 Tstep=.1 Xmin=L10 Xmax=100 Xscl=50 Ymin=L5 Ymax=15 Yscl=10 9. TI-83 Plus Parametric Graphing 156 Press } Í Í to change the graph style to ë for X3T and Y3T. Press ~ 2, and then press 1 Í to define... set to ë for the window variables. Enter these values for X1T and Y1T. (These keystrokes assume that all graph styles were set AxesOff, which turns off the axes. Press p. The horizontal component vector is defined by X3T and Y3T. 6.

User Manual
Page 218
...settings on the mode screen. • Change the format settings on the format screen. • Enter or edit functions in the Y= editor. • Select or deselect functions in Func graphing. The coordinates for all ...on a Graph You can use the DRAW instructions, consider whether you display the graph again. TI-83 Plus Draw Instructions 215 Note: If you draw on a graph and then perform any DRAW menu ... in the Y= editor. • Change the window variable values. • Turn stat plots on or off. • Clear existing drawings with ClrDraw. Drawing on Func, Par, Pol, ...
...settings on the mode screen. • Change the format settings on the format screen. • Enter or edit functions in the Y= editor. • Select or deselect functions in Func graphing. The coordinates for all ...on a Graph You can use the DRAW instructions, consider whether you display the graph again. TI-83 Plus Draw Instructions 215 Note: If you draw on a graph and then perform any DRAW menu ... in the Y= editor. • Change the window variable values. • Turn stat plots on or off. • Clear existing drawings with ClrDraw. Drawing on Func, Par, Pol, ...

User Manual
Page 235
... local minimum of the selected function. To draw on the pen. 3. TI-83 Plus Draw Instructions 232 For example, Pen was used to create the arrow pointing to Draw on a Graph Pen draws directly on the point where you want to turn off the pen. You cannot execute Pen from the DRAW menu. 2. Press... the cursor on a graph only. Select A:Pen from the home screen or a program. As you move the cursor to a new position where you want to turn on a displayed graph, follow these steps. 1. To cancel Pen, press '.
... local minimum of the selected function. To draw on the pen. 3. TI-83 Plus Draw Instructions 232 For example, Pen was used to create the arrow pointing to Draw on a Graph Pen draws directly on the point where you want to turn off the pen. You cannot execute Pen from the DRAW menu. 2. Press... the cursor on a graph only. Select A:Pen from the home screen or a program. As you move the cursor to a new position where you want to turn on a displayed graph, follow these steps. 1. To cancel Pen, press '.

User Manual
Page 236
The TI-83 Plus's interpretation of these steps. 1. Move the cursor to draw the point. Select 1:Pt.On( from a graph. Drawing Points Directly on a Graph with Pt.On( To ... 1 if pixel on a Graph DRAW POINTS Menu To display the DRAW POINTS menu, press y < ~. TI-83 Plus Draw Instructions 233 DRAW POINTS STO 1:Pt-On( Turns on a point. 2:Pt-Off( Turns off a point. 3:Pt-Change( Toggles a point on or off. 4:Pxl-On( Turns on a pixel. 5:Pxl-Off( Turns off a pixel. 6:Pxl-Change( Toggles a pixel on or off .
The TI-83 Plus's interpretation of these steps. 1. Move the cursor to draw the point. Select 1:Pt.On( from a graph. Drawing Points Directly on a Graph with Pt.On( To ... 1 if pixel on a Graph DRAW POINTS Menu To display the DRAW POINTS menu, press y < ~. TI-83 Plus Draw Instructions 233 DRAW POINTS STO 1:Pt-On( Turns on a point. 2:Pt-Off( Turns off a point. 3:Pt-Change( Toggles a point on or off. 4:Pxl-On( Turns on a pixel. 5:Pxl-Off( Turns off a pixel. 6:Pxl-Change( Toggles a pixel on or off .

User Manual
Page 237
3. Press Í to draw the point. To cancel Pt.On(, press '. To continue drawing points, repeat steps 2 and 3. Erasing Points with Pt.Off( To erase (turn off ) from the DRAW POINTS menu. 2. To continue erasing points, repeat steps 2 and 3. Press Í to erase the point. Select 2:Pt.Off( (point off ) a drawn point on a graph, follow these steps. 1. Move the cursor to the point you want to erase. 3. To cancel Pt.Off(, press '. TI-83 Plus Draw Instructions 234
3. Press Í to draw the point. To cancel Pt.On(, press '. To continue drawing points, repeat steps 2 and 3. Erasing Points with Pt.Off( To erase (turn off ) from the DRAW POINTS menu. 2. To continue erasing points, repeat steps 2 and 3. Press Í to erase the point. Select 2:Pt.Off( (point off ) a drawn point on a graph, follow these steps. 1. Move the cursor to the point you want to erase. 3. To cancel Pt.Off(, press '. TI-83 Plus Draw Instructions 234

User Manual
Page 238
..., repeat steps 2 and 3. default) 2 = › (box) 3 = + (cross) Pt.On(x,y[,mark]) Pt.Off(x,y[,mark]) Pt.Change(x,y) TI-83 Plus Draw Instructions 235 mark is optional; Pt.Off( turns the point off . it determines the point's appearance; specify 1, 2, or 3, where: 1 = ¦ (dot; Changing Points with Pt.Change(... To change ) from the Home Screen or a Program Pt.On( (point on) turns on the point at (X=x,Y=y). Select 3:Pt.Change( (point change (toggle on or off status. To cancel Pt.Change(, press '. Press Í to change...
..., repeat steps 2 and 3. default) 2 = › (box) 3 = + (cross) Pt.On(x,y[,mark]) Pt.Off(x,y[,mark]) Pt.Change(x,y) TI-83 Plus Draw Instructions 235 mark is optional; Pt.Off( turns the point off . it determines the point's appearance; specify 1, 2, or 3, where: 1 = ¦ (dot; Changing Points with Pt.Change(... To change ) from the Home Screen or a Program Pt.On( (point on) turns on the point at (X=x,Y=y). Select 3:Pt.Change( (point change (toggle on or off status. To cancel Pt.Change(, press '. Press Í to change...

User Manual
Page 239
TI-83 Plus Draw Instructions 236 Pt.Change( does not have the mark option. Note: If you specified mark to turn on a point with Pt.On(, you must specify mark when you turn off the point with Pt.Off(.
TI-83 Plus Draw Instructions 236 Pt.Change( does not have the mark option. Note: If you specified mark to turn on a point with Pt.On(, you must specify mark when you turn off the point with Pt.Off(.

User Manual
Page 240
...an integer between 0 and 62 and column is a square dot on the graph using the cursor. When you turn on, turn off, or reverse a pixel (dot) on the TI-83 Plus display. Pxl.Off( turns the pixel off . The pixel instructions are not interactive. The Pxl. (pixel) instructions let you select a ...pixel instruction from the DRAW POINTS menu, the TI-83 Plus returns to the home screen or the program editor. Pxl.On(row,column) Pxl.Off(row,column) Pxl.Change(row,column) TI-83 Plus Draw Instructions 237 Turning On and Off Pixels with Pxl.On( and Pxl.Off( Pxl.On...
...an integer between 0 and 62 and column is a square dot on the graph using the cursor. When you turn on, turn off, or reverse a pixel (dot) on the TI-83 Plus display. Pxl.Off( turns the pixel off . The pixel instructions are not interactive. The Pxl. (pixel) instructions let you select a ...pixel instruction from the DRAW POINTS menu, the TI-83 Plus returns to the home screen or the program editor. Pxl.On(row,column) Pxl.Off(row,column) Pxl.Change(row,column) TI-83 Plus Draw Instructions 237 Turning On and Off Pixels with Pxl.On( and Pxl.Off( Pxl.On...

