TRENDnet TV-H110 Support and Manuals
Get Help and Manuals for this TRENDnet item
View All Support Options Below
Free TRENDnet TV-H110 manuals!
Problems with TRENDnet TV-H110?
Ask a Question
Free TRENDnet TV-H110 manuals!
Problems with TRENDnet TV-H110?
Ask a Question
Popular TRENDnet TV-H110 Manual Pages
Datasheet - Page 1

... of outdoor use with an IP66 enclosure rating.
internet cameras
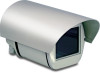
Outdoor Camera Enclosure with Fan and Heater
TV-H110 (V1.0R)
The Outdoor Camera Enclosure with Heater and Fan protects TRENDnet's Internet security cameras from extreme temperatures with a built in heater and fan and from severe weather with compatible TRENDnet Internet security cameras. The Outdoor Camera Enclosure is...
Datasheet - Page 2

Outdoor Camera Enclosure with Fan and Heater
TV-H110 (V1.0R)
SPECIFICATIONS
Hardware
Supported Devices Protection Level Blower Fan and Heater Housing Material Power Supply Dimensions Weight Max. Other Brands and product names are trademarks of their respective holders. For the most recent product information please visit http://www.trendnet.com. Camera Dimension Temperature Humidity
&#...
Quick Installation Guide - Page 3

... Requirements
The following items below are not included. Electrical Tape ? 8P8C Modular Plug/RJ-45 connector (for wired Internet camera server)
*Note: You must provide the items themselves. Phillips Screwdriver ? Quick Installation Guide ? 1. IR Shelter ? TV-IP110, TV-IP110W, TV-IP212, TV-IP212W, TV-IP312, TV-IP312W)
? TV-H110 ? Screws, washers and wall mount kit ?
Quick Installation Guide - Page 4

... bracket. Slide out the back end of the camera enclosure. Hardware Installation
Note: Configure your Internet Camera Server to use these screws. Save these screws later.
2
English
You will need to use these screws. Save these screws later.
2. Unscrew the circuit board from the back of the enclosure.
3. 2. You will need to match your network...
Quick Installation Guide - Page 5

Note: This is the AC adapter that is included with your Internet Camera Server.
3
English Connect the IR shelter to the metal bracket.
6. Take the Internet Camera Server's power adapter and cut about 4 inches from the TV-H110. You will need to use this screw. 4. Unscrew the metal bracket from the end of the power...
Quick Installation Guide - Page 6

... jumper cable to split the cable into two strands.
9. 8. Use a wire stripper to remove the insulation to the base of the TV-H110 is run through the top of the camera housing.
12. Run the Internet Camera Server's power adapter and RJ-45 Ethernet cable from the top to expose the copper wiring.
10.
Quick Installation Guide - Page 9

Slide the back end of the camera enclosure.
7
English Screw the circuit board back to the Internet Camera server.
26. Connect the Ethernet cable to the metal bracket.
24. 23. Connect the power adapter to the Internet Camera server.
25. Secure the screws into the back of the enclosure back in.
27.
Quick Installation Guide - Page 10

... Antenna to the top of the caps from the enclosure.
8
English Run the TEW-ASAK from the back of your wireless Internet Camera Server.
2. Remove one of the mounting arm.
3. Remove the antenna from the base to Wireless Internet Camera
Note: Before installation, you need the following products: TEW-ASAK (v2.0R), TEW-L406...
Quick Installation Guide - Page 12

Connect the TEW-ASAK and the power adapter to your outdoor antenna (e.g. Secure the screws into the back of the enclosure back in the QIG for the TEW-ASAK to connect the surge arrestor to the Internet Camera Server.
11. Follow the directions in .
12. Slide the back end of the camera enclosure.
13. TEW-AO14D).
10
English 10.
Quick Installation Guide - Page 13

... size of the four holes with a pencil.
2. Use the bracket screws to mount the mounting bracket to secure the mounting bracket.
11
English Mounting the Camera Housing
1. Drill holes for the screws at each of the provided white screws.
3. Insert the screws into the holes.
4. Use the provided Allen wrench to...
Quick Installation Guide - Page 14

... choosing TRENDnet
12
English Align the Wall Mount bracket with the screws, and then use the provided Allen wrench and turn it . Register Your Product
To ensure the highest level of customer service and support, please take a moment to secure position.
6. Then use the provided nuts and washers to the desired position.
5.
Your installation...
Quick Installation Guide - Page 15

... problems or have any questions regarding the TV-H110, please contact TRENDnet's Technical Support Department.
13 Q2: Where is run the Ethernet cable unterminated. Q4: My antenna cable will not fit through the cap and the TV-H110, then terminate the Ethernet cable with your camera. Troubleshooting
Q1: After I do? What should I do ? If an Ethernet is distorted. See Installing...
Quick Installation Guide - Page 16

...'S MISUSE, NEGLECT, IMPROPER INSTALLATION OR TESTING, UNAUTHORIZED ATTEMPTS TO REPAIR OR MODIFY, OR ANY OTHER CAUSE BEYOND THE RANGE OF THE INTENDED USE, OR BY ACCIDENT, FIRE, LIGHTNING, OR OTHER HAZARD.
14 TV-H110- 2 Year Limited Warranty
If a product does not operate as warranted above during the applicable warranty period, TRENDnet shall, at its products...
Quick Installation Guide - Page 17

... state of California. LIMITATION OF LIABILITY: TO THE FULL EXTENT ALLOWED BY LAW TRENDNET ALSO EXCLUDES FOR ITSELF AND ITS SUPPLIERS ANY LIABILITY, WHETHER BASED IN CONTRACT OR...SALE, INSTALLATION, MAINTENANCE, USE, PERFORMANCE, FAILURE, OR INTERRUPTION OF THE POSSIBILITY OF SUCH DAMAGES, AND LIMITS ITS LIABILITY TO REPAIR, REPLACEMENT, OR REFUND OF THE PURCHASE PRICE PAID, AT TRENDNET'S OPTION....
Quick Installation Guide - Page 19

TRENDnet. Go to register your product online. Product Warranty Registration
Please take a moment to TRENDnet's website at http://www.trendnet.com/register
20675 Manhattan Place Torrance, CA 90501 USA
Copyright ©2008. All Rights Reserved.
TRENDnet TV-H110 Reviews
We have not received any reviews for TRENDnet yet.