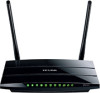
TL-WR842ND FTP Server Application Guide for USB function
Page 2
Topology and USB Device 2 1.1 Typical Topology...2 1.2 Special Topology ...3 1.3 USB Device...3 Chapter 2. Configuration of the Wireless Router 4 Chapter 3. Access via Web Browser 8 3.1 WAN Access...8 3.2 LAN Access...12 Chapter 4. CONTENTS Chapter 1. Access via PC Client Software 17 4.1 WAN Access...17 4.2 LAN Access...21
TL-WR842ND FTP Server Application Guide for USB function
Page 3
Topology and USB Device 1.1 Typical Topology Application Guide Figure 1-1 Typical Topology ) Note: 1. Remote PC here means the PC that is not in the same subnet with the FTP Sever. Local PC here means the PC that is in the same subnet with the FTP Sever. Local PC can access the FTP Server by LAN (Local Area Network), which is called WAN Access. - 2 - Remote PC needs to go through the Internet if needed to access the FTP server, which is called LAN Access. 3. USB Flash Device stands for FTP Server in this topology. 2. Chapter 1.
TL-WR842ND FTP Server Application Guide for USB function
Page 4
... the modem, the remote PC cannot reach the FTP server through the WAN IP of TL-WR1043ND because the WAN IP of TL-WR1043ND is linked to the LAN port of this situation. You can consult the vendor of the modem to modify some settings to let the TL-WR1043ND obtain....doc). The following part would help you set up a FTP server and download the files from your ISP and TL-WR1043ND obtains its IP through a USB Flash. - 3 - 1.2 Special Topology Application Guide ) Note: Figure 1-2 Special Topology The WAN port of TL-WR1043ND is not a public IP in case of an xDSL modem...
TL-WR842ND FTP Server Application Guide for USB function
Page 5
... connected to log in the address field to the wireless router, either through wireless connection or wired connection. 2. Plug an external USB hard disk drive or USB flash drive into the USB port on the back panel of the Wireless Router To set up your FTP Server, please follow the instructions below: 1. After...
TL-WR842ND FTP Server Application Guide for USB function
Page 6
Specify a Service Port for the FTP Server. Do not change it unless necessary.) 8. Click Add New Folder to USB Settings->FTP Server, the screen will appear as shown in Display Name edit box, for example, TP-LINK. - 5 - Enter a display name for the share folder in Figure 2-3. The IP behind Internet Address would be used...
TL-WDR4300 Print Server Application Guide
Page 2
... for Mac OS 21 6.1 To Launch/Exit the TP-LINK USB Printer Controller 21 6.2 To Utilize the TP-LINK USB Printer Controller 22 6.2.1 To Print ...22 6.2.2 To Scan ...25 6.2.3 Other functions/ settings...31 Appendix: Troubleshooting...33 Installation for Windows OS 7 4.1 To Launch/Exit the TP-LINK USB Printer Controller 7 4.2 To Utilize the TP-LINK USB Printer Controller 8 4.2.1 To Print ...8 4.2.2 To Scan ...11...
TL-WDR4300 Print Server Application Guide
Page 3
Typical Topology ) Note: (1) The client utility TP-LINK USB Printer Controller supports Windows 7 32/64 bit, Windows Vista 32/64bit, Windows XP 32/64bit, and Mac. (2) Before connection, please check the Printer Compatibility List ...
TL-WDR4300 Print Server Application Guide
Page 4
...print server, make sure you have CD-ROM drive to run the resource CD, please download the relevant software from our website: www.tp-link.com. Before Installation Chapter 2. Please refer to share the print server via the Router. Otherwise, please install it wants to Appendix: Troubleshooting... the print server, please note the following points: 9 Make sure you have the following devices and accessories: 9 TP-LINK Router with USB port which supports print server function 9 USB printer and USB cable 9 Computer with Windows XP/ Windows Vista/ Windows 7/ Mac ) Note: For Mac or Windows computers that ...
TL-WDR4300 Print Server Application Guide
Page 5
Insert the Router's Resource CD into the CD-ROM drive. 3. Click START. 2. Installation for Windows OS 1. Click NEXT. -2- Installation for Windows OS Chapter 3. Connect your Router model and click USB Printer Setup. 4. Select your computer and printer to the Router step by step as instructed.
TL-WDR4300 Print Server Application Guide
Page 6
Check the LED lights and click NEXT. Please wait a moment for Windows OS 7. Click Next and go on to start installing the printer share software. 8. Installation for the installation preparation. 6. Click NEXT to install the TP-LINK USB Printer Controller. -3- 5.
TL-WDR4300 Print Server Application Guide
Page 8
13. Click Finish to configure other computers in your LAN, each computer that wants to share the print server should also install the TP-LINK USB Printer Controller. Please follow the previous steps to complete and exit the InstallShield Wizard. Installation for Windows OS When the installation is completed, the TP-LINK USB Printer Controller will pop up, with whose help you can print documents via the Router now. ) Note: In your LAN. -5-
TL-WDR4300 Print Server Application Guide
Page 9
... of your computer. 4.1 To Launch/Exit the TP-LINK USB Printer Controller ¾ To launch the USB Printer Controller, double-click the icon ¾ To exit the USB Printer Controller, you have two ways: on your desktop. Application for Windows OS TP-LINK USB Printer Controller is used to operate the USB Printer on your screen and then click...
TL-WDR4300 Print Server Application Guide
Page 10
Application for printing tab to pull down the list, where you can execute your printing tasks automatically. Please follow the steps below to set as auto-connect printer. Step 1: Highlight the printer you want to set your auto-connect printer. Step 2: Click the inverse triangle mark on the Auto-Connect for Windows OS 4.2 To Utilize the TP-LINK USB Printer Controller 4.2.1 To Print To print, first of all, you can select Set Auto-Connect Printer. -8- After successful setting, you need to set your Auto-Connect Printer.
TL-WDR4300 Print Server Application Guide
Page 19
Application for Windows OS 4.2.3 Other functions/ settings ¾ Configuration Go to About -> About, a window will pop up and display some relevant information about this Control Center. -17- With this setting, the TP-LINK USB Printer Controller will run automatically every time you log on your computer. ¾ About Go to Tools-> Configuration, tick the option Automatically execute when logging on Windows, and then click OK.
TL-WDR4300 Print Server Application Guide
Page 23
Or you have two ways: z Click TP-Link USB Printer Controller -> Quit, when the printer controller is on the process. Application for Mac OS 6.1 To Launch/Exit the TP-LINK USB Printer Controller ¾ To launch the USB Printer Controller, double-click the icon on your desktop. ¾ To exit the USB Printer Controller, you can click Quit to quickly exit the controller. z Left-click and hold the icon in the dock for Mac OS Chapter 6. Application for a while, then you can press the keyboard command + Q to exit the controller. -21-
TL-WDR4300 Print Server Application Guide
Page 24
After successful setting, you can execute your printing tasks automatically. Step 1: Highlight your auto-connect printer. Step 2: Click the tab Auto-Connect for Mac OS 6.2 To Utilize the TP-LINK USB Printer Controller 6.2.1 To Print To print, first of all, you need to set your printer. Application for printing to pull down a list, where you can select Set Auto-Connect Printer. -22- Please follow the steps below to set your Auto-Connect Printer.
TL-WDR4300 Print Server Application Guide
Page 33
Application for Mac OS 6.2.3 Other functions/ settings ¾ About Go to log in the web-based management page of the Router will pop up . You need to enter the user name and password (both are admin by default.) to TP-Link USB Printer Controller -> About; a window will pop up and display some relevant information about this printer controller. ¾ Configure Server Highlight the Router and click the tab Configure Server, the login window of the Router. -31-
TL-WDR4300 Print Server Application Guide
Page 34
Application for Mac OS ¾ Open at Login Left-click and hold the icon in the dock for a while, until you log on your Mac. -32- With this setting, the TP-LINK USB Printer Controller will run automatically every time you can select Option > Open at Login.
TL-WDR4300 Print Server Application Guide
Page 36
Then next web page will be loaded, where you can I find your product model and go to Download ->Software -> Utility. Troubleshooting 2. Where can select the USB Printer Controller_Utility and download it. -34- Go to our website www.tp-link.com, then go to Products ->Wireless, find the relevant software for installation?
TL-WDR4300 Print Server Application Guide
Page 38
... Password. The Router's Print Server function is enabled by default. Troubleshooting 3. How to the wireless Router, either via wireless or wired connection. 2) Launch the TP-LINK USB Printer Controller, highlight the Router and click the tab Configure Server. 3) After a moment, a login window will appear. To disable the function, you have a PC...