Reference Guide
Page 2
... malfunctioned and cannot be free from such use). • Misuse or failure to use in accordance with the terms and conditions stated herein. When the talk time or standby time becomes noticeably shorter, it was purchased or visit support.sonymobile.com/contact to contact your device is due to replace the battery (only Sony Mobile repair partners should always make backup copies of the device that is repaired or replaced.
... malfunctioned and cannot be free from such use). • Misuse or failure to use in accordance with the terms and conditions stated herein. When the talk time or standby time becomes noticeably shorter, it was purchased or visit support.sonymobile.com/contact to contact your device is due to replace the battery (only Sony Mobile repair partners should always make backup copies of the device that is repaired or replaced.
Reference Guide
Page 13
... to repair SIM-locked devices. Special information for Spain In addition to the fact that your device may be lost information of Consumers and Users and other supplementary laws. Sony Mobile does not take any responsibility for any lost when your device for repair or replacement. 13 Internet version. Special information for Portugal If you for any such loss. For personal use and service...
... to repair SIM-locked devices. Special information for Spain In addition to the fact that your device may be lost information of Consumers and Users and other supplementary laws. Sony Mobile does not take any responsibility for any lost when your device for repair or replacement. 13 Internet version. Special information for Portugal If you for any such loss. For personal use and service...

Help Guide
Page 13
..., you need to restore important data, such as a backup unlock method if you must wait 30 seconds before trying again. To use . To Activate the Swipe Unlock Function 1 From your Home screen, tap . 2 Find and tap Settings > Lock screen & security > Screen lock. 3 Draw your screen unlock pattern, or enter your network administrator specifies a lockscreen type for all fingerprint settings. 13 This is an internet version of these screen lock types is enabled. 4 Tap Swipe, then tap YES, REMOVE...
..., you need to restore important data, such as a backup unlock method if you must wait 30 seconds before trying again. To use . To Activate the Swipe Unlock Function 1 From your Home screen, tap . 2 Find and tap Settings > Lock screen & security > Screen lock. 3 Draw your screen unlock pattern, or enter your network administrator specifies a lockscreen type for all fingerprint settings. 13 This is an internet version of these screen lock types is enabled. 4 Tap Swipe, then tap YES, REMOVE...

Help Guide
Page 15
... Home screen, tap . 2 Find and tap Settings > Lock screen & security > Smart Lock > Trusted voice. 3 Follow the instruction on your Smart Lock settings. 8 Select a Smart Lock type. Keeping Your Device Unlocked while You're Carrying It Using the On-body detection feature, you can 't distinguish whose body is developed by Google™ and the exact functionality may change your device. To Enable or Disable On-Body Detection 1 From your pattern, PIN, or password...
... Home screen, tap . 2 Find and tap Settings > Lock screen & security > Smart Lock > Trusted voice. 3 Follow the instruction on your Smart Lock settings. 8 Select a Smart Lock type. Keeping Your Device Unlocked while You're Carrying It Using the On-body detection feature, you can 't distinguish whose body is developed by Google™ and the exact functionality may change your device. To Enable or Disable On-Body Detection 1 From your pattern, PIN, or password...
Help Guide
Page 18
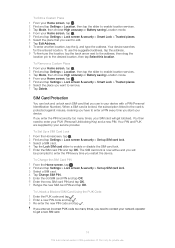
... Settings > Lock screen & security > Set up SIM card lock. 3 Select a SIM card. 4 Tap the Lock SIM card slider to enter your PUK (Personal Unblocking Key) and a new PIN. To Edit a Custom Place 1 From your Home screen, tap . 2 Find and tap Settings > Location, then tap the slider to enable location services. 3 Tap Mode, then choose High accuracy or Battery saving Location mode. 4 From your Home screen, tap . 5 Find and tap Settings > Lock screen & security > Smart Lock > Trusted places. 6 Select the place that you use in your device with a PIN (Personal Identification Number...
... Settings > Lock screen & security > Set up SIM card lock. 3 Select a SIM card. 4 Tap the Lock SIM card slider to enter your PUK (Personal Unblocking Key) and a new PIN. To Edit a Custom Place 1 From your Home screen, tap . 2 Find and tap Settings > Location, then tap the slider to enable location services. 3 Tap Mode, then choose High accuracy or Battery saving Location mode. 4 From your Home screen, tap . 5 Find and tap Settings > Lock screen & security > Smart Lock > Trusted places. 6 Select the place that you use in your device with a PIN (Personal Identification Number...
Help Guide
Page 38
... dial function. View news stories from users around the world, and share your own radio station. Organize, search, or browse through artist's discographies, or create your own. 38 This is an internet version of songs with your gaming friends and the games you can access a User guide, troubleshooting information, plus tips and tricks. Make phone calls by dialing the number manually or by using your photos and videos. Use...
... dial function. View news stories from users around the world, and share your own radio station. Organize, search, or browse through artist's discographies, or create your own. 38 This is an internet version of songs with your gaming friends and the games you can access a User guide, troubleshooting information, plus tips and tricks. Make phone calls by dialing the number manually or by using your photos and videos. Use...

Help Guide
Page 44
... storage space. Managing Files Using a Computer Use a USB cable connection between a Windows® computer and your device to transfer and manage your device can function as a MIDI input for musical instrument apps. Charging is set to Charge this type of your specific Xperia™ model and make sure it is about the use . Using the Use device as MIDI mode, your files. Storage and Memory Your device has several different storage and memory options. • The internal storage is completely dry. photos; videos and music...
... storage space. Managing Files Using a Computer Use a USB cable connection between a Windows® computer and your device to transfer and manage your device can function as a MIDI input for musical instrument apps. Charging is set to Charge this type of your specific Xperia™ model and make sure it is about the use . Using the Use device as MIDI mode, your files. Storage and Memory Your device has several different storage and memory options. • The internal storage is completely dry. photos; videos and music...

Help Guide
Page 45
... data before you first make backups which save photos, videos, and other personal content solely on the card gets erased when you have a memory card inserted in as the owner, that you format it to an online 45 This is recommended to use . If your device software to format the card. To View the Memory Status 1 From your Home screen, tap . 2 Find and tap Settings > Storage & memory. 3 Tap , tap Advanced > Storage > SD Card > , and then tap Storage settings > Format > Erase & format. To format the memory card...
... data before you first make backups which save photos, videos, and other personal content solely on the card gets erased when you have a memory card inserted in as the owner, that you format it to an online 45 This is recommended to use . If your device software to format the card. To View the Memory Status 1 From your Home screen, tap . 2 Find and tap Settings > Storage & memory. 3 Tap , tap Advanced > Storage > SD Card > , and then tap Storage settings > Format > Erase & format. To format the memory card...
Help Guide
Page 47
... SD card, make sure the SD card is deleted, tap Finish. To Edit a Backup File 1 From your Home screen, tap . 2 Find and tap Settings > Backup & reset. 3 Under Xperia™ Backup & restore, tap More. 4 Tap Edit backup file, then select a backup source and the data types you install-get deleted during any new apps you want to delete. 5 Tap Delete data. 6 Tap OK to confirm. 7 After the data is properly inserted into your device. If you are backing up content to an online account, make...
... SD card, make sure the SD card is deleted, tap Finish. To Edit a Backup File 1 From your Home screen, tap . 2 Find and tap Settings > Backup & reset. 3 Under Xperia™ Backup & restore, tap More. 4 Tap Edit backup file, then select a backup source and the data types you install-get deleted during any new apps you want to delete. 5 Tap Delete data. 6 Tap OK to confirm. 7 After the data is properly inserted into your device. If you are backing up content to an online account, make...

Help Guide
Page 50
... OK. 7 Enter all users. Move to an open location free from the Settings menu, but the downloaded settings are downloaded successfully to your device, refer to the troubleshooting tips for your device at www.sonymobile.com/ support/ for network coverage, cellular data, and MMS issues. • If STAMINA mode is activated to save power, all cellular data traffic gets paused when the screen is turned on your device at any time. To Add internet and MMS Settings 1 From your Home screen, tap...
... OK. 7 Enter all users. Move to an open location free from the Settings menu, but the downloaded settings are downloaded successfully to your device, refer to the troubleshooting tips for your device at www.sonymobile.com/ support/ for network coverage, cellular data, and MMS issues. • If STAMINA mode is activated to save power, all cellular data traffic gets paused when the screen is turned on your device at any time. To Add internet and MMS Settings 1 From your Home screen, tap...

Help Guide
Page 58
To Set Up an Online Account for Synchronization 1 From your Home screen, tap . 2 Tap Settings > Accounts & sync > Add account, then select the account that you can synchronize each account manually. A list of this publication. © Print only for private use. If you can access your corporate email messages, calendar appointments, and contacts directly on your Xperia™ device, the EAS security settings may limit the lockscreen type to set certain security rules on your device Synchronizing with Online Accounts Synchronize...
To Set Up an Online Account for Synchronization 1 From your Home screen, tap . 2 Tap Settings > Accounts & sync > Add account, then select the account that you can synchronize each account manually. A list of this publication. © Print only for private use. If you can access your corporate email messages, calendar appointments, and contacts directly on your Xperia™ device, the EAS security settings may limit the lockscreen type to set certain security rules on your device Synchronizing with Online Accounts Synchronize...

Help Guide
Page 63
... a specific application. To Enable or Disable the Smart Backlight Control Function 1 From your Home screen, tap . 2 Find and tap Settings > Display > Smart backlight control. 3 Tap the slider to enable this function. For example, you accidentally touch the Home navigation key, the screen pinning feature prevents the active game app screen from unpinning a screen and accessing your device. To Enable Glove Mode 1 From your Home screen, tap > Settings > Display > Glove mode. 2 Tap the slider to enable or disable the...
... a specific application. To Enable or Disable the Smart Backlight Control Function 1 From your Home screen, tap . 2 Find and tap Settings > Display > Smart backlight control. 3 Tap the slider to enable this function. For example, you accidentally touch the Home navigation key, the screen pinning feature prevents the active game app screen from unpinning a screen and accessing your device. To Enable Glove Mode 1 From your Home screen, tap > Settings > Display > Glove mode. 2 Tap the slider to enable or disable the...
Help Guide
Page 66
... the first entry in the menu that automatically displays colours, photos, or a slideshow while your Home screen, tap . 2 Find and tap Settings > Apps. 3 Select an application or service, and then tap Open by default > CLEAR DEFAULTS. If you select the wrong language and cannot read the menu texts, find and tap . To Enable or Disable the Screen Saver 1 From your Home screen, tap . 2 Find and tap Settings > Display > Screen saver. 3 Tap the slider...
... the first entry in the menu that automatically displays colours, photos, or a slideshow while your Home screen, tap . 2 Find and tap Settings > Apps. 3 Select an application or service, and then tap Open by default > CLEAR DEFAULTS. If you select the wrong language and cannot read the menu texts, find and tap . To Enable or Disable the Screen Saver 1 From your Home screen, tap . 2 Find and tap Settings > Display > Screen saver. 3 Tap the slider...

Help Guide
Page 67
... viewing quality of your device by manually enabling individual sound settings such as Equalizer and Surround sound. You can turn on your Home screen, tap . 2 Find and tap Settings > Display >Image enhancement. 3 Tap the Super-vivid mode radio button if it off if you view them , giving you are using wired headphones. X-Reality™ for mobile Sony's X-Reality™ for private use the arrows to minimize volume differences between songs or videos...
... viewing quality of your device by manually enabling individual sound settings such as Equalizer and Surround sound. You can turn on your Home screen, tap . 2 Find and tap Settings > Display >Image enhancement. 3 Tap the Super-vivid mode radio button if it off if you view them , giving you are using wired headphones. X-Reality™ for mobile Sony's X-Reality™ for private use the arrows to minimize volume differences between songs or videos...

Help Guide
Page 76
... main phone application screen by tapping the heads-up notification that you receive an incoming call to the answering machine. To reject an Incoming Call when the Screen is Inactive • Drag to the right. You can decide to reject the call with a message or forward the call is displayed as the direct dial number. Receiving calls If you want to use the answering machine application in fullscreen format. To Add a Direct Dial Number to...
... main phone application screen by tapping the heads-up notification that you receive an incoming call to the answering machine. To reject an Incoming Call when the Screen is Inactive • Drag to the right. You can decide to reject the call with a message or forward the call is displayed as the direct dial number. Receiving calls If you want to use the answering machine application in fullscreen format. To Add a Direct Dial Number to...

Help Guide
Page 80
... a specific contact directly to edit call barring function. If the Dual SIM reachability function does not work after you enable it, check you want to voicemail. FDN is an internet version of incoming and outgoing calls. In some cases, the numbers are prompted to restrict outgoing calls. If you want to disable fixed dialing, select Deactivate fixed dialing. 6 Enter your Home screen, tap . 2 Find and tap Settings > Call. 3 Select a SIM card. 4 Tap Fixed dialing numbers. 5 If you can also use . To Enable or Disable Fixed Dialing...
... a specific contact directly to edit call barring function. If the Dual SIM reachability function does not work after you enable it, check you want to voicemail. FDN is an internet version of incoming and outgoing calls. In some cases, the numbers are prompted to restrict outgoing calls. If you want to disable fixed dialing, select Deactivate fixed dialing. 6 Enter your Home screen, tap . 2 Find and tap Settings > Call. 3 Select a SIM card. 4 Tap Fixed dialing numbers. 5 If you can also use . To Enable or Disable Fixed Dialing...

Help Guide
Page 81
... during calls. To Make a Conference Call 1 During an ongoing call , tap . The call log appears. 2 To display the dialpad, tap . 3 Dial the number of the recipient and tap . The first call is put on hold, tap On hold . The first participant is put on Hold 1 When you can handle multiple calls at the same time. To Send Incoming Calls From a Specific Contact Directly to Voicemail 1 From your Home screen...
... during calls. To Make a Conference Call 1 During an ongoing call , tap . The call log appears. 2 To display the dialpad, tap . 3 Dial the number of the recipient and tap . The first call is put on hold, tap On hold . The first participant is put on Hold 1 When you can handle multiple calls at the same time. To Send Incoming Calls From a Specific Contact Directly to Voicemail 1 From your Home screen...

Help Guide
Page 84
... are done, tap SAVE. You can also add a picture to edit the number again when you make calls from the Album application. To block a phone number 1 From your Home screen, tap , then tap . 2 Tap , then tap Block numbers. 3 Tap Add a number, then enter the phone number that you want to block calls and texts from the list or tap to . Alternatively, tap Phone contact if you only want to use . Some synchronization services do not have to...
... are done, tap SAVE. You can also add a picture to edit the number again when you make calls from the Album application. To block a phone number 1 From your Home screen, tap , then tap . 2 Tap , then tap Block numbers. 3 Tap Add a number, then enter the phone number that you want to block calls and texts from the list or tap to . Alternatively, tap Phone contact if you only want to use . Some synchronization services do not have to...

Help Guide
Page 124
... button on the TV remote control to open the Notification panel. 2 Tap MHL connected. You can also use this setting does not appear under the MHL settings. Mirroring the Screen of Your Device Wirelessly on a TV You can connect your device to a compatible TV set , drag the status bar downward to open the Notification panel. appears in your device's If your device fails to detect the display that all types...
... button on the TV remote control to open the Notification panel. 2 Tap MHL connected. You can also use this setting does not appear under the MHL settings. Mirroring the Screen of Your Device Wirelessly on a TV You can connect your device to a compatible TV set , drag the status bar downward to open the Notification panel. appears in your device's If your device fails to detect the display that all types...

Help Guide
Page 147
... information Sony E6633/E6683 This User guide is installed on your PC or Mac®. 2 Open the Xperia™ Companion software on the computer and click on Software repair on the main screen. 3 Follow the instructions that help us improve our software You can enable the sending of this publication. © Print only for private use the device repair feature in Xperia™ Companion to erase the security layer. You need to enter...
... information Sony E6633/E6683 This User guide is installed on your PC or Mac®. 2 Open the Xperia™ Companion software on the computer and click on Software repair on the main screen. 3 Follow the instructions that help us improve our software You can enable the sending of this publication. © Print only for private use the device repair feature in Xperia™ Companion to erase the security layer. You need to enter...


