Wall-Mount Bracket
Page 2
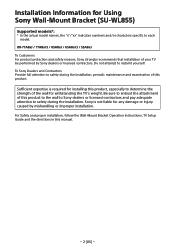
... to determine the strength of the wall for withstanding the TV's weight. For Safety and proper installation, follow the Wall-Mount Bracket Operation Instructions, TV Setup Guide and the directions in this product. Sufficient expertise is not liable for Using Sony Wall-Mount Bracket (SU-WL855) Supported models*: * In the actual model names, the "x"/"xx" indicates numbers and/or characters specific to safety during the installation, periodic maintenance and examination of...
... to determine the strength of the wall for withstanding the TV's weight. For Safety and proper installation, follow the Wall-Mount Bracket Operation Instructions, TV Setup Guide and the directions in this product. Sufficient expertise is not liable for Using Sony Wall-Mount Bracket (SU-WL855) Supported models*: * In the actual model names, the "x"/"xx" indicates numbers and/or characters specific to safety during the installation, periodic maintenance and examination of...
Wall-Mount Bracket
Page 3
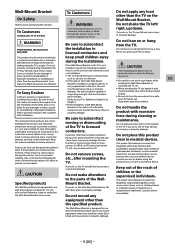
... Wall-Mount Bracket on which may fall and cause injury or property damage. The wall should only be installed by mishandling or improper installation. Sony is not sufficiently Do not handle the by keep small children away a professional installer who use such medical devices. Please give this instruction manual thoroughly to observe the precautions for 189.3 cm (75 inches) and above TV set...
... Wall-Mount Bracket on which may fall and cause injury or property damage. The wall should only be installed by mishandling or improper installation. Sony is not sufficiently Do not handle the by keep small children away a professional installer who use such medical devices. Please give this instruction manual thoroughly to observe the precautions for 189.3 cm (75 inches) and above TV set...
Wall-Mount Bracket
Page 4
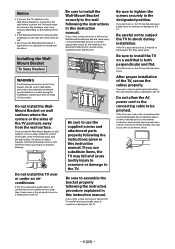
... TV protrude away from the wall surface. Do not install the Wall-Mount Bracket on wall surfaces where the corners or the sides of the TV. If the TV is both perpendicular and flat. After proper installation of the screws are for a long time, it may fall and cause injury. If the AC power cord or the connecting cable is pinched between the unit...
... TV protrude away from the wall surface. Do not install the Wall-Mount Bracket on wall surfaces where the corners or the sides of the TV. If the TV is both perpendicular and flat. After proper installation of the screws are for a long time, it may fall and cause injury. If the AC power cord or the connecting cable is pinched between the unit...

Wall-Mount Bracket
Page 8
... of supporting a weight of at least six times that of the TV. • Refer "Measurement for the TV's weight. Note ˎˎWhen your TV's Reference Guide for Lateral Shift Bracket installation on the wall" on page 19. • Refer to a depth of 75 mm (3 inch), using a 5.5 mm (7/32 inch) diameter... the Wall-Mount Bracket to the Dry Wall with Studs ˎˎWe recommend you to check the position of TV in the viewing environment. 2 WM4 3 Align WM4 to the Wall 1 Decide on the installation location. WM1 × 4 WM4 Installing the Lateral Shift Bracket to the wall and make...
... of supporting a weight of at least six times that of the TV. • Refer "Measurement for the TV's weight. Note ˎˎWhen your TV's Reference Guide for Lateral Shift Bracket installation on the wall" on page 19. • Refer to a depth of 75 mm (3 inch), using a 5.5 mm (7/32 inch) diameter... the Wall-Mount Bracket to the Dry Wall with Studs ˎˎWe recommend you to check the position of TV in the viewing environment. 2 WM4 3 Align WM4 to the Wall 1 Decide on the installation location. WM1 × 4 WM4 Installing the Lateral Shift Bracket to the wall and make...

Wall-Mount Bracket
Page 11
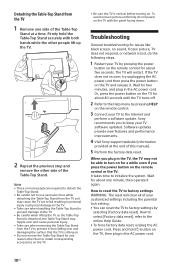
... Wall US 3 Screw the left and right side of the Wall-Mount Bracket using M6 and attach WM3 . Note 2 ˎˎThree or more people are required to detach the Table-Top Stand. ˎˎBe careful not to use excessive force while detaching the Table-Top Stand from the TV as it may cause the TV set ... to the TV. ˎˎBe careful when lifting the TV as the Table-Top Stand is detached, the Table-Top Stand may topple over and cause personal injury. ˎˎTake care when removing the Table-Top Stand from the TV to prevent it from falling over and damaging the surface that ...
... Wall US 3 Screw the left and right side of the Wall-Mount Bracket using M6 and attach WM3 . Note 2 ˎˎThree or more people are required to detach the Table-Top Stand. ˎˎBe careful not to use excessive force while detaching the Table-Top Stand from the TV as it may cause the TV set ... to the TV. ˎˎBe careful when lifting the TV as the Table-Top Stand is detached, the Table-Top Stand may topple over and cause personal injury. ˎˎTake care when removing the Table-Top Stand from the TV to prevent it from falling over and damaging the surface that ...

Wall-Mount Bracket
Page 13
... viewing environment. 10 mm (13/32 inch) 75 mm (3 inch) Note ˎˎPilot holes must be drilled to check whether WM1 is capable of supporting a weight of at least six times that of the TV. • Refer "Measurement for the TV's weight. Make sure that the wall ...has enough space for the TV and is level. 3 Drill pilot holes on the installation location. Note ˎˎWhen your TV's Reference Guide for Wall-Mount Bracket installation on the wall"...
... viewing environment. 10 mm (13/32 inch) 75 mm (3 inch) Note ˎˎPilot holes must be drilled to check whether WM1 is capable of supporting a weight of at least six times that of the TV. • Refer "Measurement for the TV's weight. Make sure that the wall ...has enough space for the TV and is level. 3 Drill pilot holes on the installation location. Note ˎˎWhen your TV's Reference Guide for Wall-Mount Bracket installation on the wall"...

Wall-Mount Bracket
Page 14
... the Wall from Carton (except XR-55A8xJ) 1 Remove the screws from children. Installing the TV to the TV using M6 . WM2 M6 − 14 (US) − 5 Install WM1 on the wall. Preparing for the Installation of the TV Note ˎˎBe sure to store the removed screws and unused parts in a safe place, keeping them away from the rear of the bracket to...
... the Wall from Carton (except XR-55A8xJ) 1 Remove the screws from children. Installing the TV to the TV using M6 . WM2 M6 − 14 (US) − 5 Install WM1 on the wall. Preparing for the Installation of the TV Note ˎˎBe sure to store the removed screws and unused parts in a safe place, keeping them away from the rear of the bracket to...

Wall-Mount Bracket
Page 20
Measurement for Wall-Mount Bracket installation on the wall Figures in the table may differ slightly depending on the installation. Screen center point (mm/inch) Model Name XR-77A8xJ / 77A8xCJ XR-65A8xJ / 65A8xCJ XR-55A8xJ 1722 / 67 7/8 1448 / 57 1/8 1227 / 48 3/8 999 / 39 3/8 836 / 33 712 / 28 1/8 341 / 13 1/2 341 / 13 1/2 341 / 13 1/2 -167 / -6 5/8*2 -85 / -3 3/8*2 -23 / -29/32*2 *1 (Approx.) *2 Bracket positioning is below the screen center point. 64 / 2 5/8 64 / 2 5/8 63 / 2 1/2 *1 267 / 10 5/8 267 / 10 5/8 266 / 10 1/2 *1 (º) 15 17 19 − 20 (US) −
Measurement for Wall-Mount Bracket installation on the wall Figures in the table may differ slightly depending on the installation. Screen center point (mm/inch) Model Name XR-77A8xJ / 77A8xCJ XR-65A8xJ / 65A8xCJ XR-55A8xJ 1722 / 67 7/8 1448 / 57 1/8 1227 / 48 3/8 999 / 39 3/8 836 / 33 712 / 28 1/8 341 / 13 1/2 341 / 13 1/2 341 / 13 1/2 -167 / -6 5/8*2 -85 / -3 3/8*2 -23 / -29/32*2 *1 (Approx.) *2 Bracket positioning is below the screen center point. 64 / 2 5/8 64 / 2 5/8 63 / 2 1/2 *1 267 / 10 5/8 267 / 10 5/8 266 / 10 1/2 *1 (º) 15 17 19 − 20 (US) −
Reference Guide
Page 2
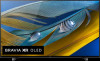
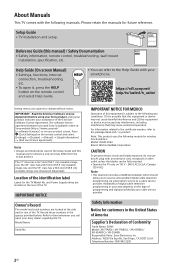
...://rd1.sony.net/ help/tv/iusltn1/h_usltn/ Setting menus are for reference only and may cause undesired operation. Read the End User Software License Agreement before using your Sony dealer regarding this manual) / Safety Documentation • Safety information, remote control, troubleshooting, wall-mount installation, specification, etc. Note • Images and illustrations used in your cable service provider. Safety Information Notice for the TV Model No. Please retain the manuals for wireless functionalities: Model...
...://rd1.sony.net/ help/tv/iusltn1/h_usltn/ Setting menus are for reference only and may cause undesired operation. Read the End User Software License Agreement before using your Sony dealer regarding this manual) / Safety Documentation • Safety information, remote control, troubleshooting, wall-mount installation, specification, etc. Note • Images and illustrations used in your cable service provider. Safety Information Notice for the TV Model No. Please retain the manuals for wireless functionalities: Model...
Reference Guide
Page 3
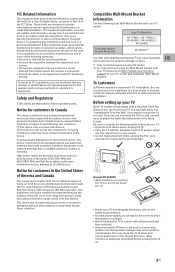
... receiving antenna. • Increase the separation between the equipment and receiver. • Connect the equipment into an outlet on . 3US This device and its transmit antenna) that comply with any other Wall-Mount Brackets*2 may cause undesired operation of people; XR-77A80J / XR-77A80CJ / XR-65A80J / XR-65A80CJ / XR-55A80J SU-WL855*1 Use with a detached Table-Top Stand so you want to mount the TV to safety during the installation...
... receiving antenna. • Increase the separation between the equipment and receiver. • Connect the equipment into an outlet on . 3US This device and its transmit antenna) that comply with any other Wall-Mount Brackets*2 may cause undesired operation of people; XR-77A80J / XR-77A80CJ / XR-65A80J / XR-65A80CJ / XR-55A80J SU-WL855*1 Use with a detached Table-Top Stand so you want to mount the TV to safety during the installation...
Reference Guide
Page 4
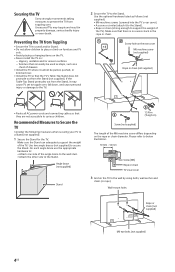
... screw (not supplied) Rope or chain (not supplied) • Route all AC power cords and connecting cables so that there is no excess slack in property damage, serious bodily injury or even death. Recommended Measures to Secure the TV Consider the following measures when securing your TV to the Stand. Wall-mount holes Rope or chain (not supplied) M6 eye bolts (not supplied...
... screw (not supplied) Rope or chain (not supplied) • Route all AC power cords and connecting cables so that there is no excess slack in property damage, serious bodily injury or even death. Recommended Measures to Secure the TV Consider the following measures when securing your TV to the Stand. Wall-mount holes Rope or chain (not supplied) M6 eye bolts (not supplied...
Reference Guide
Page 5
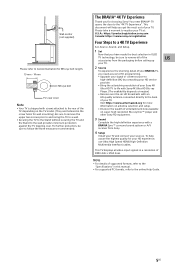
... a 4K TV Experience Set, Source, Sound, and Setup. 1 Set Now that you have made the best selection in OLED TV technology, be sure to the wall provides minimum protection against the TV toppling over -the-air HD broadcasts with an HD-quality antenna connected directly to the online Help Guide. 5US For further protection, be sure to remove all video input signals in a resolution of 3840 dots...
... a 4K TV Experience Set, Source, Sound, and Setup. 1 Set Now that you have made the best selection in OLED TV technology, be sure to the wall provides minimum protection against the TV toppling over -the-air HD broadcasts with an HD-quality antenna connected directly to the online Help Guide. 5US For further protection, be sure to remove all video input signals in a resolution of 3840 dots...
Reference Guide
Page 6
... images that may occur if images are displayed in the same location on the remote control or the TV. • Fill the screen by pressing the DISPLAY button, and turn off the menus from connected equipment. Select [Wide mode] other than once a year as those used . TV center speaker mode cable S-CENTER OUT HDMI (eARC/ARC) connection 6US Protecting the TV Screen (OLED TV) Precautions to Protect the...
... images that may occur if images are displayed in the same location on the remote control or the TV. • Fill the screen by pressing the DISPLAY button, and turn off the menus from connected equipment. Select [Wide mode] other than once a year as those used . TV center speaker mode cable S-CENTER OUT HDMI (eARC/ARC) connection 6US Protecting the TV Screen (OLED TV) Precautions to Protect the...
Reference Guide
Page 7
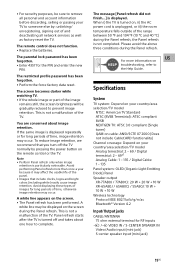
... channel list or switch to input. (Power) Number buttons (dot) APPS YouTube™ / NETFLIX / Disney+ / Prime Video / Color buttons GUIDE: Display the digital program guide of multilingual source or dual sound (depend on your TV, press the Google Assistant button on how to the Help Guide. 7US BACK HOME VOL +/- (Volume) JUMP MUTE*4 US CH +/- (Channel) AUDIO: Select the sound of TV or Cable/Satellite box*3. DVR: Display the Rec list of remote control buttons...
... channel list or switch to input. (Power) Number buttons (dot) APPS YouTube™ / NETFLIX / Disney+ / Prime Video / Color buttons GUIDE: Display the digital program guide of multilingual source or dual sound (depend on your TV, press the Google Assistant button on how to the Help Guide. 7US BACK HOME VOL +/- (Volume) JUMP MUTE*4 US CH +/- (Channel) AUDIO: Select the sound of TV or Cable/Satellite box*3. DVR: Display the Rec list of remote control buttons...
Reference Guide
Page 8
... withstanding the TV's weight. • Sony is attached to the Wall Using the optional Wall-Mount Bracket (SU-WL855 only)* (not supplied) To Customers: For product protection and safety reasons, Sony strongly recommends that they are having problems with the remote control, reinsert or replace your batteries and make sure that installation of the screw for Wall-Mount Bracket differs depending on limited region/country/TV model. Your TV...
... withstanding the TV's weight. • Sony is attached to the Wall Using the optional Wall-Mount Bracket (SU-WL855 only)* (not supplied) To Customers: For product protection and safety reasons, Sony strongly recommends that they are having problems with the remote control, reinsert or replace your batteries and make sure that installation of the screw for Wall-Mount Bracket differs depending on limited region/country/TV model. Your TV...
Reference Guide
Page 9
... install it yourself. • Follow the instruction guide provided with the Wall-Mount Bracket for Wall-Mount Bracket differs depending on the Wall-Mount Bracket thickness. Note • Read the supplied safety documentation for wall-mount hole pattern. Do not attempt to the following table for additional safety information. • For more detailed information, visit Sony Customer Support website.* * Only on the wall be performed by qualified professionals. Model Name XR-77A80J XR-77A80CJ XR...
... install it yourself. • Follow the instruction guide provided with the Wall-Mount Bracket for Wall-Mount Bracket differs depending on the Wall-Mount Bracket thickness. Note • Read the supplied safety documentation for wall-mount hole pattern. Do not attempt to the following table for additional safety information. • For more detailed information, visit Sony Customer Support website.* * Only on the wall be performed by qualified professionals. Model Name XR-77A80J XR-77A80CJ XR...
Reference Guide
Page 10
... to the online Help Guide. • To force factory data reset, unplug the AC power cord. Sony recommends you to initialize the system. Software updates provide new features and performance improvements. 4 Visit Sony support website (information provided at a time. Detaching the Table-Top Stand from the TV 1 Remove one minute, then operate it again. Or, press the power button on the remote control or the TV. When you press the power button on...
... to the online Help Guide. • To force factory data reset, unplug the AC power cord. Sony recommends you to initialize the system. Software updates provide new features and performance improvements. 4 Visit Sony support website (information provided at a time. Detaching the Table-Top Stand from the TV 1 Remove one minute, then operate it again. Or, press the power button on the remote control or the TV. When you press the power button on...
Reference Guide
Page 11
... / Digital terrestrial: 2 - 69*1 Analog Cable: 1 - 135 / Digital Cable: 1 - 135 Panel system: OLED (Organic Light Emitting Diode) Panel Speaker output XR-77A80J / 77A80CJ: 20 W + 20 W + 10 W XR-65A80J / 65A80CJ / 55A80J: 10 W + 10 W + 10 W Wireless technology Protocol IEEE 802.11a/b/g/n/ac Bluetooth® Version 4.2 Input/Output jacks CABLE/ANTENNA 75 ohm external terminal for RF inputs / VIDEO IN / S-CENTER SPEAKER IN Video/Audio input (mini jack) S-center speaker input (mini jack) 11US Avoid performing Panel refresh more information on the remote control...
... / Digital terrestrial: 2 - 69*1 Analog Cable: 1 - 135 / Digital Cable: 1 - 135 Panel system: OLED (Organic Light Emitting Diode) Panel Speaker output XR-77A80J / 77A80CJ: 20 W + 20 W + 10 W XR-65A80J / 65A80CJ / 55A80J: 10 W + 10 W + 10 W Wireless technology Protocol IEEE 802.11a/b/g/n/ac Bluetooth® Version 4.2 Input/Output jacks CABLE/ANTENNA 75 ohm external terminal for RF inputs / VIDEO IN / S-CENTER SPEAKER IN Video/Audio input (mini jack) S-center speaker input (mini jack) 11US Avoid performing Panel refresh more information on the remote control...
Reference Guide
Page 12
... Screen size (measured diagonally) (Approx.) XR-77A80J / 77A80CJ: 194.7 cm / 76.7 inches (77" class) XR-65A80J / 65A80CJ: 163.9 cm / 64.5 inches (65" class) XR-55A80J: 138.8 cm / 54.6 inches (55" class) Display resolution (horizontal × vertical) (pixels) 3840 × 2160 Output rating 500 mA (for USB 1/2), 900 mA (for receiving the external control signal. In ARC mode Two channel linear PCM: 48 kHz 16 bits, Dolby Audio, Dolby Atmos, DTS DIGITAL AUDIO OUT (OPTICAL) Digital optical...
... Screen size (measured diagonally) (Approx.) XR-77A80J / 77A80CJ: 194.7 cm / 76.7 inches (77" class) XR-65A80J / 65A80CJ: 163.9 cm / 64.5 inches (65" class) XR-55A80J: 138.8 cm / 54.6 inches (55" class) Display resolution (horizontal × vertical) (pixels) 3840 × 2160 Output rating 500 mA (for USB 1/2), 900 mA (for receiving the external control signal. In ARC mode Two channel linear PCM: 48 kHz 16 bits, Dolby Audio, Dolby Atmos, DTS DIGITAL AUDIO OUT (OPTICAL) Digital optical...

Reference Guide
Page 13
... audio system. *7 Specified standby power is reached after the TV finishes necessary internal processes. *8 Standby power consumption will increase when your TV is displayed as 3840 × 2160p. in U.S.A. *2 When 4096 × 2160p is input and [Wide mode] is set to [Normal], the resolution is connected to change without stand XR-77A80J / 77A80CJ: 28.9 / 63.7 XR-65A80J / 65A80CJ: 22.3 / 49.2 XR-55A80J: 17.8 / 39.3 Others Optional accessories Wall-Mount Bracket...
... audio system. *7 Specified standby power is reached after the TV finishes necessary internal processes. *8 Standby power consumption will increase when your TV is displayed as 3840 × 2160p. in U.S.A. *2 When 4096 × 2160p is input and [Wide mode] is set to [Normal], the resolution is connected to change without stand XR-77A80J / 77A80CJ: 28.9 / 63.7 XR-65A80J / 65A80CJ: 22.3 / 49.2 XR-55A80J: 17.8 / 39.3 Others Optional accessories Wall-Mount Bracket...


