
Operating Instructions
Page 6
...thinner. • Clean the filter at regular intervals. On LCD data projector • The LCD data projector is in a room where floor and walls are of reflecting material, it with a soft cloth. Adjust the powered tilt adjuster carefully after its automatic operation is recommended. Stubborn stains ...the screen with ventilation holes (intake) and ventilation holes (exhaust). Caution The projector is equipped with opaque draperies. • It is recommended that continuously appear on the LCD data projector. On cleaning • To keep the cabinet looking new, periodically clean it...
...thinner. • Clean the filter at regular intervals. On LCD data projector • The LCD data projector is in a room where floor and walls are of reflecting material, it with a soft cloth. Adjust the powered tilt adjuster carefully after its automatic operation is recommended. Stubborn stains ...the screen with ventilation holes (intake) and ventilation holes (exhaust). Caution The projector is equipped with opaque draperies. • It is recommended that continuously appear on the LCD data projector. On cleaning • To keep the cabinet looking new, periodically clean it...

Operating Instructions
Page 7
... over on its side. The dust blocking the air through the filter may cause malfunction. Highly heated and humid Unsuitable Conditions Do not use the projector under the following situations. Avoid using as a piece of more than 30 cm (11 7/8 inches) around the unit. • Be careful that may block ... surfaces (rugs, blankets, etc.) or near materials (curtains, draperies) that the ventilation holes may rise rapidly. Toppling the unit Avoid using when the unit is tilted out of the range of the projector. It may cause raising the internal heat of the adjuster setting.
... over on its side. The dust blocking the air through the filter may cause malfunction. Highly heated and humid Unsuitable Conditions Do not use the projector under the following situations. Avoid using as a piece of more than 30 cm (11 7/8 inches) around the unit. • Be careful that may block ... surfaces (rugs, blankets, etc.) or near materials (curtains, draperies) that the ventilation holes may rise rapidly. Toppling the unit Avoid using when the unit is tilted out of the range of the projector. It may cause raising the internal heat of the adjuster setting.

Operating Instructions
Page 8
...; Compatible with a short focus lens that converts the input signal within 1024 × 768 dots (VPL-CX6/EX1) or 800 × 600 dots (VPL-CS6) . • Compatible input signals Notes This projector accepts video signals of • The unit is manufactured using something to cover over the ventilation holes (exhaust/intake... on a NTSC4.43 system VCR. 8 GB Features Tilting the unit to the right or left Avoid tilting the unit to an angle of 15°, and avoid installing the unit in High Altitude • When using the projector at high altitudes could have adverse effects, such as ...
...; Compatible with a short focus lens that converts the input signal within 1024 × 768 dots (VPL-CX6/EX1) or 800 × 600 dots (VPL-CS6) . • Compatible input signals Notes This projector accepts video signals of • The unit is manufactured using something to cover over the ventilation holes (exhaust/intake... on a NTSC4.43 system VCR. 8 GB Features Tilting the unit to the right or left Avoid tilting the unit to an angle of 15°, and avoid installing the unit in High Altitude • When using the projector at high altitudes could have adverse effects, such as ...

Operating Instructions
Page 10
... is turned off the power" on . - During this time, you press the key, the input signal switches as follows: INPUT A t MS t VIDEO t S VIDEO (VPL-CX6 only) 5 Lens protector (lens cover) The lens protector automatically opens when the power is turned on. 6 Front remote control detector 7 Ventilation holes... (exhaust) 10 GB Location and Function of Controls Top/Front/Left Side TILT Rear/Right Side/Bottom 1 I / 1 (on/standby) key Turns on the projector when the projector is in green when the power is turned off the power, press the I / 1 key. The ...
... is turned off the power" on . - During this time, you press the key, the input signal switches as follows: INPUT A t MS t VIDEO t S VIDEO (VPL-CX6 only) 5 Lens protector (lens cover) The lens protector automatically opens when the power is turned on. 6 Front remote control detector 7 Ventilation holes... (exhaust) 10 GB Location and Function of Controls Top/Front/Left Side TILT Rear/Right Side/Bottom 1 I / 1 (on/standby) key Turns on the projector when the projector is in green when the power is turned off the power, press the I / 1 key. The ...

Operating Instructions
Page 11
...remote control detector 0 Ventilation holes (intake) qa Ventilation holes (intake)/Lamp cover qs Powered tilt adjuster qd Adjuster (hind pad) Turn the adjuster to the right or left for minor tilt adjustment of the projector as it may cause the air coming out heat buildup. • To maintain optimal ... near the ventilation holes as it may press the KEYSTONE key (VPL-CS6/CX6) or the D KEYSTONE key (VPL-EX1) on the Remote Commander to adjust the tilt of the TILT key to display the Tilt menu and adjust the tilt using the M/m/ The adjuster stops at its previously adjusted position. ...
...remote control detector 0 Ventilation holes (intake) qa Ventilation holes (intake)/Lamp cover qs Powered tilt adjuster qd Adjuster (hind pad) Turn the adjuster to the right or left for minor tilt adjustment of the projector as it may cause the air coming out heat buildup. • To maintain optimal ... near the ventilation holes as it may press the KEYSTONE key (VPL-CS6/CX6) or the D KEYSTONE key (VPL-EX1) on the Remote Commander to adjust the tilt of the TILT key to display the Tilt menu and adjust the tilt using the M/m/ The adjuster stops at its previously adjusted position. ...

Operating Instructions
Page 14
...details, see "To connect an IBM PC/ AT compatible computer" on page 19". 7 RESET key Resets the value of a computer only when the projector is displayed on the screen. +: Pressing the + key once displays the icon. This icon indicates the point you want to the computer using the ...; You can open a file on the screen by just pressing the FUNCTION key. Note Connect a computer to the projector using the supplied Remote Commander" on page 26. 6 FUNCTION 1, 2 keys (VPL-CX6 only) When you adjust the picture manually. 3 PIC MUTING key Used to activate the FUNCTION keys. Use an arrow ...
...details, see "To connect an IBM PC/ AT compatible computer" on page 19". 7 RESET key Resets the value of a computer only when the projector is displayed on the screen. +: Pressing the + key once displays the icon. This icon indicates the point you want to the computer using the ...; You can open a file on the screen by just pressing the FUNCTION key. Note Connect a computer to the projector using the supplied Remote Commander" on page 26. 6 FUNCTION 1, 2 keys (VPL-CX6 only) When you adjust the picture manually. 3 PIC MUTING key Used to activate the FUNCTION keys. Use an arrow ...

Operating Instructions
Page 15
Overview To install batteries 1 Push and slide to install the battery from the # side. 2 Replace the lid. For VPL-EX1 1 I / 1 (on/standby) key 2 ENTER/arrow key (M/m/ While pressing the lid, slide it. Be sure to open the lid, then install the two size AA (R6) batteries (supplied) with the correct polarity.
Overview To install batteries 1 Push and slide to install the battery from the # side. 2 Replace the lid. For VPL-EX1 1 I / 1 (on/standby) key 2 ENTER/arrow key (M/m/ While pressing the lid, slide it. Be sure to open the lid, then install the two size AA (R6) batteries (supplied) with the correct polarity.

Operating Instructions
Page 24
... protector opens, and the powered tilt adjuster rises and stops at the previously adjusted position. The ON/STANDBY indicator lights in red and the projector goes into standby mode. 2 Press the I / 1 KEYSTONE INPUT APA MENU PIC ENTER MUTING For VPL-CS6/CX6 For VPL-EX1 1 Open the connector panel..., plug the AC power cord into a wall outlet, then connect all -inone LCD type, you may have to switch the computer to output to the projector by pressing certain keys (e.g., / LCD VGA , / , etc.), or by...
... protector opens, and the powered tilt adjuster rises and stops at the previously adjusted position. The ON/STANDBY indicator lights in red and the projector goes into standby mode. 2 Press the I / 1 KEYSTONE INPUT APA MENU PIC ENTER MUTING For VPL-CS6/CX6 For VPL-EX1 1 Open the connector panel..., plug the AC power cord into a wall outlet, then connect all -inone LCD type, you may have to switch the computer to output to the projector by pressing certain keys (e.g., / LCD VGA , / , etc.), or by...

Operating Instructions
Page 25
F7 or Fx Fn Setting Up and Projecting 4 Press the INPUT key to "On," the projector searches for the input signal from the connected equipment and displays the input channel where the input signals are found. To input from Press INPUT ... the Remote Commander to the S VIDEO input connector VIDEO S VIDEO Smart APA (Auto Pixel Alignment) adjusts the picture of the picture by pressing the TILT key. Notes • If "Auto Input Search" is projected clearly. To adjust the position of the picture using the Remote Commander, press the KEYSTONE key (VPL-CS6/CX6) or the D KEYSTONE...
F7 or Fx Fn Setting Up and Projecting 4 Press the INPUT key to "On," the projector searches for the input signal from the connected equipment and displays the input channel where the input signals are found. To input from Press INPUT ... the Remote Commander to the S VIDEO input connector VIDEO S VIDEO Smart APA (Auto Pixel Alignment) adjusts the picture of the picture by pressing the TILT key. Notes • If "Auto Input Search" is projected clearly. To adjust the position of the picture using the Remote Commander, press the KEYSTONE key (VPL-CS6/CX6) or the D KEYSTONE...
Operating Instructions
Page 27
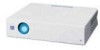
Setting Up and Projecting To Use the security lock 1 Press the MENU key and then, in the INSTALL SETTING menu, turn on the "Security Lock" setting. 2 Enter the password. Use the MENU, M/m/
Setting Up and Projecting To Use the security lock 1 Press the MENU key and then, in the INSTALL SETTING menu, turn on the "Security Lock" setting. 2 Enter the password. Use the MENU, M/m/
Operating Instructions
Page 28
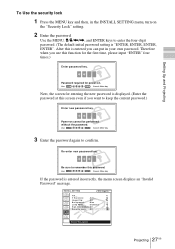
... will not be used. Notes • You will not be set to on the next time. The screen for security lock is completed. INSTALL SETTING X Tilt... Be please aware that you make a note of the selected password. • If you fail to enter the correct password after three tries, the... be able to turn off and disconnect the AC power cord. In this case, press the I / 1 key to use the projector if you forget your password and the password administrator is not available. The security lock is set if the correct password is not entered in ...
... will not be used. Notes • You will not be set to on the next time. The screen for security lock is completed. INSTALL SETTING X Tilt... Be please aware that you make a note of the selected password. • If you fail to enter the correct password after three tries, the... be able to turn off and disconnect the AC power cord. In this case, press the I / 1 key to use the projector if you forget your password and the password administrator is not available. The security lock is set if the correct password is not entered in ...
Operating Instructions
Page 29
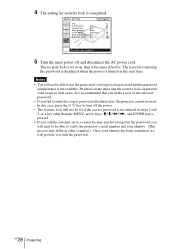
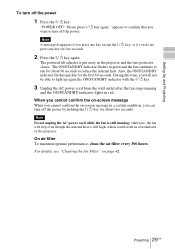
... ON/STANDBY indicator flashes in a certain condition, you will stop even though the internal heat is still high, which could result in a breakdown of the projector. During this time, you can turn off the power. Note Do not unplug the AC power cord while the fan is put away in red...-screen message When you do not press any key for the first 60 seconds. Projecting 29 GB The powered tilt adjuster is still running and the ON/STANDBY indicator lights in the projector and the lens protector closes. Setting Up and Projecting To turn off the power 1 Press the I / 1 key. 3 Unplug the...
... ON/STANDBY indicator flashes in a certain condition, you will stop even though the internal heat is still high, which could result in a breakdown of the projector. During this time, you can turn off the power. Note Do not unplug the AC power cord while the fan is put away in red...-screen message When you do not press any key for the first 60 seconds. Projecting 29 GB The powered tilt adjuster is still running and the ON/STANDBY indicator lights in the projector and the lens protector closes. Setting Up and Projecting To turn off the power 1 Press the I / 1 key. 3 Unplug the...

Operating Instructions
Page 39
... Mode: Standard High Altitude Mode: Off Security Lock: Off Input A Menu Items Tilt... V Keystone Corrects the trapezoidal distortion caused by the projection angle. On: Use this setting when using the projector at normal altitudes. Adjusts the position (height) of the trapezoid is longer than ... horizontally and/or vertically. H: Flips the image horizontally. Image Flip Flips the image on the Remote Commander, the more the projector tilts and the higher the position of the projected image will be lower compared with "Standard" setting. Lamp Mode Sets the lamp...
... Mode: Standard High Altitude Mode: Off Security Lock: Off Input A Menu Items Tilt... V Keystone Corrects the trapezoidal distortion caused by the projection angle. On: Use this setting when using the projector at normal altitudes. Adjusts the position (height) of the trapezoid is longer than ... horizontally and/or vertically. H: Flips the image horizontally. Image Flip Flips the image on the Remote Commander, the more the projector tilts and the higher the position of the projected image will be lower compared with "Standard" setting. Lamp Mode Sets the lamp...

Operating Instructions
Page 41
... the lamp breaks, the pieces may scald your finger. Turn the projector over . 2 Open the lamp cover by loosening a screw with the Phillips screwdriver (supplied with the Projector Lamp). Bottom Screws on the lamp unit with qualified Sony personnel. • Pull out the lamp by the handle. When... hour for the lamp to cool. appears on the screen • The LAMP/COVER indicator lights up . Do not tilt the lamp. When replacing the lamp after turning off the projector, then unplug the power cord. If you touch the lamp, you may scatter, causing injury. 1 Place a protective...
... the lamp breaks, the pieces may scald your finger. Turn the projector over . 2 Open the lamp cover by loosening a screw with the Phillips screwdriver (supplied with the Projector Lamp). Bottom Screws on the lamp unit with qualified Sony personnel. • Pull out the lamp by the handle. When... hour for the lamp to cool. appears on the screen • The LAMP/COVER indicator lights up . Do not tilt the lamp. When replacing the lamp after turning off the projector, then unplug the power cord. If you touch the lamp, you may scatter, causing injury. 1 Place a protective...

Operating Instructions
Page 44
...8226; The electrical system breaks down . The powered tilt adjuster and the lens protector do not work at a short interval. The powered tilt adjuster and the lens protector do not close. •...and TEMP/FAN indicators c Consult with qualified Sony personnel. c Connect the power cord plug to the AC outlet again, then turn off and on the LCD panel. Cause and Remedy • Cable ... cover securely (see page 29). • The lamp cover is detached. Troubleshooting If the projector appears to be operating erratically, try to diagnose and correct the problem using the INPUT key ...
...8226; The electrical system breaks down . The powered tilt adjuster and the lens protector do not work at a short interval. The powered tilt adjuster and the lens protector do not close. •...and TEMP/FAN indicators c Consult with qualified Sony personnel. c Connect the power cord plug to the AC outlet again, then turn off and on the LCD panel. Cause and Remedy • Cable ... cover securely (see page 29). • The lamp cover is detached. Troubleshooting If the projector appears to be operating erratically, try to diagnose and correct the problem using the INPUT key ...

Operating Instructions
Page 48
..., turn the groove counterclockwise (in the emergency mode, consult with qualified Sony personnel immediately. Note Perform this procedure. You cannot recover the powered function yourself if you use the projector in direction of the arrow). The lens protector and the tilt adjuster are switched to the emergency mode, follow the steps below. 1 Place...
..., turn the groove counterclockwise (in the emergency mode, consult with qualified Sony personnel immediately. Note Perform this procedure. You cannot recover the powered function yourself if you use the projector in direction of the arrow). The lens protector and the tilt adjuster are switched to the emergency mode, follow the steps below. 1 Place...
Operating Instructions
Page 54
...38 Message caution 47 warning 46 O Optional accessories ...... 50 P Picture Mode 34 Pin assignment 51 Power turn on 24 Power Saving 12, 38 Powered tilt adjuster ...... 11 Precautions 6 R Remote Commander 13, 15 location and function of controls ......... 13, 15 Remote control detector front 10 rear 11 Reset ... SET SETTING menu ..... 37 Sharpness 35 Shift 36 Smart APA 37 Specifications 49 Startup screen 24 Status 38 Supplied accessories ...... 50 T Tilt 39 Troubleshooting 44 U USB connector 19 V V Keystone 39 Ventilation holes intake 11 Volume 34 W Wide Mode 35 GB 54 Index
...38 Message caution 47 warning 46 O Optional accessories ...... 50 P Picture Mode 34 Pin assignment 51 Power turn on 24 Power Saving 12, 38 Powered tilt adjuster ...... 11 Precautions 6 R Remote Commander 13, 15 location and function of controls ......... 13, 15 Remote control detector front 10 rear 11 Reset ... SET SETTING menu ..... 37 Sharpness 35 Shift 36 Smart APA 37 Specifications 49 Startup screen 24 Status 38 Supplied accessories ...... 50 T Tilt 39 Troubleshooting 44 U USB connector 19 V V Keystone 39 Ventilation holes intake 11 Volume 34 W Wide Mode 35 GB 54 Index