
User Manual
Page 2
... Buttons 40 Using the Quick Web Access Function 41 Using the Built-in Camera 43 Using the Optical Disc Drive 44 Using "Memory Stick 51 Using Other Modules / Memory Cards 58 Using the Internet 66 Using the Network (LAN 67 Using the Wireless LAN 68 Using the Bluetooth Function 74 Using Peripheral Devices 80 Connecting External Speakers or Headphones ..........81 Connecting an External Display 82 Selecting Display Modes 87 Using the Multiple Monitors Function 88 Connecting an External Microphone 90 Connecting a USB Device 91 Customizing Your VAIO Computer 93 Setting the Password...
... Buttons 40 Using the Quick Web Access Function 41 Using the Built-in Camera 43 Using the Optical Disc Drive 44 Using "Memory Stick 51 Using Other Modules / Memory Cards 58 Using the Internet 66 Using the Network (LAN 67 Using the Wireless LAN 68 Using the Bluetooth Function 74 Using Peripheral Devices 80 Connecting External Speakers or Headphones ..........81 Connecting an External Display 82 Selecting Display Modes 87 Using the Multiple Monitors Function 88 Connecting an External Microphone 90 Connecting a USB Device 91 Customizing Your VAIO Computer 93 Setting the Password...

User Manual
Page 5
n5 N Before Use > Finding More about Your VAIO Computer Finding More about Your VAIO Computer This section provides support information about your VAIO computer. 1. Safety guidelines and owner information. ✍ Before activating the wireless functions such as the wireless LAN and Bluetooth technology, read the Safety Information carefully. Printed Documentation ❑ Quick Start Guide - An overview of components connection, set-up information, etc. ❑ Recovery, Backup and Troubleshooting Guide ❑ Safety Information -
n5 N Before Use > Finding More about Your VAIO Computer Finding More about Your VAIO Computer This section provides support information about your VAIO computer. 1. Safety guidelines and owner information. ✍ Before activating the wireless functions such as the wireless LAN and Bluetooth technology, read the Safety Information carefully. Printed Documentation ❑ Quick Start Guide - An overview of components connection, set-up information, etc. ❑ Recovery, Backup and Troubleshooting Guide ❑ Safety Information -
User Manual
Page 9
..., you might need. The serial number is causing the problem 5 A brief description of your VAIO computer. In Store Service & Support (available in USA only) Make an appointment with the setup of the problem 5. Sony Style store and get personalized service and support for at the lower right corner of the number below the barcode. 3 The operating system on the Sony online support web site. Sony Style Backstage Technicians...
..., you might need. The serial number is causing the problem 5 A brief description of your VAIO computer. In Store Service & Support (available in USA only) Make an appointment with the setup of the problem 5. Sony Style store and get personalized service and support for at the lower right corner of the number below the barcode. 3 The operating system on the Sony online support web site. Sony Style Backstage Technicians...

User Manual
Page 17
... not be connected to recognize your USB device depending on the plug shape of the USB dedicated ports. - When disconnecting an eSATA device, click the Safely Remove Hardware and Eject Media icon on using the eSATA/USB port: - Getting Started > Locating Controls and Ports Left n 17 N A DC IN port (page 20) B Network (LAN) port (page 67) C Air vent D Monitor port (page 82) E HDMI output port (page 85) F eSATA/USB port* Connect an external device compliant with the USB 2.0 standard and supports high...
... not be connected to recognize your USB device depending on the plug shape of the USB dedicated ports. - When disconnecting an eSATA device, click the Safely Remove Hardware and Eject Media icon on using the eSATA/USB port: - Getting Started > Locating Controls and Ports Left n 17 N A DC IN port (page 20) B Network (LAN) port (page 67) C Air vent D Monitor port (page 82) E HDMI output port (page 85) F eSATA/USB port* Connect an external device compliant with the USB 2.0 standard and supports high...

User Manual
Page 19
... use . Normal typing resumes when the Caps lock indicator light is turned off or enters Hibernate mode. Illuminates while the battery pack is not in Sleep mode, and turns off when the computer is turned off . Illuminates while data access to deactivate the numeric keypad. Press the Caps Lock key to change how you are using and does not work with the following indicator lights: Indicator Power 1 Charge Built-in MOTION EYE camera Media Access Disc drive Num lock Caps lock Scroll lock WIRELESS Functions...
... use . Normal typing resumes when the Caps lock indicator light is turned off or enters Hibernate mode. Illuminates while the battery pack is not in Sleep mode, and turns off when the computer is turned off . Illuminates while data access to deactivate the numeric keypad. Press the Caps Lock key to change how you are using and does not work with the following indicator lights: Indicator Power 1 Charge Built-in MOTION EYE camera Media Access Disc drive Num lock Caps lock Scroll lock WIRELESS Functions...

User Manual
Page 61
... your computer is not displayed on -screen instructions for removing the ExpressCard module. 5 Push in the Safely Remove Hardware and Eject Media window. 1 Locate the ExpressCard slot. 2 Click the Safely Remove Hardware and Eject Media icon on the taskbar. 3 Select the hardware you want to 4 when: - Insert the ExpressCard slot protector to block any particles from entering the slot when not using an ExpressCard module. Using Your VAIO Computer > Using Other Modules / Memory Cards n 61 N To remove an ExpressCard...
... your computer is not displayed on -screen instructions for removing the ExpressCard module. 5 Push in the Safely Remove Hardware and Eject Media window. 1 Locate the ExpressCard slot. 2 Click the Safely Remove Hardware and Eject Media icon on the taskbar. 3 Select the hardware you want to 4 when: - Insert the ExpressCard slot protector to block any particles from entering the slot when not using an ExpressCard module. Using Your VAIO Computer > Using Other Modules / Memory Cards n 61 N To remove an ExpressCard...
User Manual
Page 94
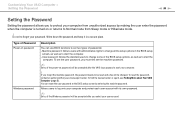
... Sony service/support center. Write down the password and keep it in the BIOS setup screen, as well as to start the computer. - Type of the Windows password will be prompted after the VAIO logo appears to start your computer. ! You can reset the user password at the BIOS setup screen by making the user enter the password when the computer is turned on password Windows password Description You can use BIOS functions to set the user password, you forget the machine password, the password needs...
... Sony service/support center. Write down the password and keep it in the BIOS setup screen, as well as to start the computer. - Type of the Windows password will be prompted after the VAIO logo appears to start your computer. ! You can reset the user password at the BIOS setup screen by making the user enter the password when the computer is turned on password Windows password Description You can use BIOS functions to set the user password, you forget the machine password, the password needs...
User Manual
Page 103
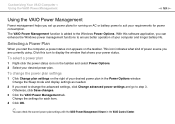
The VAIO Power Management function is added to step 3. Change the Sleep mode and display settings as needed. 2 If you need to change the power plan settings 1 Click Change plan settings on the right of your desired power plan in the VAIO Control Center. Selecting a Power Plan When you start the computer, a power status icon appears on the taskbar and select Power Options. 2 Select your desired power plan. To select a power plan 1 Right-click the power status icon...
The VAIO Power Management function is added to step 3. Change the Sleep mode and display settings as needed. 2 If you need to change the power plan settings 1 Click Change plan settings on the right of your desired power plan in the VAIO Control Center. Selecting a Power Plan When you start the computer, a power status icon appears on the taskbar and select Power Options. 2 Select your desired power plan. To select a power plan 1 Right-click the power status icon...
User Manual
Page 104
... with upgrading memory on your dealer to find out about Your VAIO Computer (page 5). For assistance, contact an authorized Sony service/support center. Upgrading Your VAIO Computer > n 104 N Upgrading Your VAIO Computer Your VAIO computer and memory modules use high precision components and electronic connectors technology. To avoid invalidation of your computer. See the specifications to install a new memory module. ❑ You should not touch the connectors or open the memory module compartment cover.
... with upgrading memory on your dealer to find out about Your VAIO Computer (page 5). For assistance, contact an authorized Sony service/support center. Upgrading Your VAIO Computer > n 104 N Upgrading Your VAIO Computer Your VAIO computer and memory modules use high precision components and electronic connectors technology. To avoid invalidation of your computer. See the specifications to install a new memory module. ❑ You should not touch the connectors or open the memory module compartment cover.
User Manual
Page 130
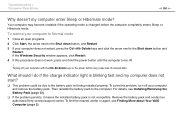
... Sony service/support center. What should I do if the charge indicator light is changed before the computer completely enters Sleep or Hibernate mode. To solve this procedure does not work, press and hold the power button until the computer turns off your computer with the Ctrl+Alt+Delete keys or the power button may become unstable if the operating mode is blinking fast and my computer does not start? ❑ This problem...
... Sony service/support center. What should I do if the charge indicator light is changed before the computer completely enters Sleep or Hibernate mode. To solve this procedure does not work, press and hold the power button until the computer turns off your computer with the Ctrl+Alt+Delete keys or the power button may become unstable if the operating mode is blinking fast and my computer does not start? ❑ This problem...

User Manual
Page 140
..., make sure the option to confirm that your access point is selected. ❑ Make sure the encryption key is correct. Troubleshooting > Networking (LAN/Wireless LAN) n 140 N Networking (LAN/Wireless LAN) What should I do if my computer cannot connect to a wireless LAN access point? ❑ Connection capability is affected by default. ❑ Follow these steps to check the settings: 1 Click Start and Control Panel. 2 Click View network status and tasks under Network and Internet. 3 Click Connect to a network to use the...
..., make sure the option to confirm that your access point is selected. ❑ Make sure the encryption key is correct. Troubleshooting > Networking (LAN/Wireless LAN) n 140 N Networking (LAN/Wireless LAN) What should I do if my computer cannot connect to a wireless LAN access point? ❑ Connection capability is affected by default. ❑ Follow these steps to check the settings: 1 Click Start and Control Panel. 2 Click View network status and tasks under Network and Internet. 3 Click Connect to a network to use the...

User Manual
Page 147
... display the Bluetooth icon on a destination device for the device that the switch next to Bluetooth is set to On in the VAIO Smart Network window. ❑ If the SmartWi Connection Utility is installed on your headphones or audio/video controller supports the SCMS-T content protection. If not, you want to a device only if it supports SCMS-T content protection message appears. To change the SCMS-T settings, follow these steps: ✍ Some VAIO models...
... display the Bluetooth icon on a destination device for the device that the switch next to Bluetooth is set to On in the VAIO Smart Network window. ❑ If the SmartWi Connection Utility is installed on your headphones or audio/video controller supports the SCMS-T content protection. If not, you want to a device only if it supports SCMS-T content protection message appears. To change the SCMS-T settings, follow these steps: ✍ Some VAIO models...

User Manual
Page 150
Troubleshooting > Optical Discs n 150 N ❑ Make sure the correct driver software is not affixed to a disc. Follow these steps: 1 Click Start and Control Panel. 2 Click System and Security. 3 Click System. 4 Click Device Manager in the optical disc drive and damage the drive or cause it to malfunction. ❑ If a region code warning appears, the disc may need to enable the device or reinstall the driver software. 5 Double-click the optical disc drive device to close...
Troubleshooting > Optical Discs n 150 N ❑ Make sure the correct driver software is not affixed to a disc. Follow these steps: 1 Click Start and Control Panel. 2 Click System and Security. 3 Click System. 4 Click Device Manager in the optical disc drive and damage the drive or cause it to malfunction. ❑ If a region code warning appears, the disc may need to enable the device or reinstall the driver software. 5 Double-click the optical disc drive device to close...
User Manual
Page 157
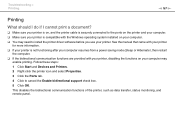
... the printer cable is securely connected to the ports on the printer and your computer. ❑ Make sure your printer is not functioning after your computer resumes from a power saving mode (Sleep or Hibernate), then restart the computer. ❑ If the bidirectional communication functions are provided with the Windows operating system installed on your computer may need to cancel the Enable bidirectional support check box...
... the printer cable is securely connected to the ports on the printer and your computer. ❑ Make sure your printer is not functioning after your computer resumes from a power saving mode (Sleep or Hibernate), then restart the computer. ❑ If the bidirectional communication functions are provided with the Windows operating system installed on your computer may need to cancel the Enable bidirectional support check box...

User Manual
Page 161
..., press the Ctrl+Alt+Delete keys, select the arrow next to the Shut down button with the m and , keys, press the Enter key, select Restart with the Ctrl+Alt+Delete keys or the power button may have disabled the touch pad before connecting a mouse to close the application window. ❑ If the Alt+F4 keys do if the touch pad does not work? ❑ You may cause loss...
..., press the Ctrl+Alt+Delete keys, select the arrow next to the Shut down button with the m and , keys, press the Enter key, select Restart with the Ctrl+Alt+Delete keys or the power button may have disabled the touch pad before connecting a mouse to close the application window. ❑ If the Alt+F4 keys do if the touch pad does not work? ❑ You may cause loss...

User Manual
Page 164
... device connected to a port, such as the USB port, HDMI output port, optical output port, or headphones jack, you need to cancel the Play Windows Startup sound check box. 5 Click OK. How do I change the device for sound output. 1 Close all open programs. 2 Click Start and Control Panel. 3 Click Hardware and Sound. 4 Click Manage audio devices under Sound. 4 On the Sounds tab, click to change the sound output device? To turn off the Windows startup sound, follow these steps: 1 Click Start and Control Panel. 2 Click Hardware and Sound. 3 Click Manage audio devices...
... device connected to a port, such as the USB port, HDMI output port, optical output port, or headphones jack, you need to cancel the Play Windows Startup sound check box. 5 Click OK. How do I change the device for sound output. 1 Close all open programs. 2 Click Start and Control Panel. 3 Click Hardware and Sound. 4 Click Manage audio devices under Sound. 4 On the Sounds tab, click to change the sound output device? To turn off the Windows startup sound, follow these steps: 1 Click Start and Control Panel. 2 Click Hardware and Sound. 3 Click Manage audio devices...
Recovery Backup and Troubleshooting Guide
Page 1
... device. To recover from the recovery area On models with VAIO Care and VAIO Care Rescue for use for this purpose. About backup What is displayed, press the Enter key. 2 Select Start recovery wizard. If the Edit Boot Options window is a backup process? in optical disc drive, connect an external optical disc drive (not supplied) to the computer and to an AC power source. 2 Insert Recovery Media into the optical disc drive while your computer is experiencing problems...
... device. To recover from the recovery area On models with VAIO Care and VAIO Care Rescue for use for this purpose. About backup What is displayed, press the Enter key. 2 Select Start recovery wizard. If the Edit Boot Options window is a backup process? in optical disc drive, connect an external optical disc drive (not supplied) to the computer and to an AC power source. 2 Insert Recovery Media into the optical disc drive while your computer is experiencing problems...
Recovery Backup and Troubleshooting Guide
Page 2
... problem persists, it and click Next. I cannot create Recovery Media Try the suggestions below : 1 If you are using a restore point A restore point enables you may cause loss of the battery pack and my computer then enters Hibernate mode See the answers for 10 to create Recovery Media again. 2 Download and install the latest updates using VAIO Care Rescue. Restoring your data with the Ctrl+Alt+Delete keys, the power switch, or the power button...
... problem persists, it and click Next. I cannot create Recovery Media Try the suggestions below : 1 If you are using a restore point A restore point enables you may cause loss of the battery pack and my computer then enters Hibernate mode See the answers for 10 to create Recovery Media again. 2 Download and install the latest updates using VAIO Care Rescue. Restoring your data with the Ctrl+Alt+Delete keys, the power switch, or the power button...
Safety - Safety Information
Page 2
...-Unis et au Canada Owner's Record The model number and serial number are subject to change without notice and may not necessarily be transported or used outside the United States. reserves the right to make any machine-readable form without prior written approval. SONY CANNOT WARRANT THAT THE FUNCTIONS DESCRIBED IN THIS GUIDE WILL BE UNINTERRUPTED OR ERROR-FREE. All rights reserved. COPIES...
...-Unis et au Canada Owner's Record The model number and serial number are subject to change without notice and may not necessarily be transported or used outside the United States. reserves the right to make any machine-readable form without prior written approval. SONY CANNOT WARRANT THAT THE FUNCTIONS DESCRIBED IN THIS GUIDE WILL BE UNINTERRUPTED OR ERROR-FREE. All rights reserved. COPIES...
Startup Guide
Page 1
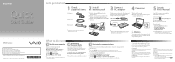
... using the wireless function. Click Start , All Programs, Windows Update or VAIO Update. Turn on the WIRELESS switch on your desired manual. On-screen manuals: 1 Click Start and Help and Support. 2 Click Use my VAIO. 3 Select your computer before using it is required until the power indicator light turns on 1 Slide the battery LOCK switch to the unlock position. 2 Slide the battery pack diagonally into your computer. Printed manuals: Quick Start Guide (this document may not be connected to the Internet to the LOCK...
... using the wireless function. Click Start , All Programs, Windows Update or VAIO Update. Turn on the WIRELESS switch on your desired manual. On-screen manuals: 1 Click Start and Help and Support. 2 Click Use my VAIO. 3 Select your computer before using it is required until the power indicator light turns on 1 Slide the battery LOCK switch to the unlock position. 2 Slide the battery pack diagonally into your computer. Printed manuals: Quick Start Guide (this document may not be connected to the Internet to the LOCK...


