
User Guide
Page 3
... Connecting External Speakers ...114 Connecting an External Display ...115 Selecting Display Modes...124 Using the Multiple Monitors Function ...126 Connecting an External Microphone ...128 Connecting a Universal Serial Bus (USB) Device...129 Connecting a Printer ...132 Connecting an i.LINK Device ...133 Connecting to a Network (LAN) ...135 Customizing Your VAIO Computer ...137 Setting the Password ...138 Setting Up Your Computer with VAIO Central ...141 Using the Power Saving Modes ...142 Managing Power with VAIO Power Management ...146 Upgrading Your VAIO Computer...148 Adding and Removing...
... Connecting External Speakers ...114 Connecting an External Display ...115 Selecting Display Modes...124 Using the Multiple Monitors Function ...126 Connecting an External Microphone ...128 Connecting a Universal Serial Bus (USB) Device...129 Connecting a Printer ...132 Connecting an i.LINK Device ...133 Connecting to a Network (LAN) ...135 Customizing Your VAIO Computer ...137 Setting the Password ...138 Setting Up Your Computer with VAIO Central ...141 Using the Power Saving Modes ...142 Managing Power with VAIO Power Management ...146 Upgrading Your VAIO Computer...148 Adding and Removing...
User Guide
Page 7
... includes information about restoring individual software programs, software drivers, and drive partition(s) or your computer, as well as information on -screen guide: 1 Click Start and Help and Support. 2 Click Manuals & Specifications. 3 Click VAIO Recovery Guide. Provides information about the software programs included with your entire hard disk drive to the Sony online support Web site at: http://esupport.sony.com/EN/VAIO/ for customers in USA, http://www.sony.ca/support for customers in Canada...
... includes information about restoring individual software programs, software drivers, and drive partition(s) or your computer, as well as information on -screen guide: 1 Click Start and Help and Support. 2 Click Manuals & Specifications. 3 Click VAIO Recovery Guide. Provides information about the software programs included with your entire hard disk drive to the Sony online support Web site at: http://esupport.sony.com/EN/VAIO/ for customers in USA, http://www.sony.ca/support for customers in Canada...
User Guide
Page 36
... has additional keys that perform model-specific tasks. To decrease lightness intensity, press Fn+F5 and then m or Combinations/Feature Fn + 8 (F5/F6): brightness control Fn + /T (F7): display output Fn + (F10): zoom Functions Adjusts the LCD brightness of your computer screen. To increase lightness intensity, press Fn+F6 and then M or ,, or keep pressing Fn+F6. n 36 N Using Your VAIO Computer Using the Keyboard Your keyboard is launched...
... has additional keys that perform model-specific tasks. To decrease lightness intensity, press Fn+F5 and then m or Combinations/Feature Fn + 8 (F5/F6): brightness control Fn + /T (F7): display output Fn + (F10): zoom Functions Adjusts the LCD brightness of your computer screen. To increase lightness intensity, press Fn+F6 and then M or ,, or keep pressing Fn+F6. n 36 N Using Your VAIO Computer Using the Keyboard Your keyboard is launched...

User Guide
Page 40
... optical disc drive. and the S2 button activates and deactivates the audio filtering feature of the VAIO logo lamp; To display this button does not work, try the substitute drive eject button on the AV Mode Button Settings utility for changing the S button assignments. n 40 N Using Your VAIO Computer Functions Plays the previous chapter/movie in the DVD or the previous song in the CD. Turns the volume on / off . You can change these button...
... optical disc drive. and the S2 button activates and deactivates the audio filtering feature of the VAIO logo lamp; To display this button does not work, try the substitute drive eject button on the AV Mode Button Settings utility for changing the S button assignments. n 40 N Using Your VAIO Computer Functions Plays the previous chapter/movie in the DVD or the previous song in the CD. Turns the volume on / off . You can change these button...

User Guide
Page 43
.../DVD-ROM P P P P PR P P P P P P - Use non-cartridge discs or discs with DVD-RAM Version 1.0 is available only on your computer does not support the DVD-RAM cartridge. n 43 N Using Your VAIO Computer Reading and Writing Optical Discs Your computer plays and records CDs and DVDs, depending on your model. DVD-R/ DVD+R/ DVD+R DVD-R DVD- Use the table below to single-sided DVD-RAM discs (2.6 GB) compliant with removable cartridge. *4 Writing data to see which types of optical disc drive installed...
.../DVD-ROM P P P P PR P P P P P P - Use non-cartridge discs or discs with DVD-RAM Version 1.0 is available only on your computer does not support the DVD-RAM cartridge. n 43 N Using Your VAIO Computer Reading and Writing Optical Discs Your computer plays and records CDs and DVDs, depending on your model. DVD-R/ DVD+R/ DVD+R DVD-R DVD- Use the table below to single-sided DVD-RAM discs (2.6 GB) compliant with removable cartridge. *4 Writing data to see which types of optical disc drive installed...

User Guide
Page 74
... VGN-FE800 Series models 1 Push in the ExpressCard module toward the computer to pop it out. 2 Gently take hold of the ExpressCard module and pull it out of the slot. Before removing an ExpressCard module If your system may not work properly. The Stop a Hardware device window appears. 4 Confirm that the device can be sure to follow these steps to prepare for removing the module safely...
... VGN-FE800 Series models 1 Push in the ExpressCard module toward the computer to pop it out. 2 Gently take hold of the ExpressCard module and pull it out of the slot. Before removing an ExpressCard module If your system may not work properly. The Stop a Hardware device window appears. 4 Confirm that the device can be sure to follow these steps to prepare for removing the module safely...

User Guide
Page 75
n 75 N Using Your VAIO Computer To remove an ExpressCard module on VGN-AR300 Series models 1 Push the ExpressCard module release button so that the release button pops out. 2 Push the ExpressCard module release button a second time so that the ExpressCard module pops out. 3 Gently take hold of the ExpressCard module and pull it out of the slot. 4 If the ExpressCard module release button is still out, push it back in all the way to the end.
n 75 N Using Your VAIO Computer To remove an ExpressCard module on VGN-AR300 Series models 1 Push the ExpressCard module release button so that the release button pops out. 2 Push the ExpressCard module release button a second time so that the ExpressCard module pops out. 3 Gently take hold of the ExpressCard module and pull it out of the slot. 4 If the ExpressCard module release button is still out, push it back in all the way to the end.

User Guide
Page 93
... the manual that support the Bluetooth functionality* and/or the IEEE 802.11a/b/g standard*, double-click ( / ) on -screen instructions. * See the online Specifications to see whether your desired wireless option(s) and click OK. 3 Click Start and Control Panel. 4 Click View network status and tasks under Network and Internet. 5 Click Manage wireless networks. 6 Click Add. 7 Follow the on the taskbar to display the Wireless Device Switch window. n 93 N Using Your VAIO Computer To connect to a wireless network 1 Make sure an access...
... the manual that support the Bluetooth functionality* and/or the IEEE 802.11a/b/g standard*, double-click ( / ) on -screen instructions. * See the online Specifications to see whether your desired wireless option(s) and click OK. 3 Click Start and Control Panel. 4 Click View network status and tasks under Network and Internet. 5 Click Manage wireless networks. 6 Click Add. 7 Follow the on the taskbar to display the Wireless Device Switch window. n 93 N Using Your VAIO Computer To connect to a wireless network 1 Make sure an access...

User Guide
Page 94
... meters) range in open space. n 94 N Using Your VAIO Computer Using the Bluetooth Functionality The Bluetooth functionality is available on the taskbar to display the Wireless Device Switch window. 3 Select the Enable Bluetooth Device option. 4 Click OK. You can transfer data between your model supports the Bluetooth functionality. To connect to see whether your computer and other Bluetooth devices such as another computer or a mobile phone. See the online Specifications to a Bluetooth device 1 Turn on the WIRELESS switch. 2 Double-click...
... meters) range in open space. n 94 N Using Your VAIO Computer Using the Bluetooth Functionality The Bluetooth functionality is available on the taskbar to display the Wireless Device Switch window. 3 Select the Enable Bluetooth Device option. 4 Click OK. You can transfer data between your model supports the Bluetooth functionality. To connect to see whether your computer and other Bluetooth devices such as another computer or a mobile phone. See the online Specifications to a Bluetooth device 1 Turn on the WIRELESS switch. 2 Double-click...

User Guide
Page 102
... ports on the computer. ❑ Connecting a Multi Function Bay Docking Station (page 103) ❑ Connecting External Speakers (page 114) ❑ Connecting an External Display (page 115) ❑ Selecting Display Modes (page 124) ❑ Using the Multiple Monitors Function (page 126) ❑ Connecting an External Microphone (page 128) ❑ Connecting a Universal Serial Bus (USB) Device (page 129) ❑ Connecting a Printer (page 132) ❑ Connecting an i.LINK Device (page 133) ❑ Connecting to a Network (LAN) (page 135) n 102 N Using...
... ports on the computer. ❑ Connecting a Multi Function Bay Docking Station (page 103) ❑ Connecting External Speakers (page 114) ❑ Connecting an External Display (page 115) ❑ Selecting Display Modes (page 124) ❑ Using the Multiple Monitors Function (page 126) ❑ Connecting an External Microphone (page 128) ❑ Connecting a Universal Serial Bus (USB) Device (page 129) ❑ Connecting a Printer (page 132) ❑ Connecting an i.LINK Device (page 133) ❑ Connecting to a Network (LAN) (page 135) n 102 N Using...

User Guide
Page 115
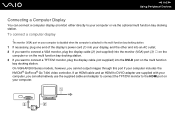
... monitors. n 115 N Using Peripheral Devices Connecting an External Display You can also use the computer with a computer display or a projector. ✍ Connect the power cord after connecting all open programs. 2 Click Start and Control Panel. 3 Click Hardware and Sound. 4 Click Manage audio devices under Sound. 5 On the Playback tab, select the desired device for sound output and click Set Default. For example, you can connect an external display (not supplied) to hear sound from the device. 1 Close all other cables. To change...
... monitors. n 115 N Using Peripheral Devices Connecting an External Display You can also use the computer with a computer display or a projector. ✍ Connect the power cord after connecting all open programs. 2 Click Start and Control Panel. 3 Click Hardware and Sound. 4 Click Manage audio devices under Sound. 5 On the Playback tab, select the desired device for sound output and click Set Default. For example, you can connect an external display (not supplied) to hear sound from the device. 1 Close all other cables. To change...
User Guide
Page 116
... VGN-AR300 Series models, however, you can connect a computer display (monitor) either directly to the HDMI port on the multi function bay docking station. To connect a computer display ! If an HDMI cable and an HDMI to DVI-D adapter are supplied with your computer, you cannot output images through this port if your computer or via the optional multi function bay docking station. n 116 N Using Peripheral Devices Connecting a Computer Display You can alternatively use...
... VGN-AR300 Series models, however, you can connect a computer display (monitor) either directly to the HDMI port on the multi function bay docking station. To connect a computer display ! If an HDMI cable and an HDMI to DVI-D adapter are supplied with your computer, you cannot output images through this port if your computer or via the optional multi function bay docking station. n 116 N Using Peripheral Devices Connecting a Computer Display You can alternatively use...

User Guide
Page 138
... BIOS setup screen, as well as starting the computer. Once you have to enter the password after the VAIO logo appears to protect the computer from unauthorized access. The power-on password and need assistance to reset it safe and private from other standard users to be sent in for depot service for changing some of the BIOS setup options, as well as to forget the password. Make sure not to start...
... BIOS setup screen, as well as starting the computer. Once you have to enter the password after the VAIO logo appears to protect the computer from unauthorized access. The power-on password and need assistance to reset it safe and private from other standard users to be sent in for depot service for changing some of the BIOS setup options, as well as to forget the password. Make sure not to start...

User Guide
Page 153
If you use only one memory module, make sure to the back of the computer. 11 Reinstall the battery pack and turn on the computer. n 153 N Upgrading Your VAIO Computer 8 Slide the memory module into the memory module slot and push it in until it to the slot that is closer to insert it clicks into place. ! Do not touch any other components on the motherboard. 9 Replace the memory module compartment cover. 10 Tighten the screws on the bottom of your computer.
If you use only one memory module, make sure to the back of the computer. 11 Reinstall the battery pack and turn on the computer. n 153 N Upgrading Your VAIO Computer 8 Slide the memory module into the memory module slot and push it in until it to the slot that is closer to insert it clicks into place. ! Do not touch any other components on the motherboard. 9 Replace the memory module compartment cover. 10 Tighten the screws on the bottom of your computer.

User Guide
Page 155
Do not touch any other components on the motherboard. 9 Replace the memory module compartment cover. 10 Tighten the screw on the bottom of your computer. If you use only one memory module, make sure to insert it clicks into place. ! n 155 N Upgrading Your VAIO Computer 7 Remove the new memory module from its packaging. 8 Slide the memory module into the memory module slot and push it in until it to the slot that is closer to the back of the computer. 11 Reinstall the battery pack and turn on the computer.
Do not touch any other components on the motherboard. 9 Replace the memory module compartment cover. 10 Tighten the screw on the bottom of your computer. If you use only one memory module, make sure to insert it clicks into place. ! n 155 N Upgrading Your VAIO Computer 7 Remove the new memory module from its packaging. 8 Slide the memory module into the memory module slot and push it in until it to the slot that is closer to the back of the computer. 11 Reinstall the battery pack and turn on the computer.

User Guide
Page 183
... than one software application. Follow these steps: 1 Click Start, Control Panel, Hardware and Sound, and Device Manager. 2 Double-click Imaging devices. 3 Right-click the device name for the camera. What should I use ? ❑ Do not place your computer into Sleep or Hibernate mode while you must reinstall the driver software for your computer automatically enters Sleep or Hibernate mode, change the corresponding power saving mode setting. If another software application is in use the built...
... than one software application. Follow these steps: 1 Click Start, Control Panel, Hardware and Sound, and Device Manager. 2 Double-click Imaging devices. 3 Right-click the device name for the camera. What should I use ? ❑ Do not place your computer into Sleep or Hibernate mode while you must reinstall the driver software for your computer automatically enters Sleep or Hibernate mode, change the corresponding power saving mode setting. If another software application is in use the built...

User Guide
Page 194
... Start and Control Panel. 2 Click System and Maintenance. 3 Click System. 4 Click Device Manager on the left pane. If you need to enable the device or reinstall the drivers. 5 Double-click the optical disc drive device to open a list of the optical disc drives of your computer. ❑ Make sure the correct driver software is dirty or damaged, your computer will stop responding. Follow these steps: 1 Press the Ctrl+Alt+Delete keys...
... Start and Control Panel. 2 Click System and Maintenance. 3 Click System. 4 Click Device Manager on the left pane. If you need to enable the device or reinstall the drivers. 5 Double-click the optical disc drive device to open a list of the optical disc drives of your computer. ❑ Make sure the correct driver software is dirty or damaged, your computer will stop responding. Follow these steps: 1 Press the Ctrl+Alt+Delete keys...

User Guide
Page 201
... connected to cancel the Enable bidirectional support check box. 5 Click OK. Follow these steps: 1 Click Start, Control Panel, and Printer under Hardware and Sound. 2 Right-click the printer icon and select Properties. 3 Click the Ports tab. 4 Click to an AC power source. This change to the settings disables the bidirectional communication functions of the printer, such as data transfer, status monitoring, and remote panel. See the manual...
... connected to cancel the Enable bidirectional support check box. 5 Click OK. Follow these steps: 1 Click Start, Control Panel, and Printer under Hardware and Sound. 2 Right-click the printer icon and select Properties. 3 Click the Ports tab. 4 Click to an AC power source. This change to the settings disables the bidirectional communication functions of the printer, such as data transfer, status monitoring, and remote panel. See the manual...

User Guide
Page 205
... a mouse is not connected to your computer. ❑ If the pointer does not move while a software application is running, press the Alt+F4 keys to close the application window. ❑ If the Alt+F4 keys do if the touch pad does not work , press and hold the power button until the computer turns off your computer with the power button may have disabled the touch pad without connecting a mouse...
... a mouse is not connected to your computer. ❑ If the pointer does not move while a software application is running, press the Alt+F4 keys to close the application window. ❑ If the Alt+F4 keys do if the touch pad does not work , press and hold the power button until the computer turns off your computer with the power button may have disabled the touch pad without connecting a mouse...

User Guide
Page 208
... driver software. Follow these steps: 1 Click Start and Control Panel. 2 Click System and Maintenance. 3 Click System. 4 Click Device Manager on your computer. ❑ See the manual that came with your PC Card, which worked normally before, does not work ? ❑ Make sure the PC Card is compatible with the Microsoft Windows operating system installed on the left pane. See Inserting a PC Card (page 68) for the PC Card to display...
... driver software. Follow these steps: 1 Click Start and Control Panel. 2 Click System and Maintenance. 3 Click System. 4 Click Device Manager on your computer. ❑ See the manual that came with your PC Card, which worked normally before, does not work ? ❑ Make sure the PC Card is compatible with the Microsoft Windows operating system installed on the left pane. See Inserting a PC Card (page 68) for the PC Card to display...


