
User Guide
Page 3
... Device ...110 Connecting to a Network (LAN) ...112 Customizing Your VAIO Computer ...114 Setting the Password ...115 Setting Up Your Computer with VAIO Control Center 120 Using the Power Saving Mode...121 Upgrading Your VAIO Computer...124 Adding and Removing Memory...125 Adding the Hard Disk Drive...132 Precautions ...138 Handling the LCD Screen ...139 Using the...
... Device ...110 Connecting to a Network (LAN) ...112 Customizing Your VAIO Computer ...114 Setting the Password ...115 Setting Up Your Computer with VAIO Control Center 120 Using the Power Saving Mode...121 Upgrading Your VAIO Computer...124 Adding and Removing Memory...125 Adding the Hard Disk Drive...132 Precautions ...138 Handling the LCD Screen ...139 Using the...
User Guide
Page 124
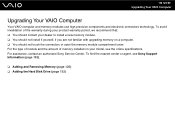
... VAIO Computer Upgrading Your VAIO Computer Your VAIO computer and memory modules use high precision components and electronic connectors technology. To find the nearest center or agent, see the online specifications. For assistance, contact an authorized Sony Service Center. For the type ...of module and the amount of the warranty during your product warranty period, we recommend that: ❑ You should contact your model, see Sony Support Information (page 193). ❑ Adding and Removing Memory (page 125) ❑ Adding the Hard Disk Drive...
... VAIO Computer Upgrading Your VAIO Computer Your VAIO computer and memory modules use high precision components and electronic connectors technology. To find the nearest center or agent, see the online specifications. For assistance, contact an authorized Sony Service Center. For the type ...of module and the amount of the warranty during your product warranty period, we recommend that: ❑ You should contact your model, see Sony Support Information (page 193). ❑ Adding and Removing Memory (page 125) ❑ Adding the Hard Disk Drive...

User Guide
Page 132
...Sony Support Information (page 193). Some hard disks are not compatible with your new hard disk drive before installing or removing a hard disk. Review the manufacturer's information provided with your hard disk for compatibility with the HARD DISK DRIVE ACCESS BAY to hold an additional 3.5-inch hard disk drive...is equipped with VAIO computers. Installing or removing a hard disk while your computer and peripheral devices from the power sources before attempting to install it in the computer. ! n 132 N Upgrading Your VAIO Computer Adding the Hard Disk Drive Your computer is ...
...Sony Support Information (page 193). Some hard disks are not compatible with your new hard disk drive before installing or removing a hard disk. Review the manufacturer's information provided with your hard disk for compatibility with the HARD DISK DRIVE ACCESS BAY to hold an additional 3.5-inch hard disk drive...is equipped with VAIO computers. Installing or removing a hard disk while your computer and peripheral devices from the power sources before attempting to install it in the computer. ! n 132 N Upgrading Your VAIO Computer Adding the Hard Disk Drive Your computer is ...

User Guide
Page 133
See Removing and Replacing the Covers (page 18) for the procedure. 3 Disconnect the power cord and the rest of the peripheral devices. 4 Wait about an hour until the computer cools down the computer, turn off all peripheral devices, and disconnect peripheral devices from the accessible ports and jacks. 2 Remove the back panel cover from the computer. n 133 N Upgrading Your VAIO Computer Installing an Additional Hard Disk Drive To install an additional hard disk drive 1 Shut down . 5 Unscrew the four screws (1) and remove the HARD DISK DRIVE ACCESS BAY cover (2).
See Removing and Replacing the Covers (page 18) for the procedure. 3 Disconnect the power cord and the rest of the peripheral devices. 4 Wait about an hour until the computer cools down the computer, turn off all peripheral devices, and disconnect peripheral devices from the accessible ports and jacks. 2 Remove the back panel cover from the computer. n 133 N Upgrading Your VAIO Computer Installing an Additional Hard Disk Drive To install an additional hard disk drive 1 Shut down . 5 Unscrew the four screws (1) and remove the HARD DISK DRIVE ACCESS BAY cover (2).

User Guide
Page 134
6 Unscrew the two screws (3) securing the drive holder. n 134 N Upgrading Your VAIO Computer 7 Pull out the drive holder (4) from the HARD DISK DRIVE ACCESS BAY and set it aside.
6 Unscrew the two screws (3) securing the drive holder. n 134 N Upgrading Your VAIO Computer 7 Pull out the drive holder (4) from the HARD DISK DRIVE ACCESS BAY and set it aside.

User Guide
Page 135
n 135 N Upgrading Your VAIO Computer 8 Place a new drive into place and secure it clicks into the drive holder and align the holes on each side of the drive holder. 9 Secure the drive to the drive holder. 10 Slide the drive holder into the drive bay until it with the screws. Do not overtighten these screws when securing the drive to the drive holder with the necessary screws. A new hard disk drive comes with screws, through the holes on each side of the drive holder. !
n 135 N Upgrading Your VAIO Computer 8 Place a new drive into place and secure it clicks into the drive holder and align the holes on each side of the drive holder. 9 Secure the drive to the drive holder. 10 Slide the drive holder into the drive bay until it with the screws. Do not overtighten these screws when securing the drive to the drive holder with the necessary screws. A new hard disk drive comes with screws, through the holes on each side of the drive holder. !

User Guide
Page 137
n 137 N Upgrading Your VAIO Computer Identifying the Additional Hard Disk Space When you initialize the new hard disk, it . The Windows Vista operating system recognizes the new hard disk drive and applies the NTFS format to complete the process. The Computer Management window appears. 3 Under the file directory on the right, click Disk Management under ...
n 137 N Upgrading Your VAIO Computer Identifying the Additional Hard Disk Space When you initialize the new hard disk, it . The Windows Vista operating system recognizes the new hard disk drive and applies the NTFS format to complete the process. The Computer Management window appears. 3 Under the file directory on the right, click Disk Management under ...


