
User Instructions
Page 4
... of Contents Getting Started Overview 5 Location and Function of Parts and Controls .... 5 Front Panel 5 Rear Panel 6 Connections 6 Connecting to the USB Connector 6 Installing the Printer Driver 6 Paper 7 Paper You Can Use 7 Loading Paper in the Unit 7 Loading Paper 7 Operation Adjustments and Settings Using the Menu ......... 9 Menu Flow 9 Menu List 10 Basic...
... of Contents Getting Started Overview 5 Location and Function of Parts and Controls .... 5 Front Panel 5 Rear Panel 6 Connections 6 Connecting to the USB Connector 6 Installing the Printer Driver 6 Paper 7 Paper You Can Use 7 Loading Paper in the Unit 7 Loading Paper 7 Operation Adjustments and Settings Using the Menu ......... 9 Menu Flow 9 Menu List 10 Basic...

User Instructions
Page 6
...hub. Refer to the Readme.txt file included on page 2. Refer to (USB) connector USB connecting cable (supplied) Installing the Printer Driver Install the printer driver provided with the printer. to "Warning on power connection" on page 3 and "Warning on power connection for the computer or other ...ends. • The unit drive software provided with the USB interface (which conforms to feed paper. For details about how to install the unit driver, refer to "Important safeguards/notices for use " on page 3. C - Connect the power cord to the unit only after connecting the unit...
...hub. Refer to the Readme.txt file included on page 2. Refer to (USB) connector USB connecting cable (supplied) Installing the Printer Driver Install the printer driver provided with the printer. to "Warning on power connection" on page 3 and "Warning on power connection for the computer or other ...ends. • The unit drive software provided with the USB interface (which conforms to feed paper. For details about how to install the unit driver, refer to "Important safeguards/notices for use " on page 3. C - Connect the power cord to the unit only after connecting the unit...

User Instructions
Page 10
... paper paper feed between prints. To set . error tones sound [BE: ON]: The operation and error tones sound. be used CO:895: UP-D895 driver conversion mode. LO:2: Loads the "SA:2" settings registered using the "SAVE" menu item. [LO:1]: Loads the "SA:1" settings registered using the "...to use the supplied cleaning sheet. Operation Menu List This section describes the menus displayed as contrast, information. To select the printer driver to the top of the screen). BACK: Cancels the head cleaning and returns to the information) are item selection column. More ...
... paper paper feed between prints. To set . error tones sound [BE: ON]: The operation and error tones sound. be used CO:895: UP-D895 driver conversion mode. LO:2: Loads the "SA:2" settings registered using the "SAVE" menu item. [LO:1]: Loads the "SA:1" settings registered using the "...to use the supplied cleaning sheet. Operation Menu List This section describes the menus displayed as contrast, information. To select the printer driver to the top of the screen). BACK: Cancels the head cleaning and returns to the information) are item selection column. More ...

User Instructions
Page 11
... printout is the factory setting. When S:SIDE is selected Basic Menu Operations This section describes the basic menu operation which rotated by the printer driver. Operation Item RSIZE b) Function Settings To select whether or not the image is enlarged [RS:OFF]: Prints the image at a larger size..., according to the paper size set by 90 degrees the image is to be counterclockwise. At a setting of 0, the outline of the printer driver, the settings made on the LCD. a) The printing direction is as follows. c) The print direction of 15 steps, from 0 to the item ...
... printout is the factory setting. When S:SIDE is selected Basic Menu Operations This section describes the basic menu operation which rotated by the printer driver. Operation Item RSIZE b) Function Settings To select whether or not the image is enlarged [RS:OFF]: Prints the image at a larger size..., according to the paper size set by 90 degrees the image is to be counterclockwise. At a setting of 0, the outline of the printer driver, the settings made on the LCD. a) The printing direction is as follows. c) The print direction of 15 steps, from 0 to the item ...
User Instructions
Page 14
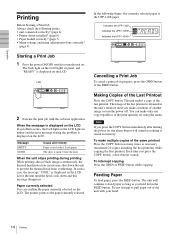
... can make only one copy regardless of the print quantity set using the menu. In the following points: • unit connected correctly? (page 6) • Printer driver installed? (page 6) • Paper loaded correctly? (page 7) • Menu settings and menu adjustments done correctly? (page 9) Starting a Print Job 1 Press the power ON/OFF switch...
... can make only one copy regardless of the print quantity set using the menu. In the following points: • unit connected correctly? (page 6) • Printer driver installed? (page 6) • Paper loaded correctly? (page 7) • Menu settings and menu adjustments done correctly? (page 9) Starting a Print Job 1 Press the power ON/OFF switch...
User Instructions
Page 15
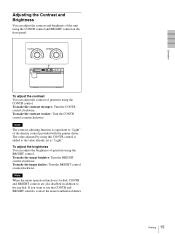
Note When the menu operation function is equivalent to "Light" of the density control provided with the printer driver. Adjusting the Contrast and Brightness You can adjust the contrast and brightness of the unit using this CONTR control is added to the value already ...
Note When the menu operation function is equivalent to "Light" of the density control provided with the printer driver. Adjusting the Contrast and Brightness You can adjust the contrast and brightness of the unit using this CONTR control is added to the value already ...

User Instructions
Page 18
... automatically. Interface Hi-Speed USB (USB 2.0) Accessories provided Thermal head cleaning sheet (1) CD-ROM (including multi-lingual operating instructions, Readme and printer driver) (1) Media label (1) USB cable 1-824-211-41 (SONY) (1) Before Using this Printer (1) Service Contact List (1) Software License (1) 18 Specifications Platen roller Notes • After the surface of the platen...
... automatically. Interface Hi-Speed USB (USB 2.0) Accessories provided Thermal head cleaning sheet (1) CD-ROM (including multi-lingual operating instructions, Readme and printer driver) (1) Media label (1) USB cable 1-824-211-41 (SONY) (1) Before Using this Printer (1) Service Contact List (1) Software License (1) 18 Specifications Platen roller Notes • After the surface of the platen...
User Instructions
Page 21
... feeding 14 loading 7 notes on storing and handling 7 paper you can use 7 Precautions on installation 16 paper cutter 16 printer carriage 16 safety 16 Printer driver 6 Printing adjusting the brightness 15 adjusting the contrast 15 cancelling 14 staring a print job 14 S Specifications 18 T Troubleshooting 19 Index 21 Index
... feeding 14 loading 7 notes on storing and handling 7 paper you can use 7 Precautions on installation 16 paper cutter 16 printer carriage 16 safety 16 Printer driver 6 Printing adjusting the brightness 15 adjusting the contrast 15 cancelling 14 staring a print job 14 S Specifications 18 T Troubleshooting 19 Index 21 Index