Technical Background
Page 37
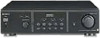
...??? 3/1 1 Subwoofer Yes -/-/-/Yes Yes Yes - Features and specifications Feature Power output, all channels driven into 8 ohms, 20 to 20,000 Hz S-Master Pro Amplifier 32-bit S-Master Pro process Power MOS FET output transistors, four per channel DC Phase Linearizer Dolby Digital® EX decoding dts® ES decoding... 12-volt trigger outputs Multi-Zone/Room Capability 2nd Room output 3rd Room output On screen display Remote Features Preprogrammed LCD Learning & Macro 2-way Touch-screen Second-room remote STRDA7100ES 170 watts x7 Yes Yes Yes Yes Yes Yes Yes IIx Yes Yes 7.1-channel Yes Yes...
...??? 3/1 1 Subwoofer Yes -/-/-/Yes Yes Yes - Features and specifications Feature Power output, all channels driven into 8 ohms, 20 to 20,000 Hz S-Master Pro Amplifier 32-bit S-Master Pro process Power MOS FET output transistors, four per channel DC Phase Linearizer Dolby Digital® EX decoding dts® ES decoding... 12-volt trigger outputs Multi-Zone/Room Capability 2nd Room output 3rd Room output On screen display Remote Features Preprogrammed LCD Learning & Macro 2-way Touch-screen Second-room remote STRDA7100ES 170 watts x7 Yes Yes Yes Yes Yes Yes Yes IIx Yes Yes 7.1-channel Yes Yes...
Technical Background
Page 38
...Digital Theater Systems Corporation. Multi-brand remote may not communicate with each other trademarks are trademarks of the Blu-ray Disc Founders. Features and specifciations are trademarks of their respective owners. 1. All rights reserved. i.LINK is a trademark of Sony used only to designate that comes with...product contains an IEEE 1394 connector. Blu-ray Disc is prohibited. Non-metric weights and measures are approximate Sony, Digital Cinema Sound, Direct Stream Digital and i.LINK are property of Dolby Laboratories Licensing Corporation. ES Receivers v1.0 Page 38...
...Digital Theater Systems Corporation. Multi-brand remote may not communicate with each other trademarks are trademarks of the Blu-ray Disc Founders. Features and specifciations are trademarks of their respective owners. 1. All rights reserved. i.LINK is a trademark of Sony used only to designate that comes with...product contains an IEEE 1394 connector. Blu-ray Disc is prohibited. Non-metric weights and measures are approximate Sony, Digital Cinema Sound, Direct Stream Digital and i.LINK are property of Dolby Laboratories Licensing Corporation. ES Receivers v1.0 Page 38...

Dimensions Diagram
Page 1
D TAP-9000ES DESCRIPTION: Multi Channel POWER DIMENSIONS Pre Amplifier (WHD): 17" x 4 7/8" x 15 1/4 " REQUIREMENTS:120VAC POWER 60Hz N WEIGHT: Approx 22 lbs RMP-9000 REMOTE COMMANDER CONSUMPTION: 20 Watts FRONT VIEW 17" IR SENSOR 1/2" 2 " 12 " SIDE VIEW 15 1/4" 4 7/8" 4 1/4" ES 2 " 1/2" 5/8" 1 1/4 " 2 " 8 3/8 " 2 " 1/2 " BACK... REQUIRE A GREAT DEGREE OF PRECISION WE RECOMMEND THAT THE PRODUCT ITSELF BE USED TO MAKE THE ACTUAL MEASUREMENTS. SONY WILL NOT BE RESPONSIBLE FOR INACCURACIES IN THE DESIGN OR MANUFACTURE OF ENCLOSURES . Consumer Integrated Systems • Park...
D TAP-9000ES DESCRIPTION: Multi Channel POWER DIMENSIONS Pre Amplifier (WHD): 17" x 4 7/8" x 15 1/4 " REQUIREMENTS:120VAC POWER 60Hz N WEIGHT: Approx 22 lbs RMP-9000 REMOTE COMMANDER CONSUMPTION: 20 Watts FRONT VIEW 17" IR SENSOR 1/2" 2 " 12 " SIDE VIEW 15 1/4" 4 7/8" 4 1/4" ES 2 " 1/2" 5/8" 1 1/4 " 2 " 8 3/8 " 2 " 1/2 " BACK... REQUIRE A GREAT DEGREE OF PRECISION WE RECOMMEND THAT THE PRODUCT ITSELF BE USED TO MAKE THE ACTUAL MEASUREMENTS. SONY WILL NOT BE RESPONSIBLE FOR INACCURACIES IN THE DESIGN OR MANUFACTURE OF ENCLOSURES . Consumer Integrated Systems • Park...

Operating Instructions
Page 3
In this manual, the European model is used in this manual: z Indicates hints and tips for model TA-P9000ES. For details on the pre amplifier. Conventions • The instructions in this manual are for making the task easier. Any difference in operation is used for example, "USA/... manual describe the controls on the use the controls on the supplied remote if they have the same or similar names as those on the pre amplifier. Check your remote, refer to the separate operating instructions supplied with the remote. • The following icon is clearly indicated in the text, ...
In this manual, the European model is used in this manual: z Indicates hints and tips for model TA-P9000ES. For details on the pre amplifier. Conventions • The instructions in this manual are for making the task easier. Any difference in operation is used for example, "USA/... manual describe the controls on the use the controls on the supplied remote if they have the same or similar names as those on the pre amplifier. Check your remote, refer to the separate operating instructions supplied with the remote. • The following icon is clearly indicated in the text, ...

Operating Instructions
Page 4
... red (right) to red. • When connecting the woofer or center channel, you don't use the remote for about 6 months. Hooking Up the Components This chapter describes how to connect a Sony TA-E9000ES control amplifier, a Sony TA-N9000ES power amplifier, and your other audio components to avoid possible damage from battery leakage and corrosion. Doing so may...
... red (right) to red. • When connecting the woofer or center channel, you don't use the remote for about 6 months. Hooking Up the Components This chapter describes how to connect a Sony TA-E9000ES control amplifier, a Sony TA-N9000ES power amplifier, and your other audio components to avoid possible damage from battery leakage and corrosion. Doing so may...

Operating Instructions
Page 8
...TA-E9000ES AC OUTLET Note The above connections do not turn the TA-E9000ES control amplifier on/off automatically when you turn this unit on/off . 8GB Multichannel Pre Amplifier TA-P9000ES... Connections Before connecting the AC power cord of this pre amplifier to use one capable of handling high current (at least...your TA-N9000ES power amplifier(s). Connect this unit's AC power cord to a wall outlet. Hooking Up the Components Turning the TA-...N9000ES On/Off From This Unit You can use a CONTROL A1 cord to connect the CTRL A1 jack on this unit to turn the TA-N9000ES power amplifier...
...TA-E9000ES AC OUTLET Note The above connections do not turn the TA-E9000ES control amplifier on/off automatically when you turn this unit on/off . 8GB Multichannel Pre Amplifier TA-P9000ES... Connections Before connecting the AC power cord of this pre amplifier to use one capable of handling high current (at least...your TA-N9000ES power amplifier(s). Connect this unit's AC power cord to a wall outlet. Hooking Up the Components Turning the TA-...N9000ES On/Off From This Unit You can use a CONTROL A1 cord to connect the CTRL A1 jack on this unit to turn the TA-N9000ES power amplifier...

Operating Instructions
Page 10
...select Turn to light INPUT 1 1 INPUT 2 2 BYPASS 5.1ch BYPASS 5.1ch* BYPASS 2ch BYPASS 2ch After selecting the input, turn on the pre amplifier, make sure that the unit is ready. 2 Input indicators Light to indicate the current input. 3 INPUT SELECTOR control Turn to select the input you...the component(s) connected to the input you want to use. Blinks momentarily after U is turned off (standby mode) using the supplied remote. Location of Parts and Basic Operations This chapter provides information about the locations and functions of the buttons and controls on the front ...
...select Turn to light INPUT 1 1 INPUT 2 2 BYPASS 5.1ch BYPASS 5.1ch* BYPASS 2ch BYPASS 2ch After selecting the input, turn on the pre amplifier, make sure that the unit is ready. 2 Input indicators Light to indicate the current input. 3 INPUT SELECTOR control Turn to select the input you...the component(s) connected to the input you want to use. Blinks momentarily after U is turned off (standby mode) using the supplied remote. Location of Parts and Basic Operations This chapter provides information about the locations and functions of the buttons and controls on the front ...

Operating Instructions
Page 11
...selected, use the balance control on the MASTER VOLUME indicator lights to adjust the center, rear, and woofer levels. The indicator on your control amplifier (Sony TA-E9000ES, etc.) to adjust the balance of the front speakers. 5 CENTER, REAR L, REAR R, WOOFER LEVEL controls Rotate to show that ...1 or INPUT 2 is selected. Gain indicators The respective indicator lights when the gain is muted. 8 IR receptor Receives signals emitted by the remote. 11GB The indicator does not light and the volume cannot be adjusted. Gain buttons Press repeatedly to select the gain as follows: +6dB n ...
...selected, use the balance control on the MASTER VOLUME indicator lights to adjust the center, rear, and woofer levels. The indicator on your control amplifier (Sony TA-E9000ES, etc.) to adjust the balance of the front speakers. 5 CENTER, REAR L, REAR R, WOOFER LEVEL controls Rotate to show that ...1 or INPUT 2 is selected. Gain indicators The respective indicator lights when the gain is muted. 8 IR receptor Receives signals emitted by the remote. 11GB The indicator does not light and the volume cannot be adjusted. Gain buttons Press repeatedly to select the gain as follows: +6dB n ...

Operating Instructions
Page 12
... secondary multi channel decoder (etc.) (see page 7). 2 BYPASS 5.1ch jacks Connect to the pre out jacks on /off using the supplied remote (see page 8). 6 AC power cord Connect to turn the TA-N9000ES power amplifier on/off . 3 BYPASS 2ch jacks Connect to the pre out jacks on a stereo control... amplifier (see page 7). 4 PRE OUT jacks Connect to your power amplifier(s) (see page 5). Signals input to the BYPASS 5.1ch jacks are output though the PRE...
... secondary multi channel decoder (etc.) (see page 7). 2 BYPASS 5.1ch jacks Connect to the pre out jacks on /off using the supplied remote (see page 8). 6 AC power cord Connect to turn the TA-N9000ES power amplifier on/off . 3 BYPASS 2ch jacks Connect to the pre out jacks on a stereo control... amplifier (see page 7). 4 PRE OUT jacks Connect to your power amplifier(s) (see page 5). Signals input to the BYPASS 5.1ch jacks are output though the PRE...

Operating Instructions
Page 15
... REAR LEVEL gain button to adjust the gain (see page 11). The remote does not function. / Point the remote at the remote sensor g on the pre amplifier. / Remove any obstacles in the path between the remote and the pre amplifier. / Replace all batteries in the remote with new ones, if they are weak. 15GB No sound or...
... REAR LEVEL gain button to adjust the gain (see page 11). The remote does not function. / Point the remote at the remote sensor g on the pre amplifier. / Remove any obstacles in the path between the remote and the pre amplifier. / Replace all batteries in the remote with new ones, if they are weak. 15GB No sound or...


