
Operating Instructions
Page 32
... provide a very natural compression. 32US "COMP. STD" is compressed as intended by the recording engineer. • COMP. MAX" setting. This may be useful when you view movies late at night at night. Adjusting the level (LEVEL menu) You can use the LEVEL menu to adjust the balance and level of the...
... provide a very natural compression. 32US "COMP. STD" is compressed as intended by the recording engineer. • COMP. MAX" setting. This may be useful when you view movies late at night at night. Adjusting the level (LEVEL menu) You can use the LEVEL menu to adjust the balance and level of the...
Operating Instructions
Page 35
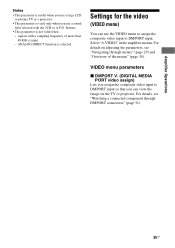
.... • This parameter is selected. signals with the 2CH or A.F.D. ANALOG DIRECT function is not valid when - Settings for the video (VIDEO menu) You can view the image on adjusting the parameters, see "Watching a connected component through menus" (page 29) and "Overview of more than 48 kHz is input. - For details...
.... • This parameter is selected. signals with the 2CH or A.F.D. ANALOG DIRECT function is not valid when - Settings for the video (VIDEO menu) You can view the image on adjusting the parameters, see "Watching a connected component through menus" (page 29) and "Overview of more than 48 kHz is input. - For details...
Operating Instructions
Page 50
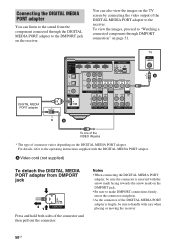
For details, refer to the operating instructions supplied with care when placing or moving the receiver. 50US Notes • When connecting the DIGITAL MEDIA PORT adapter, be sure the connector is inserted with the arrow mark facing towards the arrow mark ... and then pull out the connector. Connecting the DIGITAL MEDIA PORT adapter You can also view the images on the TV screen by connecting the video output of the DIGITAL MEDIA PORT adapter to the receiver. To view the images, proceed to "Watching a connected component through the DIGITAL MEDIA PORT adapter to the...
For details, refer to the operating instructions supplied with care when placing or moving the receiver. 50US Notes • When connecting the DIGITAL MEDIA PORT adapter, be sure the connector is inserted with the arrow mark facing towards the arrow mark ... and then pull out the connector. Connecting the DIGITAL MEDIA PORT adapter You can also view the images on the TV screen by connecting the video output of the DIGITAL MEDIA PORT adapter to the receiver. To view the images, proceed to "Watching a connected component through the DIGITAL MEDIA PORT adapter to the...
Operating Instructions
Page 51
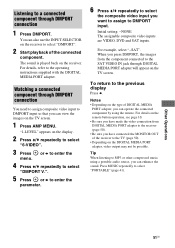
..."1-LEVEL" appears on the TV screen. 1 Press AMP MENU. Press MUSIC repeatedly to select "6-VIDEO". 3 Press menu. Other Operations 51US You can view the images on the display. 2 Press V/v repeatedly to select "PORTABLE" (page 41). Initial setting: -NONE The assignable composite video inputs are VIDEO...video input you press DMPORT, the images from DIGITAL MEDIA PORT adapter to the TV (page 50). • Depending on the receiver. Listening to the operating instructions supplied with the DIGITAL MEDIA PORT adapter. The sound is played back on the DIGITAL MEDIA PORT adapter...
..."1-LEVEL" appears on the TV screen. 1 Press AMP MENU. Press MUSIC repeatedly to select "6-VIDEO". 3 Press menu. Other Operations 51US You can view the images on the display. 2 Press V/v repeatedly to select "PORTABLE" (page 41). Initial setting: -NONE The assignable composite video inputs are VIDEO...video input you press DMPORT, the images from DIGITAL MEDIA PORT adapter to the TV (page 50). • Depending on the receiver. Listening to the operating instructions supplied with the DIGITAL MEDIA PORT adapter. The sound is played back on the DIGITAL MEDIA PORT adapter...


