

Operating Instructions
Page 1
STR-DA7100ES ©2005 Sony Corporation Serial No. Sony Corporation Printed in the space provided below. Refer to them whenever you call upon your Sony dealer regarding this product. Model No. Record the serial number in Malaysia 2-320-745-14 (3) FM Stereo/ FM-AM Receiver Operating Instructions Owner's Record The model and serial numbers are located on the rear of the unit.
STR-DA7100ES ©2005 Sony Corporation Serial No. Sony Corporation Printed in the space provided below. Refer to them whenever you call upon your Sony dealer regarding this product. Model No. Record the serial number in Malaysia 2-320-745-14 (3) FM Stereo/ FM-AM Receiver Operating Instructions Owner's Record The model and serial numbers are located on the rear of the unit.

Operating Instructions
Page 9
... the adjusted sound field settings, etc., (page 65). Name A ?/1 B HDMI/i.LINK lamp C Display window D 2CH E A.F.D. Name Function L Remote receiver Receives signals from the components connected to select sound fields (MOVIE, MUSIC) (page 92, 93). W MULTI CH IN Press to select the audio directly from ...remote commander. Press to the MULTI CHANNEL INPUT jacks (page 58). O PRESET TUNING+/- P TUNING+/- Q FM/AM Press to select 2CH STEREO mode (page 89, 94). V INPUT MODE Press to select the input mode when the same components are connected to ...
... the adjusted sound field settings, etc., (page 65). Name A ?/1 B HDMI/i.LINK lamp C Display window D 2CH E A.F.D. Name Function L Remote receiver Receives signals from the components connected to select sound fields (MOVIE, MUSIC) (page 92, 93). W MULTI CH IN Press to select the audio directly from ...remote commander. Press to the MULTI CHANNEL INPUT jacks (page 58). O PRESET TUNING+/- P TUNING+/- Q FM/AM Press to select 2CH STEREO mode (page 89, 94). V INPUT MODE Press to select the input mode when the same components are connected to ...

Operating Instructions
Page 15
Getting Started C ANTENNA section FM ANTENNA Connects to the FM wire antenna supplied with this receiver (page 43). E Control jack for maintenance and service. IR REMOTE Connects to a DVD VIDEO player, TV, or a INPUT/ tuner. a)You can watch the selected ...). You can enjoy OUTPUT jacka) high quality image (page 33, 35, 38). CTRL S Connects to the AM loop antenna supplied with this receiver (page 43). AM ANTENNA Connects to a Sony TV and DVD player, VCR, etc., which has a CONTROL A1II jack (page 87). G VIDEO/AUDIO INPUT/OUT section AUDIO IN/ W(L)/R(R) OUT ...
Getting Started C ANTENNA section FM ANTENNA Connects to the FM wire antenna supplied with this receiver (page 43). E Control jack for maintenance and service. IR REMOTE Connects to a DVD VIDEO player, TV, or a INPUT/ tuner. a)You can watch the selected ...). You can enjoy OUTPUT jacka) high quality image (page 33, 35, 38). CTRL S Connects to the AM loop antenna supplied with this receiver (page 43). AM ANTENNA Connects to a Sony TV and DVD player, VCR, etc., which has a CONTROL A1II jack (page 87). G VIDEO/AUDIO INPUT/OUT section AUDIO IN/ W(L)/R(R) OUT ...

Operating Instructions
Page 43
FM wire antenna (supplied) AM loop antenna (supplied) * The shape of the connector varies depending on the area code of this receiver. Notes • To prevent noise pickup, keep the AM loop antenna away from the receiver and other components. • Be sure to fully extend the FM wire antenna. • After connecting the FM wire antenna, keep it as horizontal as possible. • Do not use the U SIGNAL GND terminal for grounding the receiver. 43GB Getting Started 4: Connecting the antennas Connect the supplied AM loop antenna and FM wire antenna.
FM wire antenna (supplied) AM loop antenna (supplied) * The shape of the connector varies depending on the area code of this receiver. Notes • To prevent noise pickup, keep the AM loop antenna away from the receiver and other components. • Be sure to fully extend the FM wire antenna. • After connecting the FM wire antenna, keep it as horizontal as possible. • Do not use the U SIGNAL GND terminal for grounding the receiver. 43GB Getting Started 4: Connecting the antennas Connect the supplied AM loop antenna and FM wire antenna.

Operating Instructions
Page 73
... stream information You can also use MAIN MENU on the receiver. The input stream information appears. 3 Move the control key B/b for 4 seconds when the receiver detects any changes in the digital input signal. You can also use MENU on the receiver. 2 Press the control key. The input stream information... as follows. You can check the sound field, etc., by changing the information on the receiver. 73GB All inputs except "FM" and "AM" Index name and sound field name* y Input name and sound field name "FM" and "AM" Preset station name and sound field name* y Frequency name and sound field...
... stream information You can also use MAIN MENU on the receiver. The input stream information appears. 3 Move the control key B/b for 4 seconds when the receiver detects any changes in the digital input signal. You can also use MENU on the receiver. 2 Press the control key. The input stream information... as follows. You can check the sound field, etc., by changing the information on the receiver. 73GB All inputs except "FM" and "AM" Index name and sound field name* y Input name and sound field name "FM" and "AM" Preset station name and sound field name* y Frequency name and sound field...

Operating Instructions
Page 76
...Turn MENU to high; Press TUNING + to scan from high to select "FM" or "AM." 1 Press INPUT SELECTOR, then select "TUNER" from the input list. The receiver stops scanning whenever a station is poor and "STEREO" flashes on the area code as shown in tuner. Tip The tuning ...so that the sound will be changed (see page 43). to monaural. Direct tuning Enter the frequency of poor FM stereo reception If the FM stereo reception is received. For details on the receiver. 2 Press > repeatedly until the SUB menu appears. 76GB press TUNING - In case of a station directly...
...Turn MENU to high; Press TUNING + to scan from high to select "FM" or "AM." 1 Press INPUT SELECTOR, then select "TUNER" from the input list. The receiver stops scanning whenever a station is poor and "STEREO" flashes on the area code as shown in tuner. Tip The tuning ...so that the sound will be changed (see page 43). to monaural. Direct tuning Enter the frequency of poor FM stereo reception If the FM stereo reception is received. For details on the receiver. 2 Press > repeatedly until the SUB menu appears. 76GB press TUNING - In case of a station directly...

Operating Instructions
Page 77
... Make sure you have entered the right frequency. If you cannot tune in your area. "0" flashes on the display window. 5 Press > on the receiver. 4 Move the easy scroll key to 10 kHz.) If you have tuned in alphabetical order without redundancy. If the entered numbers still flash, the frequency...stations with the clearest signals. Each time you store up to turn off the receiver. If you want to store FM or AM stations one by one, see "Presetting radio stations." 1,2 MEMORY/ENTER 1 Press ?/1 to 30 FM and FM RDS stations in an AM station, adjust the direction of area code CEL only...
... Make sure you have entered the right frequency. If you cannot tune in your area. "0" flashes on the display window. 5 Press > on the receiver. 4 Move the easy scroll key to 10 kHz.) If you have tuned in alphabetical order without redundancy. If the entered numbers still flash, the frequency...stations with the clearest signals. Each time you store up to turn off the receiver. If you want to store FM or AM stations one by one, see "Presetting radio stations." 1,2 MEMORY/ENTER 1 Press ?/1 to 30 FM and FM RDS stations in an AM station, adjust the direction of area code CEL only...

Operating Instructions
Page 78
... finished, "Autobetical finished" appears on . Then you often listen to. "MEMORY" appears on the display and the receiver scans and stores all the FM and FM RDS stations in the station that you move to another area, repeat this procedure to store the stations again. Switch ...the FM reception mode, if necessary (page 76). 4 Press MEMORY/ENTER. Perform steps 5 and 6 before the display goes out. 78GB 2 Hold down MEMORY/ENTER and press ?/1 to turn the receiver back on the display momentarily and the receiver returns to normal operation. For...
... finished, "Autobetical finished" appears on . Then you often listen to. "MEMORY" appears on the display and the receiver scans and stores all the FM and FM RDS stations in the station that you move to another area, repeat this procedure to store the stations again. Switch ...the FM reception mode, if necessary (page 76). 4 Press MEMORY/ENTER. Perform steps 5 and 6 before the display goes out. 78GB 2 Hold down MEMORY/ENTER and press ?/1 to turn the receiver back on the display momentarily and the receiver returns to normal operation. For...
Operating Instructions
Page 80
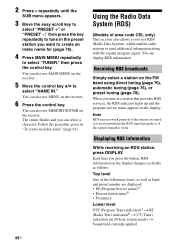
... (in "To create an index name" (page 61). Note RDS may not work properly if the station you press the button, RDS information on the receiver. 5 Move the control key V/v to send additional information along with the regular program signal. You can also use RDS (Radio Data System), which enables radio... to is not transmitting the RDS signal properly or if the signal strength is weak. Each time you tuned to use MEMORY/ENTER on the FM band using direct tuning (page 76), automatic tuning (page 76), or preset tuning (page 78). You can select a character. You can display RDS ...
... (in "To create an index name" (page 61). Note RDS may not work properly if the station you press the button, RDS information on the receiver. 5 Move the control key V/v to send additional information along with the regular program signal. You can also use RDS (Radio Data System), which enables radio... to is not transmitting the RDS signal properly or if the signal strength is weak. Each time you tuned to use MEMORY/ENTER on the FM band using direct tuning (page 76), automatic tuning (page 76), or preset tuning (page 78). You can select a character. You can display RDS ...

Operating Instructions
Page 133
...of more than 48 kHz. RDS does not work.* • Make sure that you 're tuned to an FM RDS station. • Select a stronger FM station. The image of this receiver. The RDS information that you want does not appear.* • Contact the radio station and find out whether... the components are connected securely. • Sound fields do not connect the ground wire to a gas pipe. you set to "OFF." Outdoor FM antenna Receiver Ground wire (not supplied) To ground Radio stations cannot be carried out. • Check that the antennas are connected correctly. • Select ...
...of more than 48 kHz. RDS does not work.* • Make sure that you 're tuned to an FM RDS station. • Select a stronger FM station. The image of this receiver. The RDS information that you want does not appear.* • Contact the radio station and find out whether... the components are connected securely. • Sound fields do not connect the ground wire to a gas pipe. you set to "OFF." Outdoor FM antenna Receiver Ground wire (not supplied) To ground Radio stations cannot be carried out. • Check that the antennas are connected correctly. • Select ...
Operating Instructions
Page 137
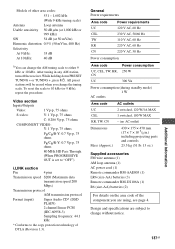
... the procedure. Design and specifications are using, see page 4. After tuning in .) including projecting parts and controls 23.5 kg (51 lb. 13 oz.) Supplied accessories FM wire antenna (1) AM loop antenna (1) AC power cord (1) Remote commander RM-AAE003 (1) LR6 (size-AA) batteries (3) Remote commander RM-US106A (1) R6 (size-AA) batteries (2) For..., 100 W MAX - (no AC outlet) Dimensions Mass (Approx.) 430 × 175 × 470 mm (17 × 7 × 18 5/8 in any AM station, turn off the receiver.
... the procedure. Design and specifications are using, see page 4. After tuning in .) including projecting parts and controls 23.5 kg (51 lb. 13 oz.) Supplied accessories FM wire antenna (1) AM loop antenna (1) AC power cord (1) Remote commander RM-AAE003 (1) LR6 (size-AA) batteries (3) Remote commander RM-US106A (1) R6 (size-AA) batteries (2) For..., 100 W MAX - (no AC outlet) Dimensions Mass (Approx.) 430 × 175 × 470 mm (17 × 7 × 18 5/8 in any AM station, turn off the receiver.

Marketing Specifications
Page 2
...7669 • www.sony.com/dn ® Last Updated 2005-08-29 dts is a trademark of Dolby Laboratories. Features and specifications are registered trademarks of Digital Theater Systems, L.P. STR-DA7100ES ES Audio/Video Receiver Features Key Features HDMI...™ Repeater Switching for Control Aluminum Panel On Screen Display (Through Component/S-Video/Composite Monitor Output) 2 Switched AC Outlets,120 W/1A Max Specifications Audio Channel Power Rating: 170 Watts Per Channel x 7 (8 ohms, 20 Hz - 20 kHz, THD 0.15%) Stereo...
...7669 • www.sony.com/dn ® Last Updated 2005-08-29 dts is a trademark of Dolby Laboratories. Features and specifications are registered trademarks of Digital Theater Systems, L.P. STR-DA7100ES ES Audio/Video Receiver Features Key Features HDMI...™ Repeater Switching for Control Aluminum Panel On Screen Display (Through Component/S-Video/Composite Monitor Output) 2 Switched AC Outlets,120 W/1A Max Specifications Audio Channel Power Rating: 170 Watts Per Channel x 7 (8 ohms, 20 Hz - 20 kHz, THD 0.15%) Stereo...


