User Guide
Page 2
... Preparation Assigning the IP Address to the Camera 8 Assigning an IP address using the IP Setup Program 8 When using Windows XP Service Pack 2 ........ 10 When using Windows Vista 12 Accessing the Camera Using the Web Browser 15 Basic Configuration by the camera zoom bar .... 27 Moving the camera to a preset ...32 Configuring the System - Setting of 802.1X network ........54 Common Tab - Camera Menu 38 Common Tab 38 Picture Tab 39 Day/Night Tab 40 Video codec Tab 41 Streaming Tab 43 Configuring the Network - Saving pan/tilt/zoom position .63 Tour Tab - Setting the SSL function...
... Preparation Assigning the IP Address to the Camera 8 Assigning an IP address using the IP Setup Program 8 When using Windows XP Service Pack 2 ........ 10 When using Windows Vista 12 Accessing the Camera Using the Web Browser 15 Basic Configuration by the camera zoom bar .... 27 Moving the camera to a preset ...32 Configuring the System - Setting of 802.1X network ........54 Common Tab - Camera Menu 38 Common Tab 38 Picture Tab 39 Day/Night Tab 40 Video codec Tab 41 Streaming Tab 43 Configuring the Network - Saving pan/tilt/zoom position .63 Tour Tab - Setting the SSL function...
User Guide
Page 4
... the PC card slot, use the alarms to 20 users can save up to 16 preset positions (pan, tilt and zoom positions) of that do not move for a determined period before and after the trigger to write time data and four-figure camera ID into the CF card slot or PC card slot enables you use the CF card slot, insert the Sony wireless card SNCA...
... the PC card slot, use the alarms to 20 users can save up to 16 preset positions (pan, tilt and zoom positions) of that do not move for a determined period before and after the trigger to write time data and four-figure camera ID into the CF card slot or PC card slot enables you use the CF card slot, insert the Sony wireless card SNCA...

User Guide
Page 6
...(printed matter) The supplied Installation Manual describes the names and functions of parts and controls of the Network Camera, connecting examples and how to the related page. Transportation When transporting the camera, repack it before operating. 6 How to Use This User's Guide How to Use This User...'s Guide This User's Guide explains how to operate the SNCRZ50N/RZ50P Network Camera from the lens or optical filter. • Use a soft, dry cloth to clean the external surfaces of the camera. Note on your system, certain displays or illustrations in the User's Guide,...
...(printed matter) The supplied Installation Manual describes the names and functions of parts and controls of the Network Camera, connecting examples and how to the related page. Transportation When transporting the camera, repack it before operating. 6 How to Use This User's Guide How to Use This User...'s Guide This User's Guide explains how to operate the SNCRZ50N/RZ50P Network Camera from the lens or optical filter. • Use a soft, dry cloth to clean the external surfaces of the camera. Note on your system, certain displays or illustrations in the User's Guide,...

User Guide
Page 8
... page 111) This section explains how to assign an IP address to the camera using Windows Vista, pop-up correctly. The program detects the network cameras connected to the local network and lists them on page 12. 2 Click the Setup icon of the network about the assigned IP address. When you are using Windows XP Service Pack...
... page 111) This section explains how to assign an IP address to the camera using Windows Vista, pop-up correctly. The program detects the network cameras connected to the local network and lists them on page 12. 2 Click the Setup icon of the network about the assigned IP address. When you are using Windows XP Service Pack...

User Guide
Page 9
... automatically. 6 Click on the camera in the relevant boxes. Note You cannot change these items, see "Setting the User - User Menu" on the network. 8 Set the DNS server address. To obtain the IP address automatically from a DHCP server: Select Obtain an IP address automatically. To change the ... Administrator password. The factory settings of both items are correctly set, then click OK. 9 Assigning the IP Address to assign a new IP address. The network settings for the selected camera are invalid for the HTTP port No. Note The Third DNS server address and Fourth DNS server address...
... automatically. 6 Click on the camera in the relevant boxes. Note You cannot change these items, see "Setting the User - User Menu" on the network. 8 Set the DNS server address. To obtain the IP address automatically from a DHCP server: Select Obtain an IP address automatically. To change the ... Administrator password. The factory settings of both items are correctly set, then click OK. 9 Assigning the IP Address to assign a new IP address. The network settings for the selected camera are invalid for the HTTP port No. Note The Third DNS server address and Fourth DNS server address...

User Guide
Page 10
... icon again. 10 Assigning the IP Address to the status of the network camera is correctly assigned. 12 To access the camera directly, double-click the camera name in the list. IP address: 192.168.0.100 Subnet mask: 255.0.0.0 Wireless LAN setting Type: Adhoc SSID: snc-rz50 Channel: 11 ch WEP: Nothing IP address: 10.0.0.100 Subnet mask...
... icon again. 10 Assigning the IP Address to the status of the network camera is correctly assigned. 12 To access the camera directly, double-click the camera name in the list. IP address: 192.168.0.100 Subnet mask: 255.0.0.0 Wireless LAN setting Type: Adhoc SSID: snc-rz50 Channel: 11 ch WEP: Nothing IP address: 10.0.0.100 Subnet mask...

User Guide
Page 12
... Program and click OK. When the above procedure is added to the Programs and Services list. 7 Click OK. Then the IP Setup Program is completed, the cameras connected in the local network are displayed in the CD-ROM. When using Windows Vista Installing software A warning message regarding the active contents may appear when...
... Program and click OK. When the above procedure is added to the Programs and Services list. 7 Click OK. Then the IP Setup Program is completed, the cameras connected in the local network are displayed in the CD-ROM. When using Windows Vista Installing software A warning message regarding the active contents may appear when...

User Guide
Page 14
Preparation The cameras will be displayed in the "General" tab. 8 Click OK. If you want to the Camera Then the IP Setup Program is completed, the cameras connected in the local network are displayed in the IP Setup Program. When the above procedure is added to the Program or port list. 14 Assigning the IP Address to keep Windows Firewall On, continue with the following steps. 5 Select the "Exceptions" tab. 6 Select Add Program.... 7 If the Add Program dialog appears, select IP Setup Program and click OK. 4 Select Off in the list.
Preparation The cameras will be displayed in the "General" tab. 8 Click OK. If you want to the Camera Then the IP Setup Program is completed, the cameras connected in the local network are displayed in the IP Setup Program. When the above procedure is added to the Program or port list. 14 Assigning the IP Address to keep Windows Firewall On, continue with the following steps. 5 Select the "Exceptions" tab. 6 Select Add Program.... 7 If the Add Program dialog appears, select IP Setup Program and click OK. 4 Select Off in the list.

User Guide
Page 16
..., then select Internet Options and click the Security tab. 2 Click the Internet icon (when using the camera via the Internet) or Local intranet icon (when using the camera via a local network). 3 Set the slider to the status of this website (not recommended). Tip Every page of the ... the Proxy server, consult your network administrator. • When you install ActiveX Control, you should be logged in the address box of Internet Explorer, the image may appear as you click Enter. Preparation When Internet Explorer 7 is used When you enter the camera IP address, "Certificate Error" may...
..., then select Internet Options and click the Security tab. 2 Click the Internet icon (when using the camera via the Internet) or Local intranet icon (when using the camera via a local network). 3 Set the slider to the status of this website (not recommended). Tip Every page of the ... the Proxy server, consult your network administrator. • When you install ActiveX Control, you should be logged in the address box of Internet Explorer, the image may appear as you click Enter. Preparation When Internet Explorer 7 is used When you enter the camera IP address, "Certificate Error" may...

User Guide
Page 17
...(desk top or ceiling). Synchronize the date and time of the camera with the initial conditions set various functions according to the installing position, network conditions or purpose of the image sent from the camera. Prepare a panorama image. We recommend you configure the following items...Setting menu E. Preparation Basic Configuration by the Administrator You can also set for this network camera. Make the setting for the camera. Select the view size of the computer. You can monitor the camera image by the Administrator flip (page 38) Video codec Tab (page 41) White ...
...(desk top or ceiling). Synchronize the date and time of the camera with the initial conditions set various functions according to the installing position, network conditions or purpose of the image sent from the camera. Prepare a panorama image. We recommend you configure the following items...Setting menu E. Preparation Basic Configuration by the Administrator You can also set for this network camera. Make the setting for the camera. Select the view size of the computer. You can monitor the camera image by the Administrator flip (page 38) Video codec Tab (page 41) White ...
User Guide
Page 18
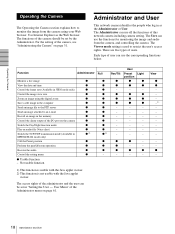
... rights. Use Internet Explorer as the Administrator or User. For the setting of this network camera including camera setting. Administrator and User This network camera identifies the people who log in z 2) z 2) MPEG4/H.264 mode only) Call the Preset position z z Perform the pan/tilt/zoom operation z z Receive the audio z z Control the setting menu z - The Viewer mode setting is not...
... rights. Use Internet Explorer as the Administrator or User. For the setting of this network camera including camera setting. Administrator and User This network camera identifies the people who log in z 2) z 2) MPEG4/H.264 mode only) Call the Preset position z z Perform the pan/tilt/zoom operation z z Receive the audio z z Control the setting menu z - The Viewer mode setting is not...

User Guide
Page 19
...19 Logging in as a user 1 Start the Web browser on the Mode setting in the Video Codec Tab in to monitor. Operating the Camera Logging in the Camera menu (page 41). For JPEG images, you can select Java applet viewer. When H.264 is set to Homepage - Welcome Page The usable... codecs and viewers are displayed depending on your computer and type the IP address of the camera you want to Homepage - Welcome Page Logging in to Dual codec You can monitor the image of Network Camera is selected The welcome page of the selected video codec (JPEG, MPEG4 or ...
...19 Logging in as a user 1 Start the Web browser on the Mode setting in the Video Codec Tab in to monitor. Operating the Camera Logging in the Camera menu (page 41). For JPEG images, you can select Java applet viewer. When H.264 is set to Homepage - Welcome Page The usable... codecs and viewers are displayed depending on your computer and type the IP address of the camera you want to Homepage - Welcome Page Logging in to Dual codec You can monitor the image of Network Camera is selected The welcome page of the selected video codec (JPEG, MPEG4 or ...

User Guide
Page 21
...is enabled. Tip Every page of the camera for the first time When you should be displayed. You can select this software is enabled in the Local Area Network (LAN) Settings of the Proxy server, consult your authorized Sony dealer. The frame rate is enabled. The...configuration and set the Proxy server manually. For the verified Java version, contact your network administrator. • When you install ActiveX Control, you log in the network camera using ActiveX viewer (JPEG) Camera control section Monitor image section Main menu 21 Configuration of Internet Explorer, then select...
...is enabled. Tip Every page of the camera for the first time When you should be displayed. You can select this software is enabled in the Local Area Network (LAN) Settings of the Proxy server, consult your authorized Sony dealer. The frame rate is enabled. The...configuration and set the Proxy server manually. For the verified Java version, contact your network administrator. • When you install ActiveX Control, you log in the network camera using ActiveX viewer (JPEG) Camera control section Monitor image section Main menu 21 Configuration of Internet Explorer, then select...

User Guide
Page 24
... number of frames actually transmitted may vary depending on network environments and camera settings (image size and image quality settings). 3 Select the view size. Auto is sent at the center. 2 Select the frame rate (only when the camera image is a unit indicating the number of the ...main viewer. Click the Frame rate list box to zoom in. For example, if you want to select the frame rate for transmitting the image. Zooming in the Camera menu (page 41). SNC-RZ50N 1, 2, 3, 4, 5, 6, 8, 10, 15, 20, 25, 30 fps SNC-RZ50P 1, 2, 3, 4, 5, 6, 8, 12, 16, 20, 25 fps "fps" ...
... number of frames actually transmitted may vary depending on network environments and camera settings (image size and image quality settings). 3 Select the view size. Auto is sent at the center. 2 Select the frame rate (only when the camera image is a unit indicating the number of the ...main viewer. Click the Frame rate list box to zoom in. For example, if you want to select the frame rate for transmitting the image. Zooming in the Camera menu (page 41). SNC-RZ50N 1, 2, 3, 4, 5, 6, 8, 10, 15, 20, 25, 30 fps SNC-RZ50P 1, 2, 3, 4, 5, 6, 8, 12, 16, 20, 25 fps "fps" ...

User Guide
Page 38
...Field is automatically adjusted. Notes • The stabilizer is adjustable from the camera. Microphone Select whether you change when opening the main viewer. Select On to 26× optical zoom and 12× digital zoom, 312× zoom in total. Note When you click in the image. Mic volume Set the... Web browser to set the functions of a moving , the whole image may not be jagged. With this network camera. Frame is performed for the video output. • The view angle of the camera is reduced by using the privacy mask (page 105). • If a flat object such as a solid...
...Field is automatically adjusted. Notes • The stabilizer is adjustable from the camera. Microphone Select whether you change when opening the main viewer. Select On to 26× optical zoom and 12× digital zoom, 312× zoom in total. Note When you click in the image. Mic volume Set the... Web browser to set the functions of a moving , the whole image may not be jagged. With this network camera. Frame is performed for the video output. • The view angle of the camera is reduced by using the privacy mask (page 105). • If a flat object such as a solid...

User Guide
Page 91
... 1024 to the domain name. Port 80 y Private IP address 192.168.1.110) Notes • Refer to the Camera" (page 8) of port forwarding setup. If you use this menu you can use the Network Camera DDNS Service and link the camera host name to 65535) in the DDNS setting menu... Computer A Private IP address 192.168.1.100 Global IP address xyz.37.128.50 Port forwarding Port 80 Private IP address 192.168.1.110 Global IP address (xyz.37.128.50) Domain name (abc-123.snccam.net) Linked Set up the network. Network Menu" (page 44). Administrating the Camera Using DDNS Service ...
... 1024 to the domain name. Port 80 y Private IP address 192.168.1.110) Notes • Refer to the Camera" (page 8) of port forwarding setup. If you use this menu you can use the Network Camera DDNS Service and link the camera host name to 65535) in the DDNS setting menu... Computer A Private IP address 192.168.1.100 Global IP address xyz.37.128.50 Port forwarding Port 80 Private IP address 192.168.1.110 Global IP address (xyz.37.128.50) Domain name (abc-123.snccam.net) Linked Set up the network. Network Menu" (page 44). Administrating the Camera Using DDNS Service ...

User Guide
Page 97
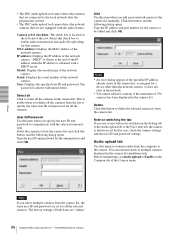
...audio file. Proxy address: Type the IP address or host name of the User ID for that Windows has recognized the hardware correctly. The factory setting of the proxy server. Select the check box on page 12. 97 Using the SNC audio upload tool - You can ... to the local network and displays them in the Microphone section. For the setting with the proxy server. Click it automatically detects Sony network cameras connected to On. Target camera(s) (Camera list) When the SNC audio upload tool starts, it again to Camera Notes • If you start the SNC audio upload tool,...
...audio file. Proxy address: Type the IP address or host name of the User ID for that Windows has recognized the hardware correctly. The factory setting of the proxy server. Select the check box on page 12. 97 Using the SNC audio upload tool - You can ... to the local network and displays them in the Microphone section. For the setting with the proxy server. Click it automatically detects Sony network cameras connected to On. Target camera(s) (Camera list) When the SNC audio upload tool starts, it again to Camera Notes • If you start the SNC audio upload tool,...
User Guide
Page 98
• The SNC audio upload tool cannot detect the cameras that are connected to the local network after the program has started. • The SNC audio upload tool cannot detect the network cameras that camera. MAC address: Displays the MAC address of 256 cameras has been displayed in the camera list, is assigned for all the cameras from the camera list and...
• The SNC audio upload tool cannot detect the cameras that are connected to the local network after the program has started. • The SNC audio upload tool cannot detect the network cameras that camera. MAC address: Displays the MAC address of 256 cameras has been displayed in the camera list, is assigned for all the cameras from the camera list and...

User Guide
Page 99
...of the network camera. The transmission speed is checked. During playback, the progress bar shows playback progress. 99 Using the SNC audio upload tool - Click it to the camera. You can upload the audio file to multiple cameras selected from the camera list ... be interrupted when the IP address is changed if Obtain an IP address automatically (DHCP) is obtained with the camera select checkbox of the selected audio file. Status: Displays the current status of the network camera. Target camera(s) (Camera list) Displays the cameras selected with a DHCP ...
...of the network camera. The transmission speed is checked. During playback, the progress bar shows playback progress. 99 Using the SNC audio upload tool - Click it to the camera. You can upload the audio file to multiple cameras selected from the camera list ... be interrupted when the IP address is changed if Obtain an IP address automatically (DHCP) is obtained with the camera select checkbox of the selected audio file. Status: Displays the current status of the network camera. Target camera(s) (Camera list) Displays the cameras selected with a DHCP ...

User Guide
Page 100
...in China does not support the SSL function.) Model: Displays the model name of "Target camera(s)" in this bar. The list shows the information and status of audio file transmission. 100 Using the SNC audio upload tool - "DHCP" is shown at a time. Recording/playback progress bar ... number select Specify the voice alert number to which you can check recording or playback progress with the camera select checkbox of the network camera. IP address: Displays the IP address of the camera list in the Setting tab. "Not uploaded" is displayed if no audio file is displayed below the...
...in China does not support the SSL function.) Model: Displays the model name of "Target camera(s)" in this bar. The list shows the information and status of audio file transmission. 100 Using the SNC audio upload tool - "DHCP" is shown at a time. Recording/playback progress bar ... number select Specify the voice alert number to which you can check recording or playback progress with the camera select checkbox of the network camera. IP address: Displays the IP address of the camera list in the Setting tab. "Not uploaded" is displayed if no audio file is displayed below the...


