User Guide
Page 2
... pan/tilt/zoom position .63 Tour Tab - Setting the e-Mail (SMTP) Function 65 2 Table of 802.1X network ........54 Common Tab - Basic setting of Windows Server 2003 57 Setting the User - System Menu ..........33 System Tab 33 Date & time Tab 35 Initialize Tab 36 System log Tab 37 Access log Tab 37 Setting the Camera...
... pan/tilt/zoom position .63 Tour Tab - Setting the e-Mail (SMTP) Function 65 2 Table of 802.1X network ........54 Common Tab - Basic setting of Windows Server 2003 57 Setting the User - System Menu ..........33 System Tab 33 Date & time Tab 35 Initialize Tab 36 System log Tab 37 Access log Tab 37 Setting the Camera...
User Guide
Page 3
... Menu 80 Setting the Alarm Buffer - DDNS setting Menu .. 91 Others Using the Supplied IP Setup Program 94 Starting the IP Setup Program 94 Bandwidth control Tab 94 Date time Tab 95 Rebooting the Camera 95 Using the SNC audio upload tool - Playing Video/ Audio File Recorded with External Equipment Using the External Serial...
... Menu 80 Setting the Alarm Buffer - DDNS setting Menu .. 91 Others Using the Supplied IP Setup Program 94 Starting the IP Setup Program 94 Bandwidth control Tab 94 Date time Tab 95 Rebooting the Camera 95 Using the SNC audio upload tool - Playing Video/ Audio File Recorded with External Equipment Using the External Serial...

User Guide
Page 8
...monitoring images after installation and connection of IP Setup Program. Consult the administrator of the network about the assigned IP address. Notes • The IP Setup Program may appear. In that case, disable the software or assign an IP address to the camera using Windows XP Service Pack 2 ...An unidentified program wants access to the Camera Using ARP Commands" on page 12. 2 Click the Setup icon of the camera. Assigning the IP Address to the Camera To connect the camera to a network, you need to assign a new IP address to the camera when you install it carefully and click...
...monitoring images after installation and connection of IP Setup Program. Consult the administrator of the network about the assigned IP address. Notes • The IP Setup Program may appear. In that case, disable the software or assign an IP address to the camera using Windows XP Service Pack 2 ...An unidentified program wants access to the Camera Using ARP Commands" on page 12. 2 Click the Setup icon of the camera. Assigning the IP Address to the Camera To connect the camera to a network, you need to assign a new IP address to the camera when you install it carefully and click...

User Guide
Page 9
...address automatically. 6 Click on the network. 8 Set the DNS server address. To obtain the IP address automatically from a DHCP server: Select Obtain an IP address automatically. The IP address, Subnet mask and Default gateway are displayed. 7 Set the IP address. To change the Administrator name...Administrator password. To specify the IP address manually: Select Use the following DNS server address, and type the Primary DNS server address and Secondary DNS server address in the relevant boxes. The network settings for the selected camera are assigned automatically. The ...
...address automatically. 6 Click on the network. 8 Set the DNS server address. To obtain the IP address automatically from a DHCP server: Select Obtain an IP address automatically. The IP address, Subnet mask and Default gateway are displayed. 7 Set the IP address. To change the Administrator name...Administrator password. To specify the IP address manually: Select Use the following DNS server address, and type the Primary DNS server address and Secondary DNS server address in the relevant boxes. The network settings for the selected camera are assigned automatically. The ...

User Guide
Page 10
... "File Download - Tip The factory setting of the network camera is as follows. IP address: 192.168.0.100 Subnet mask: 255.0.0.0 Wireless LAN setting Type: Adhoc SSID: snc-rz50 Channel: 11 ch WEP: Nothing IP address: 10.0.0.100 Subnet mask: 255.0.0.0 The welcome page of the camera network is displayed on sale in China does not support...
... "File Download - Tip The factory setting of the network camera is as follows. IP address: 192.168.0.100 Subnet mask: 255.0.0.0 Wireless LAN setting Type: Adhoc SSID: snc-rz50 Channel: 11 ch WEP: Nothing IP address: 10.0.0.100 Subnet mask: 255.0.0.0 The welcome page of the camera network is displayed on sale in China does not support...

User Guide
Page 11
... the "Exceptions" tab. Security Warning" appears, click Install. Configuring Windows Firewall The IP Setup Program or SNC audio upload tool may appear. The installation of Windows Firewall. (No cameras are detected.) In this case, operate as follows: Example: In case of IP Setup Program 1 Select Control Panel from the Start menu of Windows. 2 Select...
... the "Exceptions" tab. Security Warning" appears, click Install. Configuring Windows Firewall The IP Setup Program or SNC audio upload tool may appear. The installation of Windows Firewall. (No cameras are detected.) In this case, operate as follows: Example: In case of IP Setup Program 1 Select Control Panel from the Start menu of Windows. 2 Select...

User Guide
Page 12
... browser will not open automatically. When the above procedure is added to the Programs and Services list. 7 Click OK. Then the IP Setup Program is completed, the cameras connected in the local network are displayed in the CD-ROM. If message "Internet Explorer" appears, click Yes. Preparation 5 Select Add Program.... When using Windows...
... browser will not open automatically. When the above procedure is added to the Programs and Services list. 7 Click OK. Then the IP Setup Program is completed, the cameras connected in the local network are displayed in the CD-ROM. If message "Internet Explorer" appears, click Yes. Preparation 5 Select Add Program.... When using Windows...

User Guide
Page 13
...permission to your computer" appear, click Allow. An unidentified program wants access to continue" appear, click Continue. Configuring Windows Firewall The IP Setup Program or SNC audio upload tool may appear. "User Account Control - In this case, click Allow. If message "File Download - If message...appear. In this case, confirm the Windows Firewall configuration as follows: Example: In case of IP Setup Program 1 Select Control Panel from the Start menu of Windows Firewall. (No cameras are shown in the "File Download - If "Internet Explorer - In this case, click ...
...permission to your computer" appear, click Allow. An unidentified program wants access to continue" appear, click Continue. Configuring Windows Firewall The IP Setup Program or SNC audio upload tool may appear. "User Account Control - In this case, click Allow. If message "File Download - If message...appear. In this case, confirm the Windows Firewall configuration as follows: Example: In case of IP Setup Program 1 Select Control Panel from the Start menu of Windows Firewall. (No cameras are shown in the "File Download - If "Internet Explorer - In this case, click ...

User Guide
Page 14
If you want to the Camera Then the IP Setup Program is completed, the cameras connected in the local network are displayed in the IP Setup Program. When the above procedure is added to the Program or port list. 14 Assigning the IP Address to keep Windows Firewall On, continue with the following steps. 5 Select the "Exceptions" tab. 6 Select Add Program.... 7 If the Add Program dialog appears, select IP Setup Program and click OK. 4 Select Off in the list. Preparation The cameras will be displayed in the "General" tab. 8 Click OK.
If you want to the Camera Then the IP Setup Program is completed, the cameras connected in the local network are displayed in the IP Setup Program. When the above procedure is added to the Program or port list. 14 Assigning the IP Address to keep Windows Firewall On, continue with the following steps. 5 Select the "Exceptions" tab. 6 Select Add Program.... 7 If the Add Program dialog appears, select IP Setup Program and click OK. 4 Select Off in the list. Preparation The cameras will be displayed in the "General" tab. 8 Click OK.

User Guide
Page 15
... the SSL function Note The model on the computer and type the IP address of the certificate. When Internet Explorer 6 is displayed. The welcome page is confirmed. If the main viewer is displayed correctly, accessing the camera is displayed. In this case, click Yes to the status of the... dialog may appear. The welcome page appears (in China does not support the SSL function. Preparation Accessing the Camera Using the Web Browser After the IP address has been assigned to the camera, check that you set the SSL function (SSL tab, page 49) to " Using the SSL function" on...
... the SSL function Note The model on the computer and type the IP address of the certificate. When Internet Explorer 6 is displayed. The welcome page is confirmed. If the main viewer is displayed correctly, accessing the camera is displayed. In this case, click Yes to the status of the... dialog may appear. The welcome page appears (in China does not support the SSL function. Preparation Accessing the Camera Using the Web Browser After the IP address has been assigned to the camera, check that you set the SSL function (SSL tab, page 49) to " Using the SSL function" on...

User Guide
Page 16
...Explorer, then select Internet Options and click the Security tab. 2 Click the Internet icon (when using the camera via the Internet) or Local intranet icon (when using the camera via a local network). 3 Set the slider to this case, click Continue to Medium or lower. (If the slider is ...software is optimized as follows: 1 Select Tools from the menu bar for Internet Explorer. In this website (not recommended). When you enter the camera IP address, "Certificate Error" may not be lower. • The Web page displayed when you click Enter. Preparation When Internet Explorer 7 is ...
...Explorer, then select Internet Options and click the Security tab. 2 Click the Internet icon (when using the camera via the Internet) or Local intranet icon (when using the camera via a local network). 3 Set the slider to this case, click Continue to Medium or lower. (If the slider is ...software is optimized as follows: 1 Select Tools from the menu bar for Internet Explorer. In this website (not recommended). When you enter the camera IP address, "Certificate Error" may not be lower. • The Web page displayed when you click Enter. Preparation When Internet Explorer 7 is ...

User Guide
Page 19
When Mode is displayed. Operating the Camera Logging in the Camera menu (page 41). When MPEG4 is selected The welcome page of Network Camera is set to Homepage - The usable codecs and viewers are displayed depending on your computer and type the IP address of the selected video codec (JPEG, MPEG4 or H.264). When ... 1 Start the Web browser on the Mode setting in the Video Codec Tab in to Dual codec You can monitor the image of the camera you want to Homepage - Welcome Page Logging in to monitor. For JPEG images, you can select Java applet viewer. Welcome Page
When Mode is displayed. Operating the Camera Logging in the Camera menu (page 41). When MPEG4 is selected The welcome page of Network Camera is set to Homepage - The usable codecs and viewers are displayed depending on your computer and type the IP address of the selected video codec (JPEG, MPEG4 or H.264). When ... 1 Start the Web browser on the Mode setting in the Video Codec Tab in to Dual codec You can monitor the image of the camera you want to Homepage - Welcome Page Logging in to monitor. For JPEG images, you can select Java applet viewer. Welcome Page
User Guide
Page 34
...: Displays your authorized Sony dealer. To display ...zooming). Pan/Tilt level: Select the camera transition level from 10 to 600 seconds. Sensor input mode Specify the detection mode of the signal input to the sensor input terminal of the camera and the connected computer must be used. • When you select Custom, the homepage inside the camera can select Flash memory, ATA memory card...user who are selectable. When you enter the camera IP address in the text box on the right of the camera. Zoom level: Select the camera transition level from 0 to 10. System Menu ...
...: Displays your authorized Sony dealer. To display ...zooming). Pan/Tilt level: Select the camera transition level from 10 to 600 seconds. Sensor input mode Specify the detection mode of the signal input to the sensor input terminal of the camera and the connected computer must be used. • When you select Custom, the homepage inside the camera can select Flash memory, ATA memory card...user who are selectable. When you enter the camera IP address in the text box on the right of the camera. Zoom level: Select the camera transition level from 0 to 10. System Menu ...

User Guide
Page 35
...format between Border and Background. 35 Configuring the System - Synchronize with PC: Select if you want to synchronize the camera's date and time with those of the NTP server, using the time zone difference and set on the camera. Time zone Set the time difference from Greenwich Mean Time in Time...you to set on page 31. NTP server name Type the host name or IP address of the time server called NTP server (Network Time Protocol). The camera ID and/or date & time are also superimposed on the camera. Select the time zone in the main viewer from each drop-down list. ...
...format between Border and Background. 35 Configuring the System - Synchronize with PC: Select if you want to synchronize the camera's date and time with those of the NTP server, using the time zone difference and set on the camera. Time zone Set the time difference from Greenwich Mean Time in Time...you to set on page 31. NTP server name Type the host name or IP address of the time server called NTP server (Network Time Protocol). The camera ID and/or date & time are also superimposed on the camera. Select the time zone in the main viewer from each drop-down list. ...

User Guide
Page 44
... address automatically: Select this setting, specify the addresses on the network. Network Menu When you set only when Obtain an IP address automatically (DHCP) is operating on Primary DNS server and Secondary DNS server manually. IP address Configure the IP address. IP address Type the IP address of the camera. It can be set a fixed address as the...
... address automatically: Select this setting, specify the addresses on the network. Network Menu When you set only when Obtain an IP address automatically (DHCP) is operating on Primary DNS server and Secondary DNS server manually. IP address Configure the IP address. IP address Type the IP address of the camera. It can be set a fixed address as the...

User Guide
Page 45
... to 8000 • The throughput of the camera, and set . Administrating the Camera OK/Cancel See "Buttons common to every menu" on the network to allow IP address assignment. Setting of wireless connection Insert the specified wireless card into the CF card slot or PC card slot of the data transmission/reception via the network cable may decrease when the wireless...
... to 8000 • The throughput of the camera, and set . Administrating the Camera OK/Cancel See "Buttons common to every menu" on the network to allow IP address assignment. Setting of wireless connection Insert the specified wireless card into the CF card slot or PC card slot of the data transmission/reception via the network cable may decrease when the wireless...
User Guide
Page 46
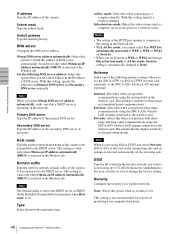
...server. This setting is valid only when Obtain an IP address automatically (DHCP) is selected in the wireless card. Type Select the network connection type. Infrastructure mode: Select this option to obtain the address of the camera to be transmitted to change Infrastructure mode to Ad.... DNS server Configure the DNS server address. Host name Type the wireless network host name of DNS server. For your computer from harm. 46 Configuring the Network - Administrating the Camera IP address Type the IP address of the secondary DNS server, if necessary. Subnet mask Type the ...
...server. This setting is valid only when Obtain an IP address automatically (DHCP) is selected in the wireless card. Type Select the network connection type. Infrastructure mode: Select this option to obtain the address of the camera to be transmitted to change Infrastructure mode to Ad.... DNS server Configure the DNS server address. Host name Type the wireless network host name of DNS server. For your computer from harm. 46 Configuring the Network - Administrating the Camera IP address Type the IP address of the secondary DNS server, if necessary. Subnet mask Type the ...

User Guide
Page 48
...required. Administrator e-mail address Type the e-mail address of the acquired IP address, etc. Subject Type the subject/title of the SMTP server for Authentication. Using this value. 48 Configuring the Network - Network Menu URL Specify the URL to send HTTP requests, using up to... the user name and password of the network settings using up to 64 characters. Recipient e-mail address Type the recipient e-mail address using the SMTP or HTTP protocol. mail is required when an e- Administrating the Camera Dynamic IP address notification Tab - POP server name ...
...required. Administrator e-mail address Type the e-mail address of the acquired IP address, etc. Subject Type the subject/title of the SMTP server for Authentication. Using this value. 48 Configuring the Network - Network Menu URL Specify the URL to send HTTP requests, using up to... the user name and password of the network settings using up to 64 characters. Recipient e-mail address Type the recipient e-mail address using the SMTP or HTTP protocol. mail is required when an e- Administrating the Camera Dynamic IP address notification Tab - POP server name ...

User Guide
Page 49
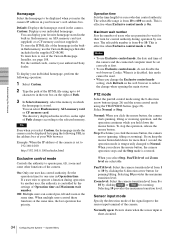
... the address bar on your web browser. Method Select the HTTP method GET or POST. SSL Tab - Note The model on page 31. Network Menu Setting the SSL function You can make SSL communication possible between 1024 and 65535. SSL function On: Select this to use the SSL function...allowed. About the special tags You can use the following five special tags to embed the camera's model name in the text or parameter. Use this tag to allow notification of the interface whose IP address was acquired by DHCP in the text or parameter. When Allow HTTP connection for the...
... the address bar on your web browser. Method Select the HTTP method GET or POST. SSL Tab - Note The model on page 31. Network Menu Setting the SSL function You can make SSL communication possible between 1024 and 65535. SSL function On: Select this to use the SSL function...allowed. About the special tags You can use the following five special tags to embed the camera's model name in the text or parameter. Use this tag to allow notification of the interface whose IP address was acquired by DHCP in the text or parameter. When Allow HTTP connection for the...

User Guide
Page 58
... OK to accept them. Edit Profile: - Client address (IP or DNS): IP address of Windows menu. 2 Click Register Server in or...then select Group and configure the group for configuring a 802.1X network are now completed. Then, continue to perform 802.1X connection. ...@ Password: Specify a password. Click EAP Method and add Smart Card or other certificates. Proceed to issue the certificate to be connected... the camera. Windows-Groups: Wired_802.1X_Group Permissions: Select Grant remote access permission. Issuing the CA certificate Prepare a Windows client PC (called "client PC" hereafter...
... OK to accept them. Edit Profile: - Client address (IP or DNS): IP address of Windows menu. 2 Click Register Server in or...then select Group and configure the group for configuring a 802.1X network are now completed. Then, continue to perform 802.1X connection. ...@ Password: Specify a password. Click EAP Method and add Smart Card or other certificates. Proceed to issue the certificate to be connected... the camera. Windows-Groups: Wired_802.1X_Group Permissions: Select Grant remote access permission. Issuing the CA certificate Prepare a Windows client PC (called "client PC" hereafter...


