

Operating Instructions
Page 2
Refer servicing to qualified personnel only. The AC power cord must be sure to operate this manual could void your authority to disconnect the recorder from Gemstar Development Corporation. This label is manufactured under license from the wall outlet. The G-CODE system is located on the laser ... in this product will increase eye hazard. To avoid electrical shock, do not expose the unit to comply with this DVD recorder is connected to the wall outlet, even if the recorder itself ; To disconnect the AC power cord, grasp the plug itself has been turned off. • If you ...
Refer servicing to qualified personnel only. The AC power cord must be sure to operate this manual could void your authority to disconnect the recorder from Gemstar Development Corporation. This label is manufactured under license from the wall outlet. The G-CODE system is located on the laser ... in this product will increase eye hazard. To avoid electrical shock, do not expose the unit to comply with this DVD recorder is connected to the wall outlet, even if the recorder itself ; To disconnect the AC power cord, grasp the plug itself has been turned off. • If you ...

Operating Instructions
Page 3
...TV for under any questions or problems concerning your recorder, please consult your TV screen. • The explanations regarding DVDs in this manual refer to DVDs created on this recorder. Reverse engineering or disassembly is intended for the DVDs or CDs unless otherwise specified by U.S. If you...the graphics displayed on your nearest Sony dealer. Copyrights • Television programs, films, video tapes, discs, and other limited viewing uses only unless otherwise authorized by Macrovision, and is prohibited. Also, use the controls on the recorder if they have any and all ...
...TV for under any questions or problems concerning your recorder, please consult your TV screen. • The explanations regarding DVDs in this manual refer to DVDs created on this recorder. Reverse engineering or disassembly is intended for the DVDs or CDs unless otherwise specified by U.S. If you...the graphics displayed on your nearest Sony dealer. Copyrights • Television programs, films, video tapes, discs, and other limited viewing uses only unless otherwise authorized by Macrovision, and is prohibited. Also, use the controls on the recorder if they have any and all ...

Operating Instructions
Page 5
Timer Recording 40 Before Recording 40 Recording mode 40 Recording a stereo/SAP program 41 Unrecordable pictures 41 Timer Recording (Standard/G-Code 41 Setting the timer manually (Standard 41 Recording TV programs using the G-Code system 43 Using the Quick Timer function 44 Adjusting the recording picture quality and size ...of albums, tracks, and files 61 Erasing and Editing 63 Before Editing 63 Edit options for DVD-RWs (VR mode 63 Edit options for DVD+RWs/DVD-RWs (Video mode)/DVD+Rs/DVD-Rs 64 Erasing and Editing a Title 64 Erasing a chapter (Delete Chapter 65 Erasing a section...
Timer Recording 40 Before Recording 40 Recording mode 40 Recording a stereo/SAP program 41 Unrecordable pictures 41 Timer Recording (Standard/G-Code 41 Setting the timer manually (Standard 41 Recording TV programs using the G-Code system 43 Using the Quick Timer function 44 Adjusting the recording picture quality and size ...of albums, tracks, and files 61 Erasing and Editing 63 Before Editing 63 Edit options for DVD-RWs (VR mode 63 Edit options for DVD+RWs/DVD-RWs (Video mode)/DVD+Rs/DVD-Rs 64 Erasing and Editing a Title 64 Erasing a chapter (Delete Chapter 65 Erasing a section...

Operating Instructions
Page 8
Quick Guide to Disc Types Recordable and playable discs Type Disc Logo Icon used in Formatting this manual (new discs) Compatibility with other DVD players (finalizing) DVD+RW +RW Automatically formatted in +VR mode Playable on DVD+RW compatible players (automatically finalized) DVDRW VR mode Video mode DVD+R DVD+R DL DVD-R -RWVR *2 -RWVideo Format in VR mode (page 29...
Quick Guide to Disc Types Recordable and playable discs Type Disc Logo Icon used in Formatting this manual (new discs) Compatibility with other DVD players (finalizing) DVD+RW +RW Automatically formatted in +VR mode Playable on DVD+RW compatible players (automatically finalized) DVDRW VR mode Video mode DVD+R DVD+R DL DVD-R -RWVR *2 -RWVideo Format in VR mode (page 29...

Operating Instructions
Page 9
... Features Rewrite (page 40) Auto Chapter (page 80) Manual Chapter (page 67) Record Change Delete 16:9 sizes title name title (page 44) (page 64) (page 66) A-B Erase (page 65) Playlist (page 67) Yes Yes No No Yes Yes ... No No Yes Yes*4 No No No Yes No Yes*3 Yes Yes*4 No No Discs that cannot be recorded on • 8 cm discs • DVD-Rs in VR mode (Video Recording format) *3 Only if the recording mode is set to "16:9." *4 Erasing titles does not free up disc space. ,continued 9 Picture Size" is LSP...
... Features Rewrite (page 40) Auto Chapter (page 80) Manual Chapter (page 67) Record Change Delete 16:9 sizes title name title (page 44) (page 64) (page 66) A-B Erase (page 65) Playlist (page 67) Yes Yes No No Yes Yes ... No No Yes Yes*4 No No No Yes No Yes*3 Yes Yes*4 No No Discs that cannot be recorded on • 8 cm discs • DVD-Rs in VR mode (Video Recording format) *3 Only if the recording mode is set to "16:9." *4 Erasing titles does not free up disc space. ,continued 9 Picture Size" is LSP...

Operating Instructions
Page 10
... Icon used in this manual Characteristics DVD Discs such as PAL 10 DATA DVD DVD+RWs/DVD+Rs/DVD-RWs/DVD-Rs/ DVD-ROMs containing JPEG image files DATA CD - 8 cm DVD+RW/ DVD-RW/DVD-R - DATA CD - CD-ROMs/CD-Rs/CD-RWs containing MP3 audio tracks or JPEG image files 8 cm DVD+RW, DVD-RW, and DVD-R recorded with a DVD video camera. (Still images...
... Icon used in this manual Characteristics DVD Discs such as PAL 10 DATA DVD DVD+RWs/DVD+Rs/DVD-RWs/DVD-Rs/ DVD-ROMs containing JPEG image files DATA CD - 8 cm DVD+RW/ DVD-RW/DVD-R - DATA CD - CD-ROMs/CD-Rs/CD-RWs containing MP3 audio tracks or JPEG image files 8 cm DVD+RW, DVD-RW, and DVD-R recorded with a DVD video camera. (Still images...

Operating Instructions
Page 23
... Easy Setup Make the basic adjustments by following the onscreen instructions in "Easy Setup." 123 456 789 0 [/1 CH +/- To return to operate this recorder. Check that the command mode switch on the remote so it matches the mode you may be unable to the previous step Press O RETURN. If ...the command mode for the recorder. SETUP Settings Video Audio Features Options Easy Setup Format DVD-RW : Dimmer : Power Save : Auto Display : Auto Stereo : Tuner Audio : Command Mode : Factory Setup VR Normal Off On...
... Easy Setup Make the basic adjustments by following the onscreen instructions in "Easy Setup." 123 456 789 0 [/1 CH +/- To return to operate this recorder. Check that the command mode switch on the remote so it matches the mode you may be unable to the previous step Press O RETURN. If ...the command mode for the recorder. SETUP Settings Video Audio Features Options Easy Setup Format DVD-RW : Dimmer : Power Save : Auto Display : Auto Stereo : Tuner Audio : Command Mode : Factory Setup VR Normal Off On...

Operating Instructions
Page 26
... input 1 VCR DVD recorder TV Line input 2 • If you disconnect the recorder's power cord, you will not be recorded. • If you pass the recorder signals via the VCR, you can use an S-video cord instead of an audio/video cord. See also the instruction manual supplied with the ...connected equipment. Audio/video cord (not supplied) S-video cord (not supplied) to LINE IN 1 or 3 R-AUDIO-L VIDEO S VIDEO 1 3 LINE IN DVD recorder IN OUT VHF/UHF DIGITAL OUT PCM/DTS/DOLBY DIGITAL COAXIAL...
... input 1 VCR DVD recorder TV Line input 2 • If you disconnect the recorder's power cord, you will not be recorded. • If you pass the recorder signals via the VCR, you can use an S-video cord instead of an audio/video cord. See also the instruction manual supplied with the ...connected equipment. Audio/video cord (not supplied) S-video cord (not supplied) to LINE IN 1 or 3 R-AUDIO-L VIDEO S VIDEO 1 3 LINE IN DVD recorder IN OUT VHF/UHF DIGITAL OUT PCM/DTS/DOLBY DIGITAL COAXIAL...

Operating Instructions
Page 29
... 2 Press Z OPEN/CLOSE to Know Your DVD Recorder Seven Basic Operations - Formatting a DVD disc (Disc Info) +RW -RWVR -RWVideo New discs are formatted automatically. If necessary, you can manually re-format a DVD+RW or DVD-RW disc to Know Your DVD Recorder 1. Wait until "LOAD" disappears from the ...front panel display. Getting to close the disc tray. For DVD-RWs, you can select a recording format (VR mode or Video mode)...
... 2 Press Z OPEN/CLOSE to Know Your DVD Recorder Seven Basic Operations - Formatting a DVD disc (Disc Info) +RW -RWVR -RWVideo New discs are formatted automatically. If necessary, you can manually re-format a DVD+RW or DVD-RW disc to Know Your DVD Recorder 1. Wait until "LOAD" disappears from the ...front panel display. Getting to close the disc tray. For DVD-RWs, you can select a recording format (VR mode or Video mode)...

Operating Instructions
Page 45
...to 16:9 (wide mode). Picture Size" works with DVDRs and DVD-RWs (Video mode) when the recording mode is set to "4:3." Rec. For all other recording modes, the screen size is received, the disc records the picture as 16:9 even if "DVD Rec. For example, if a 16:9 size picture is fixed ...to select the item you want to select "Rec Settings," and press ENTER. For DVD-RWs (VR mode), the actual picture size is fixed at "4:3." For DVD+RWs/DVD+Rs, the screen size is recorded regardless of the program to be recorded. • 4:3 (default): Sets the picture size to 4:3. • 16:9: ...
...to 16:9 (wide mode). Picture Size" works with DVDRs and DVD-RWs (Video mode) when the recording mode is set to "4:3." Rec. For all other recording modes, the screen size is received, the disc records the picture as 16:9 even if "DVD Rec. For example, if a 16:9 size picture is fixed ...to select the item you want to select "Rec Settings," and press ENTER. For DVD-RWs (VR mode), the actual picture size is fixed at "4:3." For DVD+RWs/DVD+Rs, the screen size is recorded regardless of the program to be recorded. • 4:3 (default): Sets the picture size to 4:3. • 16:9: ...

Operating Instructions
Page 70
...you want to play the disc on a disc after the initial dub, use the DV IN jack when: - See the instruction manual supplied with this recorder. your digital video camera must be set to video playback mode. 3 Press INPUT SELECT on page 50. Do not connect a MICRO... for DV/Digital8 dubbing You can connect any other DVD equipment, finalize the disc (page 38). 70 Hookups DVD recorder to operate your digital video camera. To record from connected equipment without a timer" on dubbing. If you - For the recorder to record or edit, your digital video camera does not work...
...you want to play the disc on a disc after the initial dub, use the DV IN jack when: - See the instruction manual supplied with this recorder. your digital video camera must be set to video playback mode. 3 Press INPUT SELECT on page 50. Do not connect a MICRO... for DV/Digital8 dubbing You can connect any other DVD equipment, finalize the disc (page 38). 70 Hookups DVD recorder to operate your digital video camera. To record from connected equipment without a timer" on dubbing. If you - For the recorder to record or edit, your digital video camera does not work...

Operating Instructions
Page 75
... the channels. Erase Disables the channels. 5 Select "Add" to be preset/disabled Settings - 3 Select the channel you to adjust the picture manually. 7 Select "On" to turn on the Auto Fine Tuning function. To preset or disable another channel, repeat from step 2. • If...to preset the channel, and press ENTER. 6 Select "AFT" and press ENTER. Tuner Preset Antenna / Cable : Auto Preset Manual Set : AFT : Cable Add On Ch34 4 Select "Manual Set," and press ENTER. Normally, select this. Off Allows you want to preset using CH +/-. Tuner Preset Antenna / Cable ...
... the channels. Erase Disables the channels. 5 Select "Add" to be preset/disabled Settings - 3 Select the channel you to adjust the picture manually. 7 Select "On" to turn on the Auto Fine Tuning function. To preset or disable another channel, repeat from step 2. • If...to preset the channel, and press ENTER. 6 Select "AFT" and press ENTER. Tuner Preset Antenna / Cable : Auto Preset Manual Set : AFT : Cable Add On Ch34 4 Select "Manual Set," and press ENTER. Normally, select this. Off Allows you want to preset using CH +/-. Tuner Preset Antenna / Cable ...

Operating Instructions
Page 81
... Parental Control setting is displayed on this case, enter your display device from becoming damaged (ghosting). To cancel the Parental Control setting for all recordable discs except DVD-RW in step 6. On Turns on -screen display, such as the System Menu, is complete. Parental Control Level : Off Standard : 8 ... your password, you forget your TV screen. b Notes • If you will be asked to finalize the disc manually. Auto Automatically finalizes the disc following One Touch Dubbing (page 71). To change the Parental Control level while playing the disc...
... Parental Control setting is displayed on this case, enter your display device from becoming damaged (ghosting). To cancel the Parental Control setting for all recordable discs except DVD-RW in step 6. On Turns on -screen display, such as the System Menu, is complete. Parental Control Level : Off Standard : 8 ... your password, you forget your TV screen. b Notes • If you will be asked to finalize the disc manually. Auto Automatically finalizes the disc following One Touch Dubbing (page 71). To change the Parental Control level while playing the disc...
Operating Instructions
Page 84
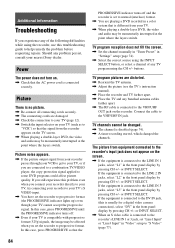
... cable is connected to the VHF/UHF OUT jack on your nearest Sony dealer. If the equipment is connected to the LINE IN 3 jacks, select "L3" in a color system that the AC power cord is set the recorder to some DVD programs could affect picture quality. Picture noise appears. , If the ...your VCR to get to your TV, or if you are distorted. , Reorient the TV antenna. , Adjust the picture (see the TV's instruction manual). , Place the recorder and TV farther apart. , Place the TV and any problem persist, consult your TV (such as to help remedy the problem before requesting repairs...
... cable is connected to the VHF/UHF OUT jack on your nearest Sony dealer. If the equipment is connected to the LINE IN 3 jacks, select "L3" in a color system that the AC power cord is set the recorder to some DVD programs could affect picture quality. Picture noise appears. , If the ...your VCR to get to your TV, or if you are distorted. , Reorient the TV antenna. , Adjust the picture (see the TV's instruction manual). , Place the recorder and TV farther apart. , Place the TV and any problem persist, consult your TV (such as to help remedy the problem before requesting repairs...

Operating Instructions
Page 86
... start playback from the beginning. , Resume play was activated (page 52). , You have inserted a DVD whose Title menu or DVD menu automatically appears on another recorder, the recorder cannot play any type of the operations above. See the instruction manual supplied with the labeled side facing up. , The disc is first inserted. Insert the disc...
... start playback from the beginning. , Resume play was activated (page 52). , You have inserted a DVD whose Title menu or DVD menu automatically appears on another recorder, the recorder cannot play any type of the operations above. See the instruction manual supplied with the labeled side facing up. , The disc is first inserted. Insert the disc...

Operating Instructions
Page 102
... image files 58 L Labeling 37 Language 75 Language code 100 LINE 2 IN 27 LINE IN 1/3 26 "Line1 Input" 77 "Line3 Input" 77 M Manual Clock Set 75 MENU 51 Menu DVD's Menu 51 Top menu 51 "Mix" 71 "MNR" 55 "Modify" 46 "Move" 68, 73 MP3 audio tracks 58 N NEXT 53 Number buttons... 45 "Rec NR" 45 REC PAUSE 31 "Rec Settings" 45 REC STOP 71 "Rec Video Equalizer" 45 Recordable discs 8 Recording 40, 48, 80 picture adjustment 44 recording format 8 recording mode 31, 40 recording time 31 while watching another program 31 Recording time 40 RECOVERY 89 Region code 11 Remaining time 34 Remote 20, 94 Resetting the...
... image files 58 L Labeling 37 Language 75 Language code 100 LINE 2 IN 27 LINE IN 1/3 26 "Line1 Input" 77 "Line3 Input" 77 M Manual Clock Set 75 MENU 51 Menu DVD's Menu 51 Top menu 51 "Mix" 71 "MNR" 55 "Modify" 46 "Move" 68, 73 MP3 audio tracks 58 N NEXT 53 Number buttons... 45 "Rec NR" 45 REC PAUSE 31 "Rec Settings" 45 REC STOP 71 "Rec Video Equalizer" 45 Recordable discs 8 Recording 40, 48, 80 picture adjustment 44 recording format 8 recording mode 31, 40 recording time 31 while watching another program 31 Recording time 40 RECOVERY 89 Region code 11 Remaining time 34 Remote 20, 94 Resetting the...


