
Operating Instructions
Page 1
2-629-953-T1(3) DVD Recorder Operating Instructions RDR-GX310 © 2005 Sony Corporation
2-629-953-T1(3) DVD Recorder Operating Instructions RDR-GX310 © 2005 Sony Corporation

Operating Instructions
Page 3
...Television programs, films, video tapes, discs, and other limited viewing uses only unless otherwise authorized by the text or illustrations. • Instructions in this unit. • Make trial recordings before making the actual recording. Plasma display panels and projection televisions are created on this... this manual describe the controls on the type of holding a still video image or on-screen display image on your nearest Sony dealer. On recording • Note that are especially susceptible to the provisions of such material may not match the graphics displayed...
...Television programs, films, video tapes, discs, and other limited viewing uses only unless otherwise authorized by the text or illustrations. • Instructions in this unit. • Make trial recordings before making the actual recording. Plasma display panels and projection televisions are created on this... this manual describe the controls on the type of holding a still video image or on-screen display image on your nearest Sony dealer. On recording • Note that are especially susceptible to the provisions of such material may not match the graphics displayed...

Operating Instructions
Page 11
... be playable by this recorder due to play on the DVD VIDEO, no region code indication may be intentionally set by region code." X RDR-XXXX 0-000-000-00 Region code Music discs encoded with "For Video" printed on their packaging. • You cannot add new recordings ..., the data may be erased. • You may not be able to the Compact Disc (CD) standard. For more information, see the instructions supplied with copyright protection technologies are made on other DVD VIDEO, the message "Playback prohibited by software producers. Recently, various music discs encoded with...
... be playable by this recorder due to play on the DVD VIDEO, no region code indication may be intentionally set by region code." X RDR-XXXX 0-000-000-00 Region code Music discs encoded with "For Video" printed on their packaging. • You cannot add new recordings ..., the data may be erased. • You may not be able to the Compact Disc (CD) standard. For more information, see the instructions supplied with copyright protection technologies are made on other DVD VIDEO, the message "Playback prohibited by software producers. Recently, various music discs encoded with...

Operating Instructions
Page 12
... 7 to hook up and adjust the settings of the following antenna hookups. b Notes • Plug cords securely to prevent unwanted noise. • Refer to the instructions supplied with an antenna output B (page 14) only Cable without cable box, or antenna C (page 15) only (no cable TV) b Notes • If your antenna...
... 7 to hook up and adjust the settings of the following antenna hookups. b Notes • Plug cords securely to prevent unwanted noise. • Refer to the instructions supplied with an antenna output B (page 14) only Cable without cable box, or antenna C (page 15) only (no cable TV) b Notes • If your antenna...

Operating Instructions
Page 19
... recorder once the front panel display lights up and the recorder enters standby mode. Hookups and Settings z Hint For correct speaker location, see the operating instructions supplied with the connected components. "Dolby," and the double-D symbol are trademarks of the recorder.
... recorder once the front panel display lights up and the recorder enters standby mode. Hookups and Settings z Hint For correct speaker location, see the operating instructions supplied with the connected components. "Dolby," and the double-D symbol are trademarks of the recorder.

Operating Instructions
Page 23
... above. To return to operate this recorder. If the command mode for the recorder. Step 7: Easy Setup Make the basic adjustments by following the onscreen instructions in "Easy Setup." 123 456 789 0 [/1 CH +/- O RETURN Hookups and Settings 3 Select "Options," and press ENTER. SETUP Settings Video Audio Features Options Easy Setup Format...
... above. To return to operate this recorder. If the command mode for the recorder. Step 7: Easy Setup Make the basic adjustments by following the onscreen instructions in "Easy Setup." 123 456 789 0 [/1 CH +/- O RETURN Hookups and Settings 3 Select "Options," and press ENTER. SETUP Settings Video Audio Features Options Easy Setup Format...

Operating Instructions
Page 25
...," and press ENTER. Close TV CH 18 5 - - - - - - Hookups and Settings 3 Select "Settings," and press ENTER. 4 Select "Set G-Code Channels," and press ENTER. Settings - See the instructions supplied with your cable box. Settings - Set G-Code Channels Guide CH TV CH -- -- ---- -- -- 6 Enter the guide channel number assigned in the program guide using the...
...," and press ENTER. Close TV CH 18 5 - - - - - - Hookups and Settings 3 Select "Settings," and press ENTER. 4 Select "Set G-Code Channels," and press ENTER. Settings - See the instructions supplied with your cable box. Settings - Set G-Code Channels Guide CH TV CH -- -- ---- -- -- 6 Enter the guide channel number assigned in the program guide using the...

Operating Instructions
Page 26
... connect your VCR to view the signals from connected equipment without a timer" on page 50. LINE OUTPUT AUDIO R L VIDEO S Video VCR, etc. See also the instruction manual supplied with the connected equipment. Connecting to the LINE IN 1 or 3 jacks Connect a VCR or similar recording device to the LINE IN 1 or 3 of...
... connect your VCR to view the signals from connected equipment without a timer" on page 50. LINE OUTPUT AUDIO R L VIDEO S Video VCR, etc. See also the instruction manual supplied with the connected equipment. Connecting to the LINE IN 1 or 3 jacks Connect a VCR or similar recording device to the LINE IN 1 or 3 of...

Operating Instructions
Page 28
... not be able to view the signals from an AC outlet when connecting the tuner. To use the Synchro-Rec function, see the tuner's operating instructions. • If you disconnect the recorder's power cord, you want to use the Synchro Rec function This connection is necessary to this recorder using the...
... not be able to view the signals from an AC outlet when connecting the tuner. To use the Synchro-Rec function, see the tuner's operating instructions. • If you disconnect the recorder's power cord, you want to use the Synchro Rec function This connection is necessary to this recorder using the...

Operating Instructions
Page 49
... be done. • To use the Synchro Rec function, you want to record, and turn off . 5 Press SYNCHRO REC. For details, see the tuner's operating instructions. • To use the connected equipment while the recorder is a Synchro Rec program, the program that starts first has priority and the second program starts...
... be done. • To use the Synchro Rec function, you want to record, and turn off . 5 Press SYNCHRO REC. For details, see the tuner's operating instructions. • To use the connected equipment while the recorder is a Synchro Rec program, the program that starts first has priority and the second program starts...

Operating Instructions
Page 51
... 123 456 789 0 CH +/- For details about the Title List, see "3. Playing the Recorded Program (Title List)" on page 32. ,continued 51 Then, follow the instructions in continuous play a DVD VIDEO, or a finalized DVD+RW, DVD-RW (Video mode), DVD+R, or DVD-R, you start playing a VIDEO CD with this recorder. INPUT...
... 123 456 789 0 CH +/- For details about the Title List, see "3. Playing the Recorded Program (Title List)" on page 32. ,continued 51 Then, follow the instructions in continuous play a DVD VIDEO, or a finalized DVD+RW, DVD-RW (Video mode), DVD+R, or DVD-R, you start playing a VIDEO CD with this recorder. INPUT...

Operating Instructions
Page 60
Then select the speed from "Fast" (quick), "Normal," and "Slow." To change the slideshow speed Press TOOLS while the album list or image list is displayed to select "Rotate Right" or "Rotate Left," and press ENTER. To rotate a picture Press TOOLS while the image is displayed to the previous or next album Press REPLAY/ADVANCE while the JPEG image is displayed. z Hints • If you are playing a DATA CD that has both MP3 and JPEG files, you can switch between photo and music albums by using the To go to select "Slideshow Speed," and press ENTER. To view the previous or next ...
Then select the speed from "Fast" (quick), "Normal," and "Slow." To change the slideshow speed Press TOOLS while the album list or image list is displayed to select "Rotate Right" or "Rotate Left," and press ENTER. To rotate a picture Press TOOLS while the image is displayed to the previous or next album Press REPLAY/ADVANCE while the JPEG image is displayed. z Hints • If you are playing a DATA CD that has both MP3 and JPEG files, you can switch between photo and music albums by using the To go to select "Slideshow Speed," and press ENTER. To view the previous or next ...

Operating Instructions
Page 70
... Do the following to select the recording mode. Connect the camera to the section on page 92. See the instruction manual supplied with the digital video camera as follows: HQ HSP SP LSP SEP SLP EP LP For details about...has an i.LINK (DV) jack, and record digital signals. Follow the instructions in DVC-SD format. Preparing for DV/ Digital8 dubbing," and then move on to the LINE IN jack and ...follow the instructions of the LINE IN jacks, see "About i.LINK" on dubbing. It will fast forward and...
... Do the following to select the recording mode. Connect the camera to the section on page 92. See the instruction manual supplied with the digital video camera as follows: HQ HSP SP LSP SEP SLP EP LP For details about...has an i.LINK (DV) jack, and record digital signals. Follow the instructions in DVC-SD format. Preparing for DV/ Digital8 dubbing," and then move on to the LINE IN jack and ...follow the instructions of the LINE IN jacks, see "About i.LINK" on dubbing. It will fast forward and...

Operating Instructions
Page 83
... Audio Features Options Easy Setup Easy Setup 4 Press ENTER. 5 Select "Start." 6 Follow the instructions for selecting a group of settings appears. 2 Select the group of the recorder. Factory Setup Allows you have a Sony DVD player or more than one Sony DVD recorder" on the remote to their default settings. 4 Press ENTER when "Finish" appears.
... Audio Features Options Easy Setup Easy Setup 4 Press ENTER. 5 Select "Start." 6 Follow the instructions for selecting a group of settings appears. 2 Select the group of the recorder. Factory Setup Allows you have a Sony DVD player or more than one Sony DVD recorder" on the remote to their default settings. 4 Press ENTER when "Finish" appears.
Operating Instructions
Page 84
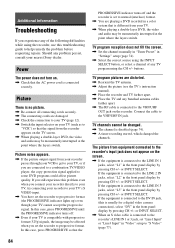
...affected when you set the recorder to the VHF/UHF OUT jack on . , Check that the PROGRESSIVE indicator turns off . , Even if your nearest Sony dealer. If the equipment is connected to the LINE IN 3 jacks, select "L3" in the front panel display by pressing CH +/- If the ..." or "Line3 Input" in "Video" setup to normal (interlace) format. , You are distorted. , Reorient the TV antenna. , Adjust the picture (see the TV's instruction manual). , Place the recorder and TV farther apart. , Place the TV and any of the following difficulties while using the INPUT SELECT button, or select...
...affected when you set the recorder to the VHF/UHF OUT jack on . , Check that the PROGRESSIVE indicator turns off . , Even if your nearest Sony dealer. If the equipment is connected to the LINE IN 3 jacks, select "L3" in the front panel display by pressing CH +/- If the ..." or "Line3 Input" in "Video" setup to normal (interlace) format. , You are distorted. , Reorient the TV antenna. , Adjust the picture (see the TV's instruction manual). , Place the recorder and TV farther apart. , Place the TV and any of the following difficulties while using the INPUT SELECT button, or select...

Operating Instructions
Page 86
... turned on for the sound track cannot be played. 86 The recorder starts playing automatically. , The DVD VIDEO features an auto playback function. See the instruction manual supplied with the labeled side facing up. , The disc is upside down. The language for about half an hour until the moisture evaporates. , If...
... turned on for the sound track cannot be played. 86 The recorder starts playing automatically. , The DVD VIDEO features an auto playback function. See the instruction manual supplied with the labeled side facing up. , The disc is upside down. The language for about half an hour until the moisture evaporates. , If...

Operating Instructions
Page 92
... (approx.): 4.1 kg Operating temperature: 5ºC to 35ºC Operating humidity: 25% to change without notice. When two or more i.LINK jacks (DV jacks), see the instruction manual of equipment can be connected. 92 i.LINK is connected to but also with not only the equipment that operations and data transactions are sometimes...
... (approx.): 4.1 kg Operating temperature: 5ºC to 35ºC Operating humidity: 25% to change without notice. When two or more i.LINK jacks (DV jacks), see the instruction manual of equipment can be connected. 92 i.LINK is connected to but also with not only the equipment that operations and data transactions are sometimes...

Operating Instructions
Page 93
...For details on some equipment. About the name "i.LINK" i.LINK is a more familiar term for IEEE 1394 data transport bus proposed by SONY, and is listed under "Specifications" in one second. IEEE 1394 is also indicated near the i.LINK jack on precautions when connecting this recorder... can be sent in the instruction manual of Electrical and Electronics Engineers. Three maximum baud rates are defined: S100 (approx. 100 Mbps*) S200 (approx. 200 Mbps) S400 (...
...For details on some equipment. About the name "i.LINK" i.LINK is a more familiar term for IEEE 1394 data transport bus proposed by SONY, and is listed under "Specifications" in one second. IEEE 1394 is also indicated near the i.LINK jack on precautions when connecting this recorder... can be sent in the instruction manual of Electrical and Electronics Engineers. Three maximum baud rates are defined: S100 (approx. 100 Mbps*) S200 (approx. 200 Mbps) S400 (...


