Operating Instructions 1
Page 2
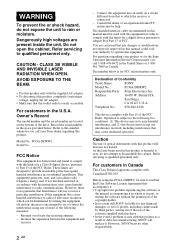
... Software License Agreement that accompanies it. • Copyright laws prohibit reproducing the software or the manual accompanying it . The shielded interface cable recommended in this manual must accept any changes or modifications not expressly approved in a particular installation. For questions regarding...476-6972 in the United States or 1-800961-7669 in accordance with Part 15 of Conformity Trade Name: SONY Model No.: PCGA-DDRW2 Responsible Party: Sony Electronics Inc. CLASS 3B VISIBLE AND INVISIBLE LASER RADIATION WHEN OPEN. These limits are cautioned that any ...
... Software License Agreement that accompanies it. • Copyright laws prohibit reproducing the software or the manual accompanying it . The shielded interface cable recommended in this manual must accept any changes or modifications not expressly approved in a particular installation. For questions regarding...476-6972 in the United States or 1-800961-7669 in accordance with Part 15 of Conformity Trade Name: SONY Model No.: PCGA-DDRW2 Responsible Party: Sony Electronics Inc. CLASS 3B VISIBLE AND INVISIBLE LASER RADIATION WHEN OPEN. These limits are cautioned that any ...

Operating Instructions 1
Page 3
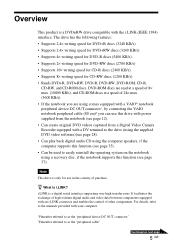
... specifications may violate copyright laws or the terms of Easy Systems Japan Ltd and DigiOn Inc. • Sony computers equipped with this drive incorporate copyright protection thechnology that is protected by Macrovision. In this manual, Microsoft® Windows® XP Home Edition, Microsoft® Windows® XP Professional, and Microsoft® Windows...
... specifications may violate copyright laws or the terms of Easy Systems Japan Ltd and DigiOn Inc. • Sony computers equipped with this drive incorporate copyright protection thechnology that is protected by Macrovision. In this manual, Microsoft® Windows® XP Home Edition, Microsoft® Windows® XP Professional, and Microsoft® Windows...
Operating Instructions 1
Page 5
... speakers, if the computer supports this function (see page 37). z What is a digital serial interface supporting very high transfer rates. For details, refer to the manuals provided with a DV terminal to the drive (using the supplied DVD video software)(see page 28). • Can play back digital audio CD using a recovery...
... speakers, if the computer supports this function (see page 37). z What is a digital serial interface supporting very high transfer rates. For details, refer to the manuals provided with a DV terminal to the drive (using the supplied DVD video software)(see page 28). • Can play back digital audio CD using a recovery...
Operating Instructions 1
Page 9
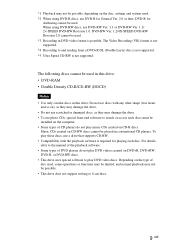
... CD players do not play DVD videos created on DVD+R, DVD+RW, DVD-R, or DVD-RW discs. • This drive uses special software to the manual of the playback software. • Some types of DVD players do not play music CDs created on CD-R discs. The following discs cannot be used...
... CD players do not play DVD videos created on DVD+R, DVD+RW, DVD-R, or DVD-RW discs. • This drive uses special software to the manual of the playback software. • Some types of DVD players do not play music CDs created on CD-R discs. The following discs cannot be used...
Operating Instructions 1
Page 10
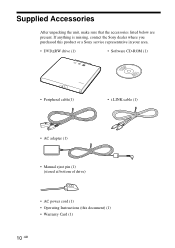
If anything is missing, contact the Sony dealer where you purchased this product or a Sony service representative in your area. • DVD±RW drive (1) • Software CD-ROM (1) • Peripheral cable(1) • i.LINK cable (1) • AC adapter (1) • Manual eject pin (1) (stored at bottom of drive) • AC power cord (1) • Operating Instructions (this document) (1) • Warranty Card (1) 10 GB Supplied Accessories After unpacking the unit, make sure that the accessories listed below are present.
If anything is missing, contact the Sony dealer where you purchased this product or a Sony service representative in your area. • DVD±RW drive (1) • Software CD-ROM (1) • Peripheral cable(1) • i.LINK cable (1) • AC adapter (1) • Manual eject pin (1) (stored at bottom of drive) • AC power cord (1) • Operating Instructions (this document) (1) • Warranty Card (1) 10 GB Supplied Accessories After unpacking the unit, make sure that the accessories listed below are present.

Operating Instructions 1
Page 11
Locating the Controls and Connectors Front Rear Bottom 1 POWER indicator 2 Eject button 3 BUSY indicator 4 Manual eject hole 5 DC IN connector 6 Peripheral cable screw hole 7 Peripheral device DC IN connector 8 i.LINK connector 9 i.LINK connector 0 Manual eject pin (see page 27) 11 GB
Locating the Controls and Connectors Front Rear Bottom 1 POWER indicator 2 Eject button 3 BUSY indicator 4 Manual eject hole 5 DC IN connector 6 Peripheral cable screw hole 7 Peripheral device DC IN connector 8 i.LINK connector 9 i.LINK connector 0 Manual eject pin (see page 27) 11 GB

Operating Instructions 1
Page 14
... refer to the drive using the supplied i.LINK cable (see page 16). If you use a Digital Video Camera Recorder, you can connect it to the manuals provided with your notebook. Note When connecting this drive to the notebook. Connecting the drive to your notebook with the supplied peripheral cable If your...
... refer to the drive using the supplied i.LINK cable (see page 16). If you use a Digital Video Camera Recorder, you can connect it to the manuals provided with your notebook. Note When connecting this drive to the notebook. Connecting the drive to your notebook with the supplied peripheral cable If your...

Operating Instructions 1
Page 19
... connector DV input/output terminal * The connection diagram shows the DCR-TRV50 model Digital Video Camera Recorder as shown below. z Hint Also refer to the manual for the Digital Video Camera Recorder you want to a power outlet.
... connector DV input/output terminal * The connection diagram shows the DCR-TRV50 model Digital Video Camera Recorder as shown below. z Hint Also refer to the manual for the Digital Video Camera Recorder you want to a power outlet.

Operating Instructions 1
Page 20
..., and set it to the DV input/output terminal on the back of Digital Video Camera Recorder operations, refer to your Digital Video Camera Recorder manual. 2 Connect the supplied i.LINK cable to video playback mode. DV input/output terminal i.LINK cable 3 Connect the other equipment) has been added in ... other than a Digital Video Camera Recorder to the i.LINK connector on the drive. 4 Click "Start", and then click "My Computer" to verify that (Sony DV camcorder or other end of the i.LINK cable to the i.LINK connector on the Digital Video Camera Recorder. For details of the drive.
..., and set it to the DV input/output terminal on the back of Digital Video Camera Recorder operations, refer to your Digital Video Camera Recorder manual. 2 Connect the supplied i.LINK cable to video playback mode. DV input/output terminal i.LINK cable 3 Connect the other equipment) has been added in ... other than a Digital Video Camera Recorder to the i.LINK connector on the drive. 4 Click "Start", and then click "My Computer" to verify that (Sony DV camcorder or other end of the i.LINK cable to the i.LINK connector on the Digital Video Camera Recorder. For details of the drive.

Operating Instructions 1
Page 21
... and set the AC adapter/charger mode switch to "VCR/Camera/Player" before connecting the AC adapter/charger to connect. z Hint Refer also to the manual for the Digital Video Camera Recorder you want to a power outlet. ■ When connecting the drive to your computer with the supplied i.LINK cable To...
... and set the AC adapter/charger mode switch to "VCR/Camera/Player" before connecting the AC adapter/charger to connect. z Hint Refer also to the manual for the Digital Video Camera Recorder you want to a power outlet. ■ When connecting the drive to your computer with the supplied i.LINK cable To...

Operating Instructions 1
Page 22
...equipment other than a Digital Video Camera Recorder to the i.LINK connector on the drive. 4 Click "Start", and then click "My Computer" to verify that (Sony DV camcorder or other end of the i.LINK cable to the i.LINK connector on the back of Digital Video Camera Recorder operations, refer to the... Digital Video Camera Recorder manual. 2 Connect the additional i.LINK cable (sold separately) to the DV input/output terminal on the Digital Video Camera Recorder, and set it to ...
...equipment other than a Digital Video Camera Recorder to the i.LINK connector on the drive. 4 Click "Start", and then click "My Computer" to verify that (Sony DV camcorder or other end of the i.LINK cable to the i.LINK connector on the back of Digital Video Camera Recorder operations, refer to the... Digital Video Camera Recorder manual. 2 Connect the additional i.LINK cable (sold separately) to the DV input/output terminal on the Digital Video Camera Recorder, and set it to ...

Operating Instructions 1
Page 24
Eject button 24 GB For details, refer to the manuals provided with your computer, observe the following points: • Ensure that the BUSY indicator of the drive is flashing. The tray pops out. Inserting a disc ...
Eject button 24 GB For details, refer to the manuals provided with your computer, observe the following points: • Ensure that the BUSY indicator of the drive is flashing. The tray pops out. Inserting a disc ...

Operating Instructions 1
Page 26
... disc, push on the rear. • When using writing software or DVD playback software, you may not be able to Help or the Quick Reference manual provided with your hand, remove the disc. Hub Disc 26 GB The tray pops out. Notes • Do not touch the lens assembly in the...
... disc, push on the rear. • When using writing software or DVD playback software, you may not be able to Help or the Quick Reference manual provided with your hand, remove the disc. Hub Disc 26 GB The tray pops out. Notes • Do not touch the lens assembly in the...

Operating Instructions 1
Page 27
The tray pops out, allowing you to remove the disc. Manual eject pin Manual eject hole 27 GB If the disc does not eject 1 Confirm that the BUSY indicator is not flashing. 2 Detach the manual eject pin from the holder at the bottom of the drive, and insert the pin into the manual eject hole.
The tray pops out, allowing you to remove the disc. Manual eject pin Manual eject hole 27 GB If the disc does not eject 1 Confirm that the BUSY indicator is not flashing. 2 Detach the manual eject pin from the holder at the bottom of the drive, and insert the pin into the manual eject hole.

Operating Instructions 1
Page 31
Do not run the computer on next page 31 GB For details of your computer's power management settings, refer to the manuals provided with packet writing software such as "DirectCD" (including commercially available preformatted discs) cannot be read in data loss. • Avoid using any devices... for the drive while writing data can lead to loss of data. • Make sure that your computer. • Do not disconnect or manually operate any resident disc management utilities or utilities to speed up disc access as these can impair data writing. • While writing data and while...
Do not run the computer on next page 31 GB For details of your computer's power management settings, refer to the manuals provided with packet writing software such as "DirectCD" (including commercially available preformatted discs) cannot be read in data loss. • Avoid using any devices... for the drive while writing data can lead to loss of data. • Make sure that your computer. • Do not disconnect or manually operate any resident disc management utilities or utilities to speed up disc access as these can impair data writing. • While writing data and while...
Operating Instructions 1
Page 32
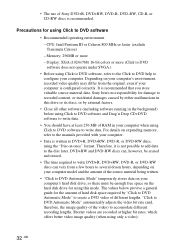
...; Before using only a video). 32 GB For details on the hard disk drive for the amount of RAM in your computer is written to the manuals provided with your computer. The values below provive a general guide for using this drive or its discs, or by either malfunctions in the background) before... Click to DVD help to the disc later. "Click to DVD Automatic Mode" automatically adjusts the video bit rate (and, therefore, the image quality of Sony DVD+R, DVD+RW, DVD-R, DVD-RW, CD-R, or CD-RW discs is recommended. Display: XGA (1024×768) 16-bit colors or more - Precautions for...
...; Before using only a video). 32 GB For details on the hard disk drive for the amount of RAM in your computer is written to the manuals provided with your computer. The values below provive a general guide for using this drive or its discs, or by either malfunctions in the background) before... Click to DVD help to the disc later. "Click to DVD Automatic Mode" automatically adjusts the video bit rate (and, therefore, the image quality of Sony DVD+R, DVD+RW, DVD-R, DVD-RW, CD-R, or CD-RW discs is recommended. Display: XGA (1024×768) 16-bit colors or more - Precautions for...

Operating Instructions 1
Page 35
...Drop CD+DVD software, contact: Easy System Japan Ltd. Always close the DVD playback software before modifying display settings. For details, refer to the manuals provided with your computer. Continued on the disc, there may not play back DVD videos. Your computer must be guaranteed. Doing so could destabilize... Registering Users Follow the procedure below to "Drag'n Drop CD+DVD", and select "User registration and Support". Website: http://www.ddcd.jp/dd3e/sony/cd/ Playing an Audio CD For users of computers with a built-in CD-ROM drive Play the audio CD with the wide range of DVDs...
...Drop CD+DVD software, contact: Easy System Japan Ltd. Always close the DVD playback software before modifying display settings. For details, refer to the manuals provided with your computer. Continued on the disc, there may not play back DVD videos. Your computer must be guaranteed. Doing so could destabilize... Registering Users Follow the procedure below to "Drag'n Drop CD+DVD", and select "User registration and Support". Website: http://www.ddcd.jp/dd3e/sony/cd/ Playing an Audio CD For users of computers with a built-in CD-ROM drive Play the audio CD with the wide range of DVDs...

Operating Instructions 1
Page 37
... you can be recoverd using the peripheral cable, connect the supplied i.LINK cable and AC adapter to the drive to the manuals provided with your notebook using this drive are Sony notebooks with the Windows XP operating system preinstalled. Mark Meaning 3 The number of audio tracks 2 The number of subtitle tracks 3 16...
... you can be recoverd using the peripheral cable, connect the supplied i.LINK cable and AC adapter to the drive to the manuals provided with your notebook using this drive are Sony notebooks with the Windows XP operating system preinstalled. Mark Meaning 3 The number of audio tracks 2 The number of subtitle tracks 3 16...

Operating Instructions 1
Page 43
... the cable is connected correctly to stand for approximately one hour. Tray does not open when the eject button is turned on how to the manuals provided with the peripheral cable, make sure that the AC adapter and i.LINK cable are connected correctly, and that the notebook is pressed. c... Push tray in your nearest Sony dealer. c Make sure that the drive is not locked. To confirm that the disc is clicked. c The software may be inhibiting disc access. ...
... the cable is connected correctly to stand for approximately one hour. Tray does not open when the eject button is turned on how to the manuals provided with the peripheral cable, make sure that the AC adapter and i.LINK cable are connected correctly, and that the notebook is pressed. c... Push tray in your nearest Sony dealer. c Make sure that the drive is not locked. To confirm that the disc is clicked. c The software may be inhibiting disc access. ...

Operating Instructions 1
Page 44
...". (For details, refer to the manuals provided with your Sony computer.) c The disc may be possible. c If there are computers connected to the computer via i.LINK cable. Clean the disc or use another disc (see "Compatible computers" (page 6) and the manuals provided with your computer. c The ...volume control of the computer may be set too low. (For details, refer to the manuals provided with your computer.) 44 GB Check the CPU speed setting. (For details, refer to the manuals provided with the drive, restart the computer. Disconnect the unused computer from an audio CD...
...". (For details, refer to the manuals provided with your Sony computer.) c The disc may be possible. c If there are computers connected to the computer via i.LINK cable. Clean the disc or use another disc (see "Compatible computers" (page 6) and the manuals provided with your computer. c The ...volume control of the computer may be set too low. (For details, refer to the manuals provided with your computer.) 44 GB Check the CPU speed setting. (For details, refer to the manuals provided with the drive, restart the computer. Disconnect the unused computer from an audio CD...


