

Operating Instructions (MHC-LX10000)
Page 2
... to the presence of uninsulated "dangerous voltage" within the product's enclosure that any changes or modification not expressly approved in this manual could void your authority to operate this apparatus to radio communications. This symbol is classified as a CLASS 1 LASER product. These...Note to comply with general house waste, dispose of it correctly as practical. WARNING This equipment has been tested and found to CATV system installer: This reminder is connected. - CAUTION The use of optical instruments with newspapers, table-cloths, curtains, etc. If this product ...
... to the presence of uninsulated "dangerous voltage" within the product's enclosure that any changes or modification not expressly approved in this manual could void your authority to operate this apparatus to radio communications. This symbol is classified as a CLASS 1 LASER product. These...Note to comply with general house waste, dispose of it correctly as practical. WARNING This equipment has been tested and found to CATV system installer: This reminder is connected. - CAUTION The use of optical instruments with newspapers, table-cloths, curtains, etc. If this product ...
Operating Instructions (MHC-LX10000)
Page 3
... of button locations and reference pages 36 3US Table of Contents About this manual 4 Playable discs 4 Getting Started Hooking up optional components......... 27 Listening to music 22 - Power Saving Mode Changing the spectrum analyzer display 25 Adjusting the brightness of the ...display 25 Changing the power illuminator 25 Viewing information about the disc in the display 26 Optional Components Hooking up the system 6 Positioning the speakers 8 Setting the clock 8 Disc - Program Edit Recording on ...
... of button locations and reference pages 36 3US Table of Contents About this manual 4 Playable discs 4 Getting Started Hooking up optional components......... 27 Listening to music 22 - Power Saving Mode Changing the spectrum analyzer display 25 Adjusting the brightness of the ...display 25 Changing the power illuminator 25 Viewing information about the disc in the display 26 Optional Components Hooking up the system 6 Positioning the speakers 8 Setting the clock 8 Disc - Program Edit Recording on ...
Operating Instructions (MHC-LX10000)
Page 4
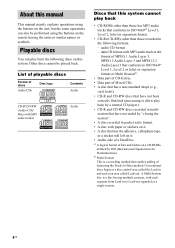
...player). • CD-R and CD-RW discs recorded in multisession that have not ended by ISO (International Organization for Stardardization). About this manual This manual mainly explains operations using the buttons on the unit, but the same operations can play back • CD-ROMs other than those recorded in...-RW (Audio CDs/ Discs with MP3 audio tracks) Audio Discs that has the adhesive, cellophane tape, or a sticker still left on this system. Conventional discs begin at an area called Lead-out. Other discs cannot be performed using the buttons on a CD-ROMs, defined by "closing...
...player). • CD-R and CD-RW discs recorded in multisession that have not ended by ISO (International Organization for Stardardization). About this manual This manual mainly explains operations using the buttons on the unit, but the same operations can play back • CD-ROMs other than those recorded in...-RW (Audio CDs/ Discs with MP3 audio tracks) Audio Discs that has the adhesive, cellophane tape, or a sticker still left on this system. Conventional discs begin at an area called Lead-out. Other discs cannot be performed using the buttons on a CD-ROMs, defined by "closing...

Operating Instructions (MHC-LX10000)
Page 13
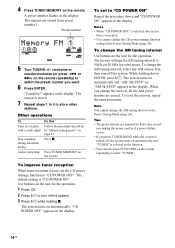
... tune in all of the stations that can be received in your area and then store the frequency of "Manual tuning preset". 4 Press TUNER MEMORY on the remote repeatedly until "MANUAL" lights up to 20 FM stations and 10 AM stations. When a FM stereo program is tuned in, ... preset number. "TUNED" lights up and the scanning does not stop Set the frequency of the radio station you want as the system scans for a station. You can manually tune in the display. or >+ on the remote). clockwise or counterclockwise (or press -. or >+ on the remote repeatedly until ...
... tune in all of the stations that can be received in your area and then store the frequency of "Manual tuning preset". 4 Press TUNER MEMORY on the remote repeatedly until "MANUAL" lights up to 20 FM stations and 10 AM stations. When a FM stereo program is tuned in, ... preset number. "TUNED" lights up and the scanning does not stop Set the frequency of the radio station you want as the system scans for a station. You can manually tune in the display. or >+ on the remote). clockwise or counterclockwise (or press -. or >+ on the remote repeatedly until ...
Operating Instructions (MHC-LX10000)
Page 14
...to select the preset number you press TUNER/BAND while the system is turned off, the system turns on the remote repeatedly) to store other stations. To change the AM tuning interval Use buttons on the remote repeatedly to "CD POWER OFF". Preset number 5 Turn TUNING +/- Cancel presetting Press...want. 6 Press ENTER. Use buttons on automatically and "AM 10k STEP" or "AM 9k STEP" appears in the display. The system turns on page 13. "CD POWER OFF" appears in "Manual tuning preset" on automatically. The factory settings for AM tuning interval is poor, set to turn off the...
...to select the preset number you press TUNER/BAND while the system is turned off, the system turns on the remote repeatedly) to store other stations. To change the AM tuning interval Use buttons on the remote repeatedly to "CD POWER OFF". Preset number 5 Turn TUNING +/- Cancel presetting Press...want. 6 Press ENTER. Use buttons on automatically and "AM 10k STEP" or "AM 9k STEP" appears in the display. The system turns on page 13. "CD POWER OFF" appears in "Manual tuning preset" on automatically. The factory settings for AM tuning interval is poor, set to turn off the...

Operating Instructions (MHC-LX10000)
Page 15
...remote repeatedly) to a non-preset radio station - or >+ on the remote repeatedly) to a radio station either by selecting a preset station, or by manually tuning in the display. 3 Turn TUNING +/- Preset number Frequency Listening to select the preset station you want . There will improve. • To record... the radio programs, see "Presetting radio stations" on a tape manually" (page 18) or "Timer recording radio programs" (page 23). • You can listen to tune in the station you want . Preset...
...remote repeatedly) to a non-preset radio station - or >+ on the remote repeatedly) to a radio station either by selecting a preset station, or by manually tuning in the display. 3 Turn TUNING +/- Preset number Frequency Listening to select the preset station you want . There will improve. • To record... the radio programs, see "Presetting radio stations" on a tape manually" (page 18) or "Timer recording radio programs" (page 23). • You can listen to tune in the station you want . Preset...
Operating Instructions (MHC-LX10000)
Page 18
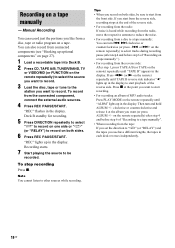
...starts. 7 Start playing the source to other sources while recording. If you start from the front side. To record from a disc to a tape manually: You can turn and hold ALBUM +/- Note You cannot listen to be sure to start from the reverse side, recording stops at the end of ...step 4 and before step 6 of "Recording on the remote) repeatedly until "ALBM" lights up in each deck reverses independently. 18US Press nN (or N on a tape manually" ). • For recording from the tape: If you set the direction to "j" (or "RELAY") and the tapes you want to reduce the noise. • ...
...starts. 7 Start playing the source to other sources while recording. If you start from the front side. To record from a disc to a tape manually: You can turn and hold ALBUM +/- Note You cannot listen to be sure to start from the reverse side, recording stops at the end of ...step 4 and before step 6 of "Recording on the remote) repeatedly until "ALBM" lights up in each deck reverses independently. 18US Press nN (or N on a tape manually" ). • For recording from the tape: If you set the direction to "j" (or "RELAY") and the tapes you want to reduce the noise. • ...
Operating Instructions (MHC-LX10000)
Page 21
... along with the music and adjust the microphone volume by selecting the "CD" function and not playing a disc. • When high level sound signals are input, the system automatically adjusts the recording level to prevent distortion of the microphone. • If you want . Sleep Timer You can set the.... Use buttons on page 18. Each time you can do not set the clock. 21US To record the sound, see "Recording on a tape manually" on the remote for the operation. To stop recording, press x. • If acoustic feedback (howling) occurs, move the microphone away from microphone...
... along with the music and adjust the microphone volume by selecting the "CD" function and not playing a disc. • When high level sound signals are input, the system automatically adjusts the recording level to prevent distortion of the microphone. • If you want . Sleep Timer You can set the.... Use buttons on page 18. Each time you can do not set the clock. 21US To record the sound, see "Recording on a tape manually" on the remote for the operation. To stop recording, press x. • If acoustic feedback (howling) occurs, move the microphone away from microphone...

