

Operating Instructions
Page 1
Para la conexión/instalación, consulte la página 37. MEX-N4200BT Serial No. To cancel the demonstration (DEMO) display, see page 34. Model No. For the connection/installation, see page 20. Record the serial number in the space provided below. Pour annuler l'affichage de d&#...located on the bottom of the unit. Pour le raccordement/l'installation, reportez-vous à la page 38. Para cancelar la pantalla de demostración (DEMO), consulte la página 21. MEX-N4200BT Refer to these numbers whenever you call upon your Sony dealer regarding this product.
Para la conexión/instalación, consulte la página 37. MEX-N4200BT Serial No. To cancel the demonstration (DEMO) display, see page 34. Model No. For the connection/installation, see page 20. Record the serial number in the space provided below. Pour annuler l'affichage de d&#...located on the bottom of the unit. Pour le raccordement/l'installation, reportez-vous à la page 38. Para cancelar la pantalla de demostración (DEMO), consulte la página 21. MEX-N4200BT Refer to these numbers whenever you call upon your Sony dealer regarding this product.

Operating Instructions
Page 2
... the chassis. However, there is no guarantee that to which can radiate radio frequency energy and, if not installed and used in a particular installation. Connect the equipment into an outlet on a circuit different from that interference will not occur in accordance with ... IN THE PROVINCE OF QUEBEC. Reorient or relocate the receiving antenna. - You are designed to operate this unit in a residential installation. This equipment has been tested and found to comply with the instructions, may cause harmful interference to radio communications. This equipment generates...
... the chassis. However, there is no guarantee that to which can radiate radio frequency energy and, if not installed and used in a particular installation. Connect the equipment into an outlet on a circuit different from that interference will not occur in accordance with ... IN THE PROVINCE OF QUEBEC. Reorient or relocate the receiving antenna. - You are designed to operate this unit in a residential installation. This equipment has been tested and found to comply with the instructions, may cause harmful interference to radio communications. This equipment generates...
Operating Instructions
Page 4
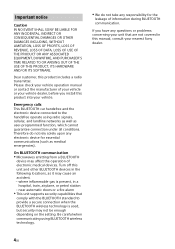
... gas is used, but security may not be enough depending on the setting. If you install this manual, consult your vehicle. Important notice Caution IN NO EVENT SHALL SONY BE LIABLE FOR ANY INCIDENTAL, INDIRECT OR CONSEQUENTIAL DAMAGES OR OTHER DAMAGES INCLUDING, WITHOUT LIMITATION,... which cannot guarantee connection under all conditions. Dear customer, this unit and other BLUETOOTH devices in this product into your nearest Sony dealer. 4GB Therefore do not take any electronic device for the leakage of electronic medical devices. Be careful when communicating using ...
... gas is used, but security may not be enough depending on the setting. If you install this manual, consult your vehicle. Important notice Caution IN NO EVENT SHALL SONY BE LIABLE FOR ANY INCIDENTAL, INDIRECT OR CONSEQUENTIAL DAMAGES OR OTHER DAMAGES INCLUDING, WITHOUT LIMITATION,... which cannot guarantee connection under all conditions. Dear customer, this unit and other BLUETOOTH devices in this product into your nearest Sony dealer. 4GB Therefore do not take any electronic device for the leakage of electronic medical devices. Be careful when communicating using ...
Operating Instructions
Page 5
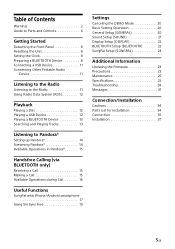
... BLUETOOTH Setup (BLUETOOTH 22 SongPal Setup (SONGPAL 23 Additional Information Updating the Firmware 23 Precautions 23 Maintenance 25 Specifications 25 Troubleshooting 28 Messages 31 Connection/Installation Cautions 34 Parts List for Installation 34 Connection 35 Installation 37 5GB
... BLUETOOTH Setup (BLUETOOTH 22 SongPal Setup (SONGPAL 23 Additional Information Updating the Firmware 23 Precautions 23 Maintenance 25 Specifications 25 Troubleshooting 28 Messages 31 Connection/Installation Cautions 34 Parts List for Installation 34 Connection 35 Installation 37 5GB
Operating Instructions
Page 9
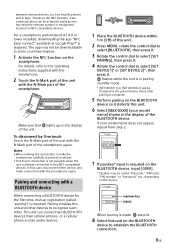
... first time, mutual registration (called "Passcode," "PIN code," "PIN number" or "Password," etc., depending on the smartphone. In this unit. 6 Select [MEX-XXXX] (your model name does not appear, repeat from step 2. 7 If passkey* input is required on NFC compatible devices. Thanks to the NFC function, ... [0000]. * Passkey may not be achieved easily just by One touch Touch the N-Mark part of the unit with Android OS 4.0 or lower installed, downloading the app "NFC Easy Connect" available at Google Play™ is already connected to select [SET DEVICE 1]* or [SET DEVICE 2]*, then...
... first time, mutual registration (called "Passcode," "PIN code," "PIN number" or "Password," etc., depending on the smartphone. In this unit. 6 Select [MEX-XXXX] (your model name does not appear, repeat from step 2. 7 If passkey* input is required on NFC compatible devices. Thanks to the NFC function, ... [0000]. * Passkey may not be achieved easily just by One touch Touch the N-Mark part of the unit with Android OS 4.0 or lower installed, downloading the app "NFC Easy Connect" available at Google Play™ is already connected to select [SET DEVICE 1]* or [SET DEVICE 2]*, then...
Operating Instructions
Page 10
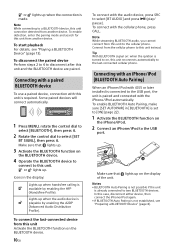
... device. 10GB To connect with the iPhone/iPod automatically. Connecting with an iPhone/iPod (BLUETOOTH Auto Pairing) When an iPhone/iPod with iOS5 or later installed is connected to the USB port, the unit is already connected to two BLUETOOTH devices. To enable BLUETOOTH Auto Pairing, make sure [SET AUTOPAIR] in...
... device. 10GB To connect with the iPhone/iPod automatically. Connecting with an iPhone/iPod (BLUETOOTH Auto Pairing) When an iPhone/iPod with iOS5 or later installed is connected to the USB port, the unit is already connected to two BLUETOOTH devices. To enable BLUETOOTH Auto Pairing, make sure [SET AUTOPAIR] in...

Operating Instructions
Page 12
...used as a general reference for a station broadcasting the selected program type. Playing a USB Device In these Operating Instructions, "iPod" is installed. Using Radio Data System (RDS) Selecting program types (PTY) 1 Press PTY during FM reception. 2 Rotate the control dial until the ...Android Open Accessory) 2.0, MSC (Mass Storage Class) and MTP (Media Transfer Protocol) type USB devices* compliant with Android OS 4.1 or higher installed support Android Open Accessory 2.0 (AOA 2.0). Some digital media players or Android smartphones may not fully support AOA 2.0 even if Android OS 4.1...
...used as a general reference for a station broadcasting the selected program type. Playing a USB Device In these Operating Instructions, "iPod" is installed. Using Radio Data System (RDS) Selecting program types (PTY) 1 Press PTY during FM reception. 2 Rotate the control dial until the ...Android Open Accessory) 2.0, MSC (Mass Storage Class) and MTP (Media Transfer Protocol) type USB devices* compliant with Android OS 4.1 or higher installed support Android Open Accessory 2.0 (AOA 2.0). Some digital media players or Android smartphones may not fully support AOA 2.0 even if Android OS 4.1...

Operating Instructions
Page 26
... × 160 mm (7 1/4 in × 2 1/8 in × 6 5/16 in) (w/h/d) Mass: Approx. 1.2 kg (2 lb 11 oz) Package contents: Main unit (1) Remote commander (1): RM-X231 Parts for installation and connections (1 set) Optional accessories/equipment: Microphone: XA-MC10 Cable for detailed information.
... × 160 mm (7 1/4 in × 2 1/8 in × 6 5/16 in) (w/h/d) Mass: Approx. 1.2 kg (2 lb 11 oz) Package contents: Main unit (1) Remote commander (1): RM-X231 Parts for installation and connections (1 set) Optional accessories/equipment: Microphone: XA-MC10 Cable for detailed information.
Operating Instructions
Page 28
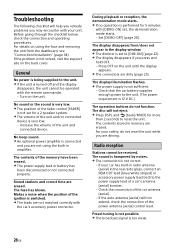
...; Press DSPL and (back)/MODE for a 2-speaker system. The volume of the unit and connected device. The display disappears from the dashboard, see "Connection/Installation" (page 34). Increase the volume of the unit and/or connected device is not sufficient. - No sound or the sound is very low. The...
...; Press DSPL and (back)/MODE for a 2-speaker system. The volume of the unit and connected device. The display disappears from the dashboard, see "Connection/Installation" (page 34). Increase the volume of the unit and/or connected device is not sufficient. - No sound or the sound is very low. The...
Operating Instructions
Page 32
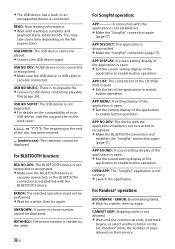
... not connected or recognized. Make the BLUETOOTH connection and establish the "SongPal" connection again (page 17). APP NO DEV: The device with the application installed is disconnected. Make the "SongPal" connection (page 17). USB NO DEV: A USB device is not connected or recognized. Make sure the USB device...
... not connected or recognized. Make the BLUETOOTH connection and establish the "SongPal" connection again (page 17). APP NO DEV: The device with the application installed is disconnected. Make the "SongPal" connection (page 17). USB NO DEV: A USB device is not connected or recognized. Make sure the USB device...

Operating Instructions
Page 34
...°. For details, see "Removing the protection collar and the bracket" (page 37). • Keep the release keys for a safe and secure installation. Parts List for Installation × 2 5 × max. 8 mm (7/32 × max. 5/16 in direct sunlight or near ...; Use only the supplied mounting hardware for future use the release keys to remove the bracket from your car. 34GB Connection/Installation Cautions • Run all ground (earth) leads to a common ground (earth) point. • Do not get the leads trapped under a...
...°. For details, see "Removing the protection collar and the bracket" (page 37). • Keep the release keys for a safe and secure installation. Parts List for Installation × 2 5 × max. 8 mm (7/32 × max. 5/16 in direct sunlight or near ...; Use only the supplied mounting hardware for future use the release keys to remove the bracket from your car. 34GB Connection/Installation Cautions • Run all ground (earth) leads to a common ground (earth) point. • Do not get the leads trapped under a...

Operating Instructions
Page 35
... control, see "Making connections" (page 36). For details on the type of car, use or not, route the microphone input cord such that it is installed around your feet.
... control, see "Making connections" (page 36). For details on the type of car, use or not, route the microphone input cord such that it is installed around your feet.

Operating Instructions
Page 36
...cable RC-SR1 (not supplied) is required before use a subwoofer without a power amplifier when it is connected to the support sites on installing the connection cable RC-SR1 (not supplied) • Refer to a rear speaker cord. Front speaker Memory hold connection When the yellow... a power antenna (aerial). Speaker connection • Before connecting the speakers, turn the unit off . When using the steering wheel remote control Installation of 4 Ω to 8 Ω, and with adequate power handling capacities to insulate the unused leads with electrical tape for help is recommended...
...cable RC-SR1 (not supplied) is required before use a subwoofer without a power amplifier when it is connected to the support sites on installing the connection cable RC-SR1 (not supplied) • Refer to a rear speaker cord. Front speaker Memory hold connection When the yellow... a power antenna (aerial). Speaker connection • Before connecting the speakers, turn the unit off . When using the steering wheel remote control Installation of 4 Ω to 8 Ω, and with adequate power handling capacities to insulate the unused leads with electrical tape for help is recommended...

Operating Instructions
Page 37
... bracket , then pull up the unit to separate. Face the hook inwards. Do not use the previous parts you removed when installing the unit. Screw Box Catch 2 Mount the unit onto the bracket , then attach the protection collar . &#...58563; Notes • If the catches are straight or bent outwards, the unit will not be installed securely and may spring out. • Make sure the 4 catches on the protection collar are properly engaged in ) 2 Insert both sides ...
... bracket , then pull up the unit to separate. Face the hook inwards. Do not use the previous parts you removed when installing the unit. Screw Box Catch 2 Mount the unit onto the bracket , then attach the protection collar . &#...58563; Notes • If the catches are straight or bent outwards, the unit will not be installed securely and may spring out. • Make sure the 4 catches on the protection collar are properly engaged in ) 2 Insert both sides ...

Operating Instructions
Page 38
...some makes of Japanese cars. Existing parts supplied with your car Bracket Note To prevent malfunction, install only with the supplied screws . Resetting the unit For details, see "Detaching the Front Panel" (page 8)....; to dashboard/center console Bracket Bracket Fuse replacement When replacing the fuse, Fuse (10 A) be able to install this unit in a Japanese car You may be an internal malfunction. If the fuse blows again after replacement... original fuse. In such a case, consult your Sony dealer. In such a case, consult your nearest...
...some makes of Japanese cars. Existing parts supplied with your car Bracket Note To prevent malfunction, install only with the supplied screws . Resetting the unit For details, see "Detaching the Front Panel" (page 8)....; to dashboard/center console Bracket Bracket Fuse replacement When replacing the fuse, Fuse (10 A) be able to install this unit in a Japanese car You may be an internal malfunction. If the fuse blows again after replacement... original fuse. In such a case, consult your Sony dealer. In such a case, consult your nearest...

