Operating Instructions
Page 3
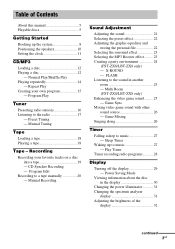
... on a disc into a tape 19 - Sleep Timer Waking up the system 8 Positioning the speakers 10 Setting the clock 11 CD/MP3 Loading a disc 12 Playing a disc 12 - Program Play Tuner Presetting radio stations 16 Listening to music 27 - CD Synchro Recording - Game Sync Mixing video game sound with other sound source 26... and storing the personal file 22 Selecting the surround effect 23 Selecting the MP3 Booster effect ......... 23 Creating a party environment 24 (FST-ZX8/LBT-ZX8 only) - Multi Room (FST-ZX8/LBT-ZX8 only) Enhancing the video game sound ......... 25 -
... on a disc into a tape 19 - Sleep Timer Waking up the system 8 Positioning the speakers 10 Setting the clock 11 CD/MP3 Loading a disc 12 Playing a disc 12 - Program Play Tuner Presetting radio stations 16 Listening to music 27 - CD Synchro Recording - Game Sync Mixing video game sound with other sound source 26... and storing the personal file 22 Selecting the surround effect 23 Selecting the MP3 Booster effect ......... 23 Creating a party environment 24 (FST-ZX8/LBT-ZX8 only) - Multi Room (FST-ZX8/LBT-ZX8 only) Enhancing the video game sound ......... 25 -
Operating Instructions
Page 5
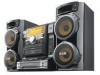
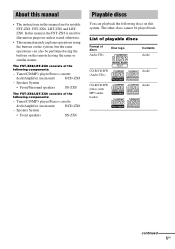
... discs You can also be played back. About this manual • The instructions in this system. Speaker System • Front/Surround speakers SS-ZX8 The FST-ZX6/LBT-ZX6 consists of the following components: - The FST-ZX8/LBT-ZX8 consists of discs Audio CDs Disc logo Contents Audio CD-R/CD-RW (Audio CDs) CD-R/CD-RW (Discs with MP3 audio tracks...
... discs You can also be played back. About this manual • The instructions in this system. Speaker System • Front/Surround speakers SS-ZX8 The FST-ZX6/LBT-ZX6 consists of the following components: - The FST-ZX8/LBT-ZX8 consists of discs Audio CDs Disc logo Contents Audio CD-R/CD-RW (Audio CDs) CD-R/CD-RW (Discs with MP3 audio tracks...
Operating Instructions
Page 6
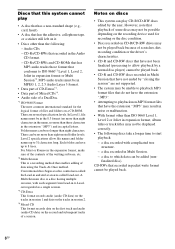
... Format The most common international standard for recording or the disc condition. • Discs recorded on CD-R/CD-RW drives may be played back. 6GB Discs that this system cannot play CD-R/CD-RW discs edited by the user. MP3 audio tracks must be no more than eight nested folder ...system may not be displayed correctly. • The following : - Level 2 specifications allow playback by a normal disc player) cannot be played back. • CD-R and CD-RW discs recorded in Multi Session that has the adhesive, cellophone tape, or a sticker still left on it. • Discs other ...
... Format The most common international standard for recording or the disc condition. • Discs recorded on CD-R/CD-RW drives may be played back. 6GB Discs that this system cannot play CD-R/CD-RW discs edited by the user. MP3 audio tracks must be no more than eight nested folder ...system may not be displayed correctly. • The following : - Level 2 specifications allow playback by a normal disc player) cannot be played back. • CD-R and CD-RW discs recorded in Multi Session that has the adhesive, cellophone tape, or a sticker still left on it. • Discs other ...
Operating Instructions
Page 7
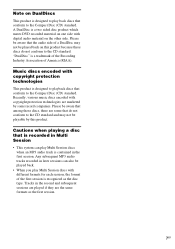
... DualDisc is recognized as the first session. 7GB Cautions when playing a disc that is recorded in the second and subsequent sessions are played if they are marketed by this product because these discs do not conform to the CD standard and may not be playable by some that do not...also be aware that among those discs, there are some record companies. "DualDisc" is contained in later sessions can play back discs that conform to the Compact Disc (CD) standard. Recently, various music discs encoded with digital audio material on the other side. Music discs encoded with ...
... DualDisc is recognized as the first session. 7GB Cautions when playing a disc that is recorded in the second and subsequent sessions are played if they are marketed by this product because these discs do not conform to the CD standard and may not be playable by some that do not...also be aware that among those discs, there are some record companies. "DualDisc" is contained in later sessions can play back discs that conform to the Compact Disc (CD) standard. Recently, various music discs encoded with digital audio material on the other side. Music discs encoded with ...
Operating Instructions
Page 12
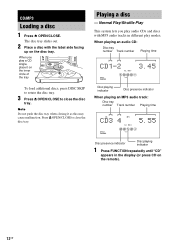
... disc tray. Playing a disc - Normal Play/Shuffle Play This system lets you play a CD single, place it as this may cause malfunction. When you play modes. Note Do not push the disc tray when closing it on the remote). 12GB CD/MP3 Loading a disc 1 Press Z OPEN/CLOSE. When playing an audio CD: Disc tray number Track number Playing time EFFECT...
... disc tray. Playing a disc - Normal Play/Shuffle Play This system lets you play a CD single, place it as this may cause malfunction. When you play modes. Note Do not push the disc tray when closing it on the remote). 12GB CD/MP3 Loading a disc 1 Press Z OPEN/CLOSE. When playing an audio CD: Disc tray number Track number Playing time EFFECT...
Operating Instructions
Page 13
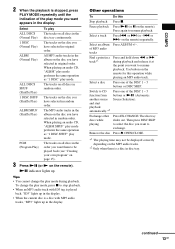
... lights up in disc tray. Other operations To Do this operation while playing an MP3 audio track. Select an album Press ALBUM +/-. When playing an audio CD, "ALBM" play mode performs the same operation as "1 DISC SHUF" play mode. Pause playback Press NX (or X on the remote) repeatedly.... buttons or DISC SKIP. Exchange other discs while playing Press EX-CHANGE. CD/MP3 2 When the playback is stopped, press PLAY MODE repeatedly until the indication of the play mode you have selected in random order. ALBM SHUF (Shuffle Play) The MP3 audio tracks in the album on ...
... lights up in disc tray. Other operations To Do this operation while playing an MP3 audio track. Select an album Press ALBUM +/-. When playing an audio CD, "ALBM" play mode performs the same operation as "1 DISC SHUF" play mode. Pause playback Press NX (or X on the remote) repeatedly.... buttons or DISC SKIP. Exchange other discs while playing Press EX-CHANGE. CD/MP3 2 When the playback is stopped, press PLAY MODE repeatedly until the indication of the play mode you have selected in random order. ALBM SHUF (Shuffle Play) The MP3 audio tracks in the album on ...

Operating Instructions
Page 14
... selected for the next MP3 audio track to start playback. • An album that disc. Repeat Play You can be sure to add the file extension ".MP3" to the file name. • If you press CD on the remote while the system is turned off , the system turns on a disc repeatedly. REP1...: A single track is played back repeatedly until "REP" or "REP1" lights up the extension ".MP3" to a track other type...
... selected for the next MP3 audio track to start playback. • An album that disc. Repeat Play You can be sure to add the file extension ".MP3" to the file name. • If you press CD on the remote while the system is turned off , the system turns on a disc repeatedly. REP1...: A single track is played back repeatedly until "REP" or "REP1" lights up the extension ".MP3" to a track other type...
Operating Instructions
Page 15
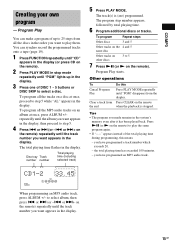
...the display. 3 Press one of DISC 1 ~ 5 buttons or DISC SKIP to play the same program again. • If "--.--" appears instead of the total playing time during programming, this Press PLAY MODE repeatedly until "CD" appears in stop mode repeatedly until the track number you have programmed an MP3 audio...select album, then press . Press CLEAR on the remote). 2 Press PLAY MODE in the display (or press CD on the remote when the playback is (are) programmed. the total playing time has exceeded 100 minutes. - or > (or -. CD/MP3 Creating your own program - or >+ on an album at ...
...the display. 3 Press one of DISC 1 ~ 5 buttons or DISC SKIP to play the same program again. • If "--.--" appears instead of the total playing time during programming, this Press PLAY MODE repeatedly until "CD" appears in stop mode repeatedly until the track number you have programmed an MP3 audio...select album, then press . Press CLEAR on the remote). 2 Press PLAY MODE in the display (or press CD on the remote when the playback is (are) programmed. the total playing time has exceeded 100 minutes. - or > (or -. CD/MP3 Creating your own program - or >+ on an album at ...
Operating Instructions
Page 19
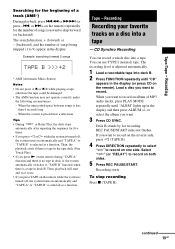
...system automatically switches to record on automatically and "TAPE A" or "TAPE B" is tape in the tape deck (One Touch Play). • If you want . 3 Press CD SYNC. Tape - Tape/Tape - CD Synchro Recording You can use TYPE I (normal) tape. When you press h or H while the system is turned ...off , the system turns on one side. The search direction, + (forward) or - (backward), and the number of MP3 audio tracks, press PLAY MODE repeatedly until "CD" appears in the display. Deck B stands by for the number of a track (AMS*) During playback, press .m or M> (or press -. Then...
...system automatically switches to record on automatically and "TAPE A" or "TAPE B" is tape in the tape deck (One Touch Play). • If you want . 3 Press CD SYNC. Tape - Tape/Tape - CD Synchro Recording You can use TYPE I (normal) tape. When you press h or H while the system is turned ...off , the system turns on one side. The search direction, + (forward) or - (backward), and the number of MP3 audio tracks, press PLAY MODE repeatedly until "CD" appears in the display. Deck B stands by for the number of a track (AMS*) During playback, press .m or M> (or press -. Then...
Operating Instructions
Page 20
... tune to the station you like from connected component, connect the external audio sources. 4 Press REC PAUSE/START. Recording a disc by the total playing time for side A and side B respectively (Tape Select Edit). Notes • You cannot use Tape Select Edit for disc or tape). Deck...page 15). Recording to other sources while recording. • Game Mixing does not function during CD Synchro Recording. Select "j" (or "RELAY") to record on both sides. 6 Press REC PAUSE/START, then start playing the source (for discs containing over 20 tracks or MP3 audio tracks. • You ...
... tune to the station you like from connected component, connect the external audio sources. 4 Press REC PAUSE/START. Recording a disc by the total playing time for side A and side B respectively (Tape Select Edit). Notes • You cannot use Tape Select Edit for disc or tape). Deck...page 15). Recording to other sources while recording. • Game Mixing does not function during CD Synchro Recording. Select "j" (or "RELAY") to record on both sides. 6 Press REC PAUSE/START, then start playing the source (for discs containing over 20 tracks or MP3 audio tracks. • You ...
Operating Instructions
Page 21
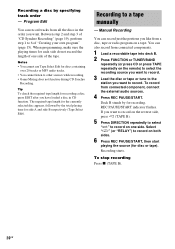
... listen to start from the front side. Tips • When you start recording. to select the album you press the button, the display changes as CD, tape, radio, VCR or turntable connected to start from the reverse side, recording stops at the end of MP3 audio tracks manually: Press... PLAY MODE repeatedly until "ALBM" lights up in each deck reverses independently. • For recording from the radio: If noise is "X-GROOVE ON". 21GB Each time ...
... listen to start from the front side. Tips • When you start recording. to select the album you press the button, the display changes as CD, tape, radio, VCR or turntable connected to start from the reverse side, recording stops at the end of MP3 audio tracks manually: Press... PLAY MODE repeatedly until "ALBM" lights up in each deck reverses independently. • For recording from the radio: If noise is "X-GROOVE ON". 21GB Each time ...
Operating Instructions
Page 26
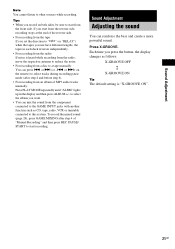
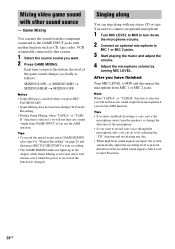
...the microphone. • If you want to MIC 1 or MIC 2 jacks. 3 Start playing the music and adjust the volume. 4 Adjust the microphone volume by selecting the "CD" function and not playing any stereo CD or tape. Tips • If acoustic feedback (howling) occurs, move the microphone away from... the speakers or change the direction of the game sound changes cyclically as CD, tape, radio, VCR or turntable connected...
...the microphone. • If you want to MIC 1 or MIC 2 jacks. 3 Start playing the music and adjust the volume. 4 Adjust the microphone volume by selecting the "CD" function and not playing any stereo CD or tape. Tips • If acoustic feedback (howling) occurs, move the microphone away from... the speakers or change the direction of the game sound changes cyclically as CD, tape, radio, VCR or turntable connected...
Operating Instructions
Page 27
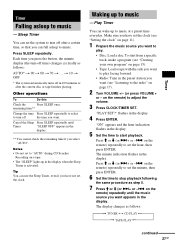
...program" on a tape. • The "SLEEP" lights up to stop playback following the same procedure as follows: t TUNER y CD PLAY T t TAPE PLAY T continued 27GB Play Timer You can use the Sleep Timer, even if you select "AUTO". To start playback. The minute indication flashes in the display... The system automatically turns off after the current disc or tape finishes playing. "ON" appears and the hour indication flashes in the preset station you want . "PLAY SET?" on the remote) repeatedly to "AUTO" during CD Synchro Recording on page 15). • Tape: Load a tape ...
...program" on a tape. • The "SLEEP" lights up to stop playback following the same procedure as follows: t TUNER y CD PLAY T t TAPE PLAY T continued 27GB Play Timer You can use the Sleep Timer, even if you select "AUTO". To start playback. The minute indication flashes in the display... The system automatically turns off after the current disc or tape finishes playing. "ON" appears and the hour indication flashes in the preset station you want . "PLAY SET?" on the remote) repeatedly to "AUTO" during CD Synchro Recording on page 15). • Tape: Load a tape ...
Operating Instructions
Page 29
... press x (TAPE B). Tips • The system turns on the remote) repeatedly until "TIMER OFF?" Notes • You cannot select the Play Timer and Timer Recording at the same time. • If you want to record on the remote) repeatedly until "REC SELECT?" switching the VIDEO... time the system turns on both sides. Note You cannot do the following buttons (a) TUNER/BAND (b) GAME (c) h/H (TAPE A) (d) h/H (TAPE B) (e) NX (CD) (f) CD on the remote (g) TAPE on one side. on the reverse side, press h (TAPE B). Cancel the timer 1 Press CLOCK/TIMER SELECT. 2 Press M or m (or...
... press x (TAPE B). Tips • The system turns on the remote) repeatedly until "TIMER OFF?" Notes • You cannot select the Play Timer and Timer Recording at the same time. • If you want to record on the remote) repeatedly until "REC SELECT?" switching the VIDEO... time the system turns on both sides. Note You cannot do the following buttons (a) TUNER/BAND (b) GAME (c) h/H (TAPE A) (d) h/H (TAPE B) (e) NX (CD) (f) CD on the remote (g) TAPE on one side. on the reverse side, press h (TAPE B). Cancel the timer 1 Press CLOCK/TIMER SELECT. 2 Press M or m (or...

Operating Instructions
Page 30
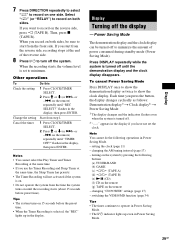
... current album (for a few seconds)4) t Clock display12) (for 8 seconds) t Effect status (for 8 seconds) Checking the total playing time Press DISPLAY repeatedly when playback is no program. 11) Only for CD-TEXT disc and a disc with MP3 audio tracks. 12) "--.--" appears in the display if you press the button, the... is not displayed from track 21 onwards. 4) Only for track title, album title or disc title. 30GB All play modes other than "ALBM" and "ALBM SHUF". 7) For audio CDs. 8) For disc with MP3 audio tracks. Viewing information about the disc in the display. Note Some characters may ...
... current album (for a few seconds)4) t Clock display12) (for 8 seconds) t Effect status (for 8 seconds) Checking the total playing time Press DISPLAY repeatedly when playback is no program. 11) Only for CD-TEXT disc and a disc with MP3 audio tracks. 12) "--.--" appears in the display if you press the button, the... is not displayed from track 21 onwards. 4) Only for track title, album title or disc title. 30GB All play modes other than "ALBM" and "ALBM SHUF". 7) For audio CDs. 8) For disc with MP3 audio tracks. Viewing information about the disc in the display. Note Some characters may ...
Operating Instructions
Page 34
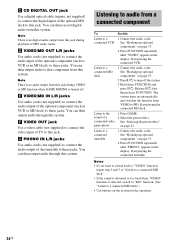
... connected MD deck. See "Selecting the preset effect" on page 33. 2 Press FUNCTION repeatedly until "VIDEO" appears in the display. Start playing the connected VCR. Listen to the sound of the optional component (such as VCR or an MD deck) to these jacks. Release ?/1 first, then ... function from this jack. Notes • If you want to switch back to "VIDEO" function, repeat step 2 and 3 of the turntable to these jacks. C CD DIGITAL OUT jack Use a digital optical cable (square, not supplied) to connect the digital input of the optional component (such as VCD or MD deck...
... connected MD deck. See "Selecting the preset effect" on page 33. 2 Press FUNCTION repeatedly until "VIDEO" appears in the display. Start playing the connected VCR. Listen to the sound of the optional component (such as VCR or an MD deck) to these jacks. Release ?/1 first, then ... function from this jack. Notes • If you want to switch back to "VIDEO" function, repeat step 2 and 3 of the turntable to these jacks. C CD DIGITAL OUT jack Use a digital optical cable (square, not supplied) to connect the digital input of the optional component (such as VCD or MD deck...
Operating Instructions
Page 37
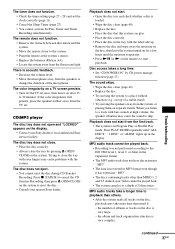
...• Place the disc that this system can play . • Place the disc correctly. • Place the disc in the display. When you listen to cancel the CD Synchro Recording, then press Z OPEN/CLOSE on the display. • Contact your nearest Sony dealer. Playback does not start . •... of albums or tracks on separate stands. MP3 audio track cannot be played back. • The system can play to eject the disc. • Consult your Sony dealer or local authorized Sony service facility. continued 37GB CD/MP3 player The disc tray does not open and "LOCKED" appears on...
...• Place the disc that this system can play . • Place the disc correctly. • Place the disc in the display. When you listen to cancel the CD Synchro Recording, then press Z OPEN/CLOSE on the display. • Contact your nearest Sony dealer. Playback does not start . •... of albums or tracks on separate stands. MP3 audio track cannot be played back. • The system can play to eject the disc. • Consult your Sony dealer or local authorized Sony service facility. continued 37GB CD/MP3 player The disc tray does not open and "LOCKED" appears on...
Operating Instructions
Page 38
..." by this system are as far away from the tape. You should set up the antenna again. Tape deck The tape does not record or play, or there is severe hum or noise ("TUNED" or "ST" flashes up in the display). • Set the proper band and frequency (page 16). ...• Connect the antenna properly (page 9). • Find a place and an orientation that can be displayed by CD power manage function (page 17). Noise increases or the high frequencies are erased. • The record/playback heads are magnetised. (See "Demagnetising the tape heads...
..." by this system are as far away from the tape. You should set up the antenna again. Tape deck The tape does not record or play, or there is severe hum or noise ("TUNED" or "ST" flashes up in the display). • Set the proper band and frequency (page 16). ...• Connect the antenna properly (page 9). • Find a place and an orientation that can be displayed by CD power manage function (page 17). Noise increases or the high frequencies are erased. • The record/playback heads are magnetised. (See "Demagnetising the tape heads...

Operating Instructions
Page 39
...and off time of Play Timer or Timer Recording is reading information of the disc. SET TIMER! Sound Adjustment Not in Use You pressed X-ROUND ON/OFF or SPEAKERS when the headphones are not available. CD/MP3 No Disc There...is set the clock or timer during playback or pause. OVER You have pressed PLAY MODE during operation. Push STOP! You tried to program more than 25 steps. You pressed CLOCK/TIMER SELECT before... Play Timer or Timer Recording is no tape in the tape deck. NO STEP You have cleared...
...and off time of Play Timer or Timer Recording is reading information of the disc. SET TIMER! Sound Adjustment Not in Use You pressed X-ROUND ON/OFF or SPEAKERS when the headphones are not available. CD/MP3 No Disc There...is set the clock or timer during playback or pause. OVER You have pressed PLAY MODE during operation. Push STOP! You tried to program more than 25 steps. You pressed CLOCK/TIMER SELECT before... Play Timer or Timer Recording is no tape in the tape deck. NO STEP You have cleared...
Operating Instructions
Page 44
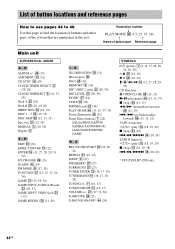
...qd (16, 17, 38) TUNER/BAND q; (16, 17, 20, 29) TUNING +/- rh (13) AMP MENU qg (31) CD SYNC ql (19) CLOCK/TIMER SELECT 2 (28, 29) CLOCK/TIMER SET 5 (11, 27, 28) Deck A e; (18... (26, 36) MIC LEVEL ed (26, 36) MODE* rj (24) P FILE eg (22) PHONES jack wd (36) PLAY MODE r; (13, 15, 37, 39) Power illuminator wk (31) Preset Effect buttons 7 (22) SALSA/REGGAE/POP/ SAMBA/TANGO...function: h/H (play) ef (18, 19, 29) x (stop) ef (18) .m/M> ef (18, 19) TAPE B function: h/H (play) qk (18, 19, 29) x (stop) qk (18, 19, 38) .m/M> qk (18, 19) * FST-ZX8/LBT-ZX8 only. 44GB Illustration number r PLAY MODE r; (...
...qd (16, 17, 38) TUNER/BAND q; (16, 17, 20, 29) TUNING +/- rh (13) AMP MENU qg (31) CD SYNC ql (19) CLOCK/TIMER SELECT 2 (28, 29) CLOCK/TIMER SET 5 (11, 27, 28) Deck A e; (18... (26, 36) MIC LEVEL ed (26, 36) MODE* rj (24) P FILE eg (22) PHONES jack wd (36) PLAY MODE r; (13, 15, 37, 39) Power illuminator wk (31) Preset Effect buttons 7 (22) SALSA/REGGAE/POP/ SAMBA/TANGO...function: h/H (play) ef (18, 19, 29) x (stop) ef (18) .m/M> ef (18, 19) TAPE B function: h/H (play) qk (18, 19, 29) x (stop) qk (18, 19, 38) .m/M> qk (18, 19) * FST-ZX8/LBT-ZX8 only. 44GB Illustration number r PLAY MODE r; (...


