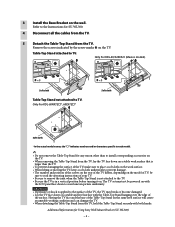
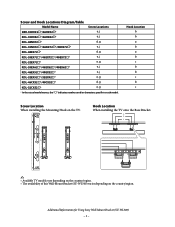
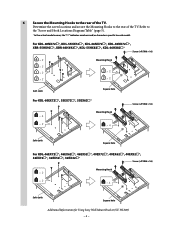
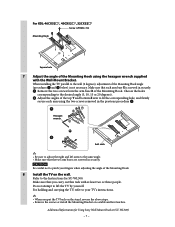
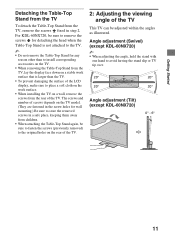
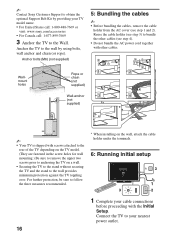
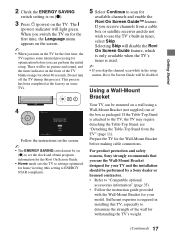
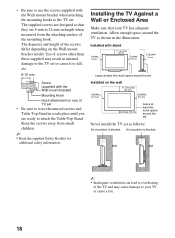
Sony KDL 46NX720 Wall Mount
Related Manual Pages
Similar Questions

Vesa, Weight And Full Motion Wall Mount Bracket For This Tv?
How much does this TV weigh? What is the VESA? What is the best full motion wall mount bracket for ...
How much does this TV weigh? What is the VESA? What is the best full motion wall mount bracket for ...
(Posted by soodynelson 6 years ago)

What Wall Mounts Are Compatible? I Need Fully Articulating Mount For Corner.
I bought an "open box" Sony 50w700b TV from Best Buy. There was no stand or wall mount brackets. I h...
I bought an "open box" Sony 50w700b TV from Best Buy. There was no stand or wall mount brackets. I h...
(Posted by ncardenn 8 years ago)
Wall Mounting Sony Kdl-60w610b
Can this Sony KDL-60W610B be wall mounted
Can this Sony KDL-60W610B be wall mounted
(Posted by ptregosch 9 years ago)

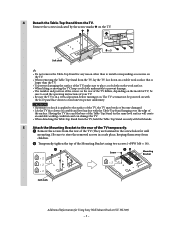
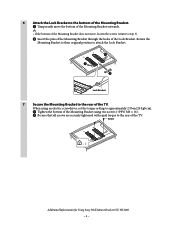
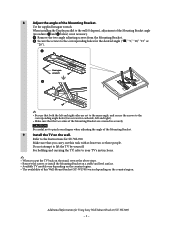
How To Install A Wall Mount For Sony Bravia Kdl46nx720
(Posted by edjhalila 10 years ago)

Screw Sizes For Tv Mount?
What screws do i need for the tv stand?
What screws do i need for the tv stand?
(Posted by Anonymous-75256 11 years ago)