Operating Instructions
Page 5
... locations (LOW LUX 47 Shooting in dark conditions (NIGHTSHOT 47 Customizing the picture quality (Picture Profile 47 Setting time data 48 Reviewing the most recently recorded scene (Last Scene Review 49 Assigning functions to the ASSIGN buttons 50 Playback Playback 51 Playback 51 Changing/checking the settings in your camcorder 53 Changing...
... locations (LOW LUX 47 Shooting in dark conditions (NIGHTSHOT 47 Customizing the picture quality (Picture Profile 47 Setting time data 48 Reviewing the most recently recorded scene (Last Scene Review 49 Assigning functions to the ASSIGN buttons 50 Playback Playback 51 Playback 51 Changing/checking the settings in your camcorder 53 Changing...

Operating Instructions
Page 42
The set , moving the v/V/b/B/ SET button up / down clears the mark. 4 Press the v/V/b/B/SET button to apply the setting. VOLUME - LAST SCENE REVIEW • If an item (such as iris value or focus value) is changed using the following diagram shows an example of changing the shutter speed ...
The set , moving the v/V/b/B/ SET button up / down clears the mark. 4 Press the v/V/b/B/SET button to apply the setting. VOLUME - LAST SCENE REVIEW • If an item (such as iris value or focus value) is changed using the following diagram shows an example of changing the shutter speed ...
Operating Instructions
Page 49
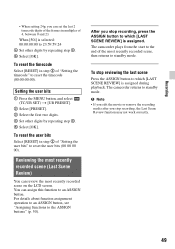
...and select (TC/UB SET) t [UB PRESET]. 2 Select [PRESET]. 3 Select the first two digits. 4 Set other digits by repeating step 3. 5 Select [OK]. You can review the most recently recorded scene, then returns to reset the user bits (00 00 00 00). The camcorder returns to which [LAST SCENE... REVIEW] is assigned. After you stop reviewing the last scene Press the ASSIGN button to 23:59:59:24 4 Set other digits by repeating step 3. 5 Select [OK]. b Note &#...
...and select (TC/UB SET) t [UB PRESET]. 2 Select [PRESET]. 3 Select the first two digits. 4 Set other digits by repeating step 3. 5 Select [OK]. You can review the most recently recorded scene, then returns to reset the user bits (00 00 00 00). The camcorder returns to which [LAST SCENE... REVIEW] is assigned. After you stop reviewing the last scene Press the ASSIGN button to 23:59:59:24 4 Set other digits by repeating step 3. 5 Select [OK]. b Note &#...

Operating Instructions
Page 50
... ASSIGN buttons Some functions can be assigned to the ASSIGN buttons • - (no function) • LOW LUX (p. 47) • FOCUS MAGNIFIER (p. 33) • LAST SCENE REVIEW (p. 49) • WHITE BALANCE (p. 40) • WB PRESET (p. 40) • WB SET (p. 40) • AE SHIFT (p. 66) • D. You can assign a single function to each...
... ASSIGN buttons Some functions can be assigned to the ASSIGN buttons • - (no function) • LOW LUX (p. 47) • FOCUS MAGNIFIER (p. 33) • LAST SCENE REVIEW (p. 49) • WHITE BALANCE (p. 40) • WB PRESET (p. 40) • WB SET (p. 40) • AE SHIFT (p. 66) • D. You can assign a single function to each...
Operating Instructions
Page 111
... 40 Indoor 40 "InfoLITHIUM" battery pack 105 INITIALIZE 81 Iris 36 IRIS button 36 Iris ring 36 ISO/GAIN button 37 L LANGUAGE 80 Last Scene Review 49 LCD BRIGHT 78 LCD screen 22 Lens 11, 108 LOW LUX 47 M MANU WB TEMP 40 MARKER 93 Maximum recording time ...100 MEDIA FORMAT...
... 40 Indoor 40 "InfoLITHIUM" battery pack 105 INITIALIZE 81 Iris 36 IRIS button 36 Iris ring 36 ISO/GAIN button 37 L LANGUAGE 80 Last Scene Review 49 LCD BRIGHT 78 LCD screen 22 Lens 11, 108 LOW LUX 47 M MANU WB TEMP 40 MARKER 93 Maximum recording time ...100 MEDIA FORMAT...


