

Operating Instructions (Large File - 12.86 MB)
Page 52
... The socket-outlet should be installed near the equipment and be determined by one or more of Conformity Trade Name: SONY Model: FWD-42PX2 Responsible Party: Sony Electronics Inc. Refer to these numbers whenever you may cause harmful interference to radio communications. To avoid electrical shock, ...so, the speakers may come out of fire or electric shock, do not open the cabinet. For customers in this manual could void your Sony dealer regarding this apparatus to qualified personnel only. De batterij mag alleen vervangen worden door vakbekwaam servicepersoneel. • Gooi...
... The socket-outlet should be installed near the equipment and be determined by one or more of Conformity Trade Name: SONY Model: FWD-42PX2 Responsible Party: Sony Electronics Inc. Refer to these numbers whenever you may cause harmful interference to radio communications. To avoid electrical shock, ...so, the speakers may come out of fire or electric shock, do not open the cabinet. For customers in this manual could void your Sony dealer regarding this apparatus to qualified personnel only. De batterij mag alleen vervangen worden door vakbekwaam servicepersoneel. • Gooi...
Operating Instructions (Large File - 12.86 MB)
Page 54
... level gradually 41 (GB) Setting an IP address and communication speed 42 (GB) Obtaining an IP address automatically (DHCP) .... 42 (GB) Setting an IP address manually (Manual 42 (GB) Setting a communication speed (Speed Setup) ...... 43 (GB) Self-diagnosis Function 43 (GB) Operating a Specific Display With the Remote Commander 44 (GB) Troubleshooting 45...
... level gradually 41 (GB) Setting an IP address and communication speed 42 (GB) Obtaining an IP address automatically (DHCP) .... 42 (GB) Setting an IP address manually (Manual 42 (GB) Setting a communication speed (Speed Setup) ...... 43 (GB) Self-diagnosis Function 43 (GB) Operating a Specific Display With the Remote Commander 44 (GB) Troubleshooting 45...
Operating Instructions (Large File - 12.86 MB)
Page 64
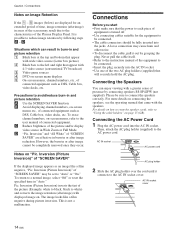
... steps A - Inversion (Picture Inversion)" of connected equipment such as DSS, Cable box, video decks, etc. This is possible to the user manual of connected equipment such as DSS, Cable box, video decks, etc. Situations which can enjoy viewing with displayed image on. To return to "...Connections Before you start • First make sure that appear with the speakers. Never pull the cable itself. • Refer to the instruction manual of the equipment to be sure to be connected. • The cable connectors should be fully inserted into the jacks. Please be connected. ...
... steps A - Inversion (Picture Inversion)" of connected equipment such as DSS, Cable box, video decks, etc. This is possible to the user manual of connected equipment such as DSS, Cable box, video decks, etc. Situations which can enjoy viewing with displayed image on. To return to "...Connections Before you start • First make sure that appear with the speakers. Never pull the cable itself. • Refer to the instruction manual of the equipment to be sure to be connected. • The cable connectors should be fully inserted into the jacks. Please be connected. ...

Operating Instructions (Large File - 12.86 MB)
Page 70
... Screen Adjust When "Auto Screen Adjust" is set to Off, this item to the COMPONENT or DVI input connectors for more than about five minutes. Manual: Manually configure an IP address. For details, see "Setting an IP address and communication speed" on the unit and automatically detects the last setting in standby...
... Screen Adjust When "Auto Screen Adjust" is set to Off, this item to the COMPONENT or DVI input connectors for more than about five minutes. Manual: Manually configure an IP address. For details, see "Setting an IP address and communication speed" on the unit and automatically detects the last setting in standby...

Operating Instructions (Large File - 12.86 MB)
Page 80
... to adjust and press ENTER. The following menu appears on the Adjust Screen menu. In such cases, adjust the dot phase manually. Adjusting manually (1) Select the item you press DISPLAY on the screen. (When you execute "Auto Adjust," the appropriate settings for the current... Shift: V Size: V Shift: Reset 28 1344 30 30 30 30 Select Set ENTER Exit MENU 2 You can adjust the screen either automatically or manually. Adjusting automatically (1) Select "Auto Adjust" with M/m and press ENTER. All the items of "Adjust Screen" menu are adjusted automatically. Every time you select...
... to adjust and press ENTER. The following menu appears on the Adjust Screen menu. In such cases, adjust the dot phase manually. Adjusting manually (1) Select the item you press DISPLAY on the screen. (When you execute "Auto Adjust," the appropriate settings for the current... Shift: V Size: V Shift: Reset 28 1344 30 30 30 30 Select Set ENTER Exit MENU 2 You can adjust the screen either automatically or manually. Adjusting automatically (1) Select "Auto Adjust" with M/m and press ENTER. All the items of "Adjust Screen" menu are adjusted automatically. Every time you select...

Operating Instructions (Large File - 12.86 MB)
Page 92
... Select Set ENTER Exit MENU 2 Select "INITIAL SETUP/INFORMATION" with M/m and press ENTER. INITIAL SETUP/INFORMATION IP Address Setup DHCP Manual Select Set ENTER Exit MENU 4 Select "DHCP" with M/m and press ENTER. The following menu appears on the Remote Commander and press..."Obtaining an IP address automatically (DHCP)" and press ENTER. The following menu appears on the screen. Setting an IP address manually (Manual) 1 Select "Manual" in the OPTION1 slot of an IP address and a communication speed is automatically obtained. The main menu appears on the ...
... Select Set ENTER Exit MENU 2 Select "INITIAL SETUP/INFORMATION" with M/m and press ENTER. INITIAL SETUP/INFORMATION IP Address Setup DHCP Manual Select Set ENTER Exit MENU 4 Select "DHCP" with M/m and press ENTER. The following menu appears on the Remote Commander and press..."Obtaining an IP address automatically (DHCP)" and press ENTER. The following menu appears on the screen. Setting an IP address manually (Manual) 1 Select "Manual" in the OPTION1 slot of an IP address and a communication speed is automatically obtained. The main menu appears on the ...

Operating Instructions (Large File - 12.86 MB)
Page 93
... pattern shown by a three second pause, two more flashes and this case, the count for the number of flashes is set manually. INITIAL SETUP/INFORMATION Speed Setup Speed: Execute Auto Detect INITIAL SETUP/INFORMATION Speed Setup Speed: Execute Auto Detect 10Mbps/Half Dup 10Mbps...If the POWER/STANDBY indicator flashes in accordance with M/m and press ENTER. Inform your authorized Sony dealer of the number of the display's current condition. The following error codes will be set manually with M/m and repeat the same procedure and press ENTER. 6 After values are set ...
... pattern shown by a three second pause, two more flashes and this case, the count for the number of flashes is set manually. INITIAL SETUP/INFORMATION Speed Setup Speed: Execute Auto Detect INITIAL SETUP/INFORMATION Speed Setup Speed: Execute Auto Detect 10Mbps/Half Dup 10Mbps...If the POWER/STANDBY indicator flashes in accordance with M/m and press ENTER. Inform your authorized Sony dealer of the number of the display's current condition. The following error codes will be set manually with M/m and repeat the same procedure and press ENTER. 6 After values are set ...

Protocol Manual
Page 9
... Input Detect (Option1) [b]Range/Switch Code Command Control 0x00 Gray Yes 0x01 Dark Gray 0x02 Black 0x00 OFF Yes 0x01 ON 0x00 DHCP Yes 0x01 Manual 0X02 Speed 0x00 No No 0x01 Yes 0x00 Done Yes 0x01 Error 1 (UART Commu.) 0x02 Error 2 (Duplication) 0x03 Error 3 (IP Add Setting) 0x04 Error 4 (GW... Yes Yes Yes Yes No Yes Yes Standby Disable Disable Enable Enable Enable Enable Disable Power On Enable Enable Enable Enable Enable Enable Enable (Continued) FWD-42PX2 5
... Input Detect (Option1) [b]Range/Switch Code Command Control 0x00 Gray Yes 0x01 Dark Gray 0x02 Black 0x00 OFF Yes 0x01 ON 0x00 DHCP Yes 0x01 Manual 0X02 Speed 0x00 No No 0x01 Yes 0x00 Done Yes 0x01 Error 1 (UART Commu.) 0x02 Error 2 (Duplication) 0x03 Error 3 (IP Add Setting) 0x04 Error 4 (GW... Yes Yes Yes Yes No Yes Yes Standby Disable Disable Enable Enable Enable Enable Disable Power On Enable Enable Enable Enable Enable Enable Enable (Continued) FWD-42PX2 5
