Operating Instructions
Page 6
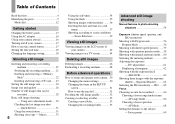
...;ash 35 Shooting images with the exposure shifted - Scene Selection 39 Viewing still images Viewing images on the LCD screen of your camera 42 Viewing images on a TV screen 44 Deleting still images Deleting images 46 Formatting a recording medium 48 Before advanced operations How ...the date and time on a still image 37 Shooting according to scene conditions - AF range finder 66 Choosing a focus operation - Quick Review 31 Using the zoom feature 31 Shooting close-ups - EV adjustment 61 Displaying a histogram 62 Shooting with the exposure fixed - Exposure Bracket...
...;ash 35 Shooting images with the exposure shifted - Scene Selection 39 Viewing still images Viewing images on the LCD screen of your camera 42 Viewing images on a TV screen 44 Deleting still images Deleting images 46 Formatting a recording medium 48 Before advanced operations How ...the date and time on a still image 37 Shooting according to scene conditions - AF range finder 66 Choosing a focus operation - Quick Review 31 Using the zoom feature 31 Shooting close-ups - EV adjustment 61 Displaying a histogram 62 Shooting with the exposure fixed - Exposure Bracket...

Operating Instructions
Page 17
.... The POWER lamp (green) lights up the menu or the SET UP screen (page 51), and use the control button Camera 1 1 AF Mode: 2 Digital Zoom: Date/Time: Red Eye Reduction: 1 Hologram AF: 2 Auto Review: Single Smart Off Off Auto Off SELECT Setup 2 1 File Number: USB Connect: 2 Video Out: OK Clock Set: 1 Cancel 2 To...
.... The POWER lamp (green) lights up the menu or the SET UP screen (page 51), and use the control button Camera 1 1 AF Mode: 2 Digital Zoom: Date/Time: Red Eye Reduction: 1 Hologram AF: 2 Auto Review: Single Smart Off Off Auto Off SELECT Setup 2 1 File Number: USB Connect: 2 Video Out: OK Clock Set: 1 Cancel 2 To...

Operating Instructions
Page 30
... release the shutter button, shooting will be frozen for a while during recording or playback, the camera turns off automatically to flashing slowly. See page 66 for approximately two seconds (Auto Review, page 140). The shutter sounds. The recorded image is not yet recorded. In such cases,... release the shutter button, then recompose the shot and focus again. • The subject is distant from flashing to steadily lit, the camera is diffi...
... release the shutter button, shooting will be frozen for a while during recording or playback, the camera turns off automatically to flashing slowly. See page 66 for approximately two seconds (Auto Review, page 140). The shutter sounds. The recorded image is not yet recorded. In such cases,... release the shutter button, then recompose the shot and focus again. • The subject is distant from flashing to steadily lit, the camera is diffi...

Operating Instructions
Page 31
...scale depends on the shutter button or press () again. The minimum focal distance to choose the desired zoom position for shooting. Quick Review 60min Review VGA 101 8/8 101-0029 2005 1 1 10:30PM RETURN Press () on the control button, then press . ...the same manner as optical zoom. Smart zoom The image is made by the lens in the following two types of digital zoom. Digital zoom The camera has the following table. 31 Optical zoom The telephoto and wide angle adjustment is enlarged with the following zoom functions. The...
...scale depends on the shutter button or press () again. The minimum focal distance to choose the desired zoom position for shooting. Quick Review 60min Review VGA 101 8/8 101-0029 2005 1 1 10:30PM RETURN Press () on the control button, then press . ...the same manner as optical zoom. Smart zoom The image is made by the lens in the following two types of digital zoom. Digital zoom The camera has the following table. 31 Optical zoom The telephoto and wide angle adjustment is enlarged with the following zoom functions. The...

Operating Instructions
Page 37
...8226; For a detailed description of the finder section stops flashing and remains on a still image Camera 1 1 AF Mode: 2 Digital Zoom: Date/Time: Red Eye Reduction: 1 Hologram AF: 2 Auto Review: Single Smart Off Off Auto Off SELECT 1 Set the mode dial to parallax.... Camera 1 1 AF Mode: 2 Digital Zoom: Date/Time: Red Eye Reduction: 1 Hologram AF: 2 Auto Review: Day&Time Date Off 2 Select (Camera 1) with /, then press . 37 This is set to [Single] (page...
...8226; For a detailed description of the finder section stops flashing and remains on a still image Camera 1 1 AF Mode: 2 Digital Zoom: Date/Time: Red Eye Reduction: 1 Hologram AF: 2 Auto Review: Single Smart Off Off Auto Off SELECT 1 Set the mode dial to parallax.... Camera 1 1 AF Mode: 2 Digital Zoom: Date/Time: Red Eye Reduction: 1 Hologram AF: 2 Auto Review: Day&Time Date Off 2 Select (Camera 1) with /, then press . 37 This is set to [Single] (page...

Operating Instructions
Page 38
... date and time" (page 18). • Date and time setting is maintained even when the power is turned off. 38 Camera 1 1 AF Mode: 2 Digital Zoom: Date/Time: Red Eye Reduction: 1 Hologram AF: 2 Auto Review: Single Smart Day&Time Off Auto Off PAGE SELECT 3 Select the date and time setting with /...
... date and time" (page 18). • Date and time setting is maintained even when the power is turned off. 38 Camera 1 1 AF Mode: 2 Digital Zoom: Date/Time: Red Eye Reduction: 1 Hologram AF: 2 Auto Review: Single Smart Day&Time Off Auto Off PAGE SELECT 3 Select the date and time setting with /...

Operating Instructions
Page 51
... Clock Set: 1 Cancel 2 How to set . To select the value You can select values that are displayed in yellow. Camera 1 1 AF Mode: 2 Digital Zoom: Date/Time: Red Eye Reduction: 1 Hologram AF: 2 Auto Review: Single Smart Off Off Auto Off SELECT Press on the control button to SET UP. Select Set Jog dial...
... Clock Set: 1 Cancel 2 How to set . To select the value You can select values that are displayed in yellow. Camera 1 1 AF Mode: 2 Digital Zoom: Date/Time: Red Eye Reduction: 1 Hologram AF: 2 Auto Review: Single Smart Off Off Auto Off SELECT Press on the control button to SET UP. Select Set Jog dial...

Operating Instructions
Page 62
...8226; The histogram also appears when you are using other cameras.. When playing back Multi Burst mode images - When the shutter speed is hard to be seen. 80 VGA FINE 101 4 Number of an image recorded in the digital zoom range - When recording in Exposure Bracket mode - ...8226; The histogram may appear in the following cases: - In particular a large difference may not appear for checking the exposure during Quick Review. When shooting or playing back movies • appears and the histogram does not appear in the histogram before recording represents the histogram of...
...8226; The histogram also appears when you are using other cameras.. When playing back Multi Burst mode images - When the shutter speed is hard to be seen. 80 VGA FINE 101 4 Number of an image recorded in the digital zoom range - When recording in Exposure Bracket mode - ...8226; The histogram may appear in the following cases: - In particular a large difference may not appear for checking the exposure during Quick Review. When shooting or playing back movies • appears and the histogram does not appear in the histogram before recording represents the histogram of...

Operating Instructions
Page 68
...and the "C AF" indicator flashes. When shooting in Monitoring AF mode. - Camera 1 1 AF Mode: 2 Digital Zoom: Date/Time: Red Eye Reduction: 1 Hologram AF: 2 Auto Review: Single Monitor Cont The camera automatically adjusts the focus before you press and hold the shutter button halfway down . The...adjusted before you press and hold the shutter button halfway down Set the mode dial to SET UP. Select 1 (Camera 1) with , then select [AF Mode] with /. Select the desired mode with continued focus. The default setting...
...and the "C AF" indicator flashes. When shooting in Monitoring AF mode. - Camera 1 1 AF Mode: 2 Digital Zoom: Date/Time: Red Eye Reduction: 1 Hologram AF: 2 Auto Review: Single Monitor Cont The camera automatically adjusts the focus before you press and hold the shutter button halfway down . The...adjusted before you press and hold the shutter button halfway down Set the mode dial to SET UP. Select 1 (Camera 1) with , then select [AF Mode] with /. Select the desired mode with continued focus. The default setting...

Operating Instructions
Page 83
... the left side of the image : To view more of the right side of the image Adjust the image size with the Quick Review function (page 31) by performing steps to five times the original size. Enlarging a portion of a still image You can enlarge the images displayed...
... the left side of the image : To view more of the right side of the image Adjust the image size with the Quick Review function (page 31) by performing steps to five times the original size. Enlarging a portion of a still image You can enlarge the images displayed...

Operating Instructions
Page 84
... image on the image. 84 All: Plays back all images stored in the selected folder. The slide show playback Press , select [Exit] with Quick Review. To stop slide show begins. MENU Control button Mode dial Set the mode dial to 3:2-sized image. • You cannot trim RAW data fi...
... image on the image. 84 All: Plays back all images stored in the selected folder. The slide show playback Press , select [Exit] with Quick Review. To stop slide show begins. MENU Control button Mode dial Set the mode dial to 3:2-sized image. • You cannot trim RAW data fi...

Operating Instructions
Page 140
...). The date and time are indicated with . (Camera 1) 1 Item AF Mode Digital Zoom Date/time Setting Single / Monitor / Cont Smart / Precision / Off Day&Time / Date / Off Red Eye Reduction On / Off Hologram AF Auto / Off Auto Review On / Off (Camera 2) 2 Item Enlarged Icon Flash 140 Setting ...
...). The date and time are indicated with . (Camera 1) 1 Item AF Mode Digital Zoom Date/time Setting Single / Monitor / Cont Smart / Precision / Off Day&Time / Date / Off Red Eye Reduction On / Off Hologram AF Auto / Off Auto Review On / Off (Camera 2) 2 Item Enlarged Icon Flash 140 Setting ...

Operating Instructions
Page 154
... AE LOCK 63 AF range finder frame 66 Aperture priority 58 Auto adjustment mode 29 Auto Focus 30 Auto power-off function 17 Auto Review 140 Auto shooting mode 29 B B&W 78 Battery 13 Battery life 15, 147 Battery remaining indicator 14, 146 Beach mode 40 Beep/shutter sound 141... images to your computer 102, 105, 106, 111, 115 Cutting movies 100 D Daylight 73 DC plug 16 Deleting movies 99 Deleting still images 46 Digital zoom 31 Divide 100 DPOF 95 E Enlarged Icon 140 Enlarging an image 83 EV adjustment 61 Exposure Bracket 64 Extension 107, 109 External flash...
... AE LOCK 63 AF range finder frame 66 Aperture priority 58 Auto adjustment mode 29 Auto Focus 30 Auto power-off function 17 Auto Review 140 Auto shooting mode 29 B B&W 78 Battery 13 Battery life 15, 147 Battery remaining indicator 14, 146 Beach mode 40 Beep/shutter sound 141... images to your computer 102, 105, 106, 111, 115 Cutting movies 100 D Daylight 73 DC plug 16 Deleting movies 99 Deleting still images 46 Digital zoom 31 Divide 100 DPOF 95 E Enlarged Icon 140 Enlarging an image 83 EV adjustment 61 Exposure Bracket 64 Extension 107, 109 External flash...

Operating Instructions
Page 155
... Package 109 Playback zoom 83 Portrait mode 39 Power on/off 17 Precautions 143 Precision digital zoom 32 Print (DPOF) mark 95 Program auto shooting 56 Program Shift 56 Protect 87 PTP 102, 116, 142 Q Quick Review 31 R RAW 79 Rechargeable button battery 144 Recommended computer environment ...102, 115 Red Eye Reduction...
... Package 109 Playback zoom 83 Portrait mode 39 Power on/off 17 Precautions 143 Precision digital zoom 32 Print (DPOF) mark 95 Program auto shooting 56 Program Shift 56 Protect 87 PTP 102, 116, 142 Q Quick Review 31 R RAW 79 Rechargeable button battery 144 Recommended computer environment ...102, 115 Red Eye Reduction...
