
Limited Warranty (US Only)
Page 1
... one (1) year. 4-557-172-02 General Stereo/Hifi Components/Tape Decks ® CD Players/Mini Disc Players/Audio Systems Hifi Audio LIMITED WARRANTY Sony Electronics Inc. ("Sony") warrants this Product is determined to be presented to any Sony authorized service facility. This warranty does not cover damage due to improper operation or maintenance, connection to improper voltage supply, or attempted repair by anyone other rights which is evidence...
... one (1) year. 4-557-172-02 General Stereo/Hifi Components/Tape Decks ® CD Players/Mini Disc Players/Audio Systems Hifi Audio LIMITED WARRANTY Sony Electronics Inc. ("Sony") warrants this Product is determined to be presented to any Sony authorized service facility. This warranty does not cover damage due to improper operation or maintenance, connection to improper voltage supply, or attempted repair by anyone other rights which is evidence...
Operating Instructions (CDPC5CS)
Page 2
... B digital device, pursuant to Part 15 of important operating and maintenance (servicing) instructions in the United States This symbol is encouraged to try to provide reasonable protection against harmful interference in the space provided below. Record the serial number in a residential installation. For customer in the literature accompanying the appliance. Increase the separation between the equipment and receiver. - Model No.CDP-C5CS Serial...
... B digital device, pursuant to Part 15 of important operating and maintenance (servicing) instructions in the United States This symbol is encouraged to try to provide reasonable protection against harmful interference in the space provided below. Record the serial number in a residential installation. For customer in the literature accompanying the appliance. Increase the separation between the equipment and receiver. - Model No.CDP-C5CS Serial...

Operating Instructions (CDPC5CS)
Page 3
Normal Play/Shuffle Play/Repeat Play 7 Using the CD display ...9 FR Replacing Discs While Playing a Disc 10 Programming the CD tracks 11 Fading In or Out ...12 Recording From CDs Recording a CD by Specifying Tape Length (Time Edit 12 Adjusting the Recording Level (Peak Search 13 Additional Information Precautions ...14 Notes on CDs ...14 Troubleshooting ...15 Specifications ...15 3US Table of Contents Parts Identification Front Panel ...4 Rear Panel ...5 Remote Control ...5 Getting Started Inserting Batteries Into the Remote Control 6 Playing CDs Loading a CD ...7 Playing the CD --
Normal Play/Shuffle Play/Repeat Play 7 Using the CD display ...9 FR Replacing Discs While Playing a Disc 10 Programming the CD tracks 11 Fading In or Out ...12 Recording From CDs Recording a CD by Specifying Tape Length (Time Edit 12 Adjusting the Recording Level (Peak Search 13 Additional Information Precautions ...14 Notes on CDs ...14 Troubleshooting ...15 Specifications ...15 3US Table of Contents Parts Identification Front Panel ...4 Rear Panel ...5 Remote Control ...5 Getting Started Inserting Batteries Into the Remote Control 6 Playing CDs Loading a CD ...7 Playing the CD --
Operating Instructions (CDPC5CS)
Page 4
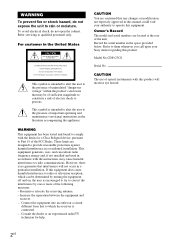
Parts Identification Front Panel The items are arranged in parentheses ( ) for details. Refer to the pages indicated in alphabetical order. CDP-C5CS CHECK w; (11, 12) CLEAR 9 (11, 12) DISC 1-5 2 (7, 8, 11) Disc compartment qj (7) DISC SKIP 8 (7, 10, 12) Display 3 (9) EX-CHANGE 7 (10, 13) FADER qd (12) PEAK SEARCH qs (13) PHONES jack wa (8) PLAY MODE qa (8, 11, 13) POWER 1 (7) Remote sensor qh (6) REPEAT qf (8) TIME qg (9, 10) TIME EDIT ql (12) BUTTON DESCRIPTIONS A OPEN/CLOSE ws (6, 7, 8, 9) H 4 (7, 8, 11, 13) X 5 (8, 13) x 6 (8, 13) lAMSL dial 0 (8, 9, 11, 13) m/M qk (8, 9, 12) 4US
Parts Identification Front Panel The items are arranged in parentheses ( ) for details. Refer to the pages indicated in alphabetical order. CDP-C5CS CHECK w; (11, 12) CLEAR 9 (11, 12) DISC 1-5 2 (7, 8, 11) Disc compartment qj (7) DISC SKIP 8 (7, 10, 12) Display 3 (9) EX-CHANGE 7 (10, 13) FADER qd (12) PEAK SEARCH qs (13) PHONES jack wa (8) PLAY MODE qa (8, 11, 13) POWER 1 (7) Remote sensor qh (6) REPEAT qf (8) TIME qg (9, 10) TIME EDIT ql (12) BUTTON DESCRIPTIONS A OPEN/CLOSE ws (6, 7, 8, 9) H 4 (7, 8, 11, 13) X 5 (8, 13) x 6 (8, 13) lAMSL dial 0 (8, 9, 11, 13) m/M qk (8, 9, 12) 4US

Operating Instructions (CDPC5CS)
Page 5
...) 5 5US US Rear Panel Parts Identification ANALOG OUT L/R jacks 2 DIGITAL OUT OPTICAL jack 1 IR REMOTE 3 (6) Mains lead 4 Note You cannot use the following functions when making the digital connection: • Fading In or Out (see page 9) Remote Control ANALOG OUT LEVEL +/- qk (8, 9) CHECK qs (11, 12) CLEAR qd (11, 12) CONTINUE 2 (7) DISC 1-5 7 (7, 8, 11) DISC SKIP qg (7, 10, 12) FADER qf (12) Number buttons 5 (8, 11) PROGRAM qa (7) REPEAT 3 (8) SHUFFLE 1 (7) TIME 4 (9, 10) BUTTON DESCRIPTIONS >10...
...) 5 5US US Rear Panel Parts Identification ANALOG OUT L/R jacks 2 DIGITAL OUT OPTICAL jack 1 IR REMOTE 3 (6) Mains lead 4 Note You cannot use the following functions when making the digital connection: • Fading In or Out (see page 9) Remote Control ANALOG OUT LEVEL +/- qk (8, 9) CHECK qs (11, 12) CLEAR qd (11, 12) CONTINUE 2 (7) DISC 1-5 7 (7, 8, 11) DISC SKIP qg (7, 10, 12) FADER qf (12) Number buttons 5 (8, 11) PROGRAM qa (7) REPEAT 3 (8) SHUFFLE 1 (7) TIME 4 (9, 10) BUTTON DESCRIPTIONS >10...
Operating Instructions (CDPC5CS)
Page 6
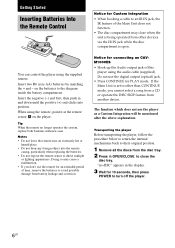
... Audio output jack of this player using the remote, point it at the remote sensor on the batteries to close when the unit is open. "no longer operates the system, replace both batteries with new ones. on the player. Insert the negative (-) end first, then push in the display. 3 Wait for Custom Integration • When hooking a cable to an IR IN jack, the IR feature of time, remove the batteries...
... Audio output jack of this player using the remote, point it at the remote sensor on the batteries to close when the unit is open. "no longer operates the system, replace both batteries with new ones. on the player. Insert the negative (-) end first, then push in the display. 3 Wait for Custom Integration • When hooking a cable to an IR IN jack, the IR feature of time, remove the batteries...

Operating Instructions (CDPC5CS)
Page 7
... to the sound from this player. 2 Press POWER to play. Each time you press the button, the disc tray turns and you can select the disc you 've selected. All tracks on the player. 3 Press AOPEN/CLOSE. The tracks on the CD in the order you first. 6 Press AOPEN/CLOSE to ALL DISCS Shuffle Play, press PLAY MODE until the mode you want to turn on all discs in the display. Semi-circles...
... to the sound from this player. 2 Press POWER to play. Each time you press the button, the disc tray turns and you can select the disc you 've selected. All tracks on the player. 3 Press AOPEN/CLOSE. The tracks on the CD in the order you first. 6 Press AOPEN/CLOSE to ALL DISCS Shuffle Play, press PLAY MODE until the mode you want to turn on all discs in the display. Semi-circles...

Operating Instructions (CDPC5CS)
Page 8
... adjust the volume, connect the headphones to the PHONES jack and adjust the volume with the ANALOG OUT LEVEL +/- Press DISC 1 - 5. Tips • You can adjust the analog output level of the amplifier with the ANALOG OUT LEVEL +/- Repeat Play Operations You can play the CD tracks repeatedly in any play or pause, turn off the player, the analog output level automatically returns to repeat. Example: To play . To activate the Repeat Play function, press REPEAT until "SHUFFLE...
... adjust the volume, connect the headphones to the PHONES jack and adjust the volume with the ANALOG OUT LEVEL +/- Press DISC 1 - 5. Tips • You can adjust the analog output level of the amplifier with the ANALOG OUT LEVEL +/- Repeat Play Operations You can play the CD tracks repeatedly in any play or pause, turn off the player, the analog output level automatically returns to repeat. Example: To play . To activate the Repeat Play function, press REPEAT until "SHUFFLE...

Operating Instructions (CDPC5CS)
Page 9
... disappear after they are played. on the remote while recording, the recording level will change even when it is preset on a disc have been played, the semi-circle around a disc number indicates the disc is recognized as empty, the semi-circled disc number disappears. During normal playback While playing a disc, the display shows the current disc number, track number, playing time of tracks, total playing time and music calendar. The track numbers in the display, the disc has reached the end...
... disappear after they are played. on the remote while recording, the recording level will change even when it is preset on a disc have been played, the semi-circle around a disc number indicates the disc is recognized as empty, the semi-circled disc number disappears. During normal playback While playing a disc, the display shows the current disc number, track number, playing time of tracks, total playing time and music calendar. The track numbers in the display, the disc has reached the end...
Operating Instructions (CDPC5CS)
Page 10
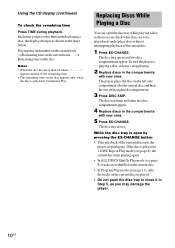
... the disc tray to be played next and replace discs without interrupting playback of the current disc ends, the player stops playing. If the disc is playing a disc, it in 1 DISC Repeat Play mode (see page 8), the current disc starts playing again. • In ALL DISCS Shuffle Play mode (see page 11), only the tracks on the right side compartment. 3 Press DISC SKIP. The disc tray opens and two disc compartments appear. Each time you press this button while playing a disc, the display changes as...
... the disc tray to be played next and replace discs without interrupting playback of the current disc ends, the player stops playing. If the disc is playing a disc, it in 1 DISC Repeat Play mode (see page 8), the current disc starts playing again. • In ALL DISCS Shuffle Play mode (see page 11), only the tracks on the right side compartment. 3 Press DISC SKIP. The disc tray opens and two disc compartments appear. Each time you press this button while playing a disc, the display changes as...
Operating Instructions (CDPC5CS)
Page 11
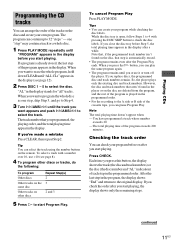
... track. You have programmed a track whose number exceeds 20. - Press CHECK. To cancel Program Play Press PLAY MODE. If a program is open, follow Steps 1 to 4 with a number over 10, use >10 (see page 12). 2 Press DISC 1 - 5 to the A side or B side of the cassette tape, you can check your program before or after you erase it or turn off the player. When you want to erase the whole program, hold...
... track. You have programmed a track whose number exceeds 20. - Press CHECK. To cancel Program Play Press PLAY MODE. If a program is open, follow Steps 1 to 4 with a number over 10, use >10 (see page 12). 2 Press DISC 1 - 5 to the A side or B side of the cassette tape, you can check your program before or after you erase it or turn off the player. When you want to erase the whole program, hold...
Operating Instructions (CDPC5CS)
Page 12
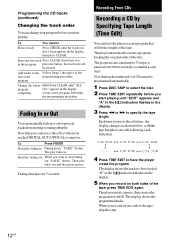
... the disc. 2 Press TIME EDIT repeatedly before you record on one side of the tape, press TIME EDIT again. The play fades out and the player pauses. Then play fades in. C-90 45.00 C-74 37.00 4 Press TIME EDIT to start fading out. The display shows the programmed tracks. The display shows the tracks to prevent tracks from starting or ending abruptly. Programming the CD tracks (continued) Changing the track...
... the disc. 2 Press TIME EDIT repeatedly before you record on one side of the tape, press TIME EDIT again. The play fades out and the player pauses. Then play fades in. C-90 45.00 C-74 37.00 4 Press TIME EDIT to start fading out. The display shows the programmed tracks. The display shows the tracks to prevent tracks from starting or ending abruptly. Programming the CD tracks (continued) Changing the track...
Operating Instructions (CDPC5CS)
Page 13
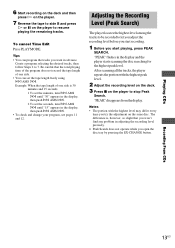
... that the total playing time of the program does not exceed the tape length of one side. • You can program the tracks you open the disc tray by pressing the EX-CHANGE button. Notes • The portion with the highest peak level. 2 Adjust the recording level on the deck. 3 Press x on the player to resume playing the remaining tracks. To cancel Time Edit Press PLAY MODE. "PEAK" flashes...
... that the total playing time of the program does not exceed the tape length of one side. • You can program the tracks you open the disc tray by pressing the EX-CHANGE button. Notes • The portion with the highest peak level. 2 Adjust the recording level on the deck. 3 Press x on the player to resume playing the remaining tracks. To cancel Time Edit Press PLAY MODE. "PEAK" flashes...

Operating Instructions (CDPC5CS)
Page 14
... very low level inputs or no audio signals. In this unit. On adjusting volume • Do not turn up the volume while listening to a portion with adequate ventilation to direct sunlight, excessive dust or mechanical shock. On cleaning • Clean the cabinet, panel and controls with a soft cloth slightly moistened with a cleaning cloth. Note on CD-R/CD-RW playback • Discs recorded on CD-R/CD-RW drives may condense...
... very low level inputs or no audio signals. In this unit. On adjusting volume • Do not turn up the volume while listening to a portion with adequate ventilation to direct sunlight, excessive dust or mechanical shock. On cleaning • Clean the cabinet, panel and controls with a soft cloth slightly moistened with a cleaning cloth. Note on CD-R/CD-RW playback • Discs recorded on CD-R/CD-RW drives may condense...
Operating Instructions (CDPC5CS)
Page 15
... LEVEL +/- The recording level has changed. • The recording level changes if you adjust the analog output level with new ones if they are subject to change without notice. The remote does not function. • When hooking the connecting cable to an IR IN jack, this troubleshooting guide to reset the player. Troubleshooting If you experience any problem persist, consult your nearest Sony dealer. on the disc tray correctly. • Clean the CD (see page...
... LEVEL +/- The recording level has changed. • The recording level changes if you adjust the analog output level with new ones if they are subject to change without notice. The remote does not function. • When hooking the connecting cable to an IR IN jack, this troubleshooting guide to reset the player. Troubleshooting If you experience any problem persist, consult your nearest Sony dealer. on the disc tray correctly. • Clean the CD (see page...

Operating Instructions (CDPC5CS)
Page 16
Sony Corporation Printed in Malaysia
Sony Corporation Printed in Malaysia
Marketing Specifications
Page 1
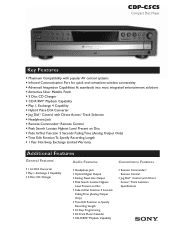
...; Play 1, Exchange 4 Capability • 5 Disc CD Changer • Headphone Jack • Optical Digital Output • Analog Fixed Line Output • Peak Search Locates Highest Level Present on Disc • Fade In/Out Function 5 Seconds Fading Time (Analog Output Only) • Time Edit Function to Specify Recording Length • 32 Step Programming • 20-Track Music Calendar • CD-R/RW* Playback Capability Convenience Features • Remote Commander® Remote Control • Jog Dial™ Control with Direct Access™ Track...
...; Play 1, Exchange 4 Capability • 5 Disc CD Changer • Headphone Jack • Optical Digital Output • Analog Fixed Line Output • Peak Search Locates Highest Level Present on Disc • Fade In/Out Function 5 Seconds Fading Time (Analog Output Only) • Time Edit Function to Specify Recording Length • 32 Step Programming • 20-Track Music Calendar • CD-R/RW* Playback Capability Convenience Features • Remote Commander® Remote Control • Jog Dial™ Control with Direct Access™ Track...
Marketing Specifications
Page 2
... • Power Consumption at Off .5W Supplied Accessories Weights and Measures • 11 lbs. (5 kg) • 17" x 4 11/32 x 15 3/4 (430 x 110 x 400 mm) UPC Code • TBD • Instruction Manual • Remote Commander® Remote Control • Batteries: AA x 2 • Audio Cord (RCA Type) x 1 Sony Electronics Inc. 1 Sony Drive Park Ridge, NJ 07656 *CD-R/RW playback may not be compatible with all discs, depending on recording conditions...
... • Power Consumption at Off .5W Supplied Accessories Weights and Measures • 11 lbs. (5 kg) • 17" x 4 11/32 x 15 3/4 (430 x 110 x 400 mm) UPC Code • TBD • Instruction Manual • Remote Commander® Remote Control • Batteries: AA x 2 • Audio Cord (RCA Type) x 1 Sony Electronics Inc. 1 Sony Drive Park Ridge, NJ 07656 *CD-R/RW playback may not be compatible with all discs, depending on recording conditions...


