Operating Instructions
Page 2
...classified as it is connected to the AC outlet, even if the unit itself has been turned off. • As the main plug is used to disconnect the unit from the AC outlet immediately. Record the serial number in a NOTE: This equipment has been tested and found to ...model manufactured for a Class B digital device, pursuant to Part 15 of the FCC Rules. BDV-T20W/BDV-E500W Serial No The following FCC statement applies only to the version of this BD/ DVD Home Theatre System is intended to alert the user to the presence of important operating and maintenance (servicing) instructions ...
...classified as it is connected to the AC outlet, even if the unit itself has been turned off. • As the main plug is used to disconnect the unit from the AC outlet immediately. Record the serial number in a NOTE: This equipment has been tested and found to ...model manufactured for a Class B digital device, pursuant to Part 15 of the FCC Rules. BDV-T20W/BDV-E500W Serial No The following FCC statement applies only to the version of this BD/ DVD Home Theatre System is intended to alert the user to the presence of important operating and maintenance (servicing) instructions ...
Operating Instructions
Page 5
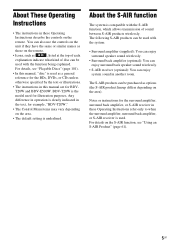
...; Surround amplifier (supplied): You can enjoy surround speaker sound wirelessly. • Surround back amplifier (optional): You can enjoy surround back speaker sound wirelessly. • S-AIR receiver (optional): You can be purchased as a general reference for the BDs, DVDs, or CDs unless otherwise specified by the text or illustrations. • The instructions in this manual, "disc" is used for the surround amplifier, surround back amplifier, or S-AIR receiver in these Operating Instructions describe the controls on the remote...
...; Surround amplifier (supplied): You can enjoy surround speaker sound wirelessly. • Surround back amplifier (optional): You can enjoy surround back speaker sound wirelessly. • S-AIR receiver (optional): You can be purchased as a general reference for the BDs, DVDs, or CDs unless otherwise specified by the text or illustrations. • The instructions in this manual, "disc" is used for the surround amplifier, surround back amplifier, or S-AIR receiver in these Operating Instructions describe the controls on the remote...

Operating Instructions
Page 6
... Front Panel Display 75 Deactivating the Buttons on the Unit ... 76 About the demonstration 76 Saving Power in Standby Mode 77 Settings and Adjustments Using the Setup Display 78 [Network Update 79 [Video Settings 80 [Audio Settings 82 [BD/DVD Viewing Settings 84 [Photo Settings 86 [HDMI Settings 86 [System Settings 87 [Network Settings 88 [Easy Setup 89 [Resetting 90 Additional Information Precautions 91 Notes about the Discs 92 Troubleshooting 93 Self-diagnosis Function 100 Playable Discs 101 Supported Audio Formats 103 Video Output Resolution 104 Specifications 105...
... Front Panel Display 75 Deactivating the Buttons on the Unit ... 76 About the demonstration 76 Saving Power in Standby Mode 77 Settings and Adjustments Using the Setup Display 78 [Network Update 79 [Video Settings 80 [Audio Settings 82 [BD/DVD Viewing Settings 84 [Photo Settings 86 [HDMI Settings 86 [System Settings 87 [Network Settings 88 [Easy Setup 89 [Resetting 90 Additional Information Precautions 91 Notes about the Discs 92 Troubleshooting 93 Self-diagnosis Function 100 Playable Discs 101 Supported Audio Formats 103 Video Output Resolution 104 Specifications 105...

Operating Instructions
Page 10
...S-AIR receiver. TV (page 73) Changes to standby mode. D AUDIO (pages 53, 54) Selects the audio format/track. D.TUNING (page 58) Selects the radio frequencies. Remote control TOP ONE-TOUCH THEATER PLAY TV BRAVIA Sync S-AIR DYNAMIC MODE NIGHT BASS TV 123 456 789 ENTER CLEAR 0 TIME FAVORITES CC WIDE SYSTEM AUDIO SUBTITLE ANGLE MENU D.TUNING RED GREEN BLUE YELLOW DISPLAY U P 1 2 3 4 5 6 GUIDE MEN OP UP/MENU RETURN TOOOPLTISONS 0 FUNCTION HOME SOUND MODE PRESET REPLAY ADVANCE PRESET TUNING TUNING SCENE SEARCH VOLUME MUTING CH TV INPUT DISPLAY 7 8 9 Number...
...S-AIR receiver. TV (page 73) Changes to standby mode. D AUDIO (pages 53, 54) Selects the audio format/track. D.TUNING (page 58) Selects the radio frequencies. Remote control TOP ONE-TOUCH THEATER PLAY TV BRAVIA Sync S-AIR DYNAMIC MODE NIGHT BASS TV 123 456 789 ENTER CLEAR 0 TIME FAVORITES CC WIDE SYSTEM AUDIO SUBTITLE ANGLE MENU D.TUNING RED GREEN BLUE YELLOW DISPLAY U P 1 2 3 4 5 6 GUIDE MEN OP UP/MENU RETURN TOOOPLTISONS 0 FUNCTION HOME SOUND MODE PRESET REPLAY ADVANCE PRESET TUNING TUNING SCENE SEARCH VOLUME MUTING CH TV INPUT DISPLAY 7 8 9 Number...

Operating Instructions
Page 11
... connected TV. TV INPUT (page 73) Switches the TV's input source between radio frequency and station name. DISPLAY (page 46) Displays the playback information on the TV screen. G FUNCTION (pages 37, 41, 49, 50, 56, 60) Selects the playback source. SOUND MODE (page 52) Selects the sound mode. E Color buttons (RED/GREEN/BLUE/ YELLOW) (page 88) Short cut keys for selecting items on a BD-ROM/ DVD VIDEO. OPTIONS (pages 41, 49, 50, 56) Displays the options menu...
... connected TV. TV INPUT (page 73) Switches the TV's input source between radio frequency and station name. DISPLAY (page 46) Displays the playback information on the TV screen. G FUNCTION (pages 37, 41, 49, 50, 56, 60) Selects the playback source. SOUND MODE (page 52) Selects the sound mode. E Color buttons (RED/GREEN/BLUE/ YELLOW) (page 88) Short cut keys for selecting items on a BD-ROM/ DVD VIDEO. OPTIONS (pages 41, 49, 50, 56) Displays the options menu...

Operating Instructions
Page 24
...MEDIA PORT adapter are not output via the HDMI OUT jack. * HDMI (High-Definition Multimedia Interface) Method 3: Component video cable (C) and video cord (A) connection If your TV, select the connection method. To the component video input jacks of output signal (pages 34, 81). Method 1: Video cord (A) connection This is the basic connection. When connecting with a component video cable and video cord. When connecting with the video cord. Video signals from the DIGITAL MEDIA PORT adapter, you need to connect to the TV with the component video cable, you need to connect to...
...MEDIA PORT adapter are not output via the HDMI OUT jack. * HDMI (High-Definition Multimedia Interface) Method 3: Component video cable (C) and video cord (A) connection If your TV, select the connection method. To the component video input jacks of output signal (pages 34, 81). Method 1: Video cord (A) connection This is the basic connection. When connecting with a component video cable and video cord. When connecting with the video cord. Video signals from the DIGITAL MEDIA PORT adapter, you need to connect to the TV with the component video cable, you need to connect to...

Operating Instructions
Page 26
... audio out jacks of the TV. Connect the components as follows. Getting Started Connecting the other DIGITAL MEDIA PORT adapters.) • VCR, digital satellite receiver, PlayStation, or portable audio source, etc. (not supplied): G • VCR or digital satellite receiver, etc. (not supplied) which has a digital coaxial output jack: H Rear panel of the unit H Digital coaxial cord (not supplied) COAAXNITAELN7N5 A F DIGITAL MEDIA PORT adapter (page 60) COMPONENT VIDEO OUT PR / CR PB / CB Y LAN(1S0PE0A)KER VIDEO OUT HDMI...
... audio out jacks of the TV. Connect the components as follows. Getting Started Connecting the other DIGITAL MEDIA PORT adapters.) • VCR, digital satellite receiver, PlayStation, or portable audio source, etc. (not supplied): G • VCR or digital satellite receiver, etc. (not supplied) which has a digital coaxial output jack: H Rear panel of the unit H Digital coaxial cord (not supplied) COAAXNITAELN7N5 A F DIGITAL MEDIA PORT adapter (page 60) COMPONENT VIDEO OUT PR / CR PB / CB Y LAN(1S0PE0A)KER VIDEO OUT HDMI...

Operating Instructions
Page 32
... connected to the surround amplifier, or radio reception is poor. Before setting, make sure that is connected to the surround speakers. SPEAKER CENTER SUBWOOFER COMPONENT VIDEO OUT VIDEO OUT Y PB / CB PR / CR LAN(100) SPEAKER FRONT R FRONT L HDMI OUT DMPORT DC5V 700mA MAX EZW-RT10 ANTENNA COAXIAL 75 FM SAT/CABLE TV DIGITAL IN DIGITAL IN EXT DC5V 500mA MAX COAXIAL OPTICAL S-AIR ID ABC TV L R AUDIO IN AUDIO AM L A. To enjoy sound by using...
... connected to the surround amplifier, or radio reception is poor. Before setting, make sure that is connected to the surround speakers. SPEAKER CENTER SUBWOOFER COMPONENT VIDEO OUT VIDEO OUT Y PB / CB PR / CR LAN(100) SPEAKER FRONT R FRONT L HDMI OUT DMPORT DC5V 700mA MAX EZW-RT10 ANTENNA COAXIAL 75 FM SAT/CABLE TV DIGITAL IN DIGITAL IN EXT DC5V 500mA MAX COAXIAL OPTICAL S-AIR ID ABC TV L R AUDIO IN AUDIO AM L A. To enjoy sound by using...

Operating Instructions
Page 34
... Setup Display does not appear Recall the Easy Setup Display. Displayed items vary depending on the country model. 123 456 789 0 "/1 C/X/x/c, HOME 1 Turn on the TV. 2 Press [/1 on the unit, and POWER on the surround amplifier. 3 Switch the input selector on the TV screen. Execute the Auto Calibration Check that the signal from the system appears on your TV. • When you connect the unit and TV with a component video cord, select [Component Video...
... Setup Display does not appear Recall the Easy Setup Display. Displayed items vary depending on the country model. 123 456 789 0 "/1 C/X/x/c, HOME 1 Turn on the TV. 2 Press [/1 on the unit, and POWER on the surround amplifier. 3 Switch the input selector on the TV screen. Execute the Auto Calibration Check that the signal from the system appears on your TV. • When you connect the unit and TV with a component video cord, select [Component Video...

Operating Instructions
Page 37
Note • Loud test sound is finished. If you install the surround amplifier in appropriate location and turn the volume down. Easy Setup is output when [Auto Calibration] starts. Function "BD/DVD" "TUNER FM"/ "TUNER AM" "TV" "SAT/CABLE" "DMPORT" "AUDIO" Source Disc that is played by pressing the color button (RED). 22 Press . You cannot turn the surround amplifier on. 21 Confirm the conclusions of the room in the appropriate location. Press C/c to change a measurement unit...
Note • Loud test sound is finished. If you install the surround amplifier in appropriate location and turn the volume down. Easy Setup is output when [Auto Calibration] starts. Function "BD/DVD" "TUNER FM"/ "TUNER AM" "TV" "SAT/CABLE" "DMPORT" "AUDIO" Source Disc that is played by pressing the color button (RED). 22 Press . You cannot turn the surround amplifier on. 21 Confirm the conclusions of the room in the appropriate location. Press C/c to change a measurement unit...

Operating Instructions
Page 56
... X/x to the Radio You can operate the tuner function using the system menu" (page 58) 1 Press FUNCTION repeatedly until "TUNER FM" or "TUNER AM" appears in the front panel display. The available items differ depending on the front panel display. Input station frequency directly. DISPLAY Current station Current band and preset number FM 7 88.00 MHz SONY RADIO Station name Tip • You can enjoy radio sound with the system's speakers. "TUNED" and "ST" (for stereo program) light up in a station. until...
... X/x to the Radio You can operate the tuner function using the system menu" (page 58) 1 Press FUNCTION repeatedly until "TUNER FM" or "TUNER AM" appears in the front panel display. The available items differ depending on the front panel display. Input station frequency directly. DISPLAY Current station Current band and preset number FM 7 88.00 MHz SONY RADIO Station name Tip • You can enjoy radio sound with the system's speakers. "TUNED" and "ST" (for stereo program) light up in a station. until...
Operating Instructions
Page 67
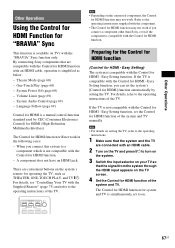
... THEATER PLAY TV BRAVIA Sync S-AIR DYNAMIC MODE NIGHT BASS TV Note • Depending on the connected component, the Control for HDMI function may not work if you can set the system's [Control for HDMI] function automatically by CEC (Consumer Electronics Control) for HDMI (High-Definition Multimedia Interface). For details, refer to turn on the system. 3 Switch the input selector on your TV so that are convenient buttons on the system's remote...
... THEATER PLAY TV BRAVIA Sync S-AIR DYNAMIC MODE NIGHT BASS TV Note • Depending on the connected component, the Control for HDMI function may not work if you can set the system's [Control for HDMI] function automatically by CEC (Consumer Electronics Control) for HDMI (High-Definition Multimedia Interface). For details, refer to turn on the system. 3 Switch the input selector on your TV so that are convenient buttons on the system's remote...

Operating Instructions
Page 70
... C R AUDIO IN AUDIO L AM AE.CCMAL-AMCI2C R AUDIO IN COAXIAL OPTICAL Calibration mic 6 Press X/x to children and neighbors. 1 Press HOME. You cannot turn the volume down . The home menu appears on the TV screen. 2 Press C/c to select [Setup]. 3 Press X/x to select [Audio Settings], then press . 4 Press X/x to the A.CAL MIC jack on . • Loud test sound is output when [Auto Calibration] starts. To cancel, select [Cancel]. 7 Press . [Auto Calibration] starts. You cannot turn the volume down . If you install the surround amplifier...
... C R AUDIO IN AUDIO L AM AE.CCMAL-AMCI2C R AUDIO IN COAXIAL OPTICAL Calibration mic 6 Press X/x to children and neighbors. 1 Press HOME. You cannot turn the volume down . The home menu appears on the TV screen. 2 Press C/c to select [Setup]. 3 Press X/x to select [Audio Settings], then press . 4 Press X/x to the A.CAL MIC jack on . • Loud test sound is output when [Auto Calibration] starts. To cancel, select [Cancel]. 7 Press . [Auto Calibration] starts. You cannot turn the volume down . If you install the surround amplifier...

Operating Instructions
Page 78
... screen. 2 Press C/c to select [Setup]. Example: [Video Settings] Setup TV Type Set the screen aspect ratio of the system. Screen Format Original DVD Aspect Ratio Letter Box Cinema Conversion Mode Auto You can make the basic settings. [Resetting] (page 90) Resets the system to the factory settings. 4 Press X/x to make various adjustments of items such as picture and sound. Icon Explanation [Network Update] (page 79) Updates the software of the system. [Video Settings] (page 80) Makes the video settings according to the type of connecting jacks. [Audio Settings...
... screen. 2 Press C/c to select [Setup]. Example: [Video Settings] Setup TV Type Set the screen aspect ratio of the system. Screen Format Original DVD Aspect Ratio Letter Box Cinema Conversion Mode Auto You can make the basic settings. [Resetting] (page 90) Resets the system to the factory settings. 4 Press X/x to make various adjustments of items such as picture and sound. Icon Explanation [Network Update] (page 79) Updates the software of the system. [Video Settings] (page 80) Makes the video settings according to the type of connecting jacks. [Audio Settings...
Operating Instructions
Page 83
... component connected. [On]: Attenuates the input level. Sound format from the HDMI OUT jack depends on the TV screen. For details, see "Setting the Speakers" (page 71). x [Speaker Settings] To obtain the best possible surround sound, set [BD/DVD Audio Output] to on the unit. x [Auto Calibration] You can select the output method. [Speaker only]: Outputs multi-channel sound from the system's speakers only. [Speaker priority]: Outputs multi-channel sound from the system's speakers and 2-channel linear PCM signals from the HDMI OUT jack. [HDMI priority]: Outputs 2-channel stereo...
... component connected. [On]: Attenuates the input level. Sound format from the HDMI OUT jack depends on the TV screen. For details, see "Setting the Speakers" (page 71). x [Speaker Settings] To obtain the best possible surround sound, set [BD/DVD Audio Output] to on the unit. x [Auto Calibration] You can select the output method. [Speaker only]: Outputs multi-channel sound from the system's speakers only. [Speaker priority]: Outputs multi-channel sound from the system's speakers and 2-channel linear PCM signals from the HDMI OUT jack. [HDMI priority]: Outputs 2-channel stereo...
Operating Instructions
Page 86
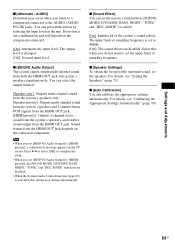
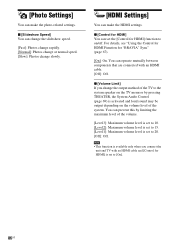
... HDMI] function to 15. [Level1]: Maximum volume level is activated and loud sound may be output depending on /off. x [Volume Limit] If you connect the unit and TV with an HDMI cable. [Off]: Off. You can prevent this by pressing THEATER, the System Audio Control (page 69) is set the [Control for HDMI] You can make the photo-related settings. You can operate mutually between components that are connected with an HDMI cable...
... HDMI] function to 15. [Level1]: Maximum volume level is activated and loud sound may be output depending on /off. x [Volume Limit] If you connect the unit and TV with an HDMI cable. [Off]: Off. You can prevent this by pressing THEATER, the System Audio Control (page 69) is set the [Control for HDMI] You can make the photo-related settings. You can operate mutually between components that are connected with an HDMI cable...

Operating Instructions
Page 90
...] - [HDMI Settings] - [System Settings] - [Network Settings] - [All Settings] (except for the [BD Parental Control], [DVD Parental Control], [Parental Control Region Code], [Password] settings) The display asks for confirmation. 3 Press x and VOLUME - To cancel, select [Cancel]. Note • Settings for "Adjusting pictures for videos" (page 47) are not reset. 3 Press C/c to select [Start], then press . You can reset the system settings to their factory default. [Resetting] Resetting the system settings other than the settings related to the password are reset, and the system turns off...
...] - [HDMI Settings] - [System Settings] - [Network Settings] - [All Settings] (except for the [BD Parental Control], [DVD Parental Control], [Parental Control Region Code], [Password] settings) The display asks for confirmation. 3 Press x and VOLUME - To cancel, select [Cancel]. Note • Settings for "Adjusting pictures for videos" (page 47) are not reset. 3 Press C/c to select [Start], then press . You can reset the system settings to their factory default. [Resetting] Resetting the system settings other than the settings related to the password are reset, and the system turns off...

Operating Instructions
Page 95
...; Set the sound mode to • Check the decoding mode setting (page 38). off. • Select "A.F.D. Operation Symptom Radio stations cannot be disabled depending on the remote. 95US It may be tuned in Dolby Digital or MPEG audio format. Adjust the antenna (aerial) or connect an external antenna (aerial) if necessary. • The signal strength of • Reduce the input level for the decoding mode (page 38). TV] a connected component. or [Attenuate - sound track of Dolby Digital, DTS...
...; Set the sound mode to • Check the decoding mode setting (page 38). off. • Select "A.F.D. Operation Symptom Radio stations cannot be disabled depending on the remote. 95US It may be tuned in Dolby Digital or MPEG audio format. Adjust the antenna (aerial) or connect an external antenna (aerial) if necessary. • The signal strength of • Reduce the input level for the decoding mode (page 38). TV] a connected component. or [Attenuate - sound track of Dolby Digital, DTS...

Operating Instructions
Page 109
... to use or resale as on-line control equipment in and to the Software and that accompanied the Software. Sony's Privacy Policy is provided with the Product that your current and further use . Additional Information Terms and Conditions of Use and End User License Agreement The Sony Blu-ray Disc player ("Product") and associated software ("Software") are provided and maintained by Sony. Automatic Update The Software contains a functionality by...
... to use or resale as on-line control equipment in and to the Software and that accompanied the Software. Sony's Privacy Policy is provided with the Product that your current and further use . Additional Information Terms and Conditions of Use and End User License Agreement The Sony Blu-ray Disc player ("Product") and associated software ("Software") are provided and maintained by Sony. Automatic Update The Software contains a functionality by...

Operating Instructions
Page 112
... the Program (or a work based on , we want to make certain that everyone 's free use in any patent must be distributed under the terms of Sections 1 and 2 above provided that redistributors of a free program will automatically terminate your option offer warranty protection in accord with the object code. 4. Also, for software interchange; These actions are not compelled to copy the source...
... the Program (or a work based on , we want to make certain that everyone 's free use in any patent must be distributed under the terms of Sections 1 and 2 above provided that redistributors of a free program will automatically terminate your option offer warranty protection in accord with the object code. 4. Also, for software interchange; These actions are not compelled to copy the source...


