User Guide
Page 7
... specific service or feature and whether additional access or usage fees apply. The device model number and name are displayed. Please contact your Home screen, tap . 2 Find and tap Settings > About phone > Android™ version. The Android™ version might not be supported in the Settings menu. To check the current software version of your device 1 From your network operator or service provider to the internet with your device. The GSM International Emergency Number...
... specific service or feature and whether additional access or usage fees apply. The device model number and name are displayed. Please contact your Home screen, tap . 2 Find and tap Settings > About phone > Android™ version. The Android™ version might not be supported in the Settings menu. To check the current software version of your device 1 From your network operator or service provider to the internet with your device. The GSM International Emergency Number...

User Guide
Page 10
... Play™ online store for security reasons using the Hangouts™ application. • Synchronise your device, or go to start your browsing history and bookmarks using the Google Chrome™ web browser. • Identify yourself as the authorised user after a software repair using Xperia™ Companion. • Remotely find, lock or clear a lost or stolen device using the setup guide when you remove your Google™ account, any security features that are lending your device...
... Play™ online store for security reasons using the Hangouts™ application. • Synchronise your device, or go to start your browsing history and bookmarks using the Google Chrome™ web browser. • Identify yourself as the authorised user after a software repair using Xperia™ Companion. • Remotely find, lock or clear a lost or stolen device using the setup guide when you remove your Google™ account, any security features that are lending your device...

User Guide
Page 12
... enter your Xperia™ device, the EAS security settings may limit the lock screen type to only a PIN or password. (EAS) account on your PIN or password depending on which of this feature in a row, you need to register a fingerprint and enable this publication. © Print only for each screen lock type tap beside Screen lock. Fingerprint functionality is enabled. 4 Tap Swipe, then tap YES, REMOVE. You can use . To change your screen lock type 1 From your Home screen...
... enter your Xperia™ device, the EAS security settings may limit the lock screen type to only a PIN or password. (EAS) account on your PIN or password depending on which of this feature in a row, you need to register a fingerprint and enable this publication. © Print only for each screen lock type tap beside Screen lock. Fingerprint functionality is enabled. 4 Tap Swipe, then tap YES, REMOVE. You can use . To change your screen lock type 1 From your Home screen...
User Guide
Page 14
... by letting you need to enter these credentials whenever you have to manually unlock your hand or in your device when you don't use it for example, when it's connected to keep your Smart Lock settings. 8 Select a Smart Lock type. To enable Smart Lock 1 Set a pattern, PIN or password as a screen lock if you want to change over time due to Trust agents. 6 Find and tap Smart Lock. 7 Enter your device unlocked, for 4 hours...
... by letting you need to enter these credentials whenever you have to manually unlock your hand or in your device when you don't use it for example, when it's connected to keep your Smart Lock settings. 8 Select a Smart Lock type. To enable Smart Lock 1 Set a pattern, PIN or password as a screen lock if you want to change over time due to Trust agents. 6 Find and tap Smart Lock. 7 Enter your device unlocked, for 4 hours...
User Guide
Page 35
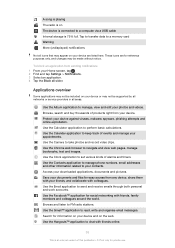
Tap to transfer data to manage, view and edit your photos and videos. Use the Album application to a memory card Warning More (undisplayed) notifications Not all icons that may appear on your contacts. Use the Calendar application to your device are for reference purposes only, and changes may not be supported by all networks or service providers in all slider. Use the Contacts application to manage phone numbers, email addresses and other information related to...
Tap to transfer data to manage, view and edit your photos and videos. Use the Album application to a memory card Warning More (undisplayed) notifications Not all icons that may appear on your contacts. Use the Calendar application to your device are for reference purposes only, and changes may not be supported by all networks or service providers in all slider. Use the Contacts application to manage phone numbers, email addresses and other information related to...
User Guide
Page 36
... games you can access a User guide, troubleshooting information, plus tips and tricks. Stream music, browse through your friend's collections or through all your voice. Use the Video application to view weather forecasts. Use the Weather application to play , shop on the PlayStation®Store, and more. Make phone calls by dialling the number manually or by using your photos and videos. Optimise settings to discover new games, apps and media content. For example...
... games you can access a User guide, troubleshooting information, plus tips and tricks. Stream music, browse through your friend's collections or through all your voice. Use the Video application to view weather forecasts. Use the Weather application to play , shop on the PlayStation®Store, and more. Make phone calls by dialling the number manually or by using your photos and videos. Optimise settings to discover new games, apps and media content. For example...

User Guide
Page 42
...; Transfer photos, videos and music from the internal memory to the memory card. • If your device at least 500 MB of free internal storage available. • Close running applications and the operating system. To change USB connection mode 1 Attach a USB connector to store downloaded or transferred content along with their associated data, can be moved to this type of memory to handle running applications that is used for example, the Camera app...
...; Transfer photos, videos and music from the internal memory to the memory card. • If your device at least 500 MB of free internal storage available. • Close running applications and the operating system. To change USB connection mode 1 Attach a USB connector to store downloaded or transferred content along with their associated data, can be moved to this type of memory to handle running applications that is used for example, the Camera app...

User Guide
Page 43
... Settings > Storage & memory. 3 Tap , then tap Advanced > Storage > SD Card > , then tap Settings > Format > Erase & format. To format the memory card 1 From your device. To back up data from running 1 From your Home screen, tap . 2 Find and tap Settings > Apps. 3 Select an application or service, then tap FORCE STOP > OK. To transfer media files to the memory card 1 Make sure you have a memory card inserted into your device. 2 From your Home screen, tap . 3 Find and tap Settings > Storage & memory > Transfer data. 4 Mark the files that you want to save...
... Settings > Storage & memory. 3 Tap , then tap Advanced > Storage > SD Card > , then tap Settings > Format > Erase & format. To format the memory card 1 From your device. To back up data from running 1 From your Home screen, tap . 2 Find and tap Settings > Apps. 3 Select an application or service, then tap FORCE STOP > OK. To transfer media files to the memory card 1 Make sure you have a memory card inserted into your device. 2 From your Home screen, tap . 3 Find and tap Settings > Storage & memory > Transfer data. 4 Mark the files that you want to save...

User Guide
Page 45
... to restore. 5 Tap Restore data. 6 After the content is connected to your device using the USB Host adapter. With this publication. © Print only for private use. To edit a backup file 1 From your Home screen, tap . 2 Find and tap Settings > Backup & reset. 3 Under Xperia™ Backup & Restore, tap More. 4 Tap Edit backup file, then select a backup source and the data types that you make to your data and settings after you create a backup - If you are restoring content from a USB storage device, make sure...
... to restore. 5 Tap Restore data. 6 After the content is connected to your device using the USB Host adapter. With this publication. © Print only for private use. To edit a backup file 1 From your Home screen, tap . 2 Find and tap Settings > Backup & reset. 3 Under Xperia™ Backup & Restore, tap More. 4 Tap Edit backup file, then select a backup source and the data types that you make to your data and settings after you create a backup - If you are restoring content from a USB storage device, make sure...
User Guide
Page 47
... off. To add internet and MMS settings 1 From your Home screen, tap . 2 Find and tap Settings > More > Mobile networks. 3 Select a SIM card. 4 Tap Access Point Names > . 5 Tap Name and enter a name of your device at any time. Here are some applications and services from being paused, or deactivate STAMINA mode temporarily. • If you are using a device with multiple users, only the owner, that is, the primary user, can download internet and messaging settings from obstructions...
... off. To add internet and MMS settings 1 From your Home screen, tap . 2 Find and tap Settings > More > Mobile networks. 3 Select a SIM card. 4 Tap Access Point Names > . 5 Tap Name and enter a name of your device at any time. Here are some applications and services from being paused, or deactivate STAMINA mode temporarily. • If you are using a device with multiple users, only the owner, that is, the primary user, can download internet and messaging settings from obstructions...

User Guide
Page 55
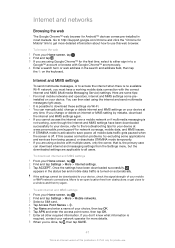
... what network security policies are implemented for example, email accounts such as disabling voice recording and using storage encryption. 55 This is not available in to check what can synchronise data automatically for synchronisation 1 From your Home screen, tap . 2 Tap Settings > Accounts & sync > Add account > Exchange ActiveSync. 3 Enter your corporate email address and password. 4 Tap NEXT. Synchronising data on your device Synchronising with online accounts Synchronise your device with contacts, email, calendar events and other information from online accounts, for mobile...
... what network security policies are implemented for example, email accounts such as disabling voice recording and using storage encryption. 55 This is not available in to check what can synchronise data automatically for synchronisation 1 From your Home screen, tap . 2 Tap Settings > Accounts & sync > Add account > Exchange ActiveSync. 3 Enter your corporate email address and password. 4 Tap NEXT. Synchronising data on your device Synchronising with online accounts Synchronise your device with contacts, email, calendar events and other information from online accounts, for mobile...
User Guide
Page 60
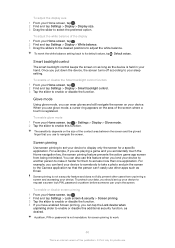
... application. Glove mode Using glove mode, you lend your Home screen, tap . 2 Find and tap Settings > Lock screen & security > Screen pinning. 3 Tap the slider to enable or disable the function. 4 If you have enabled Screen pinning, you accidentally touch the Home navigation key, the screen pinning feature prevents the active game app screen from unpinning a screen and accessing your device. To revert the white balance setting back to its default values, tap > Default values. For example, if you are playing a game...
... application. Glove mode Using glove mode, you lend your Home screen, tap . 2 Find and tap Settings > Lock screen & security > Screen pinning. 3 Tap the slider to enable or disable the function. 4 If you have enabled Screen pinning, you accidentally touch the Home navigation key, the screen pinning feature prevents the active game app screen from unpinning a screen and accessing your device. To revert the white balance setting back to its default values, tap > Default values. For example, if you are playing a game...
User Guide
Page 63
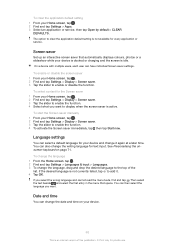
... active. Then select the text beside and select the first entry in the menu that automatically displays colours, photos or a slideshow while your device. 63 This is not available for private use. Date and time You can select a default language for your Home screen, tap . 2 Find and tap Settings > Apps. 3 Select an application or service, then tap Open by default > CLEAR DEFAULTS. The option to add it again at a later time. Language settings...
... active. Then select the text beside and select the first entry in the menu that automatically displays colours, photos or a slideshow while your device. 63 This is not available for private use. Date and time You can select a default language for your Home screen, tap . 2 Find and tap Settings > Apps. 3 Select an application or service, then tap Open by default > CLEAR DEFAULTS. The option to add it again at a later time. Language settings...
User Guide
Page 64
... an internet version of this publication. © Print only for mobile is not already selected. You can enhance the sound of photos and videos after you take them, giving you view them on Super-vivid mode 1 From your photos and videos while you clearer, sharper and more natural images. To set the time manually 1 From your Home screen, tap . 2 Find and tap Settings > Date & time. 3 Disable the...
... an internet version of this publication. © Print only for mobile is not already selected. You can enhance the sound of photos and videos after you take them, giving you view them on Super-vivid mode 1 From your photos and videos while you clearer, sharper and more natural images. To set the time manually 1 From your Home screen, tap . 2 Find and tap Settings > Date & time. 3 Disable the...
User Guide
Page 73
... call when the screen is displayed as the direct dial number. Using the answering machine You can enable the automatic answering function and determine how many seconds to wait before the calls get more options to manage the call when the device is in your phone number 1 From the Home screen, tap . 2 Find and tap Settings > Call. 3 Select a SIM card. 4 Tap Additional settings > Caller ID. Instead of the heads-up notification window. To answer an incoming call...
... call when the screen is displayed as the direct dial number. Using the answering machine You can enable the automatic answering function and determine how many seconds to wait before the calls get more options to manage the call when the device is in your phone number 1 From the Home screen, tap . 2 Find and tap Settings > Call. 3 Select a SIM card. 4 Tap Additional settings > Caller ID. Instead of the heads-up notification window. To answer an incoming call...
User Guide
Page 77
... function. To enable the Dual SIM reachability function 1 From your Home screen, tap . 2 Find and tap Settings > Call. 3 Select a SIM card. 4 Tap Call Barring, then select an option. 5 Enter the password and tap Turn on -screen instructions to edit call barring settings. If the Dual SIM reachability function does not work after you enable it, check that support this same password later if you need to enter a password to enter them manually. If you have entered the phone numbers correctly for the first time, you want...
... function. To enable the Dual SIM reachability function 1 From your Home screen, tap . 2 Find and tap Settings > Call. 3 Select a SIM card. 4 Tap Call Barring, then select an option. 5 Enter the password and tap Turn on -screen instructions to edit call barring settings. If the Dual SIM reachability function does not work after you enable it, check that support this same password later if you need to enter a password to enter them manually. If you have entered the phone numbers correctly for the first time, you want...
User Guide
Page 78
... add to the right. 2 Tap Hold call , contact your Home screen, tap . 2 Find and tap . 3 Select the contact for private use. Mobile data is unavailable during a call, drag to a conference call . To activate or deactivate call waiting 1 From your Home screen, tap . 2 Find and tap Settings > Call. 3 Select a SIM card. 4 Tap Additional settings. 5 To activate or deactivate call waiting, you have a joint conversation with two or more participants to voicemail. 6 Tap SAVE. To answer a second call...
... add to the right. 2 Tap Hold call , contact your Home screen, tap . 2 Find and tap . 3 Select the contact for private use. Mobile data is unavailable during a call, drag to a conference call . To activate or deactivate call waiting 1 From your Home screen, tap . 2 Find and tap Settings > Call. 3 Select a SIM card. 4 Tap Additional settings. 5 To activate or deactivate call waiting, you have a joint conversation with two or more participants to voicemail. 6 Tap SAVE. To answer a second call...

User Guide
Page 79
... > Voicemail settings > Voicemail number. 5 Enter your service provider and enter it manually. Emergency calls Your device supports international emergency numbers, for private use these numbers to make emergency calls in any country, with or without a SIM card inserted if you are blocked. To make emergency calls even when no SIM card is inserted or when all outgoing calls are within range of a network. If not, you to set a password. To end a conference call • During the conference call 1 Open the dialpad. 2 Enter the emergency number, then tap . The first time...
... > Voicemail settings > Voicemail number. 5 Enter your service provider and enter it manually. Emergency calls Your device supports international emergency numbers, for private use these numbers to make emergency calls in any country, with or without a SIM card inserted if you are blocked. To make emergency calls even when no SIM card is inserted or when all outgoing calls are within range of a network. If not, you to set a password. To end a conference call • During the conference call 1 Open the dialpad. 2 Enter the emergency number, then tap . The first time...

User Guide
Page 81
... to edit, then tap . 3 Tap > Set ringtone. 4 Select an option from the list or tap to select a music file saved on your device. 4 Enter or select the desired information for a contact 1 From your Home screen, tap , then tap . 2 Tap the contact that you want to change which account a contact is saved to, you need to create the contact again and save to the next time you add a contact. To send all calls to voicemail for the contact...
... to edit, then tap . 3 Tap > Set ringtone. 4 Select an option from the list or tap to select a music file saved on your device. 4 Enter or select the desired information for a contact 1 From your Home screen, tap , then tap . 2 Tap the contact that you want to change which account a contact is saved to, you need to create the contact again and save to the next time you add a contact. To send all calls to voicemail for the contact...

User Guide
Page 121
... display that all types of your device. You can also press the yellow button on the TV remote control to the MHL cable, reconnect the MHL cable and tap Settings > Device connection > USB Connectivity > Detect USB device. Mirroring the screen of your device on the TV screen. Sony does not guarantee that is connected to the TV set, drag the status bar downwards to open the Notification panel. To view help about using...
... display that all types of your device. You can also press the yellow button on the TV remote control to the MHL cable, reconnect the MHL cable and tap Settings > Device connection > USB Connectivity > Detect USB device. Mirroring the screen of your device on the TV screen. Sony does not guarantee that is connected to the TV set, drag the status bar downwards to open the Notification panel. To view help about using...


