User Guide
Page 1
User guide T250i This is the Internet version of the User's guide. © Print only for private use.
User guide T250i This is the Internet version of the User's guide. © Print only for private use.
User Guide
Page 2
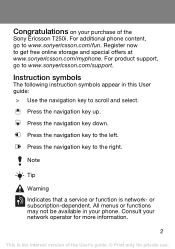
... network- For product support, go to the right. Press the navigation key up. Note Tip Warning Indicates that a service or function is the Internet version of the Sony Ericsson T250i. Press the navigation key down. All menus or functions may not be available in this User guide: > Use the navigation key to get free...
... network- For product support, go to the right. Press the navigation key up. Note Tip Warning Indicates that a service or function is the Internet version of the Sony Ericsson T250i. Press the navigation key down. All menus or functions may not be available in this User guide: > Use the navigation key to get free...
User Guide
Page 3
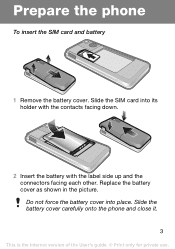
Prepare the phone To insert the SIM card and battery 1 Remove the battery cover. Slide the battery cover carefully onto the phone and close it. 3 This is the Internet version of the User's guide. © Print only for private use. Do not force the battery cover into its holder with the contacts facing down. 2 Insert the battery with the label side up and the connectors facing each other. Replace the battery cover as shown in the picture. Slide the SIM card into place.
Prepare the phone To insert the SIM card and battery 1 Remove the battery cover. Slide the battery cover carefully onto the phone and close it. 3 This is the Internet version of the User's guide. © Print only for private use. Do not force the battery cover into its holder with the contacts facing down. 2 Insert the battery with the label side up and the connectors facing each other. Replace the battery cover as shown in the picture. Slide the SIM card into place.

User Guide
Page 4
You can charge the battery for private use the phone during charging. You can use . Press a key to fully charge the battery. It takes approximately 2.5 hours to illuminate the screen. 2 To remove the charger, tilt the plug upwards. Interrupted charging will not damage the battery. 4 This is partly charged when you buy it. Charge the battery 2.5 h 1 The phone battery is the Internet version of the User's guide. © Print only for more or less than 2.5 hours. Connect the charger to the phone.
You can charge the battery for private use the phone during charging. You can use . Press a key to fully charge the battery. It takes approximately 2.5 hours to illuminate the screen. 2 To remove the charger, tilt the plug upwards. Interrupted charging will not damage the battery. 4 This is partly charged when you buy it. Charge the battery 2.5 h 1 The phone battery is the Internet version of the User's guide. © Print only for more or less than 2.5 hours. Connect the charger to the phone.

User Guide
Page 5
Standby After you have turned the phone on and entered your PIN, the name of the User's guide. © Print only for private use. Turn the phone on the screen. To turn the phone off • Press and hold down . 2 Enter your operator appears on 1 Press and hold down . You can now make and receive calls. 5 This is called standby. To correct mistakes, select Delete. 3 Select OK. 4 Select a language. 5 Enter the time and date and select Save. This is the Internet version of your PIN if requested.
Standby After you have turned the phone on and entered your PIN, the name of the User's guide. © Print only for private use. Turn the phone on the screen. To turn the phone off • Press and hold down . 2 Enter your operator appears on 1 Press and hold down . You can now make and receive calls. 5 This is called standby. To correct mistakes, select Delete. 3 Select OK. 4 Select a language. 5 Enter the time and date and select Save. This is the Internet version of your PIN if requested.
User Guide
Page 6
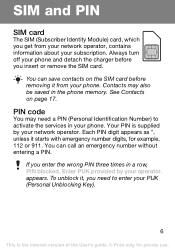
... You may also be saved in a row, PIN blocked. If you enter the wrong PIN three times in the phone memory. Your PIN is the Internet version of the User's guide. © Print only for example, 112 or 911. You can call an emergency number without entering a PIN.
... You may also be saved in a row, PIN blocked. If you enter the wrong PIN three times in the phone memory. Your PIN is the Internet version of the User's guide. © Print only for example, 112 or 911. You can call an emergency number without entering a PIN.
User Guide
Page 7
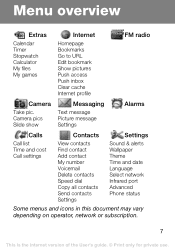
... Select network Infrared port Advanced Phone status Some menus and icons in this document may vary depending on operator, network or subscription. 7 This is the Internet version of the User's guide. © Print only for private use. Menu overview Extras Calendar Timer Stopwatch Calculator My files My games...
... Select network Infrared port Advanced Phone status Some menus and icons in this document may vary depending on operator, network or subscription. 7 This is the Internet version of the User's guide. © Print only for private use. Menu overview Extras Calendar Timer Stopwatch Calculator My files My games...

User Guide
Page 8
Phone overview Stereo handsfree and battery charger connector Infrared port Navigation key with shortcuts. Selection key Call key Keylock Volume keys End key, On/off key 8 This is the Internet version of the User's guide. © Print only for private use.
Phone overview Stereo handsfree and battery charger connector Infrared port Navigation key with shortcuts. Selection key Call key Keylock Volume keys End key, On/off key 8 This is the Internet version of the User's guide. © Print only for private use.
User Guide
Page 9
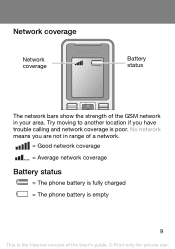
No network means you have trouble calling and network coverage is the Internet version of a network. = Good network coverage = Average network coverage Battery status = The phone battery is fully charged = The phone battery is empty 9 This is poor. Try moving to another location if you are not in your area. Network coverage Network coverage Battery status The network bars show the strength of the GSM network in range of the User's guide. © Print only for private use.
No network means you have trouble calling and network coverage is the Internet version of a network. = Good network coverage = Average network coverage Battery status = The phone battery is fully charged = The phone battery is empty 9 This is poor. Try moving to another location if you are not in your area. Network coverage Network coverage Battery status The network bars show the strength of the GSM network in range of the User's guide. © Print only for private use.

User Guide
Page 10
Screen icons These icons may appear on The FM radio is playing The Infrared port is activated 10 This is on the screen. Icon Description Battery icon. A completely green icon means that the battery is fully charged You have missed a call Divert calls is activated The phone is set to silent The keypad is locked You have received a new text message You have received a new picture message An alarm is activated Ongoing call The loudspeaker is the Internet version of the User's guide. © Print only for private use.
Screen icons These icons may appear on The FM radio is playing The Infrared port is activated 10 This is on the screen. Icon Description Battery icon. A completely green icon means that the battery is fully charged You have missed a call Divert calls is activated The phone is set to silent The keypad is locked You have received a new text message You have received a new picture message An alarm is activated Ongoing call The loudspeaker is the Internet version of the User's guide. © Print only for private use.

User Guide
Page 11
... and hold down . To set the phone to standby • Press . To call your voicemail service • Press and hold down . 11 This is the Internet version of the User's guide. © Print only for private use the navigation keys to go directly to a function: • Press to write a text or...
... and hold down . To set the phone to standby • Press . To call your voicemail service • Press and hold down . 11 This is the Internet version of the User's guide. © Print only for private use the navigation keys to go directly to a function: • Press to write a text or...
User Guide
Page 12
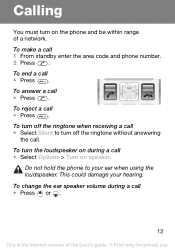
... the User's guide. © Print only for private use. Calling You must turn the loudspeaker on during a call • Press or . 12 This is the Internet version of a network. To end a call • Select Options > Turn on speaker. To answer a call 1 From standby enter the area code and phone number. 2 Press...
... the User's guide. © Print only for private use. Calling You must turn the loudspeaker on during a call • Press or . 12 This is the Internet version of a network. To end a call • Select Options > Turn on speaker. To answer a call 1 From standby enter the area code and phone number. 2 Press...
User Guide
Page 13
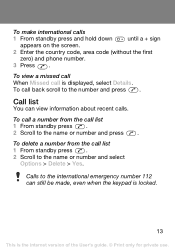
To call list 1 From standby press . 2 Scroll to the number and press . To call a number from the call is the Internet version of the User's guide. © Print only for private use. Calls to the name or number and select Options > Delete > Yes. Call list You ...
To call list 1 From standby press . 2 Scroll to the number and press . To call a number from the call is the Internet version of the User's guide. © Print only for private use. Calls to the name or number and select Options > Delete > Yes. Call list You ...
User Guide
Page 14
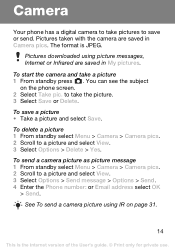
... saved in Camera pics. To start the camera and take the picture. 3 Select Save or Delete. See To send a camera picture using picture messages, Internet or Infrared are saved in My pictures. Pictures downloaded using IR on the phone screen. 2 Select Take pic. To save or send. To delete a... picture 1 From standby select Menu > Camera > Camera pics. 2 Scroll to a picture and select View. 3 Select Options > Delete > Yes. The format is the Internet version of the User's guide. © Print only for private use. You can see the subject on page 31. 14 This is JPEG.
... saved in Camera pics. To start the camera and take the picture. 3 Select Save or Delete. See To send a camera picture using picture messages, Internet or Infrared are saved in My pictures. Pictures downloaded using IR on the phone screen. 2 Select Take pic. To save or send. To delete a... picture 1 From standby select Menu > Camera > Camera pics. 2 Scroll to a picture and select View. 3 Select Options > Delete > Yes. The format is the Internet version of the User's guide. © Print only for private use. You can see the subject on page 31. 14 This is JPEG.
User Guide
Page 15
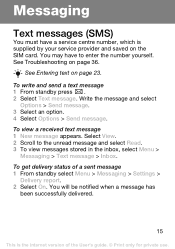
... successfully delivered. 15 This is supplied by your service provider and saved on the SIM card. You may have a service centre number, which is the Internet version of a sent message 1 From standby select Menu > Messaging > Settings > Delivery report. 2 Select On. See Troubleshooting on page 23. Select View. 2 Scroll to enter the...
... successfully delivered. 15 This is supplied by your service provider and saved on the SIM card. You may have a service centre number, which is the Internet version of a sent message 1 From standby select Menu > Messaging > Settings > Delivery report. 2 Select On. See Troubleshooting on page 23. Select View. 2 Scroll to enter the...
User Guide
Page 16
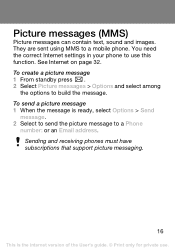
... in your phone to a Phone number: or an Email address. To send a picture message 1 When the message is the Internet version of the User's guide. © Print only for private use this function. Picture messages (MMS) Picture messages can contain text, sound ...and images. To create a picture message 1 From standby press . 2 Select Picture messages > Options and select among the options to a mobile phone. See Internet on page 32. Sending and receiving phones must have subscriptions that support picture messaging. 16 This is ready, select Options > Send message. 2 Select to send...
... in your phone to a Phone number: or an Email address. To send a picture message 1 When the message is the Internet version of the User's guide. © Print only for private use this function. Picture messages (MMS) Picture messages can contain text, sound ...and images. To create a picture message 1 From standby press . 2 Select Picture messages > Options and select among the options to a mobile phone. See Internet on page 32. Sending and receiving phones must have subscriptions that support picture messaging. 16 This is ready, select Options > Send message. 2 Select to send...

User Guide
Page 17
... in phone. 3 Enter the name and select Options > OK. 4 Scroll to , or enter the first few letters of the contact. 3 Press . 17 This is the Internet version of the User's guide. © Print only for private use.
... in phone. 3 Enter the name and select Options > OK. 4 Scroll to , or enter the first few letters of the contact. 3 Press . 17 This is the Internet version of the User's guide. © Print only for private use.

User Guide
Page 18
To view your own phone number • From standby select Menu > Contacts > My number. 18 This is the Internet version of the User's guide. © Print only for private use. To edit a contact 1 From standby press . 2 Scroll to the contact and select Select > Options > Delete contact. To delete a contact 1 From standby press . 2 Scroll to the contact and select Select > Options > Edit. 3 Edit the information and select Options > Save contact. To copy all contacts to the SIM card • From standby select Menu > Contacts > Copy all contacts > Copy all to SIM.
To view your own phone number • From standby select Menu > Contacts > My number. 18 This is the Internet version of the User's guide. © Print only for private use. To edit a contact 1 From standby press . 2 Scroll to the contact and select Select > Options > Delete contact. To delete a contact 1 From standby press . 2 Scroll to the contact and select Select > Options > Edit. 3 Edit the information and select Options > Save contact. To copy all contacts to the SIM card • From standby select Menu > Contacts > Copy all contacts > Copy all to SIM.

User Guide
Page 19
Speed dialling Speed dialling lets you select nine contacts that you can save in positions 2-9. Position 1 is the Internet version of the User's guide. © Print only for private use. To add contacts to Voicemail number as default. To speed dial • From standby ...
Speed dialling Speed dialling lets you select nine contacts that you can save in positions 2-9. Position 1 is the Internet version of the User's guide. © Print only for private use. To add contacts to Voicemail number as default. To speed dial • From standby ...
User Guide
Page 20
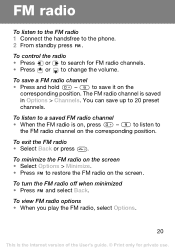
... when minimized • Press and select Back. To view FM radio options • When you play the FM radio, select Options. 20 This is the Internet version of the User's guide. © Print only for FM radio channels. • Press or to 20 preset channels. To control the radio • Press...
... when minimized • Press and select Back. To view FM radio options • When you play the FM radio, select Options. 20 This is the Internet version of the User's guide. © Print only for FM radio channels. • Press or to 20 preset channels. To control the radio • Press...

