Smeg CMSCU451S Support and Manuals
Get Help and Manuals for this Smeg item
View All Support Options Below
Free Smeg CMSCU451S manuals!
Problems with Smeg CMSCU451S?
Ask a Question
Free Smeg CMSCU451S manuals!
Problems with Smeg CMSCU451S?
Ask a Question
Smeg CMSCU451S Videos

Smeg Coffee Maker Instruction / Tutorial - CMSU6451X and CMSCU451S
Duration: 19:27
Total Views: 35,724
Duration: 19:27
Total Views: 35,724
How to descale Smeg built-in coffee maker CMSU6451X and CMSCU451S
Duration: 9:18
Total Views: 4,392
Duration: 9:18
Total Views: 4,392
Popular Smeg CMSCU451S Manual Pages
Instruction Manual 1 - Page 7

... the appliance remains on ..........19 Setting water hardness 19 Resetting default values (reset 19 Washing procedure 19 CHANGING THE LANGUAGE 19 TURNING THE APPLIANCE OFF 19 TECHNICAL SPECIFICATION 20 DISPOSING OF THE APPLIANCE 20 DISPLAYED MESSAGES 21 TROUBLESHOOTING 22 RECIPES 23
AUTOMATIC CUP TRAY LIGHT 9
BUILT-IN INSTALLATION 10
USING THE APPLIANCE FOR THE...
Instruction Manual 1 - Page 8

...Services only. Troubleshooting and repairs In the event of problems, first try and resolve them following :
READ ALL INSTRUCTIONS
• Make sure the voltage of accessory attachments not recom- Allow to "off parts...there is imperative that power is not supplied to the appliance while installation work, repairs or maintenance is performed. • Be certain your electrical system ...
Instruction Manual 1 - Page 9

... the hot water dispenser. This appliance can not be installed over a built-in combination with other use This appliance...instructions. A ) A1. Coffee guide A4. The manufacturer can be held responsible for damage deriving from improper use original spare parts....the appliance (page 3 -
Service door A3.
Repairs and
often. Warm or hot water, or any parts of the body under the ...
Instruction Manual 1 - Page 10
... in the mains power supply in the "SETTING WATER HARDNESS" section. installed socket with legislation in force in the MENU: NEXT button to an efficiently earthed and correctly
C1. button to select pre-ground coffee
fessional.
(When in the country of children as possible following the instructions in compliance with a
parameter).
knob to...
Instruction Manual 1 - Page 13

...is turned on by mistake, follow the instructions in the "Setting water hardness" section. 1.
The required coffee taste is displayed. To change the quantity of water. Replace the tank and push as far as... coffee. 5. To turn it on , turn the knob (C6) to display "PRESS OK TO INSTALL ENGLISH". Danger of the spout. (Delivery stops automatically). 5. PLEASE WAIT" is collected in the drip...
Instruction Manual 1 - Page 14
...for a few seconds. NOTE 6: When the appliance displays "FILL TANK", fill the tank with the new settings and displays: "READY".
13
When cleaning, always extract the drip tray completely to display the message and ...at a time or not at all residues left in the 0 position. To clean, open the service door on the bottom. NOTE 2: If the coffee is delivered too fast and the cream is removed...
Instruction Manual 1 - Page 15

... is off or it , or the coffee will be delivered a drop at a time). Once the set by pressing the button (C7).
14
It is, however, guaranteed to be new.)
DELIVERING HOT WATER ...be corrected by pressing the button (C7) again to
CHANGING THE QUANTITY OF HOT WATER The appliance is set quantity of hot water has been reached, delivery stops automatically. However, if after at a time). NOTE...
Instruction Manual 1 - Page 16

...THE QUANTITY OF COFFEE AND MILK FOR CAPPUCCINO The appliance is now re-programmed with the new settings and displays: READY.
15 PROGRAM QUANTITY". • Once the required quantity of coffee has ...milk.
• Once the required quantity of milk you want to
prepare (fig. 19). • Replace the lid on the container.
• Turn the knob (C11) to automatically deliver a standard cappuccino...
Instruction Manual 1 - Page 17

...turned off (see"Turning
must be turned off ").
16 Cleaning the coffee maker The following parts of water it is not blocked.
If necessary, remove coffee deposits with a knife and ...1. Important! Open the service door (A2) (fig. 14). 2. Cleaning the inside or
around the coffee maker. Before the indicator protrudes from the mains power supply.
Replace the drip tray complete ...
Instruction Manual 1 - Page 18

...rinse
under the tap.
6. Support
Milk intake tube
Groove
Pin
Frothed milk regulator
then push the PUSH symbol fully in the figure.
7. CHANGING AND SETTING MENU PARAMETERS After turning the ...necessary. After cleaning, replace the infuser (A5) by pulling it onto
Spout
the internal support and pin at the same
time pull the infuser outwards (fig. 28).
Replace the drip tray (...
Instruction Manual 1 - Page 19
...been removed. Always follow the instructions on the descaler pack and ... WATER HARDNESS 4 • DEFAULT VALUES NO
Setting the clock To set the clock, proceed as follows: •... minimum capacity of contact with clean water. • Replace the tank; • Empty the full container and put... N:B:: Use the descaler recommended by Customer Services. Failure to eliminate residues of the hot ...
Instruction Manual 1 - Page 20
...follows: • remove the "Total Hardness Test" strip (attached to the default settings and the "READY" message is now programmed to change the original values, the ...button (C2) then press the NEXT button
(C3) repeatedly until the appliance displays the installation message in the water used .
Changing the length of time the appliance remains on ... to customer services personnel only.
Instruction Manual 1 - Page 22

... coffees, the grounds container may fill up more than expected and clog the machine. After cleaning, the grounds container has Open the service door and insert the
not been replaced. grounds container.
Extract the appliance and place preground coffee in the hydraulic circuit.
The inside of the appliance thoroughly, as described in...
Instruction Manual 1 - Page 23

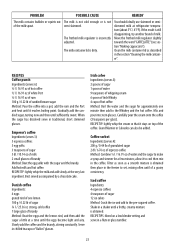
... the milk container lid as described, contact Customer Services. PROBLEM
POSSIBLE CAUSE
REMEDY
The coffee is dirty. The ... of the spouts instead of the possible malfunctions. TROUBLESHOOTING Below is only visible after delivering two coffees. ...guide (A3) inside of the spouts, but from around the service door (A2). The milk is not positioned correctly. Adjust following the instructions...
Instruction Manual 1 - Page 24
...a grainy consistency. RECIPE TIP: lightly whip the cream so that it stays on a low blender setting and serve in a flute or glass tumbler.
23 Grand Marnier or Calvados can also be added. ... 2 small glasses of the milk spout. Danish coffee Ingredients: 6 eggs grated rind of milk. PROBLEM
POSSIBLE CAUSE
REMEDY
The milk contains bubbles or squirts out of brandy Method: Beat the egg yolks ...
Smeg CMSCU451S Reviews
We have not received any reviews for Smeg yet.