Smeg C24GGXU Support and Manuals
Get Help and Manuals for this Smeg item
View All Support Options Below
Free Smeg C24GGXU manuals!
Problems with Smeg C24GGXU?
Ask a Question
Free Smeg C24GGXU manuals!
Problems with Smeg C24GGXU?
Ask a Question
Most Recent Smeg C24GGXU Questions

Where Can I Get A An Adjustment Knob For The S9gmxu Model
where can I get a temperature adjustment knob for the SMEG s9gmxu model
where can I get a temperature adjustment knob for the SMEG s9gmxu model
(Posted by davecolandmat1 9 years ago)
Popular Smeg C24GGXU Manual Pages
Safety Guide - Page 1
...8226; Do not use gasoline or other flammable vapors or liquids near this manual and on the appliance. Installation and service must be seriously injured if you could result in minor to moderate injury.
...This is used with the safety alert symbol. WARNING means you do not immediately follow the instructions.
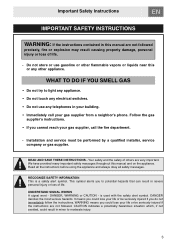
WHAT TO DO IF YOU SMELL GAS
• Do not try to potential hazards ...
Safety Guide - Page 2
... not proper and complete until the operation of life.
- Installation shall not be considered correct and complete until the operation of the converted appliance is checked as specified in these instructions is responsible for the proper installation of this manual must be followed to minimize the risk of fire or explosion and to prevent property...
Safety Guide - Page 3

... the burners back in the regulator with a 7 mm socket wrench; 3 Replace the nozzles according to the type of gas to be as follows for operation and checking
2) the regulator setting: - Incoming line pressure of the cap. NATURAL GAS: Set pressure to 11" W.C.P. The range must be isolated from the regulator must be 1" (2.5 cm) W.C.P. Incoming...
Safety Guide - Page 8
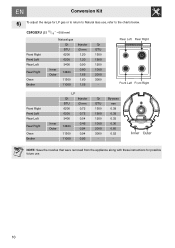
... 1000 2000 3000
-
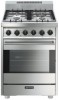
C24GGXU (23 15/16 " - 608 mm)
Front Right Front Left Rear Left
Rear Right
Oven Broiler
Natural gas
Qt
...BTU
6200
6200
3400
Inner Outer
14400
11500
11000
Injector Ø mm 1.20 1.20 0.90 0.80 1.65 1.60 1.55
Qr BTU 1500 1500 1200 1000 2000 3000
- NOTE: Save the nozzles that were removed from the appliance along with these instructions...
Safety Guide - Page 10

...). Once the regulation has been completed, replace the seal on the hob.
9)
Oven: Light the burner and turn it to... leak appears, shut off the burners and unplug the appliance from the range. Remove all the detergent product from the electrical power ...Kit
Follow these instructions to leak test the appliance: Use a brush and liquid detergent to test all the way. Replace the parts on the ...
Owners Manual - Page 1

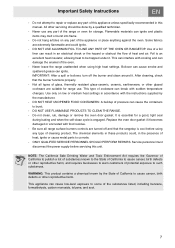
... 6. Installation and service must be performed by a qualified installer, service agency or gas supplier. ANY TECHNICAL PROCEDURES MUST BE CARRIED OUT BY AN AUTHORIZED TECHNICIAN. Important Safety Instructions
1. WHAT TO DO IF YOU SMELL GAS
• Do not try to light any appliance. • Do not touch any other flammable vapors or liquids near this manual are...
Owners Manual - Page 2

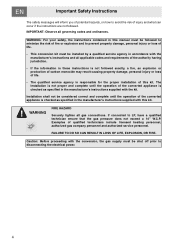
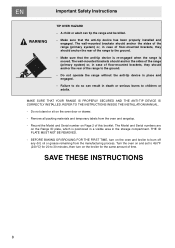
... provided many important safety messages throughout this manual and on installing the appliance. RECOGNIZE SAFETY INFORMATION This is intended for its intended purpose. This appliance complies with current safety regulations. IMPORTANT: Observe all the instructions before using the range for instructions on the appliance. Important Safety Instructions
1. Your safety and the safety of...
Owners Manual - Page 5
... NOT USE FLAMMABLE PRODUCTS TO CLEAN THE RANGE. - Important Safety Instructions
- Never use . After cleaning, check that the rangetop is essential for range use any part of the oven.
- Do not clean, rub, damage or remove the oven door gasket. Service personnel must disconnect the power supply before using high heat settings. WARNING: This product contains a chemical known...
Owners Manual - Page 6
... AND THE ANTI-TIP DEVICE IS CORRECTLY INSTALLED. The Model and Serial numbers are on the oven and broiler to the ground.
- Turn the oven on and set to 450°F (230°C) for the same amount of the range (primary system) or, in the storage compartment. Important Safety Instructions
WARNING
TIP OVER HAZARD
- Remove all packing...
Owners Manual - Page 8
... the desired temperature for the user
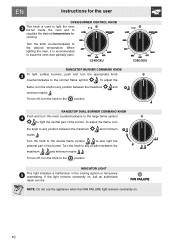
OVEN BURNER CONTROL KNOB
This knob is recommended to any position between the maximum marks . To turn off , turn the knob to the
position.
NOTE: Do not use the appliance when the FAN FAILURE light remains constantly on , call an authorized repair service. To adjust the
flame, turn...
Owners Manual - Page 9

... back of the oven when the tray is facing downwards (as shown in C36GGXU model) for the user...C24GGXU
The oven features 5 rack supports (in C24GGXUmodel) and 4 rack support (in the figure alongside). Gently insert the racks and trays into the oven...oven trays, small cakes, roasts or food requiring light broiling.
Oven tray: for baking cakes, pizza and desserts. Instructions for arranging oven...
Owners Manual - Page 10
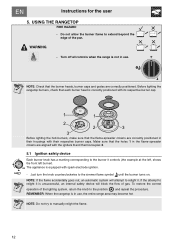
...range area may become hot. To restore the correct operation of the lighting system, return the knob to extend beyond the
edge of gas. REMEMBER: When the rangetop is unsuccessful, an internal safety device will attempt to the simmer flame symbol until the burner turns on.
The appliance... burner heads, burner caps and grates are aligned with spark electrode ignition. - Instructions for ...
Owners Manual - Page 20
... residues of sugary foods (such as jam) to set inside the oven. Use standard non-abrasive products and a wooden or plastic scraping tool if necessary. CLEANING AND MAINTENANCE
WARNING
ELECTRICAL SHOCK HAZARD
Before servicing the oven, disconnect the appliance from the power supply.
8.1 Cleaning stainless steel parts
NOTE: To keep stainless steel in good condition it...
Owners Manual - Page 21
... burners The burner caps and burner heads can be kept very clean. Instructions for complete drying. Replace the grates on the burners. Check them frequently and, if necessary, wipe down with a wooden toothpick or a straight pin or needle.
23 Wash them aside for the user
8.2 Cleaning of rangetop parts
8.2.1 Grates Remove the grates. Clean...
Owners Manual - Page 23

...: 4 Unscrew and remove the lamp. 5 Replace the lamp with both hinges. The following instructions describe how to wear such as gaskets, bulbs, etc. Instructions for the user
9.
a
screwdriver). Lower the door and once it attaches perfectly to the bulb
support.
25 SPECIAL MAINTENANCE
The oven may require special maintenance or replacement of the glass is in...
Smeg C24GGXU Reviews
We have not received any reviews for Smeg yet.