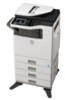
MX-C311 | MX-C401 Operation Manual Suite
Page 4
... 3 Cautions 3 Warnings 4 Laser information 6 INSTALLATION REQUIREMENTS . . . 7 SUPPLIES 9 Storage of supplies 9 Supply of spare parts and consumables 9 REPLACING SUPPLIES AND MAINTENANCE 10 Replacing the toner cartridges 10 Replacing the toner collection container 15 Replacing the developer cartridge / drum cartridge 18 Replacing the developer cartridge . . 18 Replacing the drum cartridge . . 26 Replacing the staple...
MX-C311 | MX-C401 Operation Manual Suite
Page 7
Scratches or smudges on the cord. 4 Fusing unit • Do not throw toner, a toner container (toner cartridge), or a toner collection container into a fire. Exercise care in the correct order. Toner may damage your eyes. • The machine is heavy. If the machine is suddenly interrupted due to press the...wait 20 seconds and switch off the main power switch. Doing so may fly and cause burns. • Store toner, toner containers (toner cartridges), and toner collection containers out of the reach of the machine. • When unplugging the power cord, do not grasp and ...
MX-C311 | MX-C401 Operation Manual Suite
Page 12
...product are available for the toner cartridges, finisher staple cartridge, and transparency film. Storing toner cartridges Store the box that contains the toner cartridge horizontally; Store the toner in the wrapper and lying flat. 3. Be sure to use only SHARP-specified products for 7 years... the machine is stored standing up . If the toner cartridge is guaranteed for at normal temperature with minimal temperature fluctuations • not exposed to solidify. Staple cartridge The finisher requires the following staple cartridge: MX-SCX1 (for finisher) Approx. 5000 per cartridge x...
MX-C311 | MX-C401 Operation Manual Suite
Page 13
... indicated in the message display, replace the toner cartridge for replacing supplies such as toner and staple cartridges and routine maintenance. Replacing the toner cartridges Be sure to replace the toner cartridge when the message "Change the toner cartridge." Y : Yellow toner, M : Magenta toner, C : Cyan toner, Bk : Black toner Replace the toner cartridges of toner are running low or have run out...
MX-C311 | MX-C401 Operation Manual Suite
Page 14
Locations of color toner cartridges 1 (Y) (M) (C) (Bk) (Y): Yellow (M): Magenta (C): Cyan (Bk): Black Pull the toner cartridge toward you. Example: Replacing the yellow toner cartridge 2 11 REPLACING SUPPLIES AND MAINTENANCE Open the front cover.
MX-C311 | MX-C401 Operation Manual Suite
Page 15
... the protective material inserted in the cartridge. REPLACING SUPPLIES AND MAINTENANCE Take out the new toner cartridge, hold it . If shaken in any other direction, toner may collect in the horizontal direction. Toner may spill out. • Shake the toner cartridge only in one part of the cartridge. If you shake the cartridge after...
MX-C311 | MX-C401 Operation Manual Suite
Page 16
The shape of the toner cartridge varies by color. REPLACING SUPPLIES AND MAINTENANCE Insert the new toner cartridge horizontally and push it firmly in the same location as the toner cartridge that was removed. 5 13 Insert in .
MX-C311 | MX-C401 Operation Manual Suite
Page 17
.... • Store the box that contains the toner cartridge horizontally; Toner may solidify inside the cartridge. When the remaining toner falls to use a SHARP-recommended toner cartridge. • Keep the used toner cartridge in the cartridge to solidify. • If a toner cartridge other than 104°F (40°C). Store the toner in a location that your fingers are not...
MX-C311 | MX-C401 Operation Manual Suite
Page 18
... container, take measures such as placing covers on and around the machine to replace the toner collection container. Grasp the top right of the toner collection container with your right hand and support the bottom left with your left hand, and ... toward you. 15 REPLACING SUPPLIES AND MAINTENANCE Replacing the toner collection container The toner collection container collects excess toner that is replaced. When the toner collection container becomes full, "Replace used toner collection container. (1) Turn the toner collection container lock lever to replace the transfer unit. Follow...
MX-C311 | MX-C401 Operation Manual Suite
Page 19
...removed it until your service technician comes to remove it. • Do not point the holes down as used toner will collect the toner collection container. Install the new toner collection container. Your service technician will spill out. • Hold the container by both hands and lift it ...up slowly. • Do not discard the toner collection container. Place it in a plastic bag and keep it .) 4 (2) (1) 16 REPLACING SUPPLIES AND MAINTENANCE Remove the toner collection container. 3 • If the toner collection container is tipped forward too far, it will not be ...
MX-C311 | MX-C401 Operation Manual Suite
Page 20
... when closing the cover. REPLACING SUPPLIES AND MAINTENANCE Turn the lock lever on your clothes. • Do not touch the part soiled with toner of the removed toner collection container. Close the front cover. 6 Take care that your hands. 17 In particular, make sure that there will be no problem... if toner spills on the machine, around the machine, or on the toner collection container to the left . Toner may spill when the toner collection container is correctly in place. Turn the lock lever to the left until it...
MX-C311 | MX-C401 Operation Manual Suite
Page 21
... panel to . Refer to the procedure below if your service technician instructs you to turn off position. 1 Open the front cover and remove the toner collection container. ☞ Replacing the toner collection container (page 15) 2 18 Only replace the cartridge as explained below to replace the drum cartridge. Follow the instructions carefully.
MX-C311 | MX-C401 Operation Manual Suite
Page 23
... the developer cartridge near the middle with both hands at the middle. • Try to keep the developer cartridge horizontal as you accidentally touch the toner, immediately wash your hand and completely remove the developer cartridge. If you remove it with your hands. 20 Do not touch the roller area. Roller...
MX-C311 | MX-C401 Operation Manual Suite
Page 27
REPLACING SUPPLIES AND MAINTENANCE Install the toner collection container. ☞ Replacing the toner collection container (page 15) 10 (2) (1) Close the front cover. 11 Take care that your fingers are not pinched when closing the cover. 24
MX-C311 | MX-C401 Operation Manual Suite
Page 28
...cartridge out of the reach of the removed toner collection container. Switch the main power switch "ON" and press the [POWER] key ( operation panel to turn on the operation panel power. ) on the power. If you accidentally touch the toner, immediately wash your clothes or the immediate surroundings.... • Do not touch the part soiled with toner of small children. • When replacing the developer cartridge, be aware that it may soil...
MX-C311 | MX-C401 Operation Manual Suite
Page 29
Turn off the power and remove the developer cartridge. If you accidentally touch the toner, immediately wash your finger and pull the drum cartridge toward you. Follow the instructions carefully. • Do not leave the drum cartridge outside of "Replacing ..., the developer cartridge must first be removed. 1 Drum cartridge Developer cartridge Hold down the lever on the drum cartridge with both hands. 2 Do not touch toner on the cartridge. This may cause a failure. • When you to shine on the old drum cartridge. Place one hand at the middle of the...
MX-C311 | MX-C401 Operation Manual Suite
Page 30
... the 4 machine, and turn on the new drum cartridge and the insertion label match. For the procedure for replacing the developer cartridge and toner collection container, see steps 7 to 8 and steps 10 to sunlight or electric light. • Do not tilt the drum cartridge or... Drum • To remove the protective material, slowly pull it straight out so that it in the machine. Replace the developer cartridge and toner collection container, close the front cover of "Replacing the developer cartridge" (page 18). 27 REPLACING SUPPLIES AND MAINTENANCE Remove the protective material from...
MX-C311 | MX-C401 Operation Manual Suite
Page 35
... the main charger. Press the [POWER] key ( ) on the operation panel to turn off position. 1 Open the front cover and remove the toner collection container. ☞ Replacing the toner collection container (page 15) 2 32 REPLACING SUPPLIES AND MAINTENANCE Scanning area If colored lines or white lines appear in images scanned using the...
MX-C311 | MX-C401 Operation Manual Suite
Page 37
REPLACING SUPPLIES AND MAINTENANCE Clean the main charger. (1) Gently push the charger cleaner all the way in. (2) Gently pull the charger cleaner out. (3) Repeat the above (1) to (2) three times. • Take care not to let the tip of the charger cleaner become soiled by 5 toner. • Clean with the mark ( ) on the charger cleaner facing down. • Holes to be cleaned by the charger cleaner are indicated by labels similar to (A). (A) Position of mark • Do not use the charger cleaner for any purpose other than cleaning the main charger. 34
MX-C311 | MX-C401 Operation Manual Suite
Page 39
Switch the main power switch "ON" and press the [POWER] key ( operation panel to turn on the operation panel power. ) on the power. Turn on the 11 36 REPLACING SUPPLIES AND MAINTENANCE Install the toner collection container. ☞ Replacing the toner collection container (page 15) 9 (2) (1) Close the front cover. 10 Take care that your fingers are not pinched when closing the cover.