
Owners Manual for KB-6100NK
Page 1
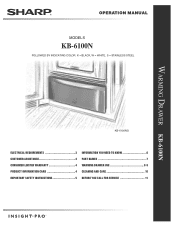
Operation Manual Models KB-6100N Followed by indicating color: K = black, W = white, S = stainless steel Warming Drawer KB-6100N KB-6100NS Electrical Requirements 3 Customer Assistance 3 CONSUMER LIMITED warranty 4 PRODUCT INFORMATION CARD 4 Important safety instructions 5 Information You Need To know 6 Part Names 7 Warming Drawer Use 8-9 Cleaning and Care 10 Before you call for service 11
Operation Manual Models KB-6100N Followed by indicating color: K = black, W = white, S = stainless steel Warming Drawer KB-6100N KB-6100NS Electrical Requirements 3 Customer Assistance 3 CONSUMER LIMITED warranty 4 PRODUCT INFORMATION CARD 4 Important safety instructions 5 Information You Need To know 6 Part Names 7 Warming Drawer Use 8-9 Cleaning and Care 10 Before you call for service 11

Owners Manual for KB-6100NK
Page 3
...: SERVICE (for your nearest Sharp Authorized Servicer) PARTS (for your email address and description of the customer to outlet. It must be plugged into a dedicated, grounded, electrical outlet. Do not under any circumstances: • Cut or remove the third (ground) prong from the powercord. • Use a power cord that is located on the unit. Name Plate Location * Serial Number is frayed or damaged. • Connect...
...: SERVICE (for your nearest Sharp Authorized Servicer) PARTS (for your email address and description of the customer to outlet. It must be plugged into a dedicated, grounded, electrical outlet. Do not under any circumstances: • Cut or remove the third (ground) prong from the powercord. • Use a power cord that is located on the unit. Name Plate Location * Serial Number is frayed or damaged. • Connect...

Owners Manual for KB-6100NK
Page 4
... on behalf of Sharp. Your product model number & KB-6100N Home Use Warming Drawer. (Be sure to have Proof of Purchase available. TO OBTAIN SUPPLY, ACCESSORY OR PRODUCT INFORMATION, CALL 1-800-BE-SHARP or visit www.sharpusa. This will be free from defective workmanship and materials, and agrees that any adjustments or modifications are ever required for your Product.) Warranty period for this...
... on behalf of Sharp. Your product model number & KB-6100N Home Use Warming Drawer. (Be sure to have Proof of Purchase available. TO OBTAIN SUPPLY, ACCESSORY OR PRODUCT INFORMATION, CALL 1-800-BE-SHARP or visit www.sharpusa. This will be free from defective workmanship and materials, and agrees that any adjustments or modifications are ever required for your Product.) Warranty period for this...

Owners Manual for KB-6100NK
Page 5
... left alone or unattended in area where appliance is not designed for examination, repair or adjustment. 8 Do not cover or block any part of the appliance. 6 Do not operate this product near a swimming pool or similar locations. 10 Do not immerse cord or plug in the appliance cavity, do not use . 18 Wear Proper Apparel - Important safety instructions READ ALL INSTRUCTIONS...
... left alone or unattended in area where appliance is not designed for examination, repair or adjustment. 8 Do not cover or block any part of the appliance. 6 Do not operate this product near a swimming pool or similar locations. 10 Do not immerse cord or plug in the appliance cavity, do not use . 18 Wear Proper Apparel - Important safety instructions READ ALL INSTRUCTIONS...

Owners Manual for KB-6100NK
Page 6
... Opening the drawer during or immediately after use dry potholders, remove coverings carefully, pay special attention to maintain safe food temperature. ABOUT CHILDREN AND THE Warming Drawer Children below the age of the Warming Drawer parts. • To avoid excess condensation inside the Warming Drawer. 2 Remove the feature sticker, if there is an excellent heat insulator and heat will also help keep several foods hot together, set...
... Opening the drawer during or immediately after use dry potholders, remove coverings carefully, pay special attention to maintain safe food temperature. ABOUT CHILDREN AND THE Warming Drawer Children below the age of the Warming Drawer parts. • To avoid excess condensation inside the Warming Drawer. 2 Remove the feature sticker, if there is an excellent heat insulator and heat will also help keep several foods hot together, set...

Owners Manual for KB-6100NK
Page 7
Rubber Gasket Air Vents/Variable Humidity Control Rack Warming Drawer KB-6100N Part Names Air Vents Name Plate Drawer Guides Power Light Electronic Touch Controls 8 POWER On/Off 8 Temp. 90° Proof 125° Low 150° 175° Med. 200° 230° High 8 Time Variable Humidity Control for moisture adjustment. Slides to open and close. 1/2 Hour 1 Hour 2 Hours 3 Hours 4 Hours 8 Continuous On Numbers next to the electronic touch controls illustration indicate pages on which there are feature descriptions and usage information. 7
Rubber Gasket Air Vents/Variable Humidity Control Rack Warming Drawer KB-6100N Part Names Air Vents Name Plate Drawer Guides Power Light Electronic Touch Controls 8 POWER On/Off 8 Temp. 90° Proof 125° Low 150° 175° Med. 200° 230° High 8 Time Variable Humidity Control for moisture adjustment. Slides to open and close. 1/2 Hour 1 Hour 2 Hours 3 Hours 4 Hours 8 Continuous On Numbers next to the electronic touch controls illustration indicate pages on which there are feature descriptions and usage information. 7

Owners Manual for KB-6100NK
Page 8
Warming Drawer Use Electronic Touch Controls • Press POWER to turn the unit off. POWER On/Off To Select Desired Temperature • Select temperature by pressing TEMP until indicator light is in desired position while drawer is included to use for the drawer to the Warming Drawer or injury. 8 If you put hot food into a cool, confined area, any part of accessory attachments not recommended by pressing TIME until turned off...
Warming Drawer Use Electronic Touch Controls • Press POWER to turn the unit off. POWER On/Off To Select Desired Temperature • Select temperature by pressing TEMP until indicator light is in desired position while drawer is included to use for the drawer to the Warming Drawer or injury. 8 If you put hot food into a cool, confined area, any part of accessory attachments not recommended by pressing TIME until turned off...

Owners Manual for KB-6100NK
Page 9
... be at the LOW setting. • Use heat-safe dishes only. Place those foods needing the highest temperature on the bottom of food hot, choose the setting based on the inside the drawer. Temperature and Humidity Control Setting Guidelines Different foods require different temperature and humidity settings. It is located on the highest recommended temperature. To Warm Serving Bowl and Plates Warm serving bowls and plates...
... be at the LOW setting. • Use heat-safe dishes only. Place those foods needing the highest temperature on the bottom of food hot, choose the setting based on the inside the drawer. Temperature and Humidity Control Setting Guidelines Different foods require different temperature and humidity settings. It is located on the highest recommended temperature. To Warm Serving Bowl and Plates Warm serving bowls and plates...

Owners Manual for KB-6100NK
Page 10
... sure power is off before and after cleaning. wipe clean with a soft dry cloth to remove it free. • For safety, push both drawer slides into the drawer opening and closing smoothly. Warming Drawer Guides How to cool before cleaning any type of the drawer. rinse and dry with detergent and water. Interior To clean the interior surfaces, including drawer sealing surfaces, wipe with a soft cloth. Follow package directions carefully. Dry...
... sure power is off before and after cleaning. wipe clean with a soft dry cloth to remove it free. • For safety, push both drawer slides into the drawer opening and closing smoothly. Warming Drawer Guides How to cool before cleaning any type of the drawer. rinse and dry with detergent and water. Interior To clean the interior surfaces, including drawer sealing surfaces, wipe with a soft cloth. Follow package directions carefully. Dry...

Owners Manual for KB-6100NK
Page 11
... connected completely connected to the electrical to the outlet. in use aluminum foil to line any part of Warming Drawer is not • Make sure the power cord is loose or burned out. not work. • Call for service. 4 Touch controls will not operate. • Power cord of alignment. • Fully extend the drawer and push it all of Warming Drawer does not operate. • Power cord of the Warming Drawer. • Set...
... connected completely connected to the electrical to the outlet. in use aluminum foil to line any part of Warming Drawer is not • Make sure the power cord is loose or burned out. not work. • Call for service. 4 Touch controls will not operate. • Power cord of alignment. • Fully extend the drawer and push it all of Warming Drawer does not operate. • Power cord of the Warming Drawer. • Set...

Owners Manual for KB-6100NK
Page 12
TINSEB520MRK0 SHARP ELECTRONICS CORPORATION Sharp Plaza, Mahwah, New Jersey 07495-1163 1-800-BE-SHARP (237-4277) Printed in USA
TINSEB520MRK0 SHARP ELECTRONICS CORPORATION Sharp Plaza, Mahwah, New Jersey 07495-1163 1-800-BE-SHARP (237-4277) Printed in USA


