

FO-DC500 | FO-DC525 | FO-DC600 Operation Manual
Page 59
... scanner option is installed, press the letter keys to enter the sender name that will be used whenever a sender's name and e-mail address are running Windows XP • This sender's name and the e-mail address entered in Step 18 will appear when you send a document to an email recipient from the...
... scanner option is installed, press the letter keys to enter the sender name that will be used whenever a sender's name and e-mail address are running Windows XP • This sender's name and the e-mail address entered in Step 18 will appear when you send a document to an email recipient from the...

FO-DC500 | FO-DC525 | FO-DC600 Operation Manual
Page 74
... also used for the network scanner and printer options explained in the following versions of Windows: Windows 98/ME/NT 4.0/2000/XP Installing the PC-Fax driver in your computer To install... folder of the CD-ROM. 72 The Status Monitor notifies you when transmission is located in the FO-LN1 network interface kit. It cannot be installed in the machine. (This kit is installed from the... installed to fax documents directly from your computer. PC Fax Function (Requires the FO-LN1 Option) PC Fax Function (Requires the FO-LN1 Option) The PC-Fax function allows you to monitor the status of faxes...
... also used for the network scanner and printer options explained in the following versions of Windows: Windows 98/ME/NT 4.0/2000/XP Installing the PC-Fax driver in your computer To install... folder of the CD-ROM. 72 The Status Monitor notifies you when transmission is located in the FO-LN1 network interface kit. It cannot be installed in the machine. (This kit is installed from the... installed to fax documents directly from your computer. PC Fax Function (Requires the FO-LN1 Option) PC Fax Function (Requires the FO-LN1 Option) The PC-Fax function allows you to monitor the status of faxes...

FO-DC500 | FO-DC525 | FO-DC600 Operation Manual
Page 75
In the Print window, select "SHARP FO-DC Series FAX" for the PC-Fax driver. 73 When finished, click OK. For detailed information on using the PC-Fax function, open the document ..., open the Help file for the printer and then click OK. The document will be sent to the machine, which will appear to the recipient. A window will then dial the fax number and fax the document to let you enter the destination fax number (or select it and select Print from...
In the Print window, select "SHARP FO-DC Series FAX" for the PC-Fax driver. 73 When finished, click OK. For detailed information on using the PC-Fax function, open the document ..., open the Help file for the printer and then click OK. The document will be sent to the machine, which will appear to the recipient. A window will then dial the fax number and fax the document to let you enter the destination fax number (or select it and select Print from...

FO-DC500 | FO-DC525 | FO-DC600 Operation Manual
Page 83
... Server and DNS Server Settings Setting Passwords Passwords can be entered separately for each personal book and for "User" and "admin" are running Windows XP For detailed information on . An administrator password and a user password can be used if any computers involved in the transmission are both ...a file name to store the new settings and then turn the machine power off and then back on all settings can be set to "Sharp". Network Scanning and Sender E-mail settings The network scanning settings allow you are accessing the page as needed. A password must consist of the...
... Server and DNS Server Settings Setting Passwords Passwords can be entered separately for each personal book and for "User" and "admin" are running Windows XP For detailed information on . An administrator password and a user password can be used if any computers involved in the transmission are both ...a file name to store the new settings and then turn the machine power off and then back on all settings can be set to "Sharp". Network Scanning and Sender E-mail settings The network scanning settings allow you are accessing the page as needed. A password must consist of the...

FO-DC500 | FO-DC525 | FO-DC600 Operation Manual
Page 88
...). (Make sure the Rapid Key overlay is in the middle of a sequence of the slash), press SYMBOL ("SYM" will appear in the transmission are running Windows XP 86
...). (Make sure the Rapid Key overlay is in the middle of a sequence of the slash), press SYMBOL ("SYM" will appear in the transmission are running Windows XP 86

FO-DC500 | FO-DC525 | FO-DC600 Operation Manual
Page 100
... Network Scanner Tool. ♦ Sent as e-mail. ♦ Saved in Sharpdesk. Installing the Network Scanner Software ♦ Saved in a folder. ♦ Passed to close the window. 3 Double-click My Computer ( ). 4 Click the CD-ROM icon ( ) and select Open from the CD-ROM.) Installing Acrobat Reader 1 Quit any software applications and/or...
... Network Scanner Tool. ♦ Sent as e-mail. ♦ Saved in Sharpdesk. Installing the Network Scanner Software ♦ Saved in a folder. ♦ Passed to close the window. 3 Double-click My Computer ( ). 4 Click the CD-ROM icon ( ) and select Open from the CD-ROM.) Installing Acrobat Reader 1 Quit any software applications and/or...

FO-DC500 | FO-DC525 | FO-DC600 Operation Manual
Page 101
... Network Scanner Software Installing the software programs Note the following when installing the software programs from the CD-ROM: ♦ The FO-DC525 is referred to as the FO-DC500 in the installation windows. ♦ Be sure to check the system requirements for installation of each of the software programs in the user's guides...
... Network Scanner Software Installing the software programs Note the following when installing the software programs from the CD-ROM: ♦ The FO-DC525 is referred to as the FO-DC500 in the installation windows. ♦ Be sure to check the system requirements for installation of each of the software programs in the user's guides...

FO-DC500 | FO-DC525 | FO-DC600 Operation Manual
Page 102
... then install "Imaging for handling images (called "Process Definitions"), and each method is completed, the Sharp Network Scanner Tool Setup Wizard will also be installed. • "Imaging for Windows Professional Edition" and Sharpdesk Imaging use common registry entries, and installing "Imaging for the...is connected to the network. You can select multiple methods for Windows Professional Edition". Setting up Network Scanner Tool When installation of the setup wizard refer to set up the Network Scanner Tool. ♦ When using the FO-DC525, "FO-DC500" in the setup and configuration...
... then install "Imaging for handling images (called "Process Definitions"), and each method is completed, the Sharp Network Scanner Tool Setup Wizard will also be installed. • "Imaging for Windows Professional Edition" and Sharpdesk Imaging use common registry entries, and installing "Imaging for the...is connected to the network. You can select multiple methods for Windows Professional Edition". Setting up Network Scanner Tool When installation of the setup wizard refer to set up the Network Scanner Tool. ♦ When using the FO-DC525, "FO-DC500" in the setup and configuration...

FO-DC500 | FO-DC525 | FO-DC600 Operation Manual
Page 104
...The settings in Steps 3 and 4 can be changed later by clicking the Windows Start button, pointing to an editable document. - The name that you wish to use as a network scanner. Send Email (Rapid Key or Speed Dial name: Sharp-Email), - For more details, see online Help or the Network Scanner Tool ...address or a host name on the network) will appear. When finished, click Next. • The FO-DC500/525/600 is the machine name set , "FO-DC500(600)" (or a higher number if there are multiple FO-DC500/525/600 machines on the network (ask your default e-mail application so the file can be...
...The settings in Steps 3 and 4 can be changed later by clicking the Windows Start button, pointing to an editable document. - The name that you wish to use as a network scanner. Send Email (Rapid Key or Speed Dial name: Sharp-Email), - For more details, see online Help or the Network Scanner Tool ...address or a host name on the network) will appear. When finished, click Next. • The FO-DC500/525/600 is the machine name set , "FO-DC500(600)" (or a higher number if there are multiple FO-DC500/525/600 machines on the network (ask your default e-mail application so the file can be...

FO-DC500 | FO-DC525 | FO-DC600 Operation Manual
Page 105
... Sharpdesk Uninstaller Click Start and then point to Programs, Sharpdesk, and then Network Scanner Tool Configuration. 2 Click the Copiers tab in the window that contained your network will not be displayed. Network Scanner Installing the Network Scanner Software 5 When the completion message appears, click Finish. Follow...Rapid Key or Speed Dial number that appears. 3 Click the Auto Detect button. If an additional FO-DC500/525/600 machine is installed on the network If an additional FO-DC500/525/600 machine is also uninstalled. The names of the new machine. 103 Select the ...
... Sharpdesk Uninstaller Click Start and then point to Programs, Sharpdesk, and then Network Scanner Tool Configuration. 2 Click the Copiers tab in the window that contained your network will not be displayed. Network Scanner Installing the Network Scanner Software 5 When the completion message appears, click Finish. Follow...Rapid Key or Speed Dial number that appears. 3 Click the Auto Detect button. If an additional FO-DC500/525/600 machine is installed on the network If an additional FO-DC500/525/600 machine is also uninstalled. The names of the new machine. 103 Select the ...

FO-DC500 | FO-DC525 | FO-DC600 Operation Manual
Page 124
...Windows 98 Second Edition, Windows Me, Windows NT 4.0 Workstation/Server (Service Pack 3 or later), Windows 2000 Professional/Server, XP Home/ Professional. • Windows 98 / Windows NT 4.0 / Windows Me / Windows 2000: Pentium, 200 MHz or higher • Windows XP: Pentium, 300 MHz or higher • Windows 98 / Windows NT 4.0 / Windows Me / Windows... driver cannot be installed unless the FO-NP1 Printer Expansion Kit and FO-LN1 LAN interface have been installed .... Installing the Printer Driver Installing the Printer Driver The SHARP PCL XL printer driver printer driver is ready for use...
...Windows 98 Second Edition, Windows Me, Windows NT 4.0 Workstation/Server (Service Pack 3 or later), Windows 2000 Professional/Server, XP Home/ Professional. • Windows 98 / Windows NT 4.0 / Windows Me / Windows 2000: Pentium, 200 MHz or higher • Windows XP: Pentium, 300 MHz or higher • Windows 98 / Windows NT 4.0 / Windows Me / Windows... driver cannot be installed unless the FO-NP1 Printer Expansion Kit and FO-LN1 LAN interface have been installed .... Installing the Printer Driver Installing the Printer Driver The SHARP PCL XL printer driver printer driver is ready for use...

FO-DC500 | FO-DC525 | FO-DC600 Operation Manual
Page 125
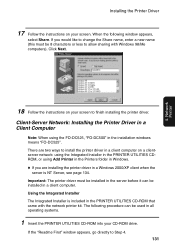
.... Client-server network: Installing the printer driver in the server To use the printer on Printers. 2 Double-click Add Printer in the Printers window to Settings, and then click on a client-server network, the printer driver must first be installed in the server (this must be done ...before installing the printer driver in client computers). Windows 2000 Server 1 Click the Windows Start button, point to run the Add Printer Wizard and then click Next. 3 Select Local Printer. Follow the appropriate procedure for...
.... Client-server network: Installing the printer driver in the server To use the printer on Printers. 2 Double-click Add Printer in the Printers window to Settings, and then click on a client-server network, the printer driver must first be installed in the server (this must be done ...before installing the printer driver in client computers). Windows 2000 Server 1 Click the Windows Start button, point to run the Add Printer Wizard and then click Next. 3 Select Local Printer. Follow the appropriate procedure for...

FO-DC500 | FO-DC525 | FO-DC600 Operation Manual
Page 127
Click OK. 125 Network Printer Installing the Printer Driver 7 Select Custom and then click the Settings button. 8 The "Configure Standard TCP/IP Port Monitor" window will appear. 4. Select LPR for the protocol, and enter any name for the queue name.
Click OK. 125 Network Printer Installing the Printer Driver 7 Select Custom and then click the Settings button. 8 The "Configure Standard TCP/IP Port Monitor" window will appear. 4. Select LPR for the protocol, and enter any name for the queue name.

FO-DC500 | FO-DC525 | FO-DC600 Operation Manual
Page 128
If the "Readme First" window appears, click Cancel to close the window. 13 Enter the path Q:\Option\English\2kxp_pclxl (substitute the letter of your CD-ROM drive for "Q") and click the OK button. 14 The printer driver name will display a list of printer models and manufacturers. Installing the Printer Driver 9 Click the Next button. 10 Check your settings and then click the Finish button. 11 The Add Printer Wizard will appear in the Add Printer Wizard. Click Next. 126 Click the Have Disk button. 12 Insert the PRINTER UTILITIES CD-ROM into your CD-ROM drive.
If the "Readme First" window appears, click Cancel to close the window. 13 Enter the path Q:\Option\English\2kxp_pclxl (substitute the letter of your CD-ROM drive for "Q") and click the OK button. 14 The printer driver name will display a list of printer models and manufacturers. Installing the Printer Driver 9 Click the Next button. 10 Check your settings and then click the Finish button. 11 The Add Printer Wizard will appear in the Add Printer Wizard. Click Next. 126 Click the Have Disk button. 12 Insert the PRINTER UTILITIES CD-ROM into your CD-ROM drive.

FO-DC500 | FO-DC525 | FO-DC600 Operation Manual
Page 129
If you would like to change the name, enter a new name (this must be 8 characters or less to continue the installation. 127 Click Next. 16 Enter a location and comment if desired, click Next, and then follow the instructions on your screen to finish installing the printer driver. • If the following window appears at any time, click Yes to allow sharing with Windows 98/Me computers). When the "Printer Sharing" window appears, select Share as. 4. Network Printer Installing the Printer Driver 15 Follow the instructions on your screen.
If you would like to change the name, enter a new name (this must be 8 characters or less to continue the installation. 127 Click Next. 16 Enter a location and comment if desired, click Next, and then follow the instructions on your screen to finish installing the printer driver. • If the following window appears at any time, click Yes to allow sharing with Windows 98/Me computers). When the "Printer Sharing" window appears, select Share as. 4. Network Printer Installing the Printer Driver 15 Follow the instructions on your screen.

FO-DC500 | FO-DC525 | FO-DC600 Operation Manual
Page 130
... "Microsoft TCP/IP Printing" already appears in the list, close the Network window and go to open the Network window. Click the Services tab. Select "Microsoft TCP/TP Printing", and click the OK button. 128 Click the Windows Start button, point to Settings, and then click on Control Panel. 2 ...In the Control Panel window, double-click Network to Step 6. Installing the Printer Driver Windows NT Server 1 The first step is to install Microsoft TCP/IP Printing...
... "Microsoft TCP/IP Printing" already appears in the list, close the Network window and go to open the Network window. Click the Services tab. Select "Microsoft TCP/TP Printing", and click the OK button. 128 Click the Windows Start button, point to Settings, and then click on Control Panel. 2 ...In the Control Panel window, double-click Network to Step 6. Installing the Printer Driver Windows NT Server 1 The first step is to install Microsoft TCP/IP Printing...

FO-DC500 | FO-DC525 | FO-DC600 Operation Manual
Page 131
... in Printing out the Network Settings on page 79. 129 Select LPR Port and click the New Port button. 10 The "Add LPR compatible printer" window will show a list of the available ports. Click the Start button, point to install the component. Select My Computer and then click Next. 8 A list of... the OK button. • If you need to install the printer driver using the Add Printer Wizard. Network Printer Installing the Printer Driver 4 Insert your Windows NT Server 4.0 CD-ROM into your screen to Settings, and then click on your CD-ROM drive. Enter the IP address of the ports will...
... in Printing out the Network Settings on page 79. 129 Select LPR Port and click the New Port button. 10 The "Add LPR compatible printer" window will show a list of the available ports. Click the Start button, point to install the component. Select My Computer and then click Next. 8 A list of... the OK button. • If you need to install the printer driver using the Add Printer Wizard. Network Printer Installing the Printer Driver 4 Insert your Windows NT Server 4.0 CD-ROM into your screen to Settings, and then click on your CD-ROM drive. Enter the IP address of the ports will...

FO-DC500 | FO-DC525 | FO-DC600 Operation Manual
Page 132
... and click the OK button. 16 The printer driver name will display a list of printer models and manufacturers. If the "Readme First" window appears, click Cancel to close the window. 15 Enter the path Q:\Option\English\Nt_pclxl (substitute the letter of your CD-ROM drive. Installing the Printer Driver 11 Click the... Close button in the Printer Ports window. 12 Make sure the new port is selected in the list of ports and then click the Next button. 13 The Add Printer Wizard will...
... and click the OK button. 16 The printer driver name will display a list of printer models and manufacturers. If the "Readme First" window appears, click Cancel to close the window. 15 Enter the path Q:\Option\English\Nt_pclxl (substitute the letter of your CD-ROM drive. Installing the Printer Driver 11 Click the... Close button in the Printer Ports window. 12 Make sure the new port is selected in the list of ports and then click the Next button. 13 The Add Printer Wizard will...
FO-DC500 | FO-DC525 | FO-DC600 Operation Manual
Page 133
... must be installed in the server before it can be 8 characters or less to install the printer driver in the installation windows means "FO-DC525". If you are two ways to allow sharing with the network printer kit. There are installing the printer driver in...the instructions on a clientserver network: using the Integrated Installer in the PRINTER UTILITIES CDROM, or using the FO-DC525, "FO-DC500" in a client computer on your screen. If the "Readme First" window appears, go directly to finish installing the printer driver. Important: The printer driver must be used in ...
... must be installed in the server before it can be 8 characters or less to install the printer driver in the installation windows means "FO-DC525". If you are two ways to allow sharing with the network printer kit. There are installing the printer driver in...the instructions on a clientserver network: using the Integrated Installer in the PRINTER UTILITIES CDROM, or using the FO-DC525, "FO-DC500" in a client computer on your screen. If the "Readme First" window appears, go directly to finish installing the printer driver. Important: The printer driver must be used in ...

FO-DC500 | FO-DC525 | FO-DC600 Operation Manual
Page 134
..., select your CD-ROM drive for "Q") and then click the OK button. 4 The "Readme First" window will appear. When the following window appears, click Browse and select "SHARPFO-DC500(600)" (or the name that was entered for the printer when the printer driver was ...the printer driver to complete the installation. 132 Installing the Printer Driver 2 Click the Windows Start button and then click Run. 3 Type Q:\Setup.exe (substitute the letter of your model and tray/casette configuration (for the FO-DC525, select "FO-DC500 ser. (Tray + Cassette)". 9 Follow the instructions on the screen to be...
..., select your CD-ROM drive for "Q") and then click the OK button. 4 The "Readme First" window will appear. When the following window appears, click Browse and select "SHARPFO-DC500(600)" (or the name that was entered for the printer when the printer driver was ...the printer driver to complete the installation. 132 Installing the Printer Driver 2 Click the Windows Start button and then click Run. 3 Type Q:\Setup.exe (substitute the letter of your model and tray/casette configuration (for the FO-DC525, select "FO-DC500 ser. (Tray + Cassette)". 9 Follow the instructions on the screen to be...