
Operation Manual
Page 1
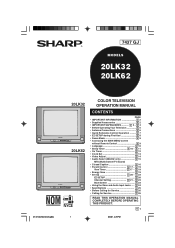
...; Supplied Accessories 2 • IMPORTANT SAFEGUARDS 3 ~ 4 • Before Operating Your Television 5 • Antenna Connections 6 • Quick Reference Control Operation .......... 7 • EZ SETUP during First Use 8 • Demo Mode 9 • Accessing the MAIN MENU screen without Remote Control 9 • Language 10 • Sleep Timer 10 ~ 11 • On Timer 12 • Clock Set 13 • Video Adjust 14 • Audio Select (20LK62 only 15 MTS (Multichannel TV Sound) • Closed Caption 16 • Parent Control 17 ~ 19 View Timer 17 ~ 19 • Energy Save...
...; Supplied Accessories 2 • IMPORTANT SAFEGUARDS 3 ~ 4 • Before Operating Your Television 5 • Antenna Connections 6 • Quick Reference Control Operation .......... 7 • EZ SETUP during First Use 8 • Demo Mode 9 • Accessing the MAIN MENU screen without Remote Control 9 • Language 10 • Sleep Timer 10 ~ 11 • On Timer 12 • Clock Set 13 • Video Adjust 14 • Audio Select (20LK62 only 15 MTS (Multichannel TV Sound) • Closed Caption 16 • Parent Control 17 ~ 19 View Timer 17 ~ 19 • Energy Save...

Operation Manual
Page 2
... is tuned and adjusted for your personal viewing preference. Supplied Accessories TV Infrared Remote Control Part Number : RRMCG1339CESB Size AA Dry Batteries AC Plug Adaptor 2 01-07 20LK32/62 [E].p65e 2 11/6/01, 4:21 pm Model No.: Serial No.: IMPORTANT INFORMATION WARNING: TO REDUCE THE RISK OF FIRE OR ELECTRIC SHOCK, DO NOT EXPOSE THIS APPLIANCE TO WET LOCATIONS. Every SHARP Color Television set for outstanding quality...
... is tuned and adjusted for your personal viewing preference. Supplied Accessories TV Infrared Remote Control Part Number : RRMCG1339CESB Size AA Dry Batteries AC Plug Adaptor 2 01-07 20LK32/62 [E].p65e 2 11/6/01, 4:21 pm Model No.: Serial No.: IMPORTANT INFORMATION WARNING: TO REDUCE THE RISK OF FIRE OR ELECTRIC SHOCK, DO NOT EXPOSE THIS APPLIANCE TO WET LOCATIONS. Every SHARP Color Television set for outstanding quality...

Operation Manual
Page 3
... Wall or shelf mounting should follow the manufacturer's instructions, and should be placed near a swimming pool, etc. 5. As a safety feature, television equipment is connected to the television equipment, be blocked or covered. Follow all of power source indicated on the marking label. Electrical energy can perform many useful functions. Use a damp cloth for ventilation, and to insure reliable operation of power supplied to replace...
... Wall or shelf mounting should follow the manufacturer's instructions, and should be placed near a swimming pool, etc. 5. As a safety feature, television equipment is connected to the television equipment, be blocked or covered. Follow all of power source indicated on the marking label. Electrical energy can perform many useful functions. Use a damp cloth for ventilation, and to insure reliable operation of power supplied to replace...

Operation Manual
Page 4
... service technician has used replacement parts specified by the operating instructions as the original part. Never spill liquid of any kind on the television equipment. 18. C. Adjust only those controls that could result in damage and will prevent damage to the equipment due to normal operation . IMPORTANT SAFEGUARDS (Continued) EXAMPLE OF ANTENNA GROUNDING ACCORDING TO NATIONAL ELECTRICAL CODE. This will often require extensive work...
... service technician has used replacement parts specified by the operating instructions as the original part. Never spill liquid of any kind on the television equipment. 18. C. Adjust only those controls that could result in damage and will prevent damage to the equipment due to normal operation . IMPORTANT SAFEGUARDS (Continued) EXAMPLE OF ANTENNA GROUNDING ACCORDING TO NATIONAL ELECTRICAL CODE. This will often require extensive work...

Operation Manual
Page 6
.../ descrambler using the TV's channel keys. Antenna Connections Antennas • The antenna requirements for good color television reception are scrambled, a cable TV converter/descrambler is required. A: Using a VHF/UHF combination outdoor antenna. A. RF switch (not supplied) A OUT IN B OUT Two-set , screw the 75 ohm cable to the subscriber by your cable TV company. When connecting the 75 ohm coaxial cable to the set signal splitter (not supplied) IN Cable TV Line Cable TV...
.../ descrambler using the TV's channel keys. Antenna Connections Antennas • The antenna requirements for good color television reception are scrambled, a cable TV converter/descrambler is required. A: Using a VHF/UHF combination outdoor antenna. A. RF switch (not supplied) A OUT IN B OUT Two-set , screw the 75 ohm cable to the subscriber by your cable TV company. When connecting the 75 ohm coaxial cable to the set signal splitter (not supplied) IN Cable TV Line Cable TV...

Operation Manual
Page 7
... → Restores sound. • CLOSED CAPTION appears when sound is muted. Press again → Exits MAIN MENU. Press again → Removes display. • Temporarily displays receiving channel when in Closed Caption mode. 7 01-07 20LK32/62 [E].p65e 7 1/6/01, 12:21 PM Press again → Off. FLASHBACK Returns to external video input mode. Press 3 times → Switch back to external video INPUT 2 mode. Quick Reference Control Operation L Location of the MENU screen. ON TIMER indicator. Press 2 times → Switch to the original...
... → Restores sound. • CLOSED CAPTION appears when sound is muted. Press again → Exits MAIN MENU. Press again → Removes display. • Temporarily displays receiving channel when in Closed Caption mode. 7 01-07 20LK32/62 [E].p65e 7 1/6/01, 12:21 PM Press again → Off. FLASHBACK Returns to external video input mode. Press 3 times → Switch back to external video INPUT 2 mode. Quick Reference Control Operation L Location of the MENU screen. ON TIMER indicator. Press 2 times → Switch to the original...

Operation Manual
Page 8
... the channels in the AC POWER cord to the wall outlet. 1 Press the POWER button on the TV set . (See page 6) (3) Plug in your region, please refer to page 20 for more information on manual memorizing the channels using CHANNEL SETTING. 8 08-09 20LK32/62 [E].p65e 8 31/5/01, 4:21 PM To cancel EZ SETUP Press VOL (-). EZ SETUP during First Use L When you turn on the TV. CONNECT ANT...
... the channels in the AC POWER cord to the wall outlet. 1 Press the POWER button on the TV set . (See page 6) (3) Plug in your region, please refer to page 20 for more information on manual memorizing the channels using CHANNEL SETTING. 8 08-09 20LK32/62 [E].p65e 8 31/5/01, 4:21 PM To cancel EZ SETUP Press VOL (-). EZ SETUP during First Use L When you turn on the TV. CONNECT ANT...

Operation Manual
Page 9
... you press MENU or both CH UP (8) and DOWN (9) on the TV set. • Some features of your Remote Control, contact a Sharp Service Center for a replacement. (On the Set) or MENU button CHANNEL UP (8)/ DOWN (9) buttons 08-09 20LK32/62 [E].p65e 9 9 5/16/01, 2:57 PM Example: DEMO mode display (On the Set) or MENU button CHANNEL UP (8)/ DOWN (9) buttons Si empre Me j or , Si empre Sharp Accessing the MAIN MENU screen without the Remote Control. The TV...
... you press MENU or both CH UP (8) and DOWN (9) on the TV set. • Some features of your Remote Control, contact a Sharp Service Center for a replacement. (On the Set) or MENU button CHANNEL UP (8)/ DOWN (9) buttons 08-09 20LK32/62 [E].p65e 9 9 5/16/01, 2:57 PM Example: DEMO mode display (On the Set) or MENU button CHANNEL UP (8)/ DOWN (9) buttons Si empre Me j or , Si empre Sharp Accessing the MAIN MENU screen without the Remote Control. The TV...

Operation Manual
Page 10
... PARENT CONTROL ENERGY SAVE SET UP (MAIN MENU screen) S L EEP T I MER ON T I S 6 Press MENU to "LANGUAGE". Language L The language for the ON SCREEN DISPLAY can preset your television to turn off automatically in increments of 30, 60, 90 or 120 minutes. 1 Press MENU to access the MAIN MENU screen. 2 Press CH UP (8) or DOWN (9) to move the " " mark to "TIMER". ("AUDIO SELECT" only appears in 20LK62 model On Screen Display.) 3 Press...
... PARENT CONTROL ENERGY SAVE SET UP (MAIN MENU screen) S L EEP T I MER ON T I S 6 Press MENU to "LANGUAGE". Language L The language for the ON SCREEN DISPLAY can preset your television to turn off automatically in increments of 30, 60, 90 or 120 minutes. 1 Press MENU to access the MAIN MENU screen. 2 Press CH UP (8) or DOWN (9) to move the " " mark to "TIMER". ("AUDIO SELECT" only appears in 20LK62 model On Screen Display.) 3 Press...

Operation Manual
Page 13
... (-) to select the minute-digit and adjust by pressing CH UP (8) or DOWN (9). 12 : 00 AM The indicator color changes to red. → 00 01 02 ... 57 58 59 (CLOCK SET mode) C LOCK SE T 5 : 0 0 AM C LOCK SE T 5 : 3 2 AM 7 Press MENU to exit. T I MER V I DEO AD J UST AUD I O SE L ECT C LOSED CAP T I ON PARENT CONTROL ENERGY SAVE SET UP (MAIN MENU screen) S L EEP T I MER ON T I MER C LOCK SE T (TIMER Select mode) C LOCK SE...
... (-) to select the minute-digit and adjust by pressing CH UP (8) or DOWN (9). 12 : 00 AM The indicator color changes to red. → 00 01 02 ... 57 58 59 (CLOCK SET mode) C LOCK SE T 5 : 0 0 AM C LOCK SE T 5 : 3 2 AM 7 Press MENU to exit. T I MER V I DEO AD J UST AUD I O SE L ECT C LOSED CAP T I ON PARENT CONTROL ENERGY SAVE SET UP (MAIN MENU screen) S L EEP T I MER ON T I MER C LOCK SE T (TIMER Select mode) C LOCK SE...

Operation Manual
Page 14
... C LOSED CAP T I ON PARENT CONTROL ENERGY SAVE SET UP (MAIN MENU screen) 4 Press CH UP (8) or DOWN (9) to select the desired mode. (Refer to the diagram below.) PICTURE TINT COLOR BRIGHT P I CTURE 5 0 - + (PICTURE adjust mode) RESET FAVORITE COLOR : CH UP (8) : CH DOWN (9) SHARP 5 Press VOL (+) or (-) to adjust the setting. 6 Repeat steps 4 to 5 to adjust other settings. 7 Press MENU to access PICTURE adjust mode. Video Adjust Description of Adjustment Items Selected VOL UP (+) button item VOL DOWN (-) button PICTURE To increase contrast To...
... C LOSED CAP T I ON PARENT CONTROL ENERGY SAVE SET UP (MAIN MENU screen) 4 Press CH UP (8) or DOWN (9) to select the desired mode. (Refer to the diagram below.) PICTURE TINT COLOR BRIGHT P I CTURE 5 0 - + (PICTURE adjust mode) RESET FAVORITE COLOR : CH UP (8) : CH DOWN (9) SHARP 5 Press VOL (+) or (-) to adjust the setting. 6 Repeat steps 4 to 5 to adjust other settings. 7 Press MENU to access PICTURE adjust mode. Video Adjust Description of Adjustment Items Selected VOL UP (+) button item VOL DOWN (-) button PICTURE To increase contrast To...

Operation Manual
Page 15
... "AUDIO SELECT". → 3 Press VOL (+) or (-) to select "STEREO", "SAP" or "MONO". T I MER V I DEO AD J UST AUD I O SE L ECT C LOSED CAP T I ON PARENT CONTROL ENERGY SAVE SET UP (MAIN MENU screen) AUD I R MONO (Channel call on screen) L You can obtain clearer sound by the video source. 15-18 20LK32/62 [E].p65e 15 15 5/17/01, 12:07 PM Note: • Once MONO mode is determined by manually switching...
... "AUDIO SELECT". → 3 Press VOL (+) or (-) to select "STEREO", "SAP" or "MONO". T I MER V I DEO AD J UST AUD I O SE L ECT C LOSED CAP T I ON PARENT CONTROL ENERGY SAVE SET UP (MAIN MENU screen) AUD I R MONO (Channel call on screen) L You can obtain clearer sound by the video source. 15-18 20LK32/62 [E].p65e 15 15 5/17/01, 12:07 PM Note: • Once MONO mode is determined by manually switching...

Operation Manual
Page 16
... to access "CLOSED CAPTION". The [TEXT] mode displays over the picture other various information (such as shown on the right. • Not all the programs and videos will offer closed captions will return the set to its previous condition. • Closed Caption may become dark and blank. VOLUME (+)/(-) CHANNEL UP (8)/ DOWN (9) MENU T I MER V I DEO AD J UST AUD I O SE L ECT C LOSED CAP T I ON PARENT CONTROL ENERGY SAVE SET UP (MAIN MENU screen) C LOSED...
... to access "CLOSED CAPTION". The [TEXT] mode displays over the picture other various information (such as shown on the right. • Not all the programs and videos will offer closed captions will return the set to its previous condition. • Closed Caption may become dark and blank. VOLUME (+)/(-) CHANNEL UP (8)/ DOWN (9) MENU T I MER V I DEO AD J UST AUD I O SE L ECT C LOSED CAP T I ON PARENT CONTROL ENERGY SAVE SET UP (MAIN MENU screen) C LOSED...

Operation Manual
Page 18
...; When you choose the correct SECRET No., the VIEW TIMER is displayed. using the REMOTE KEYPAD, and the VIEW TIMER access screen will be displayed. 2 Enter the 4-digit SECRET No. Input the SECRET No. L To change the SECRET No. (When you do nothing, the TV will be displayed. will turn TV on the VIEWING TIMER. IS INCORRECT" is displayed. using the REMOTE KEYPAD. For example, they could watch 1 hour of...
...; When you choose the correct SECRET No., the VIEW TIMER is displayed. using the REMOTE KEYPAD, and the VIEW TIMER access screen will be displayed. 2 Enter the 4-digit SECRET No. Input the SECRET No. L To change the SECRET No. (When you do nothing, the TV will be displayed. will turn TV on the VIEWING TIMER. IS INCORRECT" is displayed. using the REMOTE KEYPAD. For example, they could watch 1 hour of...

Operation Manual
Page 19
... the VIEWING TIME is displayed. VOLUME (+)/(-) CHANNEL UP (8)/ DOWN (9) MENU T I MER V I DEO AD J UST AUD I O SE L ECT C LOSED CAP T I ON PARENT CONTROL ENERGY SAVE SET UP (MAIN MENU screen) ENERGY S A VE : OFF 4 Press VOL (+) or (-) to select "ON". (ENERGY SAVE select mode) ENERGY S A VE : ON 5 Press MENU to a level that consumes approximately 20% less energy than when the feature is displayed. Now you can cancel the VIEW TIMER settings or change the SECRET No. while "INPUT...
... the VIEWING TIME is displayed. VOLUME (+)/(-) CHANNEL UP (8)/ DOWN (9) MENU T I MER V I DEO AD J UST AUD I O SE L ECT C LOSED CAP T I ON PARENT CONTROL ENERGY SAVE SET UP (MAIN MENU screen) ENERGY S A VE : OFF 4 Press VOL (+) or (-) to select "ON". (ENERGY SAVE select mode) ENERGY S A VE : ON 5 Press MENU to a level that consumes approximately 20% less energy than when the feature is displayed. Now you can cancel the VIEW TIMER settings or change the SECRET No. while "INPUT...

Operation Manual
Page 21
... 69. AIR CABLE STD CABLE HRC CABLE IRC (CH SETTING mode) A I R / CABLE AIR CAB L E CAB L E CAB L E STD HRC I RC 8 Press MENU to exit. (AIR/CABLE mode) Note: • Receivable channels of your region, follow the instructions below to manually memorize the channel. 1 Press MENU to access the MAIN MENU screen. 2 Press CH UP (8) or DOWN (9) to move the " " mark to "SET UP". ("AUDIO SELECT" only appears in 20LK62 model On Screen Display.) →...
... 69. AIR CABLE STD CABLE HRC CABLE IRC (CH SETTING mode) A I R / CABLE AIR CAB L E CAB L E CAB L E STD HRC I RC 8 Press MENU to exit. (AIR/CABLE mode) Note: • Receivable channels of your region, follow the instructions below to manually memorize the channel. 1 Press MENU to access the MAIN MENU screen. 2 Press CH UP (8) or DOWN (9) to move the " " mark to "SET UP". ("AUDIO SELECT" only appears in 20LK62 model On Screen Display.) →...

Operation Manual
Page 22
... press VOL (+) or (-) to access CH SEARCH mode. → → → EZ SETUP A I R / CABLE CH SEARCH CH MEMOR Y (CH SETTING mode) 2.1 Press VOL (+) or (-) to access CH MEMORY. 2.2 Use CH UP (8) or DOWN (9) or REMOTE KEYPAD to select each desired channel to "CH MEMORY". → → → EZ SETUP A I R / CABLE CH SEARCH CH MEMOR Y (CH SETTING mode) START 2.1 Press VOL (+). The tuner will search through all...
... press VOL (+) or (-) to access CH SEARCH mode. → → → EZ SETUP A I R / CABLE CH SEARCH CH MEMOR Y (CH SETTING mode) 2.1 Press VOL (+) or (-) to access CH MEMORY. 2.2 Use CH UP (8) or DOWN (9) or REMOTE KEYPAD to select each desired channel to "CH MEMORY". → → → EZ SETUP A I R / CABLE CH SEARCH CH MEMOR Y (CH SETTING mode) START 2.1 Press VOL (+). The tuner will search through all...

Operation Manual
Page 23
... station closes down). T I MER V I DEO AD J UST AUD I O SE L ECT C LOSED CAP T I ON PARENT CONTROL ENERGY SAVE SET UP (MAIN MENU screen) B LUE SCREEN L ANGUAGE CH SE T T I NG 4 Press VOL (+) or (-) to access BLUE SCREEN select mode. (SET UP mode) B LUE SCREEN : OFF 5 Press VOL (+) or (-) to select "ON". (BLUE SCREEN select mode) B LUE SCREEN : ON 6 Press MENU to exit. After 15 minutes of a broadcast signal. Set Up (Continued) 2.3 Press VOL (+) to add a channel...
... station closes down). T I MER V I DEO AD J UST AUD I O SE L ECT C LOSED CAP T I ON PARENT CONTROL ENERGY SAVE SET UP (MAIN MENU screen) B LUE SCREEN L ANGUAGE CH SE T T I NG 4 Press VOL (+) or (-) to access BLUE SCREEN select mode. (SET UP mode) B LUE SCREEN : OFF 5 Press VOL (+) or (-) to select "ON". (BLUE SCREEN select mode) B LUE SCREEN : ON 6 Press MENU to exit. After 15 minutes of a broadcast signal. Set Up (Continued) 2.3 Press VOL (+) to add a channel...

Operation Manual
Page 24
... remote control when the TV is set to the highest channel stored in memory, or by pressing either the CH UP (8) on the television screen. Connecting video device equipped with video output terminals. AIR or CABLE INPUT (Rear/Front) AIR or CABLE INPUT 1 (IN) Rear INPUT 2 (IN 2) Front 20LK32 20LK62 • INPUT mode can be sure that the power is pressed. CONNECTIONS VIDEO EQUIPMENT To VIDEO OUTPUT (Front connection terminals of TV) To AUDIO OUTPUT 20LK32 CAMCORDER TV GAME To VIDEO OUTPUT...
... remote control when the TV is set to the highest channel stored in memory, or by pressing either the CH UP (8) on the television screen. Connecting video device equipped with video output terminals. AIR or CABLE INPUT (Rear/Front) AIR or CABLE INPUT 1 (IN) Rear INPUT 2 (IN 2) Front 20LK32 20LK62 • INPUT mode can be sure that the power is pressed. CONNECTIONS VIDEO EQUIPMENT To VIDEO OUTPUT (Front connection terminals of TV) To AUDIO OUTPUT 20LK32 CAMCORDER TV GAME To VIDEO OUTPUT...

Operation Manual
Page 26
... antenna is possible station trouble. Check the volume level. X Change Closed Caption mode to "OFF" / Energy Save mode to page 21) Check batteries of the set? PROBLEM No Playback of the controls. X Check external Video/Audio products: look for loose/broken connection X leads. (Refer to "OFF". X Is TV plugged in Mexico SHARP CORPORATION TINS-7437GJZZ 01P07-MMP 26 24-26 20LK32/62 [E].p65e 26 11/6/01, 4:08 pm X Is antenna connected...
... antenna is possible station trouble. Check the volume level. X Change Closed Caption mode to "OFF" / Energy Save mode to page 21) Check batteries of the set? PROBLEM No Playback of the controls. X Check external Video/Audio products: look for loose/broken connection X leads. (Refer to "OFF". X Is TV plugged in Mexico SHARP CORPORATION TINS-7437GJZZ 01P07-MMP 26 24-26 20LK32/62 [E].p65e 26 11/6/01, 4:08 pm X Is antenna connected...


