Installation Manual
Page 2
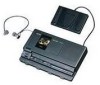
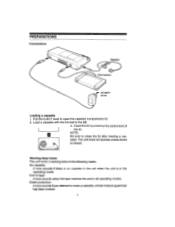
... of tape: A tone sounds when the tape reaches the end in the following cases; Pull the EJECT lever to the left. 3. The unit does not operate unless the lid is in the unit when the unit is closed. End of the lid. PREPARATIONS Connections 11111111111111111111111 Headset Foot control Oil AC 230V 50 Hz Loading a cassette 1. Warning beep tones The unit emits...
... of tape: A tone sounds when the tape reaches the end in the following cases; Pull the EJECT lever to the left. 3. The unit does not operate unless the lid is in the unit when the unit is closed. End of the lid. PREPARATIONS Connections 11111111111111111111111 Headset Foot control Oil AC 230V 50 Hz Loading a cassette 1. Warning beep tones The unit emits...
Installation Manual
Page 3
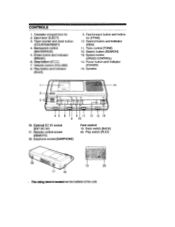
.... Speed control (SPEED CONTROL) 14. Power button and indicator (POWER) 15. Erase button and indicator (ERASE) 6. Earphone socket (EARPHONE) Foot control 19. Rewind button and indicator (REW) 11. Cassette compartment lid 2. Volume control (VOLUME) 8. Play button and indicator (PLAY) - 9. Tone control (TONE) 12. Speaker 15 2 3 4 5 11 12 13 14 10 16. The rating label is located on the bottom of the unit. Search button (SEARCH) 13. External DC 9V socket (EXT DC 9V) 17. Eject lever (EJECT) 3. Stop button (STOP) 7. Remote control socket (REMOTE) 18. CONTROLS...
.... Speed control (SPEED CONTROL) 14. Power button and indicator (POWER) 15. Erase button and indicator (ERASE) 6. Earphone socket (EARPHONE) Foot control 19. Rewind button and indicator (REW) 11. Cassette compartment lid 2. Volume control (VOLUME) 8. Play button and indicator (PLAY) - 9. Tone control (TONE) 12. Speaker 15 2 3 4 5 11 12 13 14 10 16. The rating label is located on the bottom of the unit. Search button (SEARCH) 13. External DC 9V socket (EXT DC 9V) 17. Eject lever (EJECT) 3. Stop button (STOP) 7. Remote control socket (REMOTE) 18. CONTROLS...
Installation Manual
Page 4
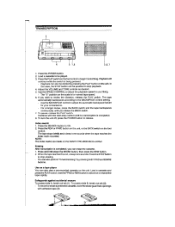
... switch on the unit. Use as desired. 5. To protect side B, break out tab (2). - Playback can also play a pre-recorded cassette on thefoot control to adjust the automatic backspace feature for normal tape speed. 6. Adjust the VOLUME and TONE controls as a tape player You can also be pressed to your convenience. - If you release the BACK switch. 7. Continue with adhesive tape (3). The tape stops briefly and a beep tone sounds when the tape reaches...
... switch on the unit. Use as desired. 5. To protect side B, break out tab (2). - Playback can also play a pre-recorded cassette on thefoot control to adjust the automatic backspace feature for normal tape speed. 6. Adjust the VOLUME and TONE controls as a tape player You can also be pressed to your convenience. - If you release the BACK switch. 7. Continue with adhesive tape (3). The tape stops briefly and a beep tone sounds when the tape reaches...


