Samsung WF405ATPAWR/AA Research
View Results Below
Free Samsung WF405ATPAWR/AA manuals!
Problems with Samsung WF405ATPAWR/AA?
Ask a Question
Free Samsung WF405ATPAWR/AA manuals!
Problems with Samsung WF405ATPAWR/AA?
Ask a Question
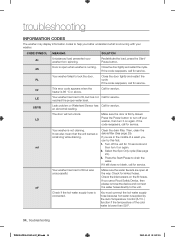
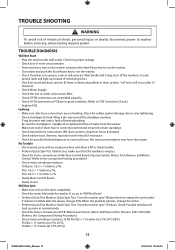
Related Manual Pages


Related Videos

Samsung WF405ATPAWR Washer Review
Duration: 4:51
Total Views: 52
Duration: 4:51
Total Views: 52
Similar Questions

Water Was Leaking Onto The Floor, Replaced Front Boot Seal And Still Leaks
(Posted by Jkroll58 3 years ago)

Stack Washer On Top Of Dryer
I would like to stack washer on top of dryer
I would like to stack washer on top of dryer
(Posted by Wilburm 10 years ago)

