TXN3271HF Features - Samsung
TXN3271HF Features

Related Manual Pages


Similar Questions


Sam
Sung 40' Lnt4061fx/xaa Or Comporable
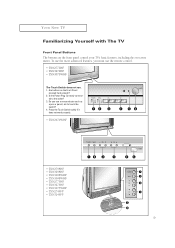
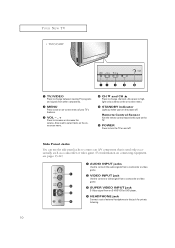
Features
features in samsung 40" tv listed above
features in samsung 40" tv listed above
(Posted by mahoneypatricia 11 years ago)

How Do You Bet The Littler Menu Of Features Off The Screen
how do you remove the features off the tv that are located on the side of the screen
how do you remove the features off the tv that are located on the side of the screen
(Posted by jonessherman81 12 years ago)