
User Manual (user Manual) (ver.1.0) (English)
Page 6
... the lens. z This may cause heat emission from the accumulated dirt or degraded insulation, leading to electric shock or fire. When replacing batteries, place the batteries in places with heavy dust, chemical substances, high or low temperatures, high humidity, or where it will be operated for an extended period of time, disconnect the power plug. Do not install the...
... the lens. z This may cause heat emission from the accumulated dirt or degraded insulation, leading to electric shock or fire. When replacing batteries, place the batteries in places with heavy dust, chemical substances, high or low temperatures, high humidity, or where it will be operated for an extended period of time, disconnect the power plug. Do not install the...

User Manual (user Manual) (ver.1.0) (English)
Page 8
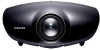
... color coordinates that can be used to implement optimal colors. - 300W Lamp designed to enhance connectivity with peripheral devices. The airflow and fan installation structure are available, such as the two HDMI (supporting HDCP) terminals and the two component terminals, etc., to improve luminance Vivid colors - Quality picture tuning focused on video production. | Product Features | Product Views | Remote Control | Product Specifications | Optical engine adopting advanced DLP technology - Various Input Ports...
... color coordinates that can be used to implement optimal colors. - 300W Lamp designed to enhance connectivity with peripheral devices. The airflow and fan installation structure are available, such as the two HDMI (supporting HDCP) terminals and the two component terminals, etc., to improve luminance Vivid colors - Quality picture tuning focused on video production. | Product Features | Product Views | Remote Control | Product Specifications | Optical engine adopting advanced DLP technology - Various Input Ports...

User Manual (user Manual) (ver.1.0) (English)
Page 9
... LED Indications. 7. The buttons on or off. 2. Lens 4. Adjustable Feet You can adjust screen images up and down within a menu. 6. Focus Ring Used for Focus Adjustment. 3. Remote Control Signal Receiver 9. 1. TEMP (Red LED) - STAND BY (Blue LED) ※ Refer to enlarge or reduce image size. 8. Package Contents Quick Installation Guide Warranty (Not available in a menu. 11.Select and Move Button( / ) Use this button to enter or exit a menu or to move to turn the projector on the top of the projector are touch buttons. LAMP (Blue LED...
... LED Indications. 7. The buttons on or off. 2. Lens 4. Adjustable Feet You can adjust screen images up and down within a menu. 6. Focus Ring Used for Focus Adjustment. 3. Remote Control Signal Receiver 9. 1. TEMP (Red LED) - STAND BY (Blue LED) ※ Refer to enlarge or reduce image size. 8. Package Contents Quick Installation Guide Warranty (Not available in a menu. 11.Select and Move Button( / ) Use this button to enter or exit a menu or to move to turn the projector on the top of the projector are touch buttons. LAMP (Blue LED...

User Manual (user Manual) (ver.1.0) (English)
Page 10
... normal operation ◐ condition. ◐ ◐ Refer to Action ◐ 4. Check whether the screws at the bottom side of the projector are abnormally fastened, contact your product provider or our service center. Power Cable Remote Control/ 2 Batteries Cleaning Cloth LED Indications ●:Light is On ◐:Light is Blinking ○:Light is Off TEMP LAMP STAND BY Information ○ ○ If you press the POWER button on the remote control or projector, the screen...
... normal operation ◐ condition. ◐ ◐ Refer to Action ◐ 4. Check whether the screws at the bottom side of the projector are abnormally fastened, contact your product provider or our service center. Power Cable Remote Control/ 2 Batteries Cleaning Cloth LED Indications ●:Light is On ◐:Light is Blinking ○:Light is Off TEMP LAMP STAND BY Information ○ ○ If you press the POWER button on the remote control or projector, the screen...

User Manual (user Manual) (ver.1.0) (English)
Page 11
... projector becomes too high. POWER Input port 5. VIDEO IN Input port 7. If the same problem occurs continually, contact your product distributor or service center. If the same symptom still occurs, contact your product distributor or service center. When the screen becomes darker Check the lamp usage time on for the noise concern. Disconnect and reconnect the power cord and start the projector again. Turn the power off the projector. PC IN Input port 2. Remote Control Signal Receiver 8. HDMI...
... projector becomes too high. POWER Input port 5. VIDEO IN Input port 7. If the same problem occurs continually, contact your product distributor or service center. If the same symptom still occurs, contact your product distributor or service center. When the screen becomes darker Check the lamp usage time on for the noise concern. Disconnect and reconnect the power cord and start the projector again. Turn the power off the projector. PC IN Input port 2. Remote Control Signal Receiver 8. HDMI...

User Manual (user Manual) (ver.1.0) (English)
Page 12
... move to check source signals, picture setup, PC screen adjustment and lamp lifespan. 9. COMP1 Button 3. INFO Button 9. RETURN Button 18. USER Button 21. INFO Used to or select each menu item. 8. PC Button 6. P.SIZE Button 10. ON ( ) Used to S-VIDEO Mode. 5. S-VIDEO Used to switch to turn on the projector. 2. MENU Used to Video Mode. 4. S-VIDEO Button 5. EXIT Button 19. VIDEO Used to switch to display Menu Screen. 7. LIGHT ( ) Button 14. COMP2 Button 17. D.BLACK Button 20. VIDEO Button 4. P.MODE Button 12. OFF ( ) Button 13. PC Used to switch to COMPONENT...
... move to check source signals, picture setup, PC screen adjustment and lamp lifespan. 9. COMP1 Button 3. INFO Button 9. RETURN Button 18. USER Button 21. INFO Used to or select each menu item. 8. PC Button 6. P.SIZE Button 10. ON ( ) Used to S-VIDEO Mode. 5. S-VIDEO Used to switch to turn on the projector. 2. MENU Used to Video Mode. 4. S-VIDEO Button 5. EXIT Button 19. VIDEO Used to switch to display Menu Screen. 7. LIGHT ( ) Button 14. COMP2 Button 17. D.BLACK Button 20. VIDEO Button 4. P.MODE Button 12. OFF ( ) Button 13. PC Used to switch to COMPONENT...

User Manual (user Manual) (ver.1.0) (English)
Page 13
... Used to switch to HDMI 1 Mode. 15. Specifications Model Size Panel Resolution Manufacturer Type Lamp Life Time Manufacturer Color Resolution Optimum resolution Maximum resolution Input video signal Input synchronization signal Maximum Pixel Clock SP-A800B 24.1 mm / 0.9 inch 1920 x 1080 Texas Instrument 300 W UHP 2000 Hrs Philips 62.2 M (1920 x 1080 x 3 x 10 bit) 1920 x 1080 @ 60 Hz 1920 x 1200 Video, S-Video, Component, Analog PC, HDMI Seperate H/V sync, TTL 162 MHz STILL Used to operate remote control in the optical system. 20. LIGHT ( ) Used to...
... Used to switch to HDMI 1 Mode. 15. Specifications Model Size Panel Resolution Manufacturer Type Lamp Life Time Manufacturer Color Resolution Optimum resolution Maximum resolution Input video signal Input synchronization signal Maximum Pixel Clock SP-A800B 24.1 mm / 0.9 inch 1920 x 1080 Texas Instrument 300 W UHP 2000 Hrs Philips 62.2 M (1920 x 1080 x 3 x 10 bit) 1920 x 1080 @ 60 Hz 1920 x 1200 Video, S-Video, Component, Analog PC, HDMI Seperate H/V sync, TTL 162 MHz STILL Used to operate remote control in the optical system. 20. LIGHT ( ) Used to...

User Manual (user Manual) (ver.1.0) (English)
Page 14
... will not exceed the maximum number of several hundred thousand micro mirrors. Sep. Diagonal screen size Projection Range Power Power Consumption Voltage Noise Dimensions Weight Key Features Brightness Contrast Keystone User Environment Temperature and Humidity 1016 mm ~ 7620 mm (16:9, Diagonal) 1.5 m ~ 14 m Less than class A. The equipment has been registered regarding EMI for home and office use . Supported Display Mode Input Source PC, DVI PC PC...
... will not exceed the maximum number of several hundred thousand micro mirrors. Sep. Diagonal screen size Projection Range Power Power Consumption Voltage Noise Dimensions Weight Key Features Brightness Contrast Keystone User Environment Temperature and Humidity 1016 mm ~ 7620 mm (16:9, Diagonal) 1.5 m ~ 14 m Less than class A. The equipment has been registered regarding EMI for home and office use . Supported Display Mode Input Source PC, DVI PC PC...

User Manual (user Manual) (ver.1.0) (English)
Page 18
..., use curtains. If the screen is not vertically installed, the picture on the screen will not be a rectangle. | Basic Settings | Connecting the Power | Connecting to the screen. When installing the screen in bright surroundings. Select Menu > Setup > Install > Front-Floor Zoom and Focus Adjustment You can install the projector in the front of the screen, Install the projector at the center of the screen. Select Menu > Setup > Install > Rear-Floor To view the picture when installing the projector in the following locations...
..., use curtains. If the screen is not vertically installed, the picture on the screen will not be a rectangle. | Basic Settings | Connecting the Power | Connecting to the screen. When installing the screen in bright surroundings. Select Menu > Setup > Install > Front-Floor Zoom and Focus Adjustment You can install the projector in the front of the screen, Install the projector at the center of the screen. Select Menu > Setup > Install > Rear-Floor To view the picture when installing the projector in the following locations...

User Manual (user Manual) (ver.1.0) (English)
Page 19
... your product is installed at a location out of the specified projection distance (refer to Screen Size and Projection Distance), the focus cannot be adjusted correctly. Depending on the position of the projector, Keystone distortion of image may adjust the level of the projector up and down within zoom range by turning the Lens Shift Dial on the screen up to 3 degrees. Screen Size and Projection Distance Install the projector on the screen using the Focus Ring. You may...
... your product is installed at a location out of the specified projection distance (refer to Screen Size and Projection Distance), the focus cannot be adjusted correctly. Depending on the position of the projector, Keystone distortion of image may adjust the level of the projector up and down within zoom range by turning the Lens Shift Dial on the screen up to 3 degrees. Screen Size and Projection Distance Install the projector on the screen using the Focus Ring. You may...

User Manual (user Manual) (ver.1.0) (English)
Page 21
... set the by referring to close the window, and click the [OK] button of . 5. If a belt is turned off or disconnected, switch You do not have to the projector. Projected images may differ from the monitor depending on the projector when your PC is shown or an abnormal signal occurs on monitor manufacture or Windows versions. Shut down the PC and connect to change setup...
... set the by referring to close the window, and click the [OK] button of . 5. If a belt is turned off or disconnected, switch You do not have to the projector. Projected images may differ from the monitor depending on the projector when your PC is shown or an abnormal signal occurs on monitor manufacture or Windows versions. Shut down the PC and connect to change setup...

User Manual (user Manual) (ver.1.0) (English)
Page 22
to video equipment | 1. If not, there may be signal problems. | Basic Settings | Connecting the Power | Connecting to "Video" mode using the [VIDEO] buttons or check whether your PC is connected correctly. Rear of Projector Plug the power cord into the power terminal on the rear side of the projector. | Basic Settings | Connecting the Power | Connecting to video equipment | Connecting to display settings supported by this projector. When connecting the projector to PC, check that PC setup complies to VCR/Camcorder/Cable Box
to video equipment | 1. If not, there may be signal problems. | Basic Settings | Connecting the Power | Connecting to "Video" mode using the [VIDEO] buttons or check whether your PC is connected correctly. Rear of Projector Plug the power cord into the power terminal on the rear side of the projector. | Basic Settings | Connecting the Power | Connecting to video equipment | Connecting to display settings supported by this projector. When connecting the projector to PC, check that PC setup complies to VCR/Camcorder/Cable Box

User Manual (user Manual) (ver.1.0) (English)
Page 23
... Composite Mode is needed for sound.) Connecting to select . This projector does not support sound. (Separate audio system is not available, check the video cables are turned off before connecting cables. Using the Projector Turn on the projector and press the [Video] button to DVD Check that the projector and the video equipment are in place. Connect [VIDEO IN(yellow)] input port of the projector to [S-VIDEO IN] input port of the projector. If the video equipment has S-VIDEO OUT port, connect it to the VIDEO (yellow) OUT port...
... Composite Mode is needed for sound.) Connecting to select . This projector does not support sound. (Separate audio system is not available, check the video cables are turned off before connecting cables. Using the Projector Turn on the projector and press the [Video] button to DVD Check that the projector and the video equipment are in place. Connect [VIDEO IN(yellow)] input port of the projector to [S-VIDEO IN] input port of the projector. If the video equipment has S-VIDEO OUT port, connect it to the VIDEO (yellow) OUT port...

User Manual (user Manual) (ver.1.0) (English)
Page 26
... connections are all completed, connect both power codes of PC using PC video cable. Adjust the screen.(Auto Adjustment) Sound comes out from PC speakers. Turn on your PC. Using the Projector Turn on the projector and press the [PC] button to the monitor output port of the projector and the PC. This product supports plug and play and therefore, if you use Window XP you do not need to HDMI/DVI Connecting to setup the driver...
... connections are all completed, connect both power codes of PC using PC video cable. Adjust the screen.(Auto Adjustment) Sound comes out from PC speakers. Turn on your PC. Using the Projector Turn on the projector and press the [PC] button to the monitor output port of the projector and the PC. This product supports plug and play and therefore, if you use Window XP you do not need to HDMI/DVI Connecting to setup the driver...

User Manual (user Manual) (ver.1.0) (English)
Page 30
... input signal, the dark screen is emphasized by filtering out the green and blue color signals. Off : You can filter the color of the screen by adjusting the tightening thread in red by opening the tightening thread fully. - Color Pattern 1) 0 IRE : Sets the light level of the darkest portion of the video signal to your taste. 1) Off : Shows the picture in the original color. 2) Monochrome : Shows the picture in black and white color by filtering...
... input signal, the dark screen is emphasized by filtering out the green and blue color signals. Off : You can filter the color of the screen by adjusting the tightening thread in red by opening the tightening thread fully. - Color Pattern 1) 0 IRE : Sets the light level of the darkest portion of the video signal to your taste. 1) Off : Shows the picture in the original color. 2) Monochrome : Shows the picture in black and white color by filtering...

User Manual (user Manual) (ver.1.0) (English)
Page 31
... view the video file. Screen Adjustment Install Description To support possible deficiencies in blue by filtering out the red and blue color signals. 5) Blue : Shows the picture in the installation location, you can set the display mode optimized for playing movies when watching a movie. Play/Stop 1) Front-Floor : Normal Image Film Mode provides optimal display settings for [Video], [S-Video] and [Component 1, 2](480i,576i). 1) Off 2) On | Input | Picture | Setup | Option | * Click the Play( )/Stop( ) button in [HDMI 1] and [HDMI 2] modes only. Film Mode 1) Off : Displays...
... view the video file. Screen Adjustment Install Description To support possible deficiencies in blue by filtering out the red and blue color signals. 5) Blue : Shows the picture in the installation location, you can set the display mode optimized for playing movies when watching a movie. Play/Stop 1) Front-Floor : Normal Image Film Mode provides optimal display settings for [Video], [S-Video] and [Component 1, 2](480i,576i). 1) Off 2) On | Input | Picture | Setup | Option | * Click the Play( )/Stop( ) button in [HDMI 1] and [HDMI 2] modes only. Film Mode 1) Off : Displays...

User Manual (user Manual) (ver.1.0) (English)
Page 32
...5) Reset : Using this function, you can view the difference by changing the Color Standard to SMPTE_D/HD/EBU. 4) Red : Red Screen, only for color adjustment. 5) Green : Green Screen, only for color adjustment. 6) Blue : Blue Screen, only for color adjustment. 7) White : White Screen, only for installation of the projector. 1) Crosshatch : You can check whether the picture is distorted or not. 2) Screen Size : You can refer to picture format sizes such as 1.33 : 1 or 1.78 : 1. 3) Color Standard : You can reset the PC menu settings to the factory default settings. Factory Default Using this...
...5) Reset : Using this function, you can view the difference by changing the Color Standard to SMPTE_D/HD/EBU. 4) Red : Red Screen, only for color adjustment. 5) Green : Green Screen, only for color adjustment. 6) Blue : Blue Screen, only for color adjustment. 7) White : White Screen, only for installation of the projector. 1) Crosshatch : You can check whether the picture is distorted or not. 2) Screen Size : You can refer to picture format sizes such as 1.33 : 1 or 1.78 : 1. 3) Color Standard : You can reset the PC menu settings to the factory default settings. Factory Default Using this...

User Manual (user Manual) (ver.1.0) (English)
Page 35
... Contacting Service Personnel | Installation and Connection No Power. External Source is sold separately. z The ceiling installation support is not selected. Unless they are not clear. If its size is not available. z Check whether your remote control and the product. z Check if the menu is correct. Screen and External Source Symptoms Cannot see picture images. Images are connected properly, the device is incorrect, replace it with the recommended battery size. z Check the Remote Control batteries. z Adjust the focus...
... Contacting Service Personnel | Installation and Connection No Power. External Source is sold separately. z The ceiling installation support is not selected. Unless they are not clear. If its size is not available. z Check whether your remote control and the product. z Check if the menu is correct. Screen and External Source Symptoms Cannot see picture images. Images are connected properly, the device is incorrect, replace it with the recommended battery size. z Check the Remote Control batteries. z Adjust the focus...

User Manual (user Manual) (ver.1.0) (English)
Page 37
... best operating performance, replace the lamp according to cool down for at the left rear of your distributor or a Service Center if dust or other sharp objects, as these may scratch the surface. Use the recommended lamp when replacing. Lamp Life Time : 2000Hrs - Lamp Type : 300W UHP Check that the power cord is located at least 1 hour before replacing lamps. Before you turn the projector over to change the lamp, cover the projector with...
... best operating performance, replace the lamp according to cool down for at the left rear of your distributor or a Service Center if dust or other sharp objects, as these may scratch the surface. Use the recommended lamp when replacing. Lamp Life Time : 2000Hrs - Lamp Type : 300W UHP Check that the power cord is located at least 1 hour before replacing lamps. Before you turn the projector over to change the lamp, cover the projector with...

User Manual (user Manual) (ver.1.0) (English)
Page 41
Backlight Remote Control The buttons on the Backlight Remote Control are transmitted on a CD size disc. A low color temperature implies a warmer (more yellow/red) light while a high color temperature implies a colder (more blue) light. Component Port (Green, Blue, Red) The Component Port separately transmits the luminance signal and provides the best quality among all video connection types. DVD (Digital Versatile Disc) DVD is a digital display technology using a coaxial cable. DLP (Digital Light Processing) DLP is a large capacity media disk that users can save multimedia content ...
Backlight Remote Control The buttons on the Backlight Remote Control are transmitted on a CD size disc. A low color temperature implies a warmer (more yellow/red) light while a high color temperature implies a colder (more blue) light. Component Port (Green, Blue, Red) The Component Port separately transmits the luminance signal and provides the best quality among all video connection types. DVD (Digital Versatile Disc) DVD is a digital display technology using a coaxial cable. DLP (Digital Light Processing) DLP is a large capacity media disk that users can save multimedia content ...


